共有ライブラリを管理するために Sonatype の Nexus Repository Manager OSS を使用する ( その26 )( Linux のサーバに Nexus Repository Manager OSS をインストールする )
概要
共有ライブラリを管理するために Sonatype の Nexus Repository Manager OSS を使用する ( その25 )( Windows 版 Nexus 3 インストール手順 ) の続きです。
- 今回の手順で確認できるのは以下の内容です。
- VirtualBox+Vagrant をインストールして Linux の仮想サーバを構築し、Unix 版の Nexus Repository Manager OSS をインストールして使用してみます。
- Linxu のディストリビューションは CentOS を使用します。
- vagrant の仮想サーバは C:\work\vagrant の下に作成します。
参照したサイト・書籍
目次
- Oracle VM VirtualBox のインストール
- Vagrant のインストール
- CentOS の仮想サーバを構築する
- Unix 版 Nexus Repository Manager OSS をインストールする
- JDK をインストールする
- 動作確認
- サービスとして登録・起動する
- ksbysample-library-depend-spring ライブラリをアップロードしてみる
- 次回は。。。
手順
Oracle VM VirtualBox のインストール
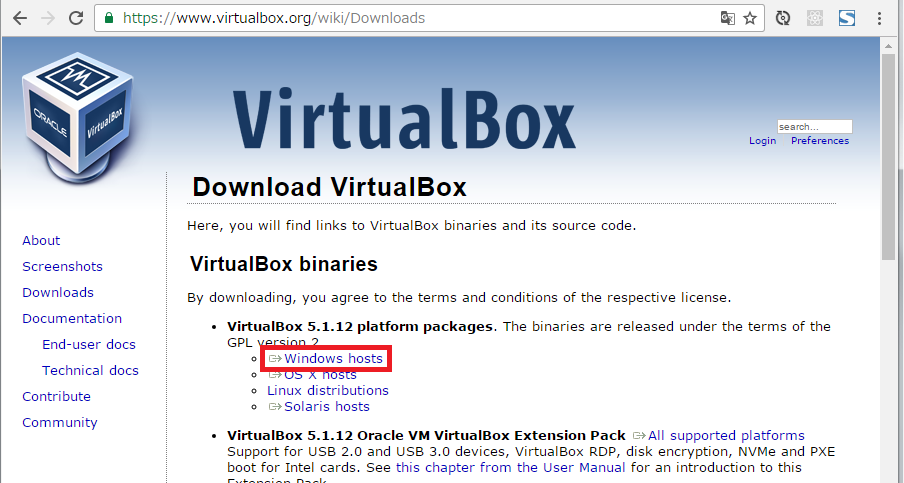
Download VirtualBox のページの「Windows hosts」リンクをクリックし、VirtualBox-5.1.12-112440-Win.exe をダウンロードします。
VirtualBox-5.1.12-112440-Win.exe を実行します。
「Oracle VM VirtualBox 5.1.12 Setup」ダイアログが表示されます。「Next >」ボタンをクリックします。
「Custom Setup」画面が表示されます。「Location」を
C:\virtualbox\に変更した後、「Next >」ボタンをクリックします。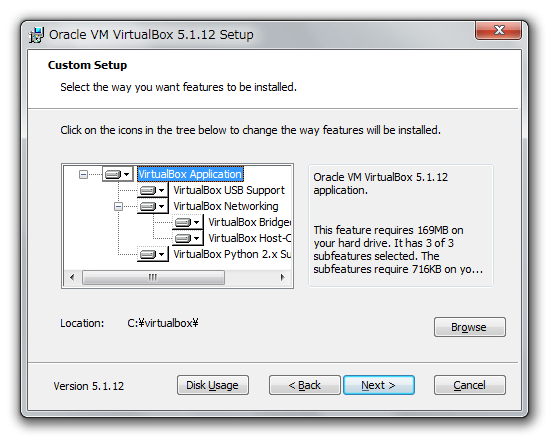
次の画面が表示されます。チェックの状態を以下の画像の通り変更した後、「Next >」ボタンをクリックします。
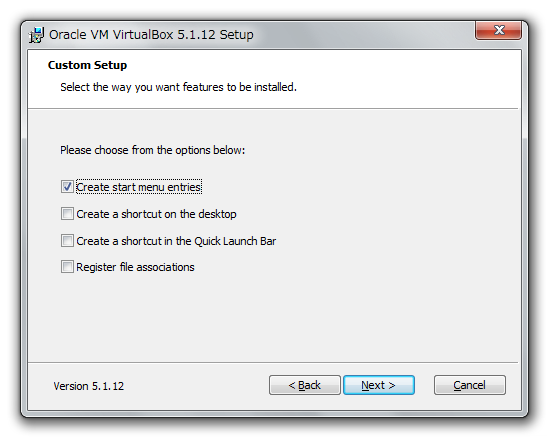
※「Create start menu entries」だけチェックを残したのは、仮想サーバの情報を確認するために VirtualBox の管理画面を見たい場合があるためです。
「Warning: Network Interfaces」画面が表示されます。「Yes」ボタンをクリックします。
「Ready to Install」画面が表示されます。「Install」ボタンをクリックします。
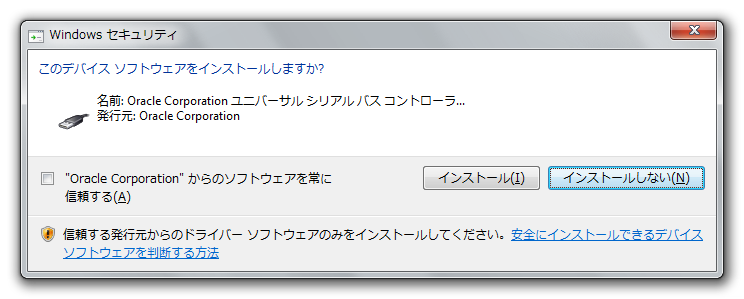
インストールの途中で以下のようなダイアログが3回表示されますので都度「インストール」ボタンをクリックします。
インストールが完了すると「Oracle VM VirtualBox 5.1.12 installation is complete」画面が表示されます。「Start Oracle VM VirtualBox 5.1.12 after installation」のチェックボックスを外した後、「Finish」ボタンをクリックします。
Vagrant のインストール
DOWNLOAD VAGRANT のページの Windows の「Universal (32 and 64-bit)」のリンクをクリックし、vagrant_1.9.1.msi をダウンロードします。
「Vagrant Setup」ダイアログが表示されます。「Next」ボタンをクリックします。
「End-User License Agreement」画面が表示されます。「I accept the terms in the License Agreement」をチェックした後、「Next」ボタンをクリックします。
「Destination Folder」画面が表示されます。
C:\vagrant\に変更した後、「Next」ボタンをクリックします。「Ready to install Vagrant」画面が表示されます。「Install」ボタンをクリックします。
インストールが完了すると「Completed the Vagrant Setup Wizard」画面が表示されます。「Finish」ボタンをクリックします。
PC の再起動を求めるダイアログが表示されるので、「YES」ボタンをクリックして再起動します。
CentOS の仮想サーバを構築する
C:\work\vagrant フォルダを作成します。
C:\work\vagrant の下に boxes フォルダを作成します。
Vagrantbox.es のページの以下の画像の赤枠の box ファイルの URL をコピーします。

コピーした URL をブラウザのアドレスバーにペーストして box ファイル centos-7-x86_64.box をダウンロードし、C:\work\vagrant\boxes の下に保存します。
vagrant box addコマンドでダウンロードした box ファイルを追加します。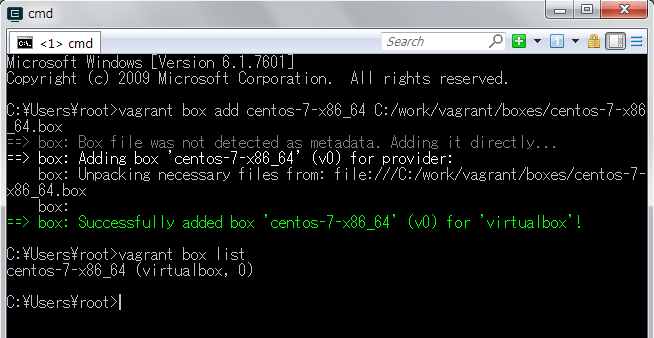
C:\work\vagrant の下に nexus-server フォルダを作成します。
vagrant initコマンドで Vagrantfile を作成します。作成された時点の Vagrantfile は リンク先のその1の内容 です。
Vagrantfile をエディタで開き リンク先のその2の内容 に変更します。今はメモリを 2GB に増やすだけです。
vagrant upコマンドを実行して仮想サーバを起動します。

起動した仮想サーバに ssh でアクセスしたいので、ssh.exe が入っている C:\Git\usr\bin を環境変数 PATH に追加します。
vagrant sshコマンドで仮想サーバに接続できることを確認します。
Unix 版 Nexus Repository Manager OSS をインストールする
Download Nexus Repository OSS ( http://www.sonatype.com/download-oss-sonatype ) のページにアクセスします。
ページ内の「nexus-3.2.0-01-unix.tar.gz」リンクをクリックしてダウンロードします。

ダウンロードした nexus-3.2.0-01-unix.tar.gz を C:\work\vagrant\nexus-server に移動します。
vagrant sshで接続して /opt の下にインストールします。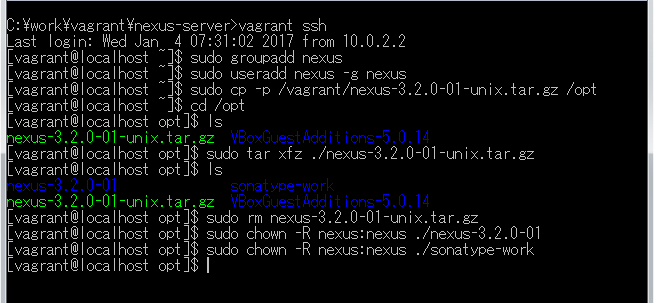
JDK をインストールする
nexus runを実行しようとしてみたところエラーメッセージが出ました。/opt/nexus-3.2.0-01/bin の下を見たところ Windows 版にあった jre ディレクトリが存在しませんでしたので、別途インストールします。
Java SE Development Kit 8 Downloads の「Java SE Development Kit 8u112」の「jdk-8u112-linux-x64.tar.gz」リンクをクリックしてダウンロードします。
ダウンロードした jdk-8u112-linux-x64.tar.gz を C:\work\vagrant\nexus-server に移動します。
以下のコマンドを実行し、jdk-8u112-linux-x64.tar.gz を展開して /opt/jdk1.8.0_112 を作成した後、/opt/java というシンボリックリンクを作成します。
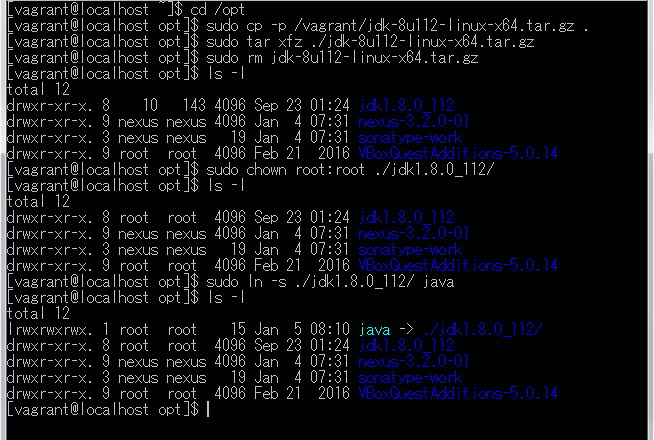
/etc/profile.d の下に java.sh を作成し、リンク先の内容 を記述します。記述後は以下のようになります。

Ctrl+D を押してログアウトした後、再度
vagrant sshで接続してjava -versionでバージョン情報が表示されることを確認します。
動作確認
※動作確認前に Windows 版 nexus のサービスは停止しています。
http://localhost:8081/ でアクセスした時に仮想サーバの nexus の管理画面にアクセスできるよう Vagrantfile を リンク先のその3の内容 に変更します。
vagrant halt→vagrant upを実行して仮想サーバを再起動します。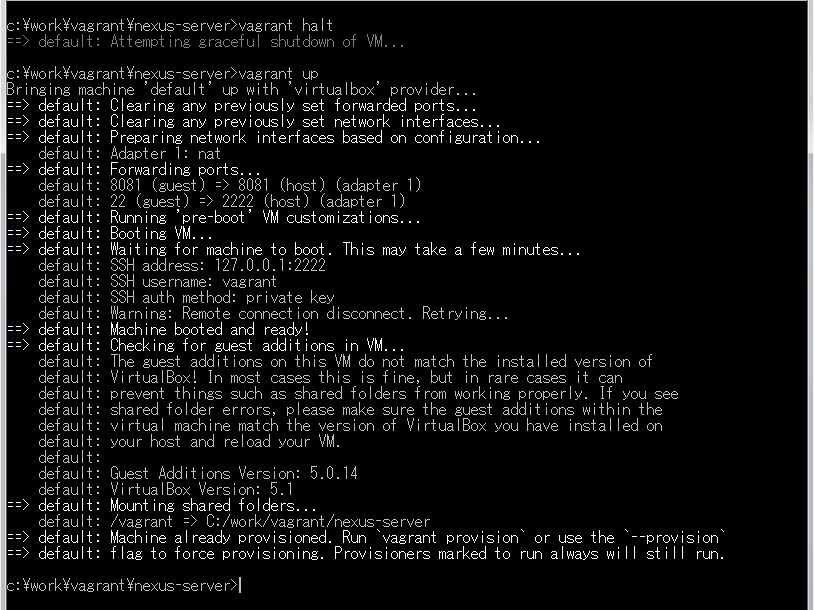
nexus runを実行します。
(.....しばらくログが出力され続けます.....)

http://localhost:8081/ にアクセスして管理画面が表示されることを確認します。
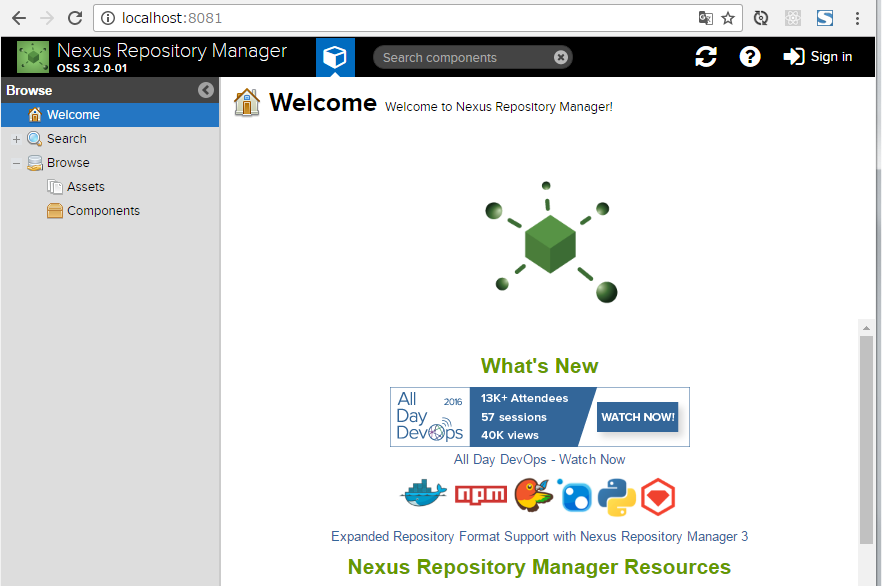
Ctrl+C を押して nexus を停止します。
サービスとして登録・起動する
/opt/nexus-3.2.0-01 → /opt/nexus のシンボリックリンクを作成します。

/etc/systemd/system/ の下に nexus.service を作成し、リンク先の内容 を記述します。
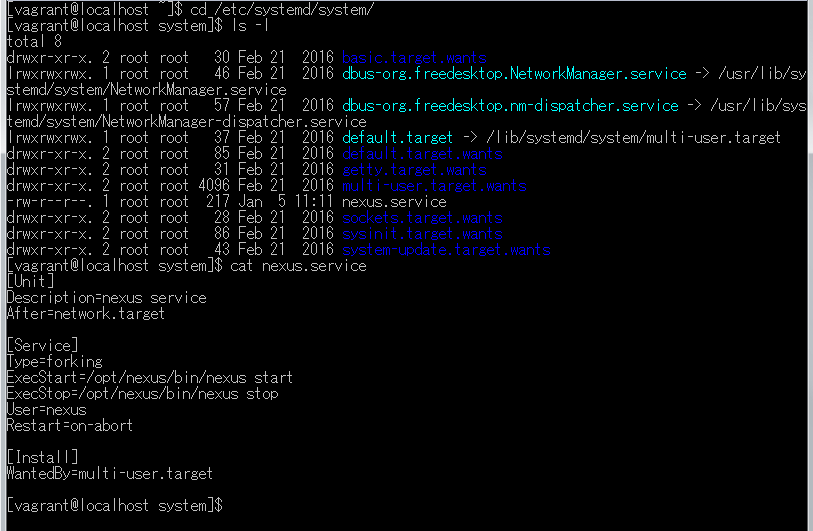
systemctl コマンドで nexus を起動します。

http://localhost:8081/ にアクセスして管理画面が表示されることを確認します。
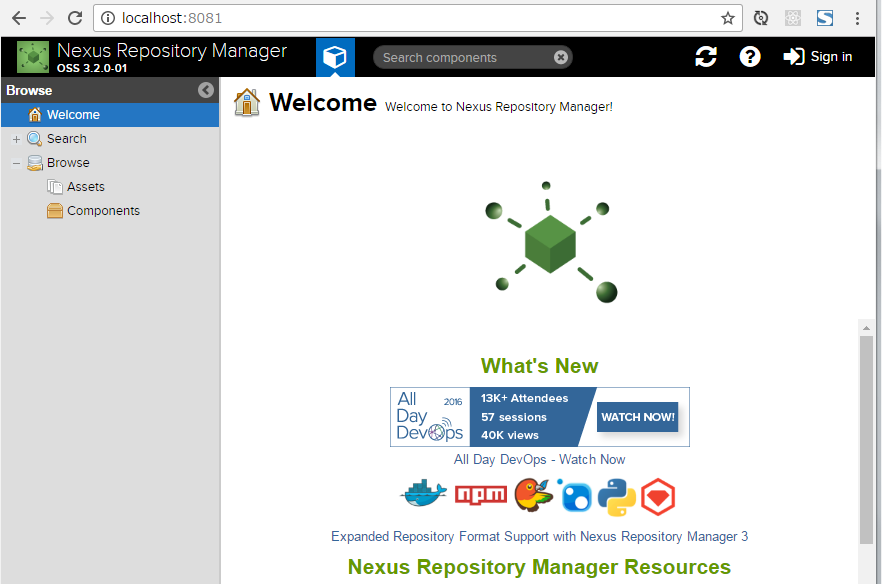
サーバ起動後に nexus が自動起動されるか確認します。
vagrant halt→vagrant upを実行して仮想サーバを再起動します。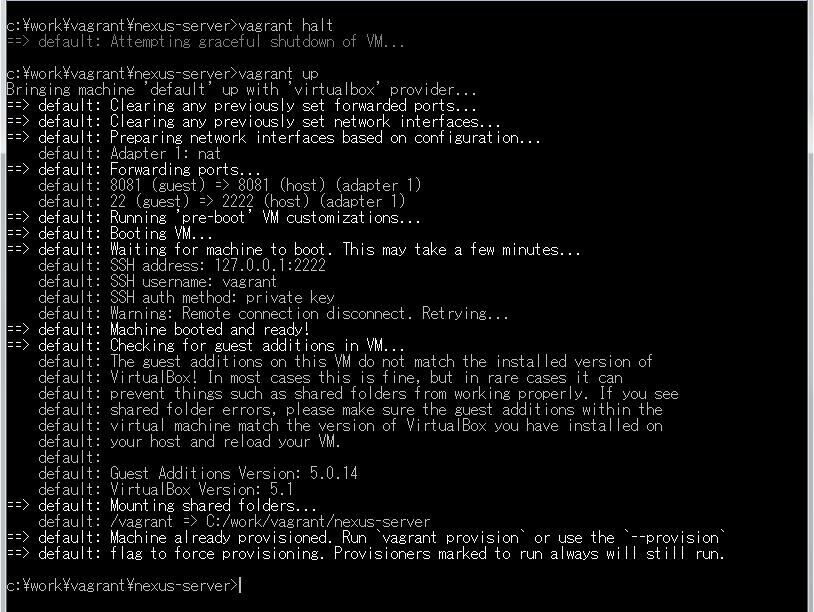
vagrant sshで接続して nexus が起動していることを確認します。また http://localhost:8081/ にアクセスして管理画面が表示されることも確認します。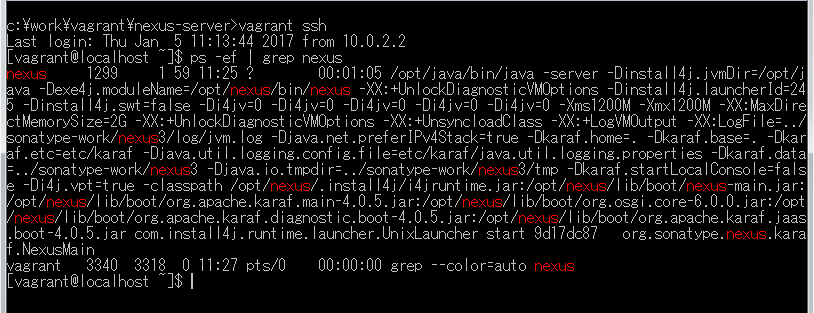
ksbysample-library-depend-spring ライブラリをアップロードしてみる
IntelliJ IDEA で ksbysample-library-depend-spring プロジェクトを開きます。
uploadArchives タスクを実行して登録します。BUILD SUCCESSFUL が表示されることが確認できます。

nexus の管理画面を見ると ksbysample-library-depend-spring ライブラリが登録されていることが確認できます。

次回は。。。
目次を作成して感想を書いて締める予定です。
ソースコード
Vagrantfile
■その1
# -*- mode: ruby -*-
# vi: set ft=ruby :

# All Vagrant configuration is done below. The "2" in Vagrant.configure
# configures the configuration version (we support older styles for
# backwards compatibility). Please don't change it unless you know what
# you're doing.
Vagrant.configure("2") do |config|
  # The most common configuration options are documented and commented below.
  # For a complete reference, please see the online documentation at
  # https://docs.vagrantup.com.

  # Every Vagrant development environment requires a box. You can search for
  # boxes at https://atlas.hashicorp.com/search.
  config.vm.box = "centos-7-x86_64"

  # Disable automatic box update checking. If you disable this, then
  # boxes will only be checked for updates when the user runs
  # `vagrant box outdated`. This is not recommended.
  # config.vm.box_check_update = false

  # Create a forwarded port mapping which allows access to a specific port
  # within the machine from a port on the host machine. In the example below,
  # accessing "localhost:8080" will access port 80 on the guest machine.
  # config.vm.network "forwarded_port", guest: 80, host: 8080

  # Create a private network, which allows host-only access to the machine
  # using a specific IP.
  # config.vm.network "private_network", ip: "192.168.33.10"

  # Create a public network, which generally matched to bridged network.
  # Bridged networks make the machine appear as another physical device on
  # your network.
  # config.vm.network "public_network"

  # Share an additional folder to the guest VM. The first argument is
  # the path on the host to the actual folder. The second argument is
  # the path on the guest to mount the folder. And the optional third
  # argument is a set of non-required options.
  # config.vm.synced_folder "../data", "/vagrant_data"

  # Provider-specific configuration so you can fine-tune various
  # backing providers for Vagrant. These expose provider-specific options.
  # Example for VirtualBox:
  #
  # config.vm.provider "virtualbox" do |vb|
  #   # Display the VirtualBox GUI when booting the machine
  #   vb.gui = true
  #
  #   # Customize the amount of memory on the VM:
  #   vb.memory = "1024"
  # end
  #
  # View the documentation for the provider you are using for more
  # information on available options.

  # Define a Vagrant Push strategy for pushing to Atlas. Other push strategies
  # such as FTP and Heroku are also available. See the documentation at
  # https://docs.vagrantup.com/v2/push/atlas.html for more information.
  # config.push.define "atlas" do |push|
  #   push.app = "YOUR_ATLAS_USERNAME/YOUR_APPLICATION_NAME"
  # end

  # Enable provisioning with a shell script. Additional provisioners such as
  # Puppet, Chef, Ansible, Salt, and Docker are also available. Please see the
  # documentation for more information about their specific syntax and use.
  # config.vm.provision "shell", inline: <<-SHELL
  #   apt-get update
  #   apt-get install -y apache2
  # SHELL
end
■その2
  config.vm.provider "virtualbox" do |vb|
  #   # Display the VirtualBox GUI when booting the machine
  #   vb.gui = true
  #
    # Customize the amount of memory on the VM:
    vb.memory = "2048"
  end
■その3
  # Create a forwarded port mapping which allows access to a specific port
  # within the machine from a port on the host machine. In the example below,
  # accessing "localhost:8080" will access port 80 on the guest machine.
  # config.vm.network "forwarded_port", guest: 80, host: 8080
  config.vm.network "forwarded_port", guest: 8081, host: 8081
config.vm.network "forwarded_port", guest: 8081, host: 8081を追加します。
java.sh
JAVA_HOME=/opt/java
PATH=$PATH:$JAVA_HOME/bin
nexus.service
[Unit]
Description=nexus service
After=network.target

[Service]
Type=forking
ExecStart=/opt/nexus/bin/nexus start
ExecStop=/opt/nexus/bin/nexus stop
User=nexus
Restart=on-abort

[Install]
WantedBy=multi-user.target
履歴
2017/01/05
初版発行。