Spring Boot 2.3.x の Web アプリを 2.4.x へバージョンアップする ( 大目次 )
- その1 ( 概要 )
- その2 ( Spring Boot を 2.3.7 → 2.3.9 へ、Gradle を 6.5.1 → 6.8.3 へバージョンアップする )
- その3 ( Spring Boot を 2.3.9 → 2.4.3 へバージョンアップする )
- その4 ( Release Notes を見て必要な箇所を変更する。。。ことがなさそうなので Checkstyle を 8.35 → 8.41 へバージョンアップする )
- その5 ( PMD を 6.26.0 → 6.32.0 へバージョンアップする )
- その6 ( Error Prone を 2.4.0 → 2.5.1 へバージョンアップする )
- その7 ( SpotBugs を 4.1.1 → 4.2.1 へバージョンアップする )
- その8 ( Docker コンテナの image をバージョンアップする )
- その9 ( RedisClusterConfig の RedisConnectionFactory Bean を削除し、application.properties で設定する方法に切り替える )
- その10 ( Docker で複数の Tomcat を起動して動作確認する )
- 感想
- その11 ( exclude junit-vintage-engine の記述を削除する+domaGen タスクで SQL ファイルが作成されない問題を解消する )
Antora で PlantUML 等の diagram を埋め込む
Translate to English
https://translate.google.com/translate?sl=auto&tl=en&u=https%3A%2F%2Fksby.hatenablog.com%2Fentry%2F2021%2F02%2F13%2F194234
概要
記事一覧はこちらです。
Antora でも Kroki を利用して PlantUML 等の diagram を埋め込んでみます。
参照したサイト・書籍
Mogztter / asciidoctor-kroki
https://github.com/Mogztter/asciidoctor-krokiAsciiDoc Keys
https://docs.antora.org/antora/2.3/playbook/configure-asciidoc/#extensions
目次
- ksbysample-antora-playbook プロジェクトに Kroki のコンテナを起動するための docker-compose.yml をコピーしてコンテナを起動する
- ksbysample-antora プロジェクトに diagram のファイルと adoc ファイルをコピーする
- ksbysample-antora-playbook プロジェクトに asciidoctor-kroki をインストールする
npx antora --fetch antora-playbook.ymlを実行してドキュメントサイトを生成する
手順
ksbysample-antora-playbook プロジェクトに Kroki のコンテナを起動するための docker-compose.yml をコピーしてコンテナを起動する
ksbysample-asciidoctor プロジェクトに docker-compose.yml を作成し、Kroki のコンテナを起動するための設定を記述する で作成した docker-compose.yml を ksbysample-antora-playbook プロジェクトのルートディレクトリ直下にコピーします。
docker-compose up -d コマンドを実行し、Kroki のコンテナを起動します。

ksbysample-antora プロジェクトに diagram のファイルと adoc ファイルをコピーする
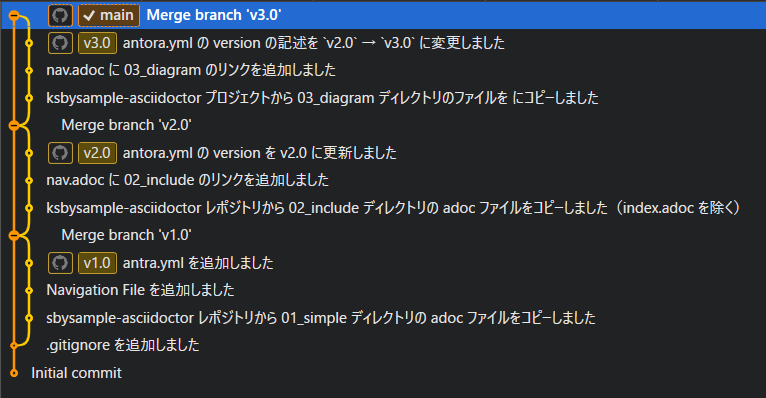
v3.0 ブランチを作成し、ksbysample-asciidoctor プロジェクトから 03_diagram ディレクトリのファイルを にコピーする
main ブランチから v3.0 ブランチを作成します。
ksbysample-asciidoctor プロジェクトから 03_diagram ディレクトリのファイルをコピーします。adoc ファイルは pages ディレクトリの下にコピーし、diagram のファイルは images ディレクトリの下にコピーします(Hierarchy and reserved names に attachments や partials のディレクトリが記述されていますが diagram は svg になるので images ディレクトリにしました)。
- modules/ROOT/pages の下に 03_diagram ディレクトリを作成します。
- ksbysample-asciidoctor プロジェクトの src/docs/asciidoc/03_diagram/index.adoc を modules/ROOT/pages の下にコピーします。
- modules/ROOT/images の下に 03_diagram ディレクトリを作成します。
- modules/ROOT/images/03_diagram の下に ksbysample-asciidoctor プロジェクトの src/docs/asciidoc/03_diagram の下の diagram のファイルをコピーします。
- src/docs/asciidoc/03_diagram/example-bpmn.xml
- src/docs/asciidoc/03_diagram/example-bytefield.clj
- src/docs/asciidoc/03_diagram/example-c4model.puml
- src/docs/asciidoc/03_diagram/example-class.puml
- src/docs/asciidoc/03_diagram/example-ditaa.txt
- src/docs/asciidoc/03_diagram/example-sequence.puml
- modules/ROOT/images の下に 02_include ディレクトリを作成し、modules/ROOT/images の下の以下のファイルを移動します。
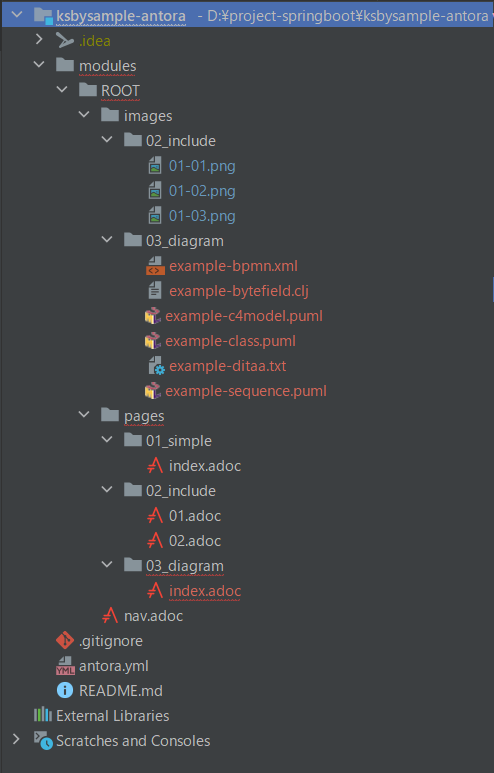
コピー後のディレクトリ構成は以下のようになります。
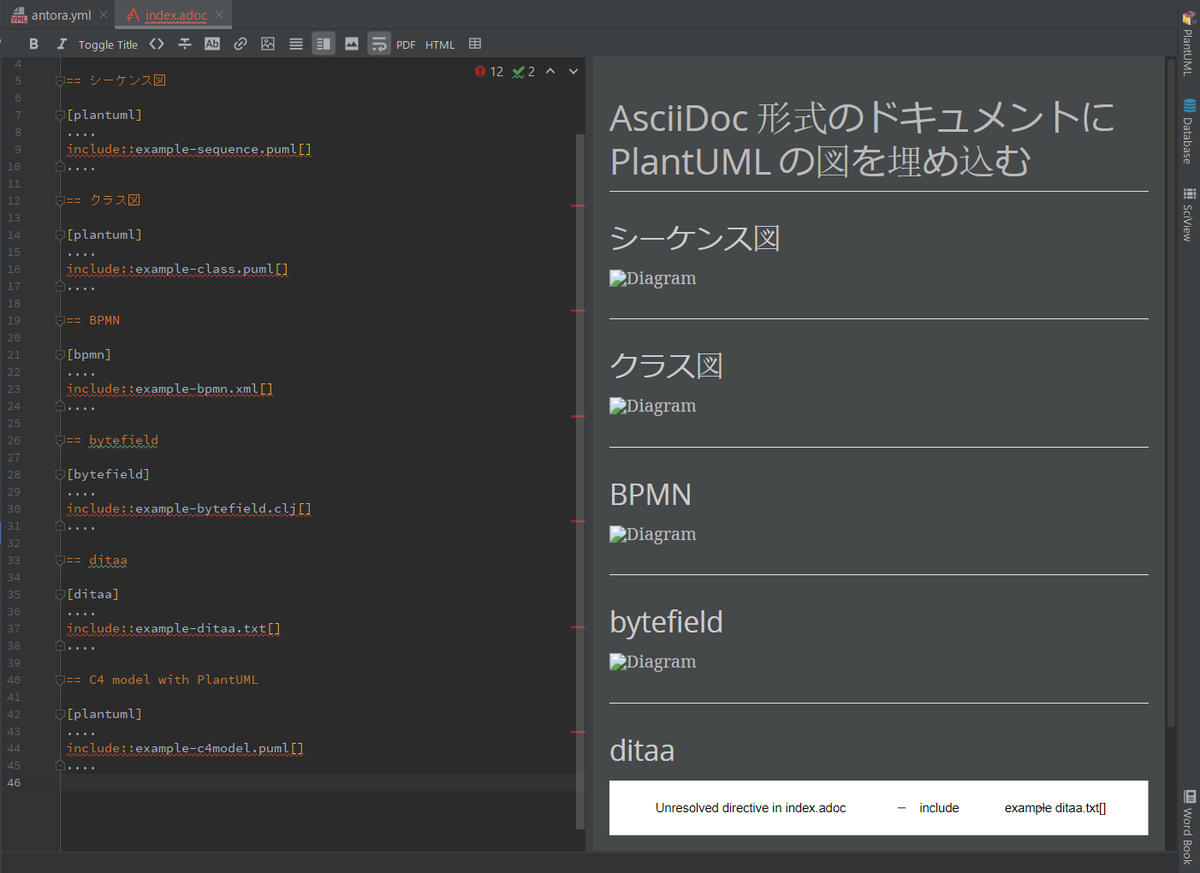
この時点では modules/ROOT/pages/03_diagram/index.adoc に赤波下線が出ており、AsciiDoc Plugin の preview にまだ diagram は表示されません。
modules/ROOT/pages/03_diagram/index.adoc を変更する
AsciiDoc Plugin の preview に diagram が表示されるよう modules/ROOT/pages/03_diagram/index.adoc を変更します。
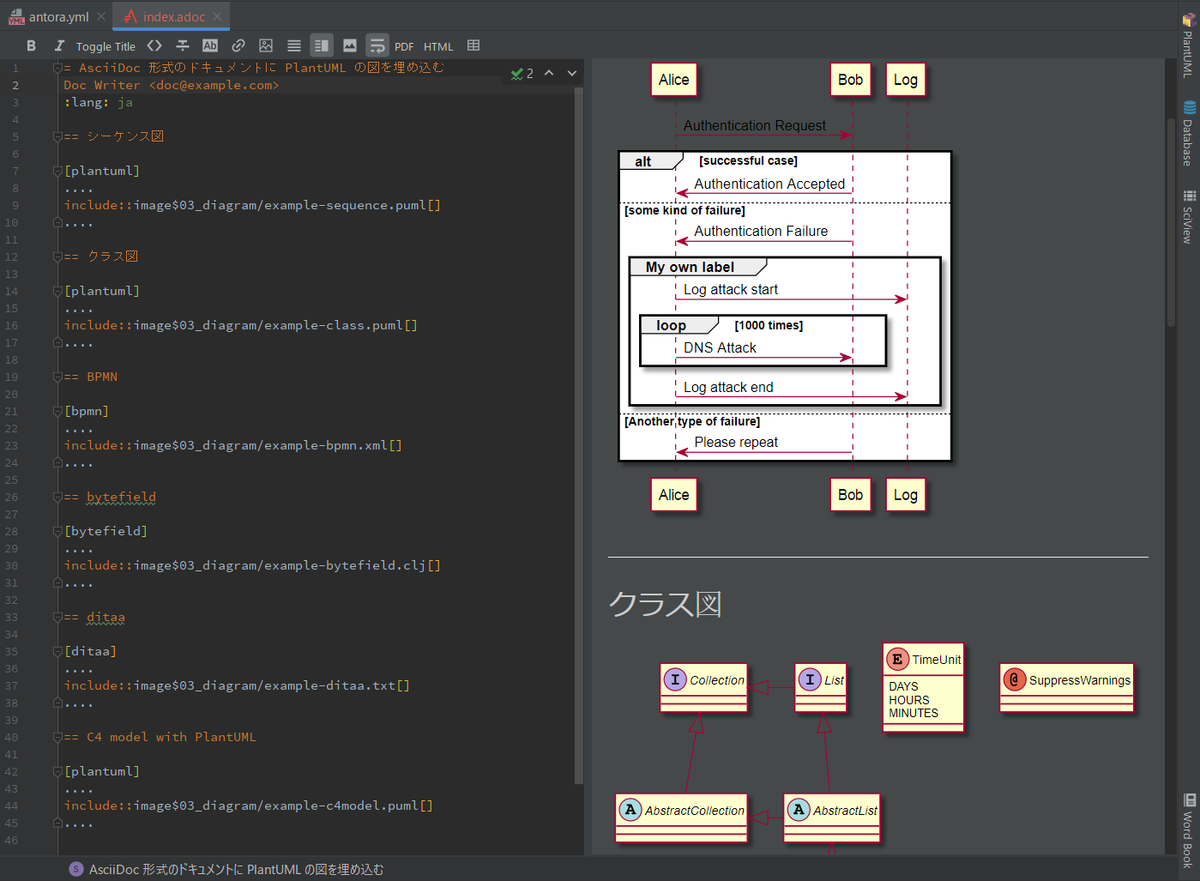
Antora の Document の Include a Page を参考に、今回 diagram のファイルは images ディレクトリの下に配置したので include::example-sequence.puml[] → include::image$03_diagram/example-sequence.puml[] のように image$03_diagram/ を追加します(ディレクトリ名の末尾の s を取り除いて $ を追加した文字列を付けると、そのディレクトリの下のファイルを参照できます)。
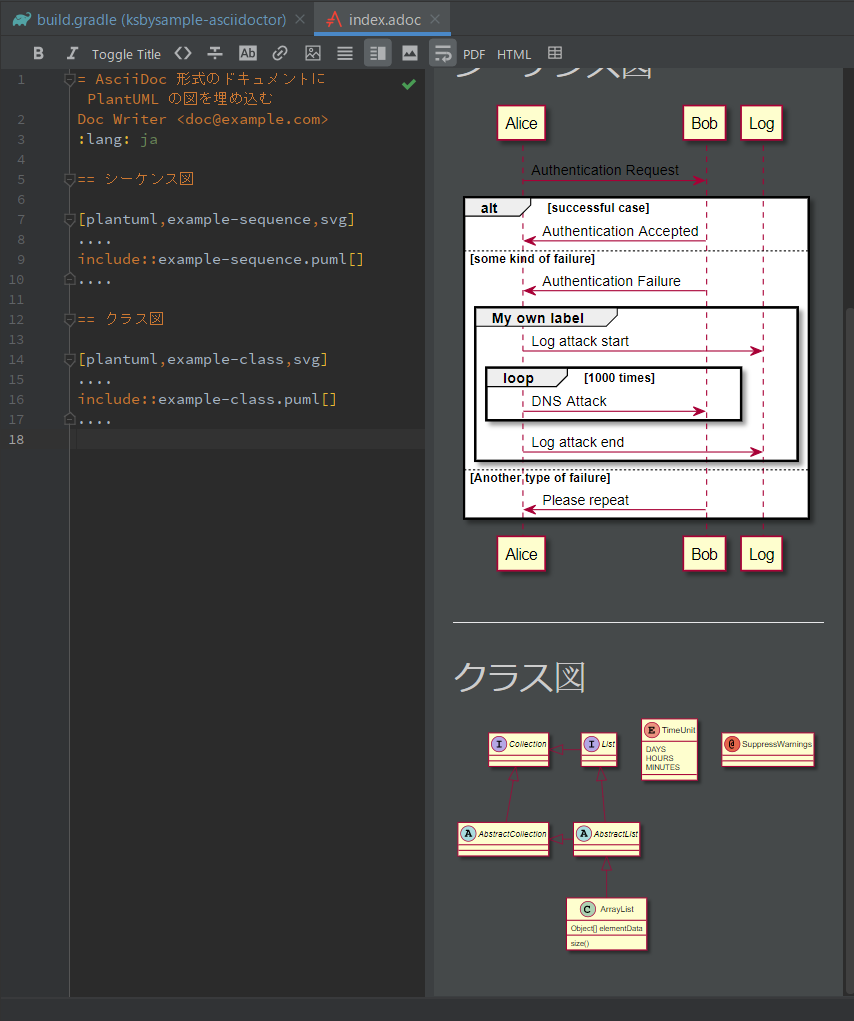
= AsciiDoc 形式のドキュメントに PlantUML の図を埋め込む
Doc Writer <doc@example.com>
:lang: ja

== シーケンス図

[plantuml]
....
include::image$03_diagram/example-sequence.puml[]
....

== クラス図

[plantuml]
....
include::image$03_diagram/example-class.puml[]
....

== BPMN

[bpmn]
....
include::image$03_diagram/example-bpmn.xml[]
....

== bytefield

[bytefield]
....
include::image$03_diagram/example-bytefield.clj[]
....

== ditaa

[ditaa]
....
include::image$03_diagram/example-ditaa.txt[]
....

== C4 model with PlantUML

[plantuml]
....
include::image$03_diagram/example-c4model.puml[]
....
そうすると adoc ファイル内の赤波下線が消えて AsciiDoc Plugin の preview に diagram が表示されるようになります。
modules/ROOT/pages/02_include/01.adoc を変更する
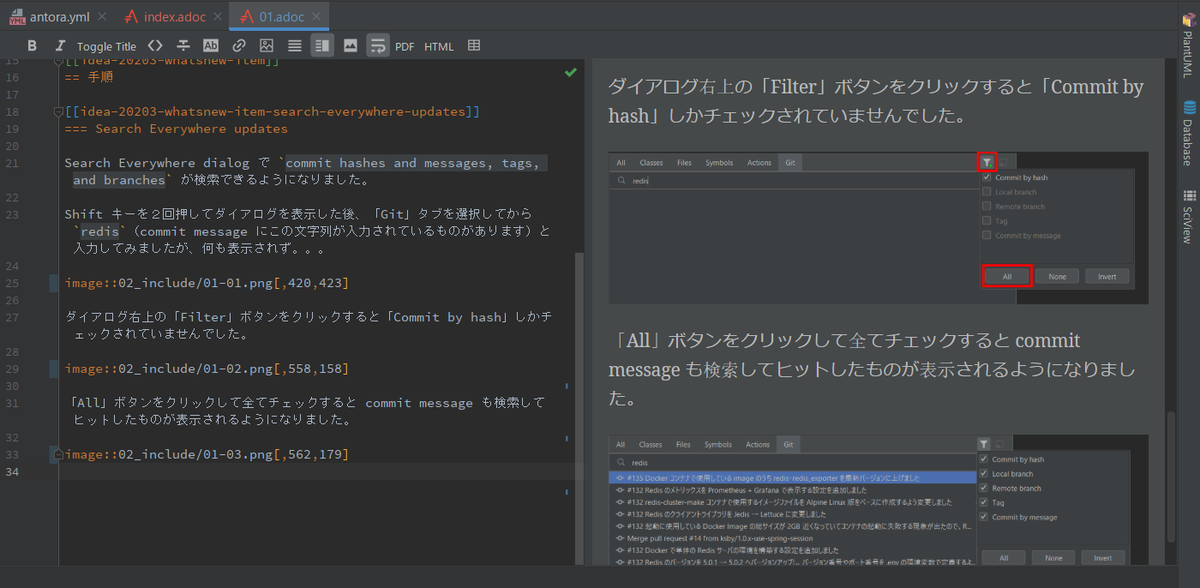
01-01.png ~ 01-03.png の画像ファイルを modules/ROOT/images/02_include の下へ移動したので modules/ROOT/pages/02_include/01.adoc の image::... のパスを image::01-01.png → 02_include/image::01-01.png のように変更します。
..........

Shift キーを2回押してダイアログを表示した後、「Git」タブを選択してから `redis`(commit message にこの文字列が入力されているものがあります)と入力してみましたが、何も表示されず。。。

image::02_include/01-01.png[,420,423]

ダイアログ右上の「Filter」ボタンをクリックすると「Commit by hash」しかチェックされていませんでした。

image::02_include/01-02.png[,558,158]

「All」ボタンをクリックして全てチェックすると commit message も検索してヒットしたものが表示されるようになりました。

image::02_include/01-03.png[,562,179]
こちらも AsciiDoc Plugin の preview に画像が表示されました。
modules/ROOT/nav.adoc を変更する
modules/ROOT/nav.adoc に modules/ROOT/pages/03_diagram/index.adoc へのリンク(.AsciiDoc 形式のドキュメントに PlantUML の図を埋め込む 以降の記述)を追加します。
* xref:ROOT:01_simple/index.adoc[Hello, AsciiDoc!]

.include directive で章毎にファイルを分けてみる
* xref:ROOT:02_include/01.adoc[IntelliJ IDEA 2020.3 新機能メモ書き]
* xref:ROOT:02_include/02.adoc[Asciidoctor+Gradle の環境で AsciiDoc 形式のドキュメントから HTML ファイルを生成してみる]

.AsciiDoc 形式のドキュメントに PlantUML の図を埋め込む
* xref:ROOT:03_diagram/index.adoc[サンプル]
antora.yml を変更する
antora.yml の version の記述を v2.0 → v3.0 に変更します。
name: ksbysample-antora
title: ksbysample-antora
version: v3.0
start_page: ROOT:01_simple/index.adoc
nav:
  - modules/ROOT/nav.adoc
v3.0 ブランチを main ブランチへマージする
v3.0 ブランチを main ブランチへマージします。
ksbysample-antora-playbook プロジェクトに asciidoctor-kroki をインストールする
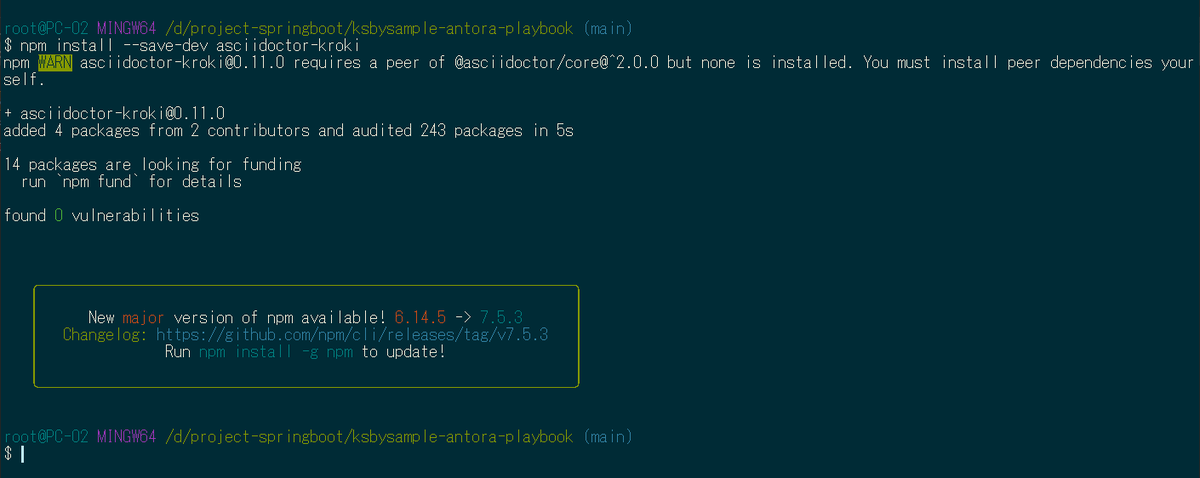
npm install --save-dev asciidoctor-kroki を実行する
Antora から Kroki のコンテナにアクセスするには asciidoctor-kroki を使用します。
ksbysample-antora-playbook プロジェクトで npm install --save-dev asciidoctor-kroki コマンドを実行してインストールします。
antora-playbook.yml を変更する
antora-playbook.yml で branches: [v2.0, v1.0] → branches: [v2.0, v1.0] に変更し、asciidoctor-kroki を利用するために asciidoc: の行以降の記述を追加します。
site:
  title: ksbysample-document-site
  start_page: ksbysample-antora::01_simple/index.adoc
content:
  sources:
    - url: https://github.com/ksby/ksbysample-antora.git
      branches: [v3.0, v2.0, v1.0]
ui:
  bundle:
    url: https://gitlab.com/antora/antora-ui-default/-/jobs/artifacts/master/raw/build/ui-bundle.zip?job=bundle-stable
    snapshot: true

asciidoc:
  attributes:
    kroki-server-url: http://localhost:8000
    kroki-fetch-diagram: true
  extensions:
    - asciidoctor-kroki
npx antora --fetch antora-playbook.yml を実行してドキュメントサイトを生成する
npx antora --fetch antora-playbook.yml を実行すると、Skipping preprocessing of PlantUML include, because reading the referenced ... というメッセージが出力されました。

modules/ROOT/images/03_diagram/example-c4model.puml を開いてみると、先頭に以下の記述があり、
@startuml "messagebus"
!include https://raw.githubusercontent.com/plantuml-stdlib/C4-PlantUML/master/C4_Container.puml
' uncomment the following line and comment the first to use locally
' !include C4_Container.puml
https://raw.githubusercontent.com/plantuml-stdlib/C4-PlantUML/master/C4_Container.puml を見てみると、以下の記述がありました。
' convert it with additional command line argument -DRELATIVE_INCLUDE="." to use locally
!if %variable_exists("RELATIVE_INCLUDE")
  !include %get_variable_value("RELATIVE_INCLUDE")/C4_Context.puml
!else
  !include https://raw.githubusercontent.com/plantuml-stdlib/C4-PlantUML/master/C4_Context.puml
!endif
調べてみると、最初は RELATIVE_INCLUDE という環境変数が設定されているから !include %get_variable_value("RELATIVE_INCLUDE")/C4_Context.puml が実行されていると思ったのですが、PlantUML の !include は Preprocessing なので最初に全て実行されている(!if ... !endif で実行されないように判断されるのは Preprocessing の後)だけのようです。
コマンド実行後の build ディレクトリの下のディレクトリ構成は以下のようになっており(Kroki で生成された svg ファイルは _images/03_diagram の下ではなく _images の下に生成されていました)、
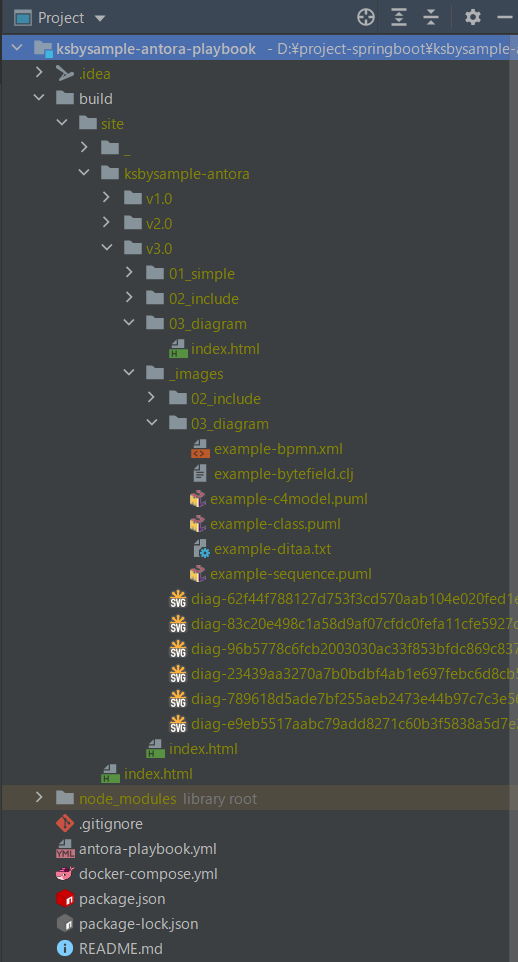
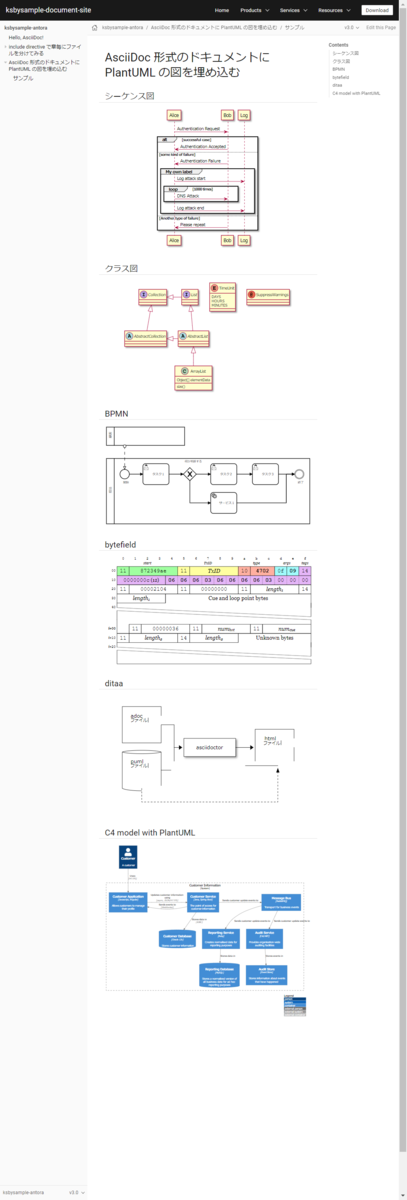
build/site/index.html を開くと diagram は全て表示されました。
メッセージはエラー出力に出力されているので npx antora --fetch antora-playbook.yml 2>/dev/null で実行すれば出力されません。

履歴
2021/02/13
初版発行。
AdoptOpenJDK を 11.0.9.1+1 → 11.0.10+9 へ、IntelliJ IDEA を 2020.3.1 → 2020.3.2 へ、Git for Windows を 2.30.0 → 2.30.0.2 へバージョンアップ
AdoptOpenJDK を 11.0.9.1+1 → 11.0.10+9 へバージョンアップする
※ksbysample-webapp-lending プロジェクトを開いた状態でバージョンアップしています。
https://adoptopenjdk.net/ を見ると 11.0.10+9 がダウンロードできるようになっていましたので、11.0.10+9 へバージョンアップします。

インストール時に削除されるかもしれないので D:\Java\jdk-11.0.9.101-hotspot → D:\Java\jdk-11.0.9.101-hotspotx にリネームします。
OpenJDK11U-jdk_x64_windows_hotspot_11.0.10_9.msi をダウンロードして D:\Java\jdk-11.0.10.9-hotspot へインストールした後、環境変数 JAVA_HOME のパスを D:\Java\jdk-11.0.10.9-hotspot へ変更します。
コマンドプロンプトから
java -versionを実行し、11.0.10に変更されていることを確認します。
D:\Java\jdk-11.0.9.101-hotspotx → D:\Java\jdk-11.0.9.101-hotspot に戻します。
IntelliJ IDEA を再起動します。
新規プロジェクトを作成する時に使用する JDK を 11.0.10+9 へ変更しようと思いましたが、IntelliJ IDEA の 2020.3 の新しい「Welcome to IntelliJ IDEA」ダイアログには 「Configure」-「Structure for New Projects」のメニューがありませんでした。

新規プロジェクトを作成する時にはダイアログ右上の「New Project」ボタンをクリックして表示される「New Project」の画面の「Project SDK」で選択すればよいようです。

「Welcome to IntelliJ IDEA」ダイアログで ksbysample-webapp-lending プロジェクトを開いて、プロジェクトが使用する JDK を 11.0.10+9 に変更します。
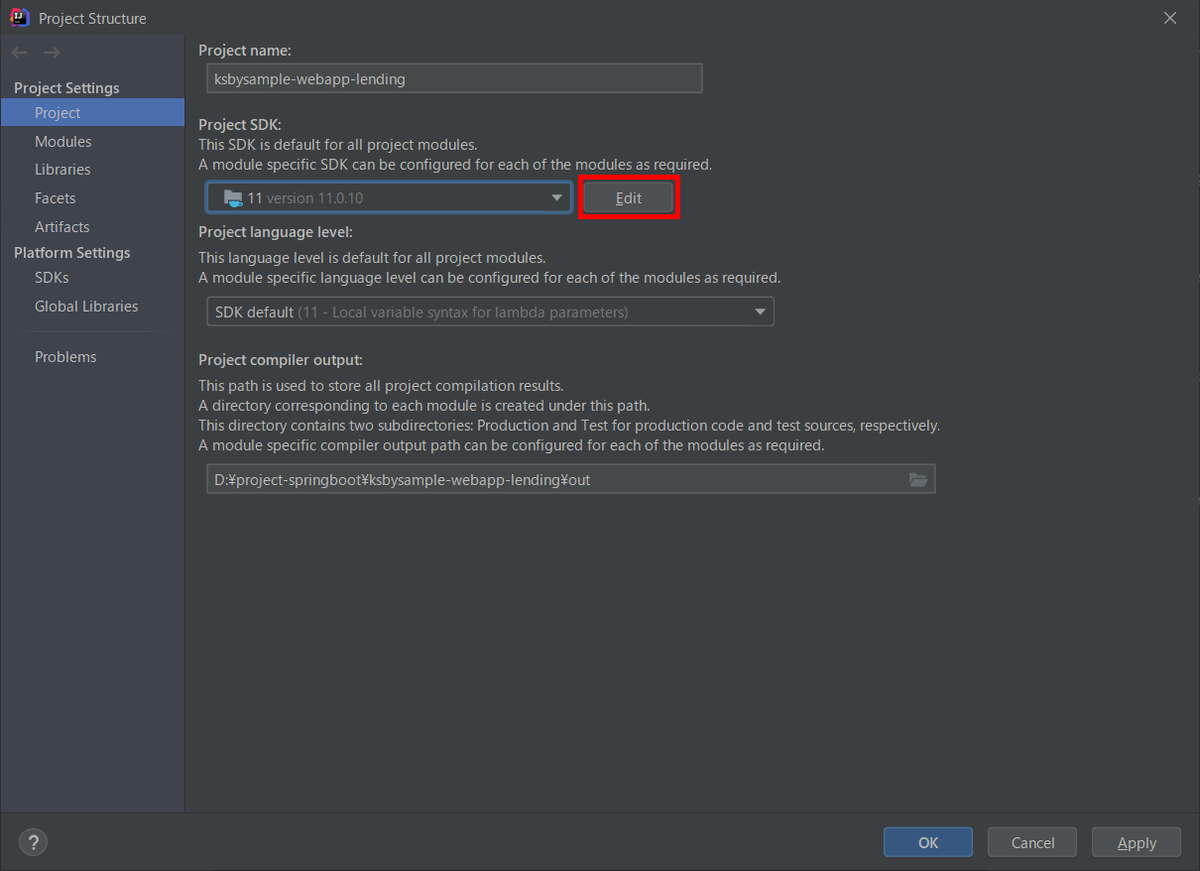
IntelliJ IDEA のメイン画面が開いたら、メニューから「File」-「Project Structure...」を選択します。
「Project Structure」ダイアログが表示されます。「Project SDK」で D:\Java\jdk-11.0.10.9-hotspot を選択します。

「Project SDK」の「Edit」ボタンをクリックします。
「Project Structure」ダイアログが表示されます。画面左側で「Platform Settings」-「SDKs」を選択して、中央のリストから「11.0.9.101」を選択した後、リストの上の「-」ボタンをクリックして削除します。

中央のリストから「11」を選択した後、"11" → "11.0.10.9" へ変更します。

「OK」ボタンをクリックして「Project Structure for New Projects」ダイアログを閉じます。
メイン画面に戻ると画面右下に「Indexing...」の表示が出るので、終了するまで待ちます。
Gradle Tool Window の左上にある「Refresh all Gradle projects」ボタンをクリックして更新します。
clean タスク実行 → Rebuild Project 実行 → build タスクを実行して、"BUILD SUCCESSFUL" のメッセージが出力されることを確認します。

Project Tool Window で src/test でコンテキストメニューを表示して「Run 'All Tests' with Coverage」を選択し、テストが全て成功することを確認します。

特に問題は発生しませんでした。11.0.10+9 で開発を進めます。
IntelliJ IDEA を 2020.3.1 → 2020.3.2 へバージョンアップする
IntelliJ IDEA の 2020.3.2 がリリースされているのでバージョンアップします。
- IntelliJ IDEA 2020.3.2 Is Available
https://blog.jetbrains.com/idea/2021/01/intellij-idea-2020-3-2/
※ksbysample-webapp-lending プロジェクトを開いた状態でバージョンアップしています。
IntelliJ IDEA のメインメニューから「Help」-「Check for Updates...」を選択します。
「IDE and Plugin Updates」ダイアログが表示されます。右下に「Update and Restart」ボタンが表示されていますので、「Update and Restart」ボタンをクリックします。
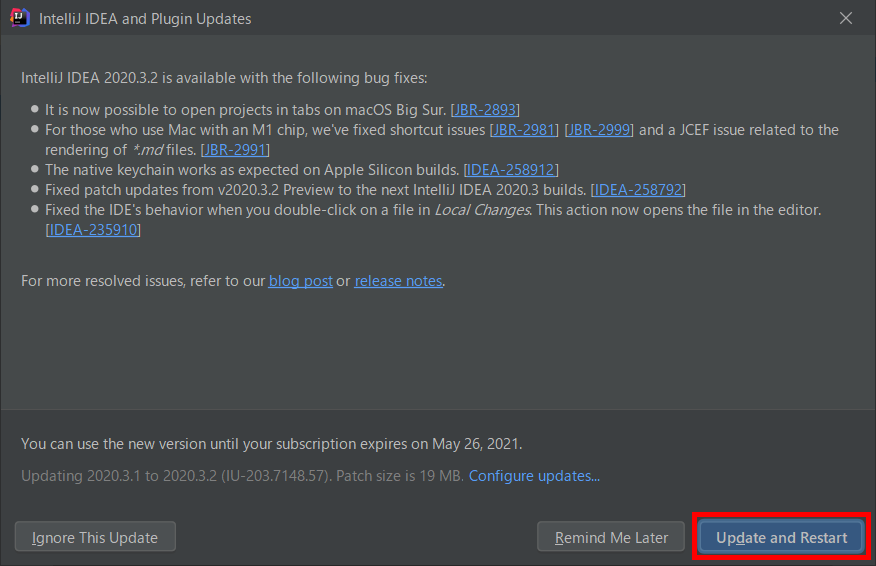
Plugin の update も表示されました。このまま「Update and Restart」ボタンをクリックします。

Patch がダウンロードされて IntelliJ IDEA が再起動します。
IntelliJ IDEA が起動すると画面下部に「Indexing」のメッセージが表示されますので、終了するまで待機します。

IntelliJ IDEA のメインメニューから「Help」-「About」を選択し、2020.3.2 へバージョンアップされていることを確認します。
clean タスク実行 → Rebuild Project 実行 → build タスクを実行して、"BUILD SUCCESSFUL" のメッセージが出力されることを確認します。

Project Tool Window で src/test でコンテキストメニューを表示して「Run 'All Tests' with Coverage」を選択し、テストが全て成功することを確認します。

Git for Windows を 2.30.0 → 2.30.0.2 へバージョンアップする
Git for Windows の 2.30.0.2 がリリースされていたのでバージョンアップします。
https://gitforwindows.org/ の「Download」ボタンをクリックして Git-2.30.0.2-64-bit.exe をダウンロードします。
Git-2.30.0.2-64-bit.exe を実行します。
「Git 2.30.0.2 Setup」ダイアログが表示されます。インストーラーの画面を一通り見たいので「Only show new options」のチェックを外してから [Next >] ボタンをクリックします。
「Select Components」画面が表示されます。「Git LFS(Large File Support)」だけチェックした状態で [Next >]ボタンをクリックします。
「Choosing the default editor used by Git」画面が表示されます。「Use Vim (the ubiquitous text editor) as Git's default editor」が選択された状態で [Next >]ボタンをクリックします。
「Adjusting the name of the initial branch in new repositories」画面が表示されます。「Let Git decide」が選択されていることを確認後、[Next >]ボタンをクリックします。
「Adjusting your PATH environment」画面が表示されます。中央の「Git from the command line and also from 3rd-party software」が選択されていることを確認後、[Next >]ボタンをクリックします。
「Choosing HTTPS transport backend」画面が表示されます。「Use the OpenSSL library」が選択されていることを確認後、[Next >]ボタンをクリックします。
「Configuring the line ending conversions」画面が表示されます。一番上の「Checkout Windows-style, commit Unix-style line endings」が選択されていることを確認した後、[Next >]ボタンをクリックします。
「Configuring the terminal emulator to use with Git Bash」画面が表示されます。「Use Windows'default console window」が選択されていることを確認した後、[Next >]ボタンをクリックします。
「Choose the default behavior of
git pull」画面が表示されます。「Default (fast-forward or merge)」が選択されていることを確認した後、[Next >]ボタンをクリックします。「Choose a credential helper」画面が表示されます。「None」が選択されていることを確認した後、[Next >]ボタンをクリックします。
「Configuring extra options」画面が表示されます。「Enable file system caching」だけがチェックされていることを確認した後、[Next >]ボタンをクリックします。
「Configuring experimental options」画面が表示されます。何もチェックせずに [Install]ボタンをクリックします。
インストールが完了すると「Completing the Git Setup Wizard」のメッセージが表示された画面が表示されます。中央の「View Release Notes」のチェックを外した後、[Next >]ボタンをクリックしてインストーラーを終了します。
コマンドプロンプトを起動して
git --versionを実行し、git のバージョンがgit version 2.30.0.windows.2になっていることを確認します。
特に問題はないようですので、2.30.0.2 で作業を進めたいと思います。
PlantUML 以外の diagram を AsciiDoc のドキュメントに埋め込んで見る(ditaa、C4 model 編)
Translate to English
https://translate.google.com/translate?sl=auto&tl=en&u=https%3A%2F%2Fksby.hatenablog.com%2Fentry%2F2021%2F02%2F03%2F222042
概要
記事一覧はこちらです。
前回からの続きです。今回は ditaa、C4 model の2つです。
参照したサイト・書籍
stathissideris / ditaa
https://github.com/stathissideris/ditaaASCII Art Studio (Freeware)
http://www.torchsoft.com/en/aas_information.htmlAsciidoctor PDFとditaaと日本語の組み合わせに苦戦した話
https://backport.net/blog/2019/09/21/asciidoctor_pdf_ditaa_japanese/plantuml-stdlib / C4-PlantUML
https://github.com/plantuml-stdlib/C4-PlantUMLThe C4 model for visualising software architecture
https://c4model.com/
目次
手順
ditaa の diagram を埋め込む
ASCII Art Studio をインストールする
ditaa は ascii art が画像ファイルになるユーティリティなので ascii art を書くのに便利なソフトがないか探したところ、ASCII Art Studio (Freeware) を見つけました。
http://www.torchsoft.com/en/download.html から ASCII Art Studio の English 版のインストーラをダウンロードしてインストールします。
インストールした ASCII Art Studio を起動すると以下のような画面が表示されました。

インストール直後はグリッドのサイズが小さかったので、メインメニューから「File」-「Settings...」を選択して「Settings」ダイアログを表示した後、「Font and Colors」タブで「Font size」を少し大きくしています。

ASCII Art Studio で ditaa の diagram を作成し TXT ファイルを出力する
http://ditaa.sourceforge.net/ に書かれている diagram をコピーしてもいいのですが、ASCII Art Studio を見つけたので自分で作成してみることにします。
適当に ascii art を書いてから、

src/docs/asciidoc/03_diagram の下に example-ditaa.txt を新規作成して、そこにコピペします。
コピペするとなぜか IntelliJ IDEA がチェックして赤波下線を表示していました。txt ファイルがチェックされる?

ファイルを選択してコンテキストメニューを表示させてから「Analyze」-「Inspect Code...」を選択してみると
<option>, <uri reference>, RequirementsTokenType.EOL, RequirementsTokenType.IDENTIFIER or RequirementsTokenType.WHITE_SPACE expected, got '+' と表示されました。

Web で検索すると stackoverflow で PyCharm treats all txt files like requirements file を見つけました。どうも Requirements プラグインをインストールしていると requirements.txt と同じチェックが行われるらしいです。どうしようもなさそうなので何もしないことにします。
AsciiDoc のドキュメントに TXT ファイルを include する
src/docs/asciidoc/03_diagram/index.adoc に example-ditaa.txt を include します。
..........

== bytefield

[bytefield]
....
include::example-bytefield.clj[]
....

== ditaa

[ditaa]
....
include::example-ditaa.txt[]
....
AsciiDoc Plugin の preview にも Kroki のコンテナで生成された diagram が表示されますが、きれいな図になっていません。。。

asciidoctorWithMoveDiagSvg タスクを実行して動作確認する
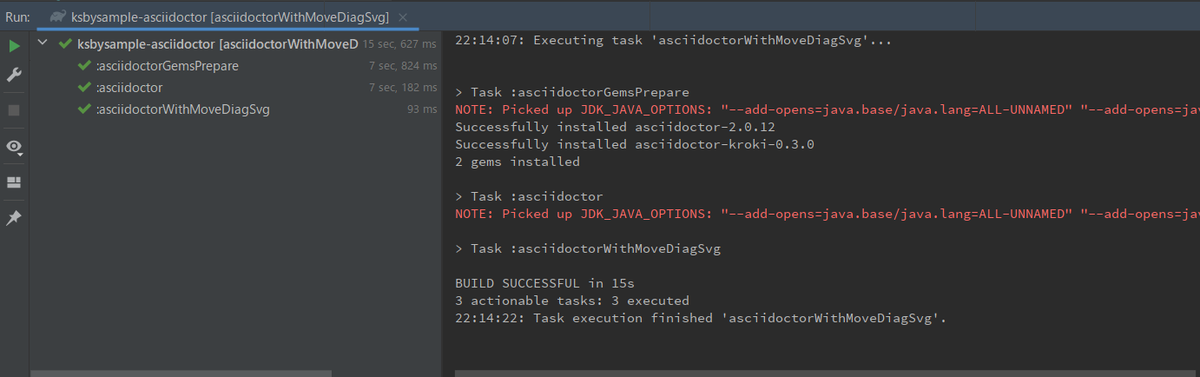
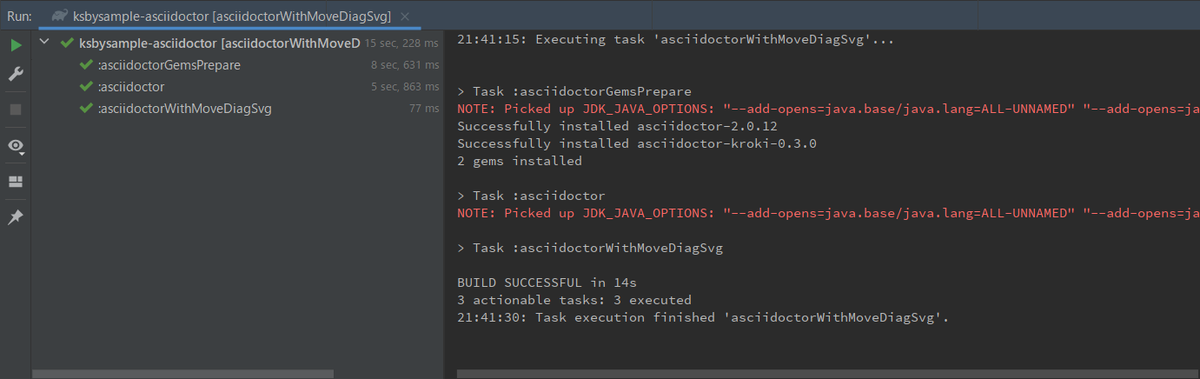
asciidoctorWithMoveDiagSvg タスクを実行すると BUILD SUCCESSFUL が表示されて、

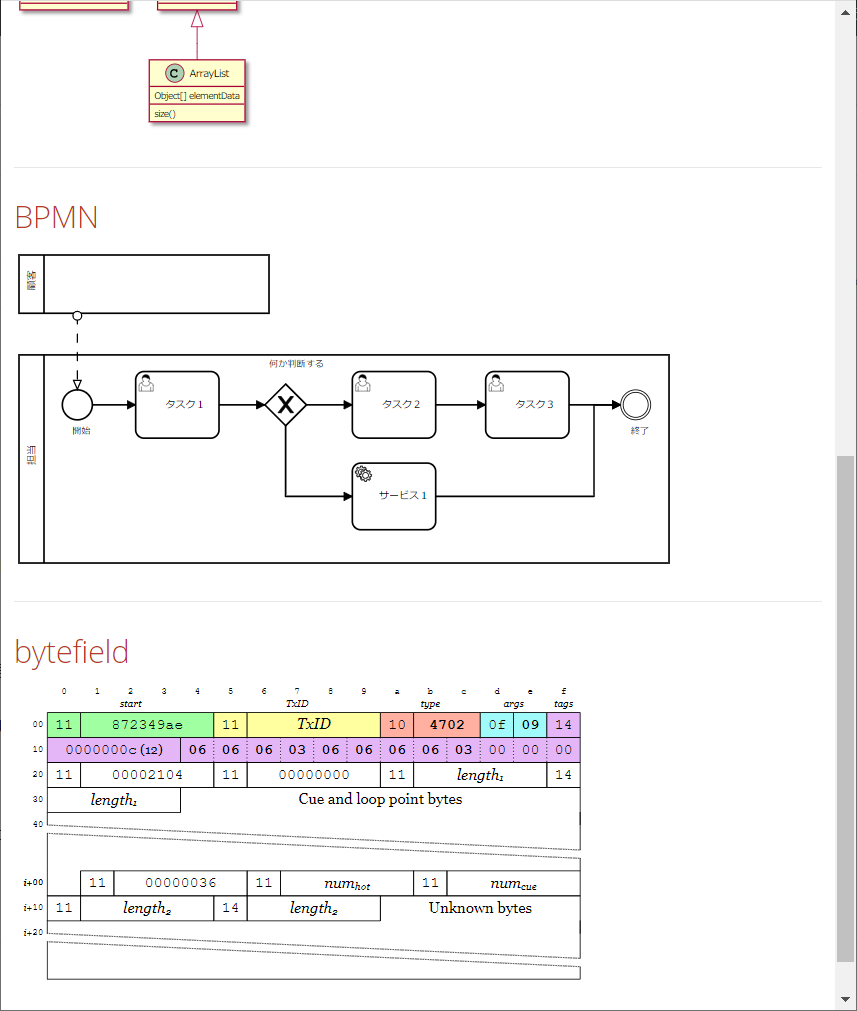
build/docs/asciidoc/03_diagram/index.html をブラウザで表示すると ditaa の diagram が表示されましたが、やっぱりきれいな図になっていませんね。。。

検索すると Asciidoctor PDFとditaaと日本語の組み合わせに苦戦した話 という記事を見つけました。どうも ditaa は日本語が含まれるとうまく出力してくれないようです。
C4 model の diagram を埋め込む
https://github.com/plantuml-stdlib/C4-PlantUML#message-bus-and-microservices の C4 model with PlantUML のコードをファイルに保存する
https://github.com/plantuml-stdlib/C4-PlantUML の Advanced Samples にきれいなサンプルがいくつもあるので、その中から Message Bus and Microservices のサンプルをコピペします。
src/docs/asciidoc/03_diagram の下に example-c4model.puml というファイルを作成してコピペします。PlantUML Plugin では diagram が表示されました。

AsciiDoc のドキュメントにファイルを include する
src/docs/asciidoc/03_diagram/index.adoc に example-c4model.puml を include します。
..........

== ditaa

[ditaa]
....
include::example-ditaa.txt[]
....

== C4 model with PlantUML

[plantuml]
....
include::example-c4model.puml[]
....
AsciiDoc Plugin の preview にも Kroki のコンテナで生成された diagram が表示されます。

asciidoctorWithMoveDiagSvg タスクを実行して動作確認する
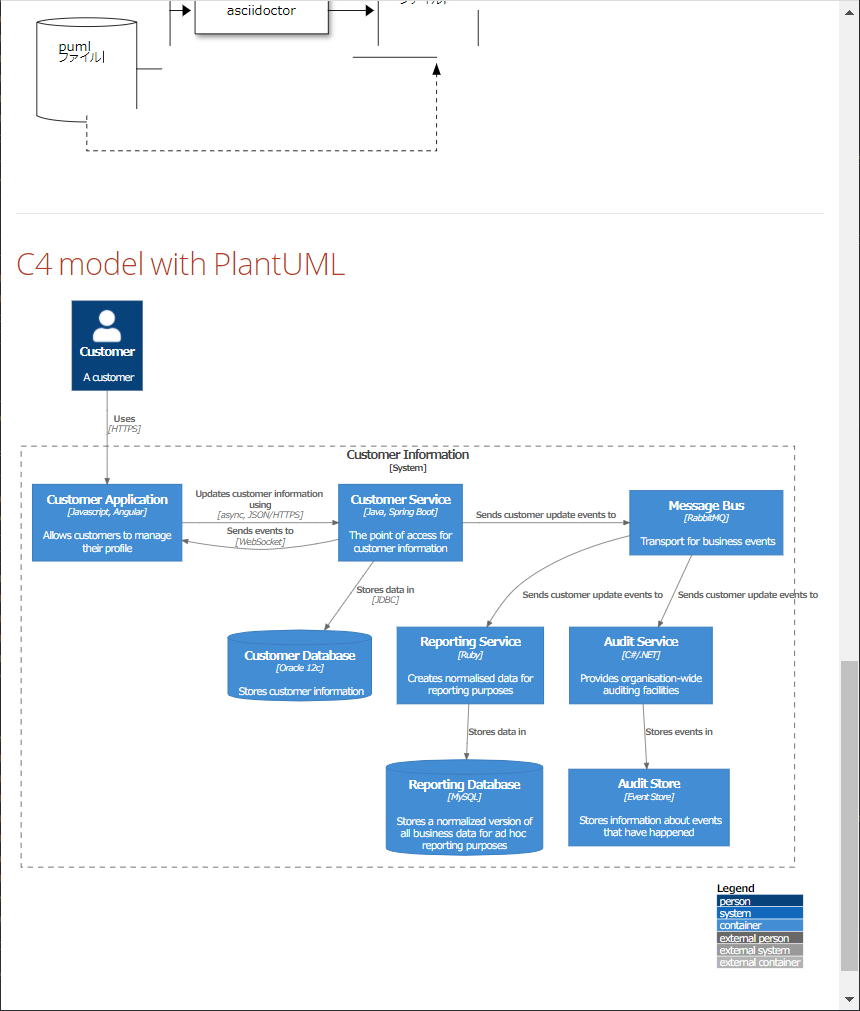
asciidoctorWithMoveDiagSvg タスクを実行すると BUILD SUCCESSFUL が表示されて、
build/docs/asciidoc/03_diagram/index.html をブラウザで表示すると C4 model with PlantUML の diagram が表示されました。
履歴
2021/02/03
初版発行。
PlantUML 以外の diagram を AsciiDoc のドキュメントに埋め込んで見る(bpmn、bytefield 編)
Translate to English
https://translate.google.com/translate?sl=auto&tl=en&u=https%3A%2F%2Fksby.hatenablog.com%2Fentry%2F2021%2F01%2F31%2F191055
概要
記事一覧はこちらです。
AsciiDoc のドキュメントには PlantUML 以外の diagram も埋め込めるので、いくつか興味を持ったものを試してみます。diagram の生成には Kroki のコンテナを使用します。
全部で bpmn、bytefield、ditaa、C4 model の4つ試します。今回は bpmn、bytefield の2つです。
参照したサイト・書籍
gtudan / bpmn-js-cmd
https://github.com/gtudan/bpmn-js-cmdbpmn-js
https://bpmn.io/toolkit/bpmn-js/ABOUT THE BUSINESS PROCESS MODEL AND NOTATION SPECIFICATION VERSION 2.0.2
https://www.omg.org/spec/BPMNDeep-Symmetry / bytefield-svg
https://github.com/Deep-Symmetry/bytefield-svgByte Field SVG Builder
https://bytefield-svg.deepsymmetry.org/bytefield-svg/intro.htmlThe Clojure Programming Language
https://clojure.org/
目次
手順
bpmn の diagram を埋め込む
https://demo.bpmn.io/ で BPMN のワークフローを描き XML ファイルを出力する
https://bpmn.io/toolkit/bpmn-js/ の「Try Online」のボタンをクリックすると

BPMN diagram のエディタのページが開くので create リンクをクリックします。

以下のページが表示されるので、

BPMN の diagram を作成して画面左下の「Download as BPMN 2.0 file」ボタンをクリックします。このエディタ、かなり使い勝手がいいです。BPMN でなくてもフローチャートのようなものを描きたい時にも使えそうです。

diagram.bpmn というファイルがダウンロードされるので、

ファイル名を example-bpmn.xml に変更してから src/docs/asciidoc/03_diagram の下にコピーします。ファイルには以下の内容が出力されていました。
<?xml version="1.0" encoding="UTF-8"?>
<bpmn:definitions xmlns:xsi="http://www.w3.org/2001/XMLSchema-instance" xmlns:bpmn="http://www.omg.org/spec/BPMN/20100524/MODEL" xmlns:bpmndi="http://www.omg.org/spec/BPMN/20100524/DI" xmlns:dc="http://www.omg.org/spec/DD/20100524/DC" xmlns:di="http://www.omg.org/spec/DD/20100524/DI" id="Definitions_1v0204h" targetNamespace="http://bpmn.io/schema/bpmn" exporter="bpmn-js (https://demo.bpmn.io)" exporterVersion="8.2.0">
  <bpmn:collaboration id="Collaboration_0esz28g">
    <bpmn:participant id="Participant_1wt0hx7" name="担当" processRef="Process_1yvf2u7" />
    <bpmn:participant id="Participant_1ekcrhk" name="顧客" processRef="Process_0y1378r" />
    <bpmn:messageFlow id="Flow_0sr1ydc" sourceRef="Participant_1ekcrhk" targetRef="Event_0bfbply" />
  </bpmn:collaboration>
  <bpmn:process id="Process_1yvf2u7">
    <bpmn:startEvent id="Event_0bfbply" name="開始">
      <bpmn:outgoing>Flow_1bjdsif</bpmn:outgoing>
    </bpmn:startEvent>
    <bpmn:exclusiveGateway id="Gateway_0z7l85o" name="何か判断する">
      <bpmn:incoming>Flow_0awhuxb</bpmn:incoming>
      <bpmn:outgoing>Flow_1valj6w</bpmn:outgoing>
      <bpmn:outgoing>Flow_0zc3okk</bpmn:outgoing>
    </bpmn:exclusiveGateway>
    <bpmn:intermediateThrowEvent id="Event_1jvqnpo" name="終了">
      <bpmn:incoming>Flow_0txzrxj</bpmn:incoming>
      <bpmn:incoming>Flow_00oerl8</bpmn:incoming>
    </bpmn:intermediateThrowEvent>
    <bpmn:userTask id="Activity_0qztpf7" name="タスク1">
      <bpmn:incoming>Flow_1bjdsif</bpmn:incoming>
      <bpmn:outgoing>Flow_0awhuxb</bpmn:outgoing>
    </bpmn:userTask>
    <bpmn:userTask id="Activity_1vn6vl3" name="タスク2">
      <bpmn:incoming>Flow_1valj6w</bpmn:incoming>
      <bpmn:outgoing>Flow_0ads6v6</bpmn:outgoing>
    </bpmn:userTask>
    <bpmn:userTask id="Activity_1um5mkv" name="タスク3">
      <bpmn:incoming>Flow_0ads6v6</bpmn:incoming>
      <bpmn:outgoing>Flow_0txzrxj</bpmn:outgoing>
    </bpmn:userTask>
    <bpmn:serviceTask id="Activity_0p4qw7j" name="サービス1">
      <bpmn:incoming>Flow_0zc3okk</bpmn:incoming>
      <bpmn:outgoing>Flow_00oerl8</bpmn:outgoing>
    </bpmn:serviceTask>
    <bpmn:sequenceFlow id="Flow_1bjdsif" sourceRef="Event_0bfbply" targetRef="Activity_0qztpf7" />
    <bpmn:sequenceFlow id="Flow_0awhuxb" sourceRef="Activity_0qztpf7" targetRef="Gateway_0z7l85o" />
    <bpmn:sequenceFlow id="Flow_1valj6w" sourceRef="Gateway_0z7l85o" targetRef="Activity_1vn6vl3" />
    <bpmn:sequenceFlow id="Flow_0ads6v6" sourceRef="Activity_1vn6vl3" targetRef="Activity_1um5mkv" />
    <bpmn:sequenceFlow id="Flow_0txzrxj" sourceRef="Activity_1um5mkv" targetRef="Event_1jvqnpo" />
    <bpmn:sequenceFlow id="Flow_0zc3okk" sourceRef="Gateway_0z7l85o" targetRef="Activity_0p4qw7j" />
    <bpmn:sequenceFlow id="Flow_00oerl8" sourceRef="Activity_0p4qw7j" targetRef="Event_1jvqnpo" />
  </bpmn:process>
  <bpmn:process id="Process_0y1378r" />
  <bpmndi:BPMNDiagram id="BPMNDiagram_1">
    <bpmndi:BPMNPlane id="BPMNPlane_1" bpmnElement="Collaboration_0esz28g">
      <bpmndi:BPMNShape id="Participant_1wt0hx7_di" bpmnElement="Participant_1wt0hx7" isHorizontal="true">
        <dc:Bounds x="160" y="200" width="780" height="250" />
      </bpmndi:BPMNShape>
      <bpmndi:BPMNEdge id="Flow_1bjdsif_di" bpmnElement="Flow_1bjdsif">
        <di:waypoint x="248" y="260" />
        <di:waypoint x="300" y="260" />
      </bpmndi:BPMNEdge>
      <bpmndi:BPMNEdge id="Flow_0awhuxb_di" bpmnElement="Flow_0awhuxb">
        <di:waypoint x="400" y="260" />
        <di:waypoint x="455" y="260" />
      </bpmndi:BPMNEdge>
      <bpmndi:BPMNEdge id="Flow_1valj6w_di" bpmnElement="Flow_1valj6w">
        <di:waypoint x="505" y="260" />
        <di:waypoint x="560" y="260" />
      </bpmndi:BPMNEdge>
      <bpmndi:BPMNEdge id="Flow_0ads6v6_di" bpmnElement="Flow_0ads6v6">
        <di:waypoint x="660" y="260" />
        <di:waypoint x="720" y="260" />
      </bpmndi:BPMNEdge>
      <bpmndi:BPMNEdge id="Flow_0txzrxj_di" bpmnElement="Flow_0txzrxj">
        <di:waypoint x="820" y="260" />
        <di:waypoint x="882" y="260" />
      </bpmndi:BPMNEdge>
      <bpmndi:BPMNEdge id="Flow_0zc3okk_di" bpmnElement="Flow_0zc3okk">
        <di:waypoint x="480" y="285" />
        <di:waypoint x="480" y="370" />
        <di:waypoint x="560" y="370" />
      </bpmndi:BPMNEdge>
      <bpmndi:BPMNEdge id="Flow_00oerl8_di" bpmnElement="Flow_00oerl8">
        <di:waypoint x="660" y="370" />
        <di:waypoint x="850" y="370" />
        <di:waypoint x="850" y="260" />
        <di:waypoint x="882" y="260" />
      </bpmndi:BPMNEdge>
      <bpmndi:BPMNShape id="Event_0bfbply_di" bpmnElement="Event_0bfbply">
        <dc:Bounds x="212" y="242" width="36" height="36" />
        <bpmndi:BPMNLabel>
          <dc:Bounds x="219" y="285" width="23" height="14" />
        </bpmndi:BPMNLabel>
      </bpmndi:BPMNShape>
      <bpmndi:BPMNShape id="Gateway_0z7l85o_di" bpmnElement="Gateway_0z7l85o" isMarkerVisible="true">
        <dc:Bounds x="455" y="235" width="50" height="50" />
        <bpmndi:BPMNLabel>
          <dc:Bounds x="447" y="205" width="66" height="14" />
        </bpmndi:BPMNLabel>
      </bpmndi:BPMNShape>
      <bpmndi:BPMNShape id="Event_1jvqnpo_di" bpmnElement="Event_1jvqnpo">
        <dc:Bounds x="882" y="242" width="36" height="36" />
        <bpmndi:BPMNLabel>
          <dc:Bounds x="889" y="285" width="23" height="14" />
        </bpmndi:BPMNLabel>
      </bpmndi:BPMNShape>
      <bpmndi:BPMNShape id="Activity_104sj26_di" bpmnElement="Activity_0qztpf7">
        <dc:Bounds x="300" y="220" width="100" height="80" />
      </bpmndi:BPMNShape>
      <bpmndi:BPMNShape id="Activity_0sjnmyp_di" bpmnElement="Activity_1vn6vl3">
        <dc:Bounds x="560" y="220" width="100" height="80" />
      </bpmndi:BPMNShape>
      <bpmndi:BPMNShape id="Activity_079ttch_di" bpmnElement="Activity_1um5mkv">
        <dc:Bounds x="720" y="220" width="100" height="80" />
      </bpmndi:BPMNShape>
      <bpmndi:BPMNShape id="Activity_0mul251_di" bpmnElement="Activity_0p4qw7j">
        <dc:Bounds x="560" y="330" width="100" height="80" />
      </bpmndi:BPMNShape>
      <bpmndi:BPMNShape id="Participant_1ekcrhk_di" bpmnElement="Participant_1ekcrhk" isHorizontal="true">
        <dc:Bounds x="160" y="80" width="300" height="70" />
      </bpmndi:BPMNShape>
      <bpmndi:BPMNEdge id="Flow_0sr1ydc_di" bpmnElement="Flow_0sr1ydc">
        <di:waypoint x="230" y="153" />
        <di:waypoint x="230" y="242" />
      </bpmndi:BPMNEdge>
    </bpmndi:BPMNPlane>
  </bpmndi:BPMNDiagram>
</bpmn:definitions>
AsciiDoc のドキュメントに出力した XML ファイルを include する
src/docs/asciidoc/03_diagram/index.adoc に example-bpmn.xml を include します。
..........

== クラス図

[plantuml]
....
include::example-class.puml[]
....

== BPMN

[bpmn]
....
include::example-bpmn.xml[]
....
AsciiDoc Plugin の preview にも Kroki のコンテナで生成された diagram が表示されます。

asciidoctorWithMoveDiagSvg タスクを実行して動作確認する
asciidoctorWithMoveDiagSvg タスクを実行すると BUILD SUCCESSFUL が表示されて、
build/docs/asciidoc/03_diagram/index.html をブラウザで表示すると BPMN の diagram が表示されました。

bytefield の diagram を埋め込む
https://kroki.io/ の Bytefield のコードをファイルに保存する
こちらは https://kroki.io/ で Bytefield を選択して表示されたコードをコピーすることにします。Deep-Symmetry / bytefield-svg によると Clojure ベースの DSL とのことなので、src/docs/asciidoc/03_diagram の下に example-bytefield.clj というファイルを作成してコピペします。
拡張子 .clj のファイルに保存すると Clojure のコードと識別されて IntelliJ IDEA のエディタ上でシンタックスハイライトされます。

AsciiDoc のドキュメントに Bytefield のコードのファイルを include する
src/docs/asciidoc/03_diagram/index.adoc に example-bytefield.clj を include します。
..........

== BPMN

[bpmn]
....
include::example-bpmn.xml[]
....

== bytefield

[bytefield]
....
include::example-bytefield.clj[]
....
AsciiDoc Plugin の preview にも Kroki のコンテナで生成された diagram が表示されます。

asciidoctorWithMoveDiagSvg タスクを実行して動作確認する
asciidoctorWithMoveDiagSvg タスクを実行すると BUILD SUCCESSFUL が表示されて、

build/docs/asciidoc/03_diagram/index.html をブラウザで表示すると bytefield の diagram が表示されました。
履歴
2021/01/31
初版発行。
PlantUML の図を生成するモジュールを Asciidoctor Diagram → Kroki に変更する
Translate to English
https://translate.google.com/translate?sl=auto&tl=en&u=https%3A%2F%2Fksby.hatenablog.com%2Fentry%2F2021%2F01%2F26%2F234903
概要
記事一覧はこちらです。
Creating a Diagram には Asciidoctor Diagram が対応している Diagram Type が PlantUML 以外にも列挙されていますが、例えば mermaid のコードを adoc ファイル内に記述しても Failed to generate image: Could not find the 'mermaid' executable in PATH; と外部プログラムが見つからないというエラーが出て図が生成・表示されません。


また plantuml-stdlib / C4-PlantUML というものを見つけたのですが、Asciidoctor Diagram はこの PlantUML で C4 model を記述する方法に対応していません。
Kroki を利用すれば外部プログラムを個別にインストールせずに PlantUML やそれ以外の diagram を生成したり、C4 model を PlantUML で記述したコードから図を生成したりできるようなので試してみます。
参照したサイト・書籍
Kroki
https://kroki.io/Kroki Documentation
https://docs.kroki.io/kroki/【12/24にGitLab対応!】テキストで自在に「描く」- KrokiではじめるDiagram as Code
https://qiita.com/tomo_makes/items/7c42a736b30554e15c35plantuml-stdlib / C4-PlantUML
https://github.com/plantuml-stdlib/C4-PlantUMLThe C4 model for visualising software architecture
https://c4model.com/asciidoctor-kroki
https://rubygems.org/gems/asciidoctor-kroki/Mogztter / asciidoctor-kroki
https://github.com/Mogztter/asciidoctor-krokiRuby GEM support
https://asciidoctor.github.io/asciidoctor-gradle-plugin/development-3.x/user-guide/#asciidoctorj-gems-pluginHow can I configure the gradle asciidoctor 2.0 plugin to use pygments.rb as higlighter?
https://github.com/asciidoctor/asciidoctor-gradle-plugin/issues/326Copy
https://docs.gradle.org/current/dsl/org.gradle.api.tasks.Copy.htmlGradle - Delete files with certain extension
https://stackoverflow.com/questions/27285885/gradle-delete-files-with-certain-extension
目次
- Ruby の gem の asciidoctor-kroki を使用して asciidoctor タスク実行時に Kroki で図を生成するよう build.gradle を変更する
- asciidoctor タスクを実行して動作確認する
- Kroki の Docker image を利用してローカルでサーバを起動し、画像ファイルがローカルに保存されるようにする
手順
Ruby の gem の asciidoctor-kroki を使用して asciidoctor タスク実行時に Kroki で図を生成するよう build.gradle を変更する
Asciidoctor+Gradle の環境で Kroki を利用するにはどうすればよいのか調べてみたところ、
- Mogztter / asciidoctor-kroki が見つかりましたが、これは
An extension for Asciidoctor.jsとのこと。 - 他にも探すと Ruby の gem である asciidoctor-kroki が見つかりました。このページ右上の GitHub のアイコンをクリックすると Mogztter / asciidoctor-kroki に遷移しますので同じ機能を持つモジュールのようです。
- Asciidoctor Gradle Plugin のドキュメントを見ると Ruby GEM support の記述があり、Asciidoctor+Gradle の環境で Ruby の gem が利用できるとのこと。
ということで Ruby の gem の asciidoctor-kroki を利用するよう build.gradle を変更すれば Kroki を利用できるようです。
build.gradle を以下のように変更します。
plugins {
    id "org.asciidoctor.jvm.convert" version "3.3.0"
    id "org.asciidoctor.jvm.gems" version "3.3.0"
}

repositories {
    mavenCentral()
    ruby.gems()
}

dependencies {
    asciidoctorGems "rubygems:asciidoctor-kroki:0.3.0"
}

asciidoctor {
    dependsOn asciidoctorGemsPrepare
    sourceDir file("src/docs/asciidoc")
    baseDirFollowsSourceFile()
    sources {
        include "**/index.adoc"
    }
    resources {
        from("${sourceDir}") {
            include "**/*.png",
                    "**/*.js"
        }
    }
}

asciidoctorj {
    requires = [
            "asciidoctor-kroki"
    ]
    attributes "source-highlighter" : "rouge"
}
- plugins block に以下の行を追加します。
id "org.asciidoctor.jvm.gems" version "3.3.0"
- repositories block に以下の行を追加します。
ruby.gems()
dependencies { asciidoctorGems "rubygems:asciidoctor-kroki:0.3.0" }を追加します。- asciidoctor block に
dependsOn asciidoctorGemsPrepareを追加します。この記述を追加することが最初分からず asciidoctor タスクを実行すると以下の画像のエラーが出たのですが、 How can I configure the gradle asciidoctor 2.0 plugin to use pygments.rb as higlighter? の Issue に記述されているサンプルを見つけたのと、Asciidoctor Gradle Plugin のドキュメントにも asciidoctorGemsPrepare の記述があり、マネしてみたらうまく動きました。
 - asciidoctorj block の以下の点を変更します。
- Asciidoctor Diagram の設定は不要になるので
modules { diagram.use() diagram.version "2.1.0" }を削除します。 requires = [ "asciidoctor-kroki" ]を追加します。
- Asciidoctor Diagram の設定は不要になるので
asciidoctor タスクを実行して動作確認する
asciidoctor タスクを実行すると BUILD SUCCESSFUL が出力されますが、asciidoctor タスクの前に asciidoctorGemsPrepare タスクが実行されるようになり、また Java 11 を使っていることに伴う WARNING メッセージが出力されました。

WARNING メッセージが出力されないようにします。IntelliJ IDEA のメインメニューから「Run」-「Edit Configurations...」を選択して「Run/Debug Configurations」ダイアログを表示した後、「ksbysample-asciidoctor [asciidoctor]」 の Environment variables に "--add-opens=java.base/java.security=ALL-UNNAMED" を追加します。Environment variables にセットされている文字列は全体で JDK_JAVA_OPTIONS="--add-opens=java.base/java.lang=ALL-UNNAMED" "--add-opens=java.base/java.util=ALL-UNNAMED" "--add-opens=java.base/java.security=ALL-UNNAMED" "-Xverify:none" "-XX:TieredStopAtLevel=1" になります。

clean タスク実行 → asciidoctor タスク実行をすると今度は WARNING メッセージが出ませんでした。

build/docs/asciidoc/03_diagram/index.html が出力されており、それ以外に、
- build/.asciidoctorGems というディレクトリが出来ていました。Ruby の gem はここにダウンロードされるようです。
- build/docs/asciidoc/03_diagram の下に index.html は作成されていますが、example-sequence.svg、example-class.svg は作成されていませんでした。

index.html をエディタで開いてみると、<img src="https://kroki.io/plantuml/svg/..." alt="example-sequence"> のような img タグが記述されていました。svg の画像は Kroki のサーバ(https://kroki.io/)上に生成されているようです。

index.html をブラウザで開くと PlantUML の図が表示されました。

Kroki の Docker image を利用してローカルでサーバを起動し、画像ファイルがローカルに保存されるようにする
画像ファイルはローカルに保存しておきたいのと、Kroki は Docker image が提供されていてローカルでサーバを起動できるので、Docker で Kroki のコンテナを起動して、生成した画像ファイルもローカルにダウンロードして保存するようにします。
docker-compose.yml を作成し、Kroki のコンテナを起動するための設定を記述する
プロジェクトのルートディレクトリ直下に docker-compose.yml を新規作成し、Install Kroki に記載されている docker-compose.yml の記述をそのままコピペします。
version: "3"
services:
  core:
    image: yuzutech/kroki
    environment:
      - KROKI_BLOCKDIAG_HOST=blockdiag
      - KROKI_MERMAID_HOST=mermaid
      - KROKI_BPMN_HOST=bpmn
    ports:
      - "8000:8000"
  blockdiag:
    image: yuzutech/kroki-blockdiag
    expose:
      - "8001"
  mermaid:
    image: yuzutech/kroki-mermaid
    expose:
      - "8002"
  bpmn:
    image: yuzutech/kroki-bpmn
    expose:
      - "8003"
  excalidraw:
    image: yuzutech/kroki-excalidraw
    expose:
      - "8004"
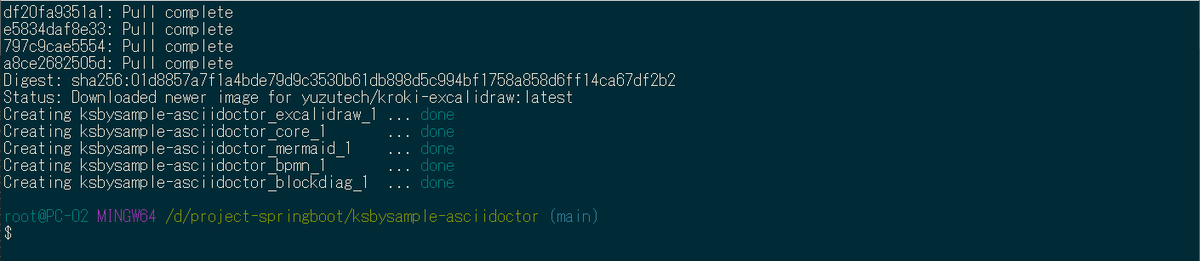
docker-compose up -d を実行して Kroki のコンテナを起動する
docker-compose up -d を実行して Kroki のコンテナを起動します。

AsciiDoc Plugin の Preview が Kroki を利用するよう設定を変更する
AsciiDoc Plugin の Preview は Asciidoctor Diagram だけでなく Kroki にも対応しているので、ローカルで起動した Kroki のコンテナを利用するように設定を変更します。
IntelliJ IDEA の「Settings」ダイアログを開いてから画面左上の検索フィールドに Kroki と入力すると「Languages & Frameworks」-「AsciiDoc」が表示されるので選択します。その後画面左側の「Use Kroki to render diagrams instead of Asciidoctor Diagram」をチェックし、「URL of custom Kroki instance」に http://localhost:8000 を入力して「OK」ボタンをクリックします。

AsciiDoc Plugin の Preview で index.adoc を表示すると今度はクラス図も表示されるようになりました。
PlantUML integration Plugin には Kroki を利用する設定はないので、こちらは何もしません(何もしなくても C4 model を PlantUML で記述したコードから図を表示してくれました)。
asciidoctor タスク実行時にローカルで起動した Kroki のコンテナを利用するよう build.gradle を変更する
build.gradle を以下のように変更します。
..........

asciidoctorj {
    requires = [
            "asciidoctor-kroki"
    ]
    attributes "source-highlighter" : "rouge"
    attributes "kroki-server-url": "http://localhost:8000"
    attributes "kroki-fetch-diagram": "true"
}

// Kroki で生成してローカルにダウンロードした画像ファイルを asciidoctor.outputDir に移動する
task asciidoctorWithMoveDiagSvg(group: "documentation") {
    doLast {
        def moveFilePattern = "**/diag-*.svg"

        copy() {
            from(asciidoctor.sourceDir) {
                include moveFilePattern
            }
            into asciidoctor.outputDir
        }

        delete fileTree(asciidoctor.sourceDir) { include moveFilePattern }
    }
}
asciidoctorWithMoveDiagSvg.dependsOn asciidoctor
- asciidoctorj block に以下の2行を追加します。
attributes "kroki-server-url": "http://localhost:8000"attributes "kroki-fetch-diagram": "true"
task asciidoctorWithMoveDiagSvg(group: "documentation") { ... }、asciidoctorWithMoveDiagSvg.dependsOn asciidoctorを追加します。
上の変更から asciidoctorWithMoveDiagSvg タスクがない状態で asciidoctor タスクを実行すると build/docs/asciidoc/03_diagram/index.html の img タグには以下のように出力されるのですが、

Kroki で生成された画像ファイルは build ディレクトリではなく src/docs/asciidoc/03_diagram の下にダウンロードされるため、index.html をブラウザで表示させた時に PlantUML の図が表示されません。

src/docs/asciidoc/03_diagram/index.adoc の中で [plantuml,example-sequence,svg] → [plantuml,opts=inline] に変更すれば index.html の中に SVG のコードが出力されるので SVG のファイルを移動しなくてもよくなるのですが、今度は AsciiDoc Plugin の Preview に図が表示されません。

ブラウザの表示も AsciiDoc Plugin の Preview の表示もできるようにするために、asciidoctorWithMoveDiagSvg タスクを追加して asciidoctor タスク実行後に svg のファイルを移動することにしました。
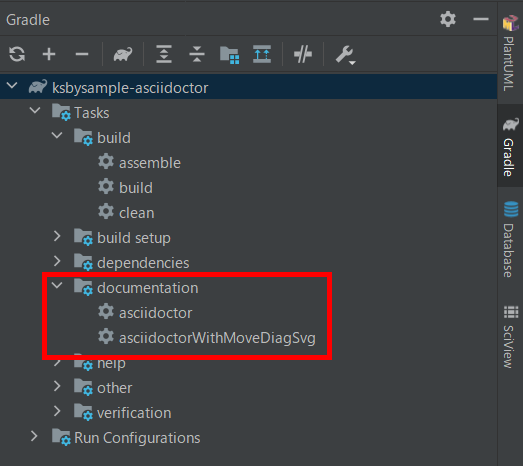
Gradle Tool Window 左上の「Reload All Gradle Projects」ボタンをクリックして更新すると、documentation の下に asciidoctorWithMoveDiagSvg タスクが表示されます。
index.adoc の plantuml の記述を変更する
Kroki を利用する場合、画像ファイル名を指定できないので、src/docs/asciidoc/03_diagram/index.adoc の [plantuml] の記述から画像ファイル名と画像のタイプの指定を削除します。
= AsciiDoc 形式のドキュメントに PlantUML の図を埋め込む
Doc Writer <doc@example.com>
:lang: ja

== シーケンス図

[plantuml]
....
include::example-sequence.puml[]
....

== クラス図

[plantuml]
....
include::example-class.puml[]
....
asciidoctorWithMoveDiagSvg タスクを実行して動作確認する
asciidoctorWithMoveDiagSvg タスクを実行すると Java 11 を使っていることに伴う WARNING メッセージが出力されました。asciidoctor タスクでなくなったので当然ですね。。。

「Run/Debug Configurations」ダイアログを表示した後、asciidoctor タスクの Environment variables に設定していた文字列を asciidoctorWithMoveDiagSvg タスクにも設定します。

再度 asciidoctorWithMoveDiagSvg タスクを実行すると今度は WARNING メッセージが出力されませんでした。

画像ファイルは build/docs/asciidoc/03_diagram の下に移動しており、

build/docs/asciidoc/03_diagram/index.html をブラウザで表示すると PlantUML の図も表示されました。

履歴
2021/01/26
初版発行。
Asciidoctor Diagram を使用して AsciiDoc 形式のドキュメントに PlantUML の図を埋め込む
Translate to English
https://translate.google.com/translate?sl=auto&tl=en&u=https%3A%2F%2Fksby.hatenablog.com%2Fentry%2F2021%2F01%2F24%2F094643
概要
記事一覧はこちらです。
Asciidoctor Diagram を使用することで AsciiDoc 形式のドキュメントに PlantUML の図を埋め込めるようなので試してみます。
参照したサイト・書籍
Asciidoctor Diagram
https://asciidoctor.org/docs/asciidoctor-diagram/asciidoctor / asciidoctor-diagram
https://github.com/asciidoctor/asciidoctor-diagramPlantUML 概要
https://plantuml.com/ja/Graphviz - Graph Visualization Software
https://graphviz.org/
目次
- build.gradle に Asciidoctor Diagram の設定を追加する
- src/docs/asciidoc/03_diagram ディレクトリを作成する
- index.adoc を作成し PlantUML の diagram を記述する
- asdiidoctor タスクを実行して PlantUML の図が表示されることを確認する
- Asciidoctor Diagram の 2.1.0 では Graphviz をインストールしていなくても画像ファイルが生成できるようになった模様
- PlantUML integration Plugin をインストールし、PlantUML のコードを拡張子 .puml の別ファイルに分ける
手順
build.gradle に Asciidoctor Diagram の設定を追加する
Using AsciidoctorJ Diagram を参考に build.gradle を以下のように変更します。
..........

asciidoctorj {
    modules {
        diagram.use()
        diagram.version "2.1.0"
    }
    attributes "source-highlighter" : "rouge"
}
- asciidoctorj block に
modules { ... }を追加します。Asciidoctor Diagram の最新バージョンは https://github.com/asciidoctor/asciidoctor-diagram で確認しました。
src/docs/asciidoc/03_diagram ディレクトリを作成する
src/docs/asciidoc の下に 03_diagram ディレクトリを作成します。
index.adoc を作成し PlantUML の diagram を記述する
src/docs/asciidoc/03_diagram の下に index.adoc を新規作成し、以下の内容を記述します。PlantUML のコードは https://plantuml.com/ja/ に掲載されていたものをコピーしました。
[plantuml, ...]を記述してから....~.....の間に PlantUML のコードを記述します。[plantuml, ...]の2番目のパラメータに生成する画像ファイル名、3番目のパラメータに生成する画像のタイプを記述します。- 各 diagram 毎の生成可能な画像のタイプは Creating a Diagram に記載されています。plantuml は png, svg, txt がサポートされていました。今回は svg を指定します。
= AsciiDoc 形式のドキュメントに PlantUML の図を埋め込む
Doc Writer <doc@example.com>
:lang: ja

== シーケンス図

[plantuml,example-sequence,svg]
....
@startuml
Alice -> Bob: Authentication Request

alt successful case

    Bob -> Alice: Authentication Accepted

else some kind of failure

    Bob -> Alice: Authentication Failure
    group My own label
    Alice -> Log : Log attack start
        loop 1000 times
            Alice -> Bob: DNS Attack
        end
    Alice -> Log : Log attack end
    end

else Another type of failure

   Bob -> Alice: Please repeat

end
@enduml
....

== クラス図

[plantuml,example-class,svg]
....
@startuml

abstract class AbstractList
abstract AbstractCollection
interface List
interface Collection

List <|-- AbstractList
Collection <|-- AbstractCollection

Collection <|- List
AbstractCollection <|- AbstractList
AbstractList <|-- ArrayList

class ArrayList {
  Object[] elementData
  size()
}

enum TimeUnit {
  DAYS
  HOURS
  MINUTES
}

annotation SuppressWarnings

@enduml
....
AsciiDoc Plugin の preview を見ると PlantUML の図が表示されません。エディタ上部に To be able to show diagrams in the preview, download asciidoctorj-diagram or enable Kroki in the settings. というメッセージが表示されていますので Yes, download now! をクリックします。

asciidoctorj-diagram の jar ファイルがダウンロードされて、今度は preview に PlantUML の図が表示されるようになりました。

ただし asciidoctorj-diagram の jar ファイルが 2.1.0 でないようで、クラス図の方は図が表示されませんでした。
asdiidoctor タスクを実行する
asciidoctor タスクを実行すると BUILD SUCCESSFUL が出力されました。

build/docs/asciidoc/03_diagram の下に index.html と画像ファイルが出力されており、

index.html をブラウザで開くと PlantUML の図が表示されました。

Asciidoctor Diagram の 2.1.0 では Graphviz をインストールしていなくても画像ファイルが生成できるようになった模様
build.gradle の diagram.version を 2.0.5 にしてから clean タスク実行 → asciidoctor タスク実行を行うと、
.........

asciidoctorj {
    modules {
        diagram.use()
        diagram.version "2.0.5"
    }
    attributes "source-highlighter" : "rouge"
}
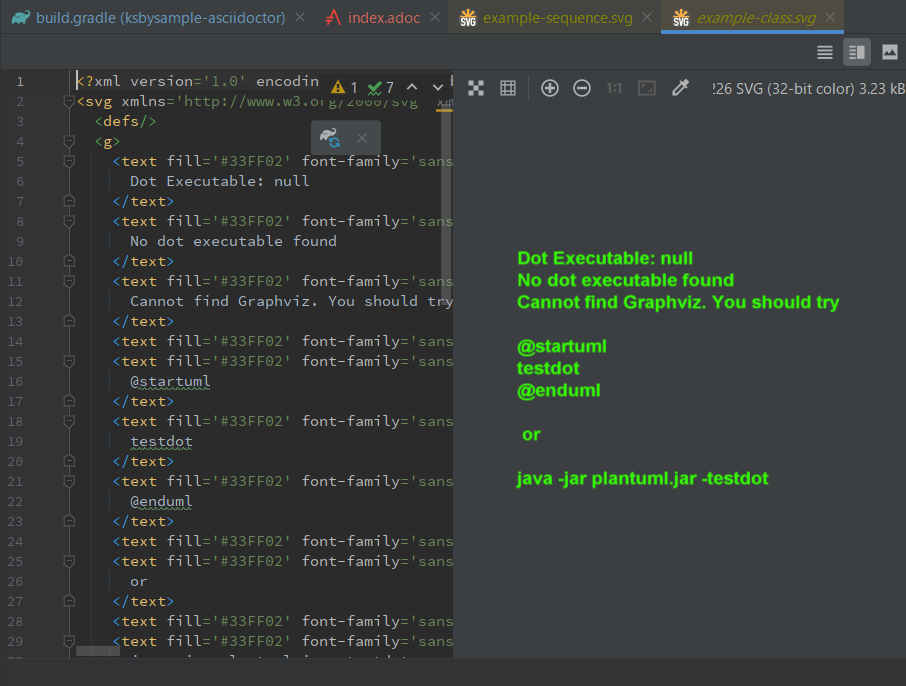
build/docs/asciidoc/03_diagram/example-sequence.svg は図が表示されますが、

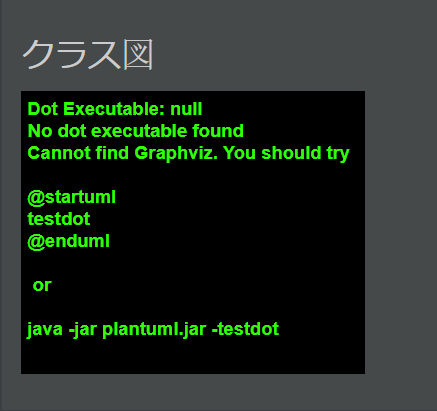
build/docs/asciidoc/03_diagram/example-class.svg は Dot Executable: null No dot executable found Cannot find Graphviz. のメッセージが表示されて図が生成されません。
このメッセージが表示された場合、Graphviz - Graph Visualization Software から Windows のインストーラーをダウンロードしてインストールすれば図が生成されるのですが、diagram.version を 2.1.0 にすると Graphviz がインストールされていなくてもどちらの図も生成されるようになりました。
PlantUML integration Plugin をインストールし、PlantUML のコードを拡張子 .puml の別ファイルに分ける
AsciiDoc Plugin の preview ではクラス図の方が表示されませんでしたが、IntelliJ IDEA には PlantUML integration Plugin があり、PlantUML のコードを拡張子 .puml のファイルに分けると PlantUML integration Plugin の画面に表示させることができます。PlantUML integration Plugin をインストールしてコードを別ファイルに分けてみます。
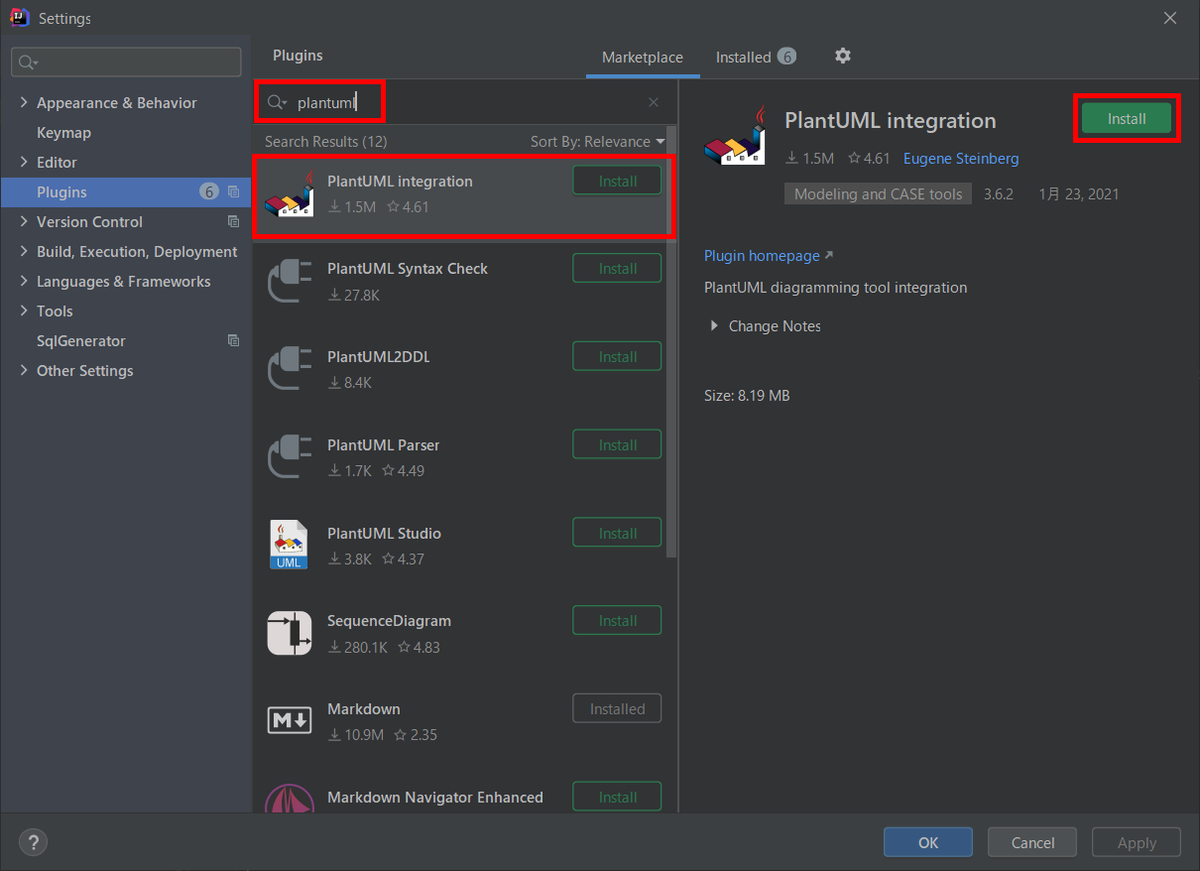
IntelliJ IDEA で「Settings」ダイアログを開き、plantuml で検索して PlantUML integration Plugin をインストールします。
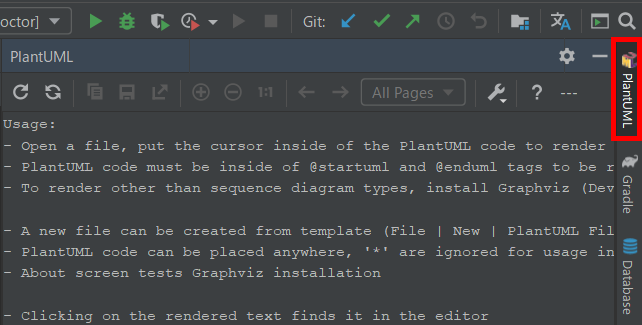
インストールすると IntelliJ IDEA の画面右側に「PlantUML」が表示されます。
src/docs/asciidoc/03_diagram の下に example-sequence.puml を新規作成し、index.adoc の [plantuml,example-sequence,svg] .... ~ .... の中のコードをこのファイルに移動します。生成されたシーケンス図が PlantUML integration Plugin の画面に表示されます。

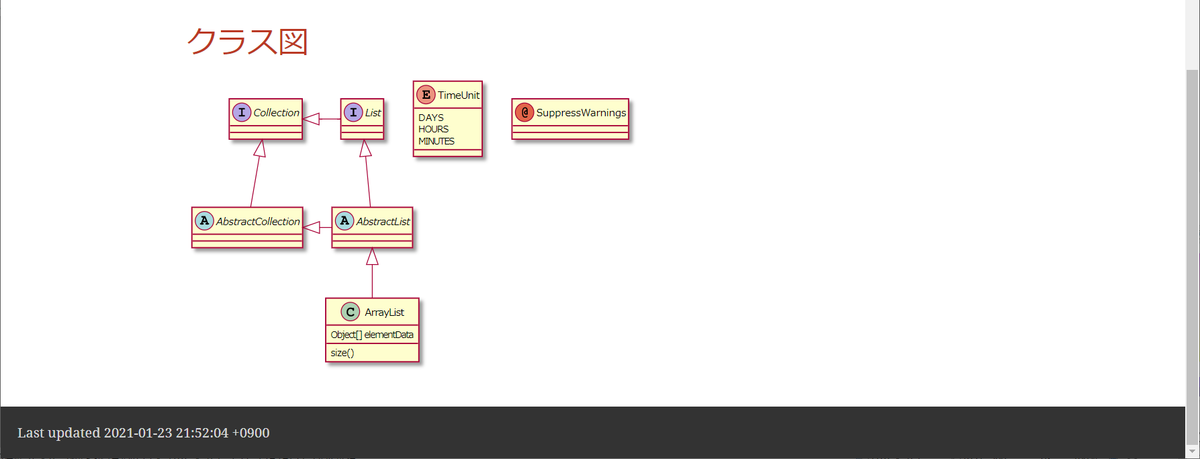
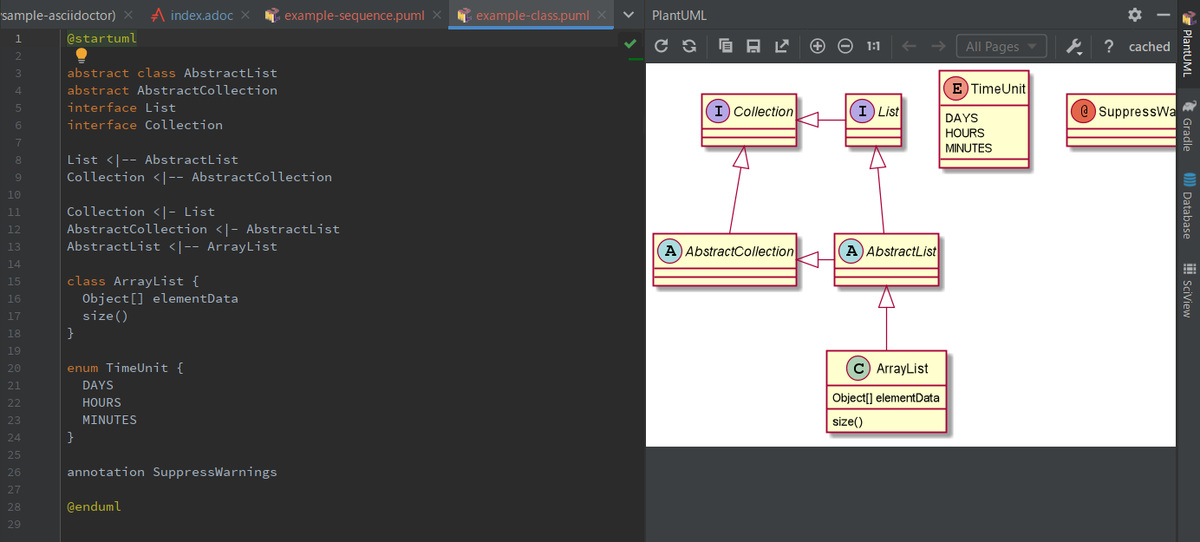
src/docs/asciidoc/03_diagram の下に example-class.puml を新規作成し、index.adoc の [plantuml,example-class,svg] .... ~ .... の中のコードをこのファイルに移動します。生成されたクラス図が PlantUML integration Plugin の画面に表示されます。
index.adoc では example-sequence.puml、example-class.puml を include するよう変更します。
= AsciiDoc 形式のドキュメントに PlantUML の図を埋め込む
Doc Writer <doc@example.com>
:lang: ja

== シーケンス図

[plantuml,example-sequence,svg]
....
include::example-sequence.puml[]
....

== クラス図

[plantuml,example-class,svg]
....
include::example-class.puml[]
....
include directive で別ファイルを取り込んでも AsciiDoc Plugin の preview に PlantUML の図が表示されます。

clean タスク実行 → asciidoctor タスク実行をすると BUILD SUCCESSFUL が表示されて、

build/docs/asciidoc/03_diagram の下にファイル分割前と同じように index.html 等が生成されており(拡張子 .puml のアイコンが PlantUML integration Plugin と同じアイコンになっています)、

index.html をブラウザで開くと PlantUML の図が表示されました。

履歴
2021/01/24
初版発行。