IntelliJ IDEA を 2020.3.2 → 2020.3.3 へ、Git for Windows を 2.30.0.2 → 2.31.0 へバージョンアップ
IntelliJ IDEA を 2020.3.2 → 2020.3.3 へバージョンアップする
IntelliJ IDEA の 2020.3.3 がリリースされているのでバージョンアップします。
- IntelliJ IDEA 2020.3.3 Is Available
https://blog.jetbrains.com/idea/2021/03/intellij-idea-2020-3-3/
※ksbysample-webapp-lending プロジェクトを開いた状態でバージョンアップしています。
IntelliJ IDEA のメインメニューから「Help」-「Check for Updates...」を選択します。
「IntelliJ IDE and Plugin Updates」ダイアログが表示されます。右下に「Update and Restart」ボタンが表示されていますので、「Update and Restart」ボタンをクリックします。

Plugin の update も表示されました。このまま「Update and Restart」ボタンをクリックします。

Patch がダウンロードされて IntelliJ IDEA が再起動します。
IntelliJ IDEA が起動すると画面下部に「Indexing」のメッセージが表示されますので、終了するまで待機します。
IntelliJ IDEA のメインメニューから「Help」-「About」を選択し、2020.3.3 へバージョンアップされていることを確認します。
clean タスク実行 → Rebuild Project 実行 → build タスクを実行して、"BUILD SUCCESSFUL" のメッセージが出力されることを確認します。

Project Tool Window で src/test でコンテキストメニューを表示して「More Run/Debug」-「Run 'All Tests' with Coverage」を選択し、テストが全て成功することを確認します。

Git for Windows を 2.30.0.2 → 2.31.0 へバージョンアップする
Git for Windows の 2.31.0 がリリースされていたのでバージョンアップします。
https://gitforwindows.org/ の「Download」ボタンをクリックして Git-2.31.0-64-bit.exe をダウンロードします。
Git-2.31.0-64-bit.exe を実行します。
「Git 2.31.0 Setup」ダイアログが表示されます。インストーラーの画面を一通り見たいので「Only show new options」のチェックを外してから [Next >] ボタンをクリックします。
「Select Components」画面が表示されます。「Git LFS(Large File Support)」だけチェックした状態で [Next >]ボタンをクリックします。
「Choosing the default editor used by Git」画面が表示されます。「Use Vim (the ubiquitous text editor) as Git's default editor」が選択された状態で [Next >]ボタンをクリックします。
「Adjusting the name of the initial branch in new repositories」画面が表示されます。「Let Git decide」が選択されていることを確認後、[Next >]ボタンをクリックします。
「Adjusting your PATH environment」画面が表示されます。中央の「Git from the command line and also from 3rd-party software」が選択されていることを確認後、[Next >]ボタンをクリックします。
「Choosing HTTPS transport backend」画面が表示されます。「Use the OpenSSL library」が選択されていることを確認後、[Next >]ボタンをクリックします。
「Configuring the line ending conversions」画面が表示されます。一番上の「Checkout Windows-style, commit Unix-style line endings」が選択されていることを確認した後、[Next >]ボタンをクリックします。
「Configuring the terminal emulator to use with Git Bash」画面が表示されます。「Use Windows'default console window」が選択されていることを確認した後、[Next >]ボタンをクリックします。
「Choose the default behavior of
git pull」画面が表示されます。「Default (fast-forward or merge)」が選択されていることを確認した後、[Next >]ボタンをクリックします。「Choose a credential helper」画面が表示されます。「None」が選択されていることを確認した後、[Next >]ボタンをクリックします。
「Configuring extra options」画面が表示されます。「Enable file system caching」だけがチェックされていることを確認した後、[Next >]ボタンをクリックします。
「Configuring experimental options」画面が表示されます。何もチェックせずに [Install]ボタンをクリックします。
インストールが完了すると「Completing the Git Setup Wizard」のメッセージが表示された画面が表示されます。中央の「View Release Notes」のチェックを外した後、[Next >]ボタンをクリックしてインストーラーを終了します。
コマンドプロンプトを起動して
git --versionを実行し、git のバージョンがgit version 2.31.0.windows.1になっていることを確認します。
特に問題はないようですので、2.31.0 で作業を進めたいと思います。
springdoc-openapi メモ書き
概要
記事一覧はこちらです。
springdoc-openapi を試した時のメモ書きです。
参照したサイト・書籍
Documenting Spring Boot Rest API With OpenAPI 3.0
https://tebatso191.medium.com/documenting-spring-boot-rest-api-with-openapi-3-0-a49be5e836adspringdoc-openapi
https://springdoc.org/Springdoc-openapi Demos
https://springdoc.org/#demosspringdoc / springdoc-openapi-demos
https://github.com/springdoc/springdoc-openapi-demosOpenAPI Specification
https://swagger.io/specification/API Documentation & Design Tools for Teams | Swagger
https://swagger.io/springdoc / springdoc-openapi-gradle-plugin
https://github.com/springdoc/springdoc-openapi-gradle-pluginOpenAPI (Swagger) 超入門
https://qiita.com/teinen_qiita/items/e440ca7b1b52ec918f1bSwagger(OAS) 3.0の登場
https://news.mynavi.jp/itsearch/article/devsoft/3854Swagger ではない OpenAPI Specification 3.0 による API サーバー開発
https://www.slideshare.net/techblogyahoo/swagger-openapi-specification-30-api
目次
- WebAPI を提供する Web アプリを作成する
- springdoc-openapi-ui を依存関係に追加し、application.properties に設定を追加する
- @SpringBootApplication 付与クラスに @OpenAPIDefinition アノテーションを付与して API の情報を表示する
- @RestController 付与クラスに @Tag、@Operation、@ApiResponses 等のアノテーションを付与して REST API の情報を表示する
- @RestControllerAdvice 付与クラスの @ExceptionHandler を付与したメソッドが UI に表示されないようにする
- POJO クラスに @Schema アノテーションを付与して UI の Schemas に表示される情報を追加する
- Swagger Petstore のページが表示されないようにする
- /api-docs にアクセスすると JSON の、/api-docs.yaml にアクセスすると YAML の OpenAPI ドキュメントがダウンロードできる
- 最後に
手順
WebAPI を提供する Web アプリを作成する
Web アプリを作成して ksbysample-springdoc-openapi-sample に入れます。
springdoc-openapi-ui を依存関係に追加し、application.properties に設定を追加する
まず build.gradle を変更します。
dependencies {
    ..........

    // dependency-management-plugin によりバージョン番号が自動で設定されないもの、あるいは最新バージョンを指定したいもの
    implementation("org.springdoc:springdoc-openapi-ui:1.5.5")
    testImplementation("net.javacrumbs.json-unit:json-unit-spring:2.25.0")

    ..........
implementation("org.springdoc:springdoc-openapi-ui:1.5.5")を追加します。
src/main/resources/application.properties を以下のように変更します。
server.port=9080

springdoc.api-docs.path=/api-docs
springdoc.swagger-ui.path=/swagger-ui.html
- 以下の2行を追加します。springdoc.swagger-ui.path の方は default 値と同じ設定なので記述しなくてもよいのですが、書いておいた方が URL を思い出しやすいかなと思い明記しています。springdoc.api-docs.path も default の /v3/api-docs のままでよければ書く必要はありません。
springdoc.api-docs.path=/api-docsspringdoc.swagger-ui.path=/swagger-ui.html
server.port=9080を設定しているのは default の 8080 以外の場合の動作を確認するためです(実際には何もすることはありませんでした)。
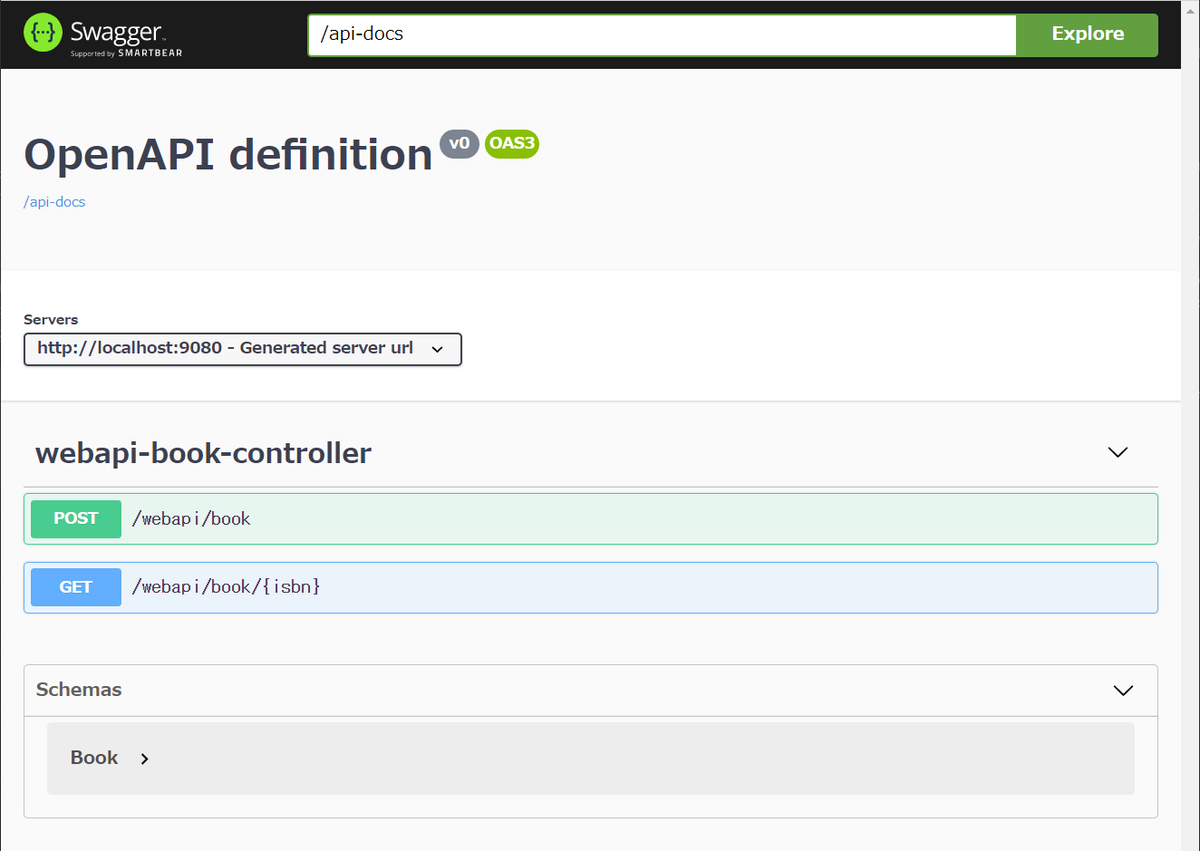
Web アプリを起動して http://localhost:9080/swagger-ui.html にアクセスすると以下の画面が表示されます。タイトルが OpenAPI definition で、バージョンが v0、その下の endpoint や Schemas には何も説明がついていない状態です。
@SpringBootApplication 付与クラスに @OpenAPIDefinition アノテーションを付与して API の情報を表示する
src/main/java/ksbysample/webapp/springdocsample/SpringdocSampleApplication.java に @OpenAPIDefinition アノテーションを付与します。
package ksbysample.webapp.springdocsample;

import io.swagger.v3.oas.annotations.OpenAPIDefinition;
import io.swagger.v3.oas.annotations.info.Info;
import org.springframework.boot.SpringApplication;
import org.springframework.boot.autoconfigure.SpringBootApplication;

@SpringBootApplication
@OpenAPIDefinition(info = @Info(title = "ksbysample-springdoc-openapi-sample",  // (1)
        description = "Spring Boot + springdoc-openapi のサンプルアプリ",  // (2)
        version = "v1"))  // (3)
public class SpringdocSampleApplication {

    ..........
@OpenAPIDefinition アノテーションの各属性の記述は UI の以下の場所に表示されます。

@RestController 付与クラスに @Tag、@Operation、@ApiResponses 等のアノテーションを付与して REST API の情報を表示する
src/main/java/ksbysample/webapp/springdocsample/webapi/book/WebapiBookController.java に @Tag、@Operation、@ApiResponses 等のアノテーションを付与します。
package ksbysample.webapp.springdocsample.webapi.book;

import io.swagger.v3.oas.annotations.Operation;
import io.swagger.v3.oas.annotations.Parameter;
import io.swagger.v3.oas.annotations.media.Content;
import io.swagger.v3.oas.annotations.media.Schema;
import io.swagger.v3.oas.annotations.responses.ApiResponse;
import io.swagger.v3.oas.annotations.responses.ApiResponses;
import io.swagger.v3.oas.annotations.tags.Tag;
import ksbysample.webapp.springdocsample.exception.BookInvalidException;
import ksbysample.webapp.springdocsample.exception.BookNotFoundException;
import lombok.extern.slf4j.Slf4j;
import org.springframework.validation.BindingResult;
import org.springframework.validation.annotation.Validated;
import org.springframework.web.bind.annotation.*;

@Slf4j
@RestController
@RequestMapping("/webapi/book")
@Tag(name = "Book", description = "the Book API")
public class WebapiBookController {

    ..........

    @Operation(summary = "Book データを登録する",
            description = "Book データを受け取ってリストに追加する")
    @ApiResponses(value = {
            @ApiResponse(responseCode = "200", description = "成功"),
            @ApiResponse(responseCode = "405", description = "入力チェックエラー")
    })
    @PostMapping
    public void add(
            @io.swagger.v3.oas.annotations.parameters.RequestBody(description = "Book データ")
            @Validated @RequestBody Book book,
            BindingResult bindingResult) {
        ..........
    }

    @Operation(summary = "Book データを検索する",
            description = "指定された ISBN の Book データを検索する")
    @ApiResponses(value = {
            @ApiResponse(responseCode = "200", description = "成功",
                    content = @Content(mediaType = "application/json", schema = @Schema(implementation = Book.class))),
            @ApiResponse(responseCode = "404", description = "指定された ISBN の Book データが存在しない",
                    content = @Content)
    })
    @GetMapping("/{isbn}")
    public Book findByIsbn(
            @Parameter(required = true, description = "ISBN-13", example = "978-4873119038")
            @PathVariable String isbn) {
        ..........
    }

}
- class に
@Tagアノテーションを付与します。 - add メソッド、findByIsbn メソッドに
@Operation、@ApiResponsesアノテーションを付与します。 - add メソッドの引数 book に
@io.swagger.v3.oas.annotations.parameters.RequestBodyアノテーションを付与します。 - findByIsbn メソッドの引数 isbn に
@Parameterアノテーションを付与します。
API が以下のように表示されます。

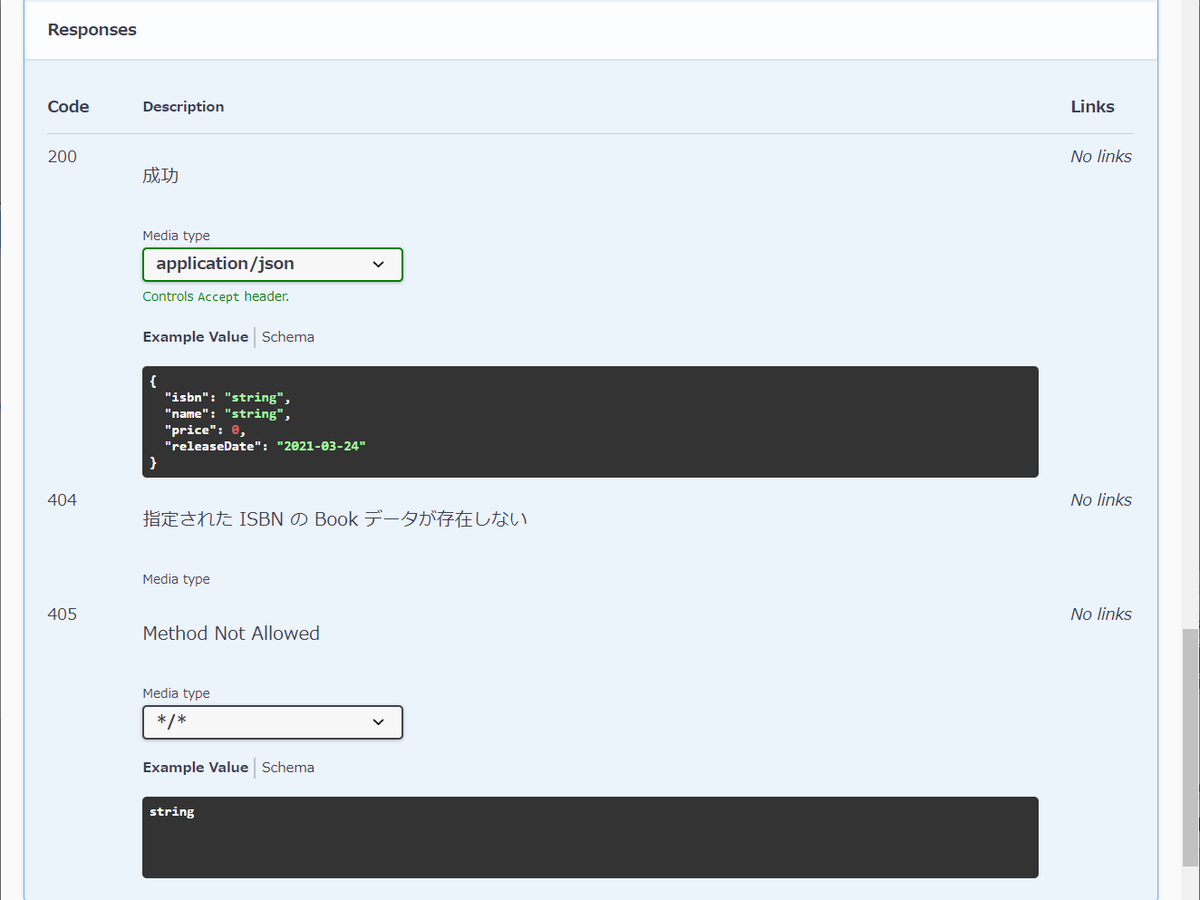
/webapi/book API は以下のように表示されます。Response に @ApiResponses に記述していない 404 が表示されていますが、これは @RestControllerAdvice クラスに定義したものが表示されているからです。この後に表示されないように記述を追加します。


Request body の Book データの Schema タブをクリックすると以下の表示に切り替わります。

/webapi/book/{isbn} API は以下のように表示されます。こちらは不要な 405 が表示されています。

@RestControllerAdvice 付与クラスの @ExceptionHandler を付与したメソッドが UI に表示されないようにする
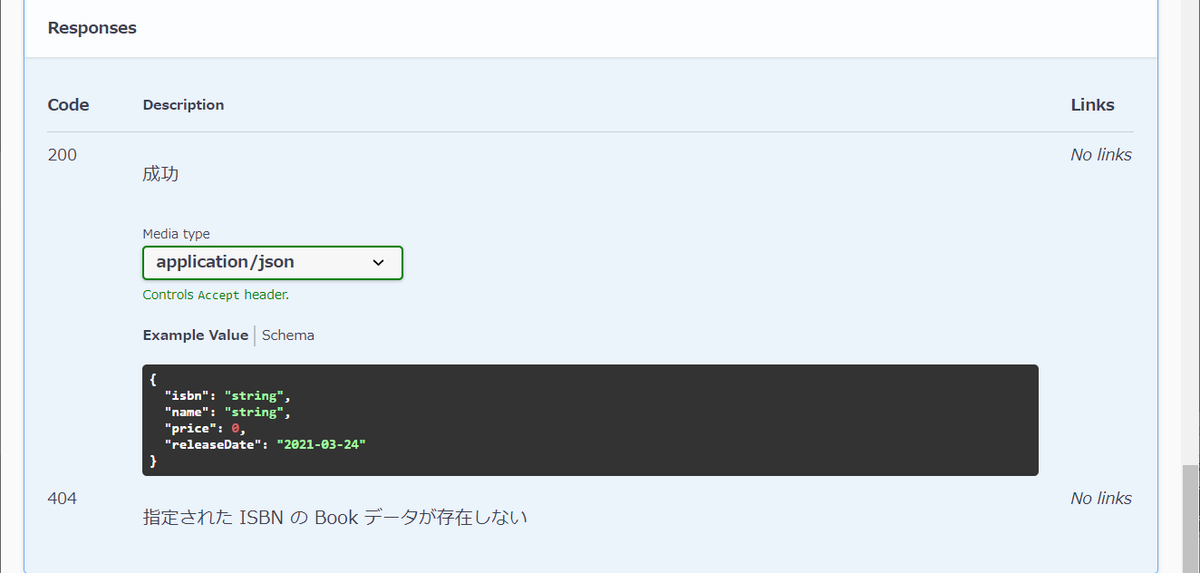
@RestControllerAdvice 付与クラスの @ExceptionHandler を付与したメソッドの情報が各 API の Responses に表示されますが、今回は不要なので class に @Hide アノテーションを付与して表示されないようにします。
package ksbysample.webapp.springdocsample.webapi.book;

import io.swagger.v3.oas.annotations.Hidden;
import ksbysample.webapp.springdocsample.exception.BookInvalidException;
import ksbysample.webapp.springdocsample.exception.BookNotFoundException;
import org.springframework.http.HttpStatus;
import org.springframework.http.ResponseEntity;
import org.springframework.web.bind.annotation.ExceptionHandler;
import org.springframework.web.bind.annotation.ResponseStatus;
import org.springframework.web.bind.annotation.RestControllerAdvice;

/**
 * WebAPI 用 Error Handler クラス
 */
@RestControllerAdvice
@Hidden
public class WebapiBookErrorHandler {

    ..........
各 API の Responses の表示が以下のようになります。

POJO クラスに @Schema アノテーションを付与して UI の Schemas に表示される情報を追加する
src/main/java/ksbysample/webapp/springdocsample/webapi/book/Book.java に @Schema アノテーションを付与します。
package ksbysample.webapp.springdocsample.webapi.book;

import io.swagger.v3.oas.annotations.media.Schema;
import lombok.*;

import javax.validation.constraints.NotBlank;
import javax.validation.constraints.NotNull;
import java.math.BigDecimal;
import java.time.LocalDate;

/**
 * Book データクラス
 */
@Data
@NoArgsConstructor
@AllArgsConstructor
@Builder
@ToString
@Schema(description = "Book データ")
public class Book {

    @NotBlank
    @Schema(type = "string", required = true, description = "ISBN-13", example = "123-1234567890")
    private String isbn;

    @NotBlank
    @Schema(type = "string", required = true, description = "書籍名",
            example = "サンプル本")
    private String name;

    @NotNull
    @Schema(type = "number", required = true, description = "価格", example = "3600")
    private BigDecimal price;

    @Schema(type = "string", format="date", required = true, description = "発売日", example = "2021-03-24")
    private LocalDate releaseDate;

}
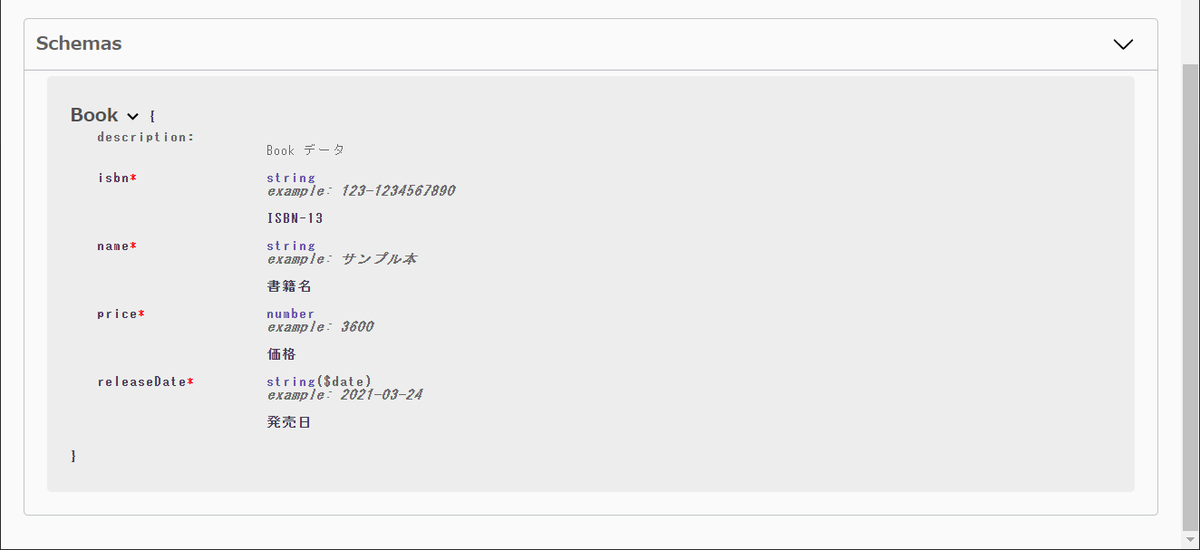
UI の Schemas に以下のように表示されます。
Swagger Petstore のページが表示されないようにする
UI が表示されているブラウザのアドレスバーの URL http://localhost:9080/swagger-ui/index.html?configUrl=/api-docs/swagger-config から ?configUrl=/api-docs/swagger-config を取り除くと Swagger Petstore の情報が表示されます。
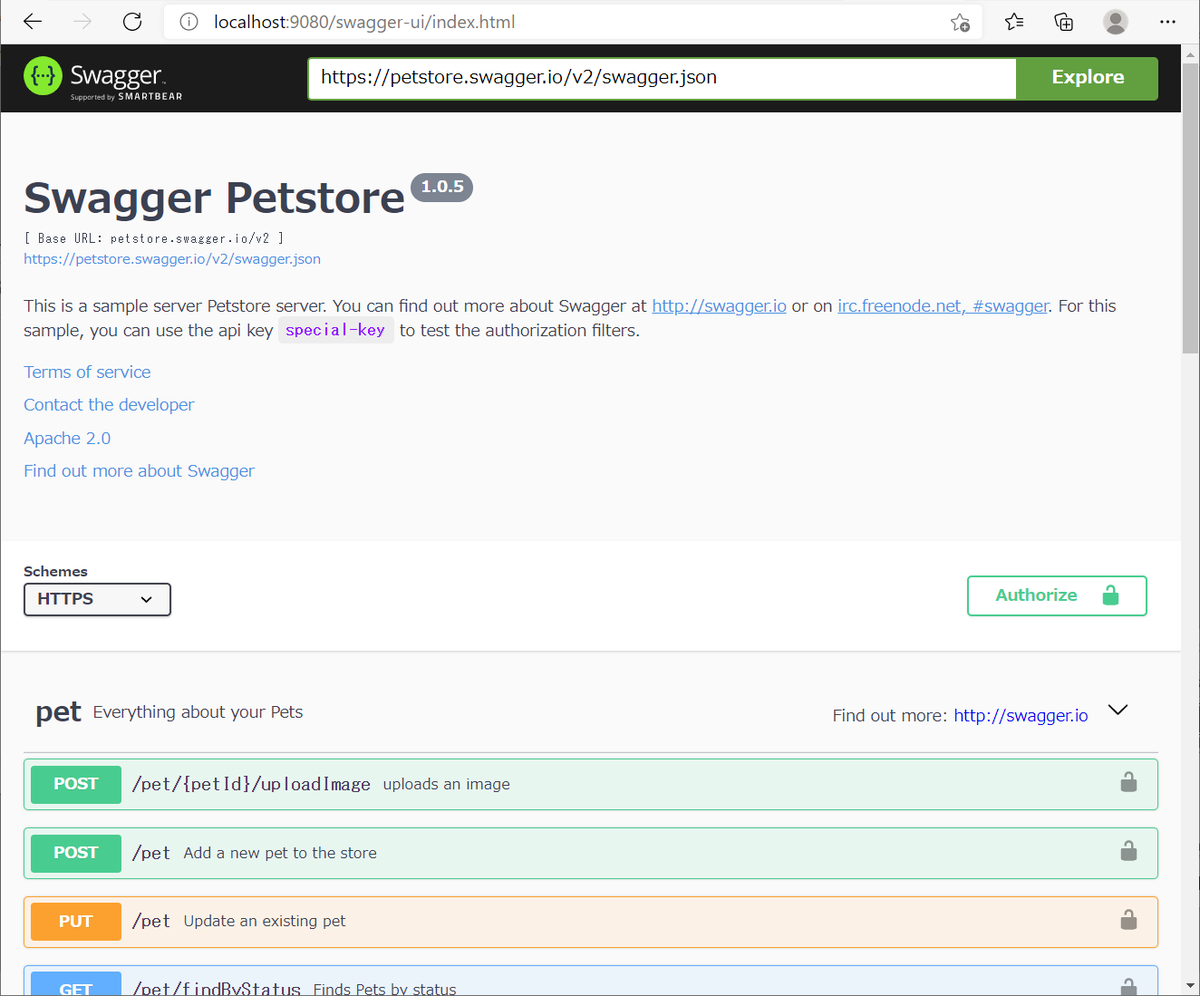
表示させたくない場合、application.properties に springdoc.swagger-ui.disable-swagger-default-url=true を追加します。
server.port=9080

springdoc.api-docs.path=/api-docs
springdoc.swagger-ui.disable-swagger-default-url=true
springdoc.swagger-ui.path=/swagger-ui.html

/api-docs にアクセスすると JSON の、/api-docs.yaml にアクセスすると YAML の OpenAPI ドキュメントがダウンロードできる
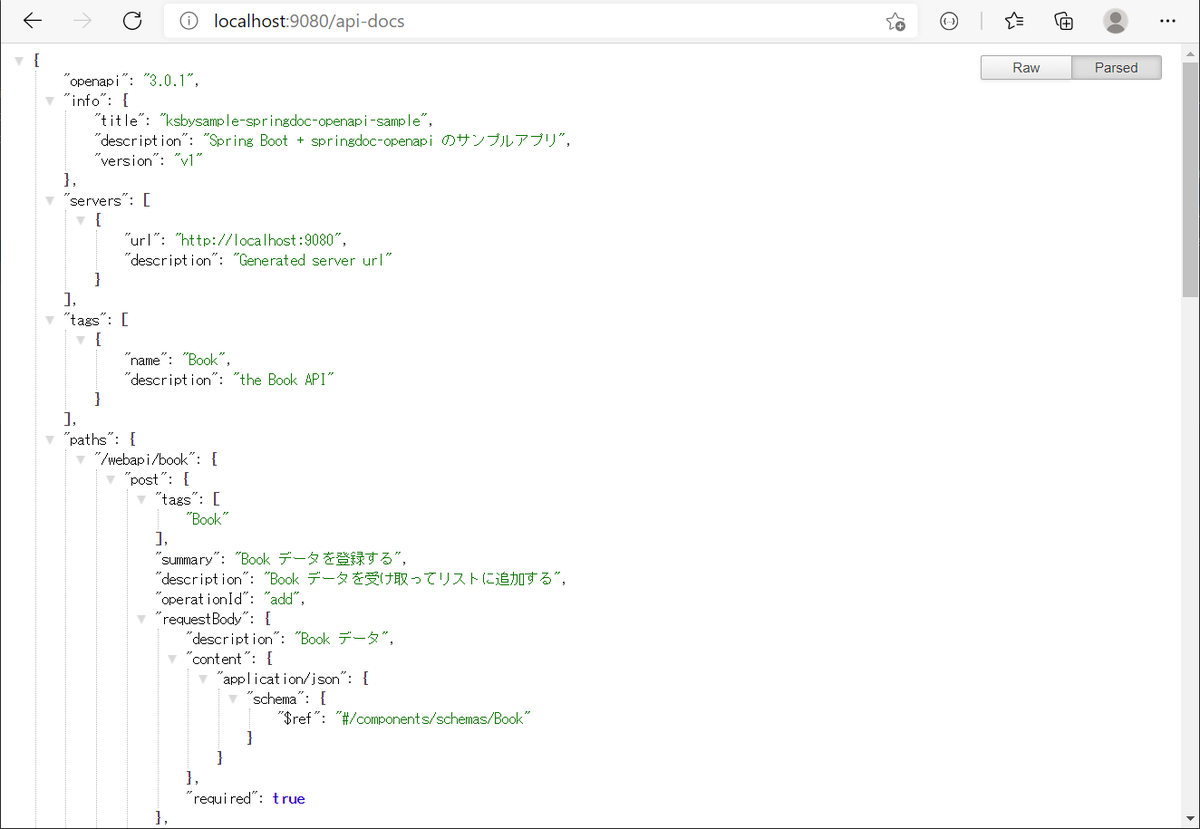
http://localhost:9080/api-docs にアクセスすると JSON の OpenAPI ドキュメントが表示され、
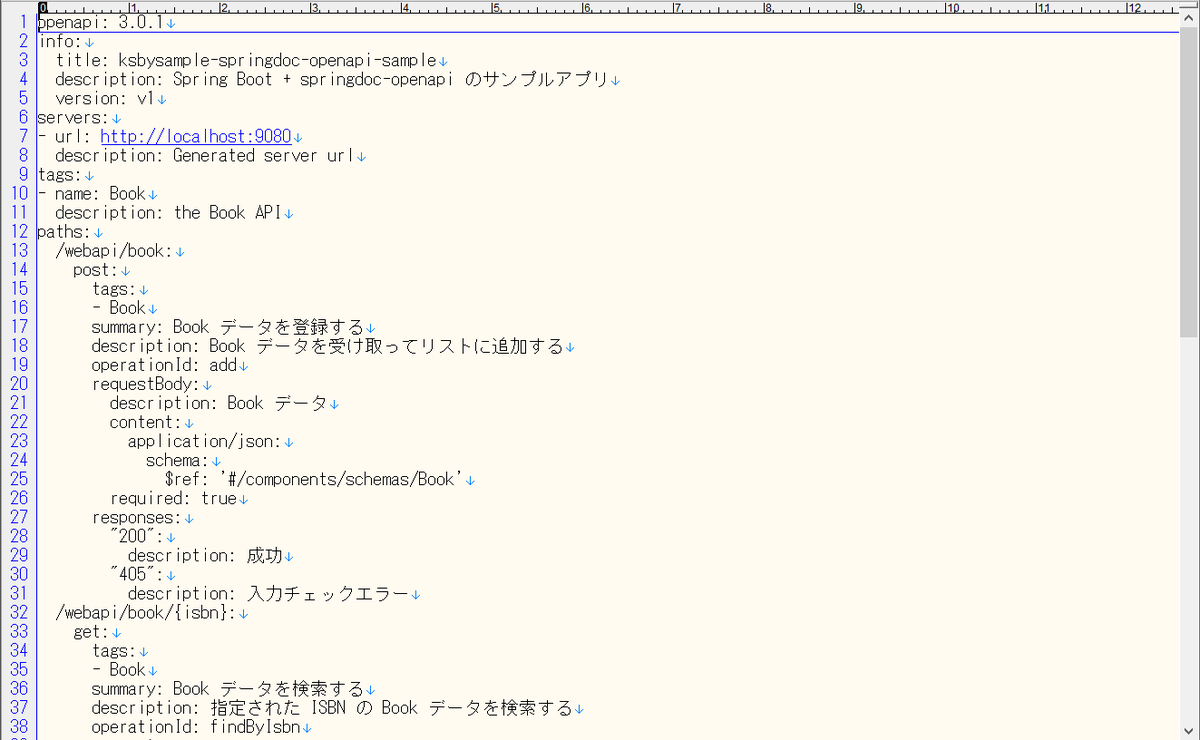
http://localhost:9080/api-docs.yaml にアクセスすると YAML の OpenAPI ドキュメントがダウンロードできます。
最後に
他にも以下のようなことができる(らしい)。テストは試してみましたが、下の2つは記事を見かけただけです。
- UI からテストがやりやすい。
- OpenAPI ドキュメントからソースコードを自動生成できる。
- AWS API Gateway の API 作成でも OpenAPI ドキュメントが使える。Configuring a REST API using OpenAPI。
今回の変更内容はこちらです。
https://github.com/ksby/ksbysample-springdoc-openapi-sample/compare/before...after
履歴
2021/03/25
初版発行。
2021/03/27
* 最後に に今回変更した点が分かるリンクを追加しました。
Spring Boot 2.3.x の Web アプリを 2.4.x へバージョンアップする ( 感想 )
記事一覧はこちらです。
Spring Boot 2.4 Release Notes と What's New in Version 5.3 には結構記述があるのですが、アプリに直接影響が出る変更がなく今回はバージョンアップするだけで終わりました。
Config File Processing (application properties and YAML files) の変更は記事を書く前から聞いていたので身構えていたのですが、ドキュメントを読むと使っていない機能に関する変更だったので影響ありませんでした。調べている時に見つけた関連しそうなリンクをメモっておきます。
- Config file processing in Spring Boot 2.4
https://spring.io/blog/2020/08/14/config-file-processing-in-spring-boot-2-4 - Spring Boot Config Data Migration Guide
https://github.com/spring-projects/spring-boot/wiki/Spring-Boot-Config-Data-Migration-Guide - Configure a Pod to Use a ConfigMap
https://kubernetes.io/docs/tasks/configure-pod-container/configure-pod-configmap/
- Config file processing in Spring Boot 2.4
これまでバージョンアップした時には追加されている Common Application properties(昔からのクセで Google で検索する時は
spring boot appendix aを入力していますね。。。) は Release Notes に記述がなければ特にチェックしていなかったのですが、2.3 から spring.redis.lettuce.cluster.refresh.period が追加されて Lettuce を利用する Redis Cluster 用の RedisConnectionFactory Bean を自分で定義する必要がなくなっていました(設定ファイルだけでよくなった)。今後は org.springframework.boot:spring-boot-autoconfigure の META-INF/spring-configuration-metadata.json をチェックすることにします。概要 で「今回のバージョンアップで Redis 6+lettuce-core 6 の構成になるので、Redis 6 の新機能を試してみます。 」と書いていたのですが、一番興味があった Client-side caching の機能を試そうとしたら lettuce-core の Issue に Investigate for Client-side caching using Redis Cluster and Master/Replica を見つけて Redis Cluster だと使用できないようなので今回は止めておきます。
Spring Boot とは直接関係ありませんが、今回いろいろ調べている時に Groovy の公式ドキュメントのサイトを見つけたのでメモっておきます(事例も豊富で分かりやすい!)。JsonSlurper の存在を初めて知ったり、サイト内のリンクから JsonUnit も初めて知りました。テストは Groovy&Spock で書くことが多いのですが、groovy-sql とか便利なライブラリも多いので個人的にはまだまだテストは Groovy で記述するつもりです。
- Groovy Language Documentation
https://docs.groovy-lang.org/latest/html/documentation/ https://github.com/apache/groovy/tree/master/src/spec/doc
- Groovy Language Documentation
次は、最近の Gradle Multi Project は buildSrc ディレクトリの下に plugin を書いてやる方式に変わっているようなので、それについて調べる予定です。
Spring Boot 2.3.x の Web アプリを 2.4.x へバージョンアップする ( その10 )( Docker で複数の Tomcat を起動して動作確認する )
概要
記事一覧はこちらです。
- 今回の手順で確認できるのは以下の内容です。
- Build OCI images with Cloud Native Buildpacks の機能で作成した Docker image で Web アプリを実行して動作確認します。
参照したサイト・書籍
目次
- clean タスク実行 → Rebuild Project 実行 → build タスクを実行する
- bootBuildImage タスクを実行する
- docker-compose.app.yml を変更する
- Docker で複数の Tomcat を起動して動作確認する
手順
clean タスク実行 → Rebuild Project 実行 → build タスクを実行する
clean タスク実行 → Rebuild Project 実行 → build タスクを実行して BUILD SUCCESSFUL のメッセージが出力されることを確認します。

bootBuildImage タスクを実行する
bootBuildImage タスクを実行して Successfully built image 'docker.io/library/ksbysample-webapp-lending:2.4.3' と BUILD SUCCESSFUL のメッセージが出力されることを確認します。

docker-compose.app.yml を変更する
docker-compose.app.yml を以下のように変更します。
  app:
    image: ksbysample-webapp-lending:2.4.3
    environment:
      - JAVA_TOOL_OPTIONS=-Dspring.profiles.active=product -Dlogging.appender=CONSOLE
      - SPRING_DATASOURCE_HIKARI_JDBC_URL=jdbc:postgresql://postgresql/ksbylending
      - SPRING_MAIL_HOST=mail-server
      - SPRING_RABBITMQ_HOST=haproxy
    deploy:
      mode: replicated
      replicas: 3
    # entrypoint: /bin/bash
    # stdin_open: true
    # tty: true
image: ksbysample-webapp-lending:2.3.7-RELEASE→image: ksbysample-webapp-lending:2.4.3に変更します。
Docker で複数の Tomcat を起動して動作確認する
docker-compose -f docker-compose.mail.yml up -d、docker-compose -f docker-compose.app.yml --compatibility up -d コマンドを実行します。

http://localhost:8080/haproxy?stats にアクセスして全てのインスタンスが緑色になるまで待ちます。

以下の手順で動作確認します ( 画面キャプチャは省略します )。
- ブラウザを起動して http://localhost:8080/ にアクセスしてログイン画面を表示します。tanaka.taro@sample.com / taro でログインします。
- 検索対象図書館登録画面が表示されます。"東京都" で検索した後、一覧表示されている図書館から「国立国会図書館東京本館」を選択します。
- ログアウトします。
- ログイン画面に戻るので suzuki.hanako@test.co.jp / hanako でログインします。
- 貸出希望書籍 CSV ファイルアップロード画面が表示されます。以下の内容が記述された CSV ファイルをアップロードします。
"ISBN","書名"
"978-4-7741-6366-6","GitHub実践入門"
"978-4-7741-5377-3","JUnit実践入門"
"978-4-7973-8014-9","Java最強リファレンス"
"978-4-7973-4778-4","アジャイルソフトウェア開発の奥義"
"978-4-87311-704-1","Javaによる関数型プログラミング" - 「貸出状況を確認しました」のメールが送信されるので、メールに記述されている URL にアクセスします。
- 貸出申請画面が表示されます。3冊程「申請する」を選択して申請します。
- ログアウトします。
- 「貸出申請がありました」のメールが送信されるので、メールに記述されている URL にアクセスします。ログイン画面が表示されるので、tanaka.taro@sample.com / taro でログインします。
- 貸出承認画面が表示されます。「承認」あるいは「却下」を選択して確定させます。
- ログアウトします。
- 「貸出申請が承認・却下されました」のメールが送信されるので、メールに記述されている URL にアクセスします。ログイン画面が表示されるので、suzuki.hanako@test.co.jp / hanako でログインします。
- 貸出申請結果確認画面が表示されるので内容を確認します。
動作確認は特に問題ありませんでした。
docker-compose -f docker-compose.app.yml --compatibility down、docker-compose -f docker-compose.mail.yml down、docker-compose down コマンドを実行してコンテナを停止します。
履歴
2021/03/11
初版発行。
Spring Boot 2.3.x の Web アプリを 2.4.x へバージョンアップする ( その9 )( RedisClusterConfig の RedisConnectionFactory Bean を削除し、application.properties で設定する方法に切り替える )
概要
記事一覧はこちらです。
Spring Boot 2.3.x の Web アプリを 2.4.x へバージョンアップする ( その8 )( Docker コンテナの image をバージョンアップする ) の続きです。
- 今回の手順で確認できるのは以下の内容です。
- これまで Redis に接続するための RedisConnectionFactory Bean は Spring Boot 1.5.x の Web アプリを 2.0.x へバージョンアップする ( その30 )( Redis のクライアントライブラリを Jedis → Lettuce に変更する ) で作成したものを使用していましたが、Redis 6+lettuce-core 6 で Redis 6 の新機能を試そうと思って Spring Boot 2.4.3 の Common Application properties を見ていたところ
spring.redis.~やspring.redis.lettuce.~の property があることに気づきました。自分で RedisConnectionFactory Bean を定義しなくても設定ファイルで定義できそうです。 - RedisConnectionFactory bean を定義している src/main/java/ksbysample/webapp/lending/config/RedisClusterConfig.java を削除して、設定ファイルで定義する方式に切り替えてみます。
- これまで Redis に接続するための RedisConnectionFactory Bean は Spring Boot 1.5.x の Web アプリを 2.0.x へバージョンアップする ( その30 )( Redis のクライアントライブラリを Jedis → Lettuce に変更する ) で作成したものを使用していましたが、Redis 6+lettuce-core 6 で Redis 6 の新機能を試そうと思って Spring Boot 2.4.3 の Common Application properties を見ていたところ
参照したサイト・書籍
Common Application properties
https://docs.spring.io/spring-boot/docs/2.4.3/reference/html/appendix-application-properties.htmlLettuce Reference Guide
https://lettuce.io/core/6.0.2.RELEASE/reference/lettuce-io / lettuce-core - Redis Cluster
https://github.com/lettuce-io/lettuce-core/wiki/Redis-Cluster
目次
- RedisClusterConfig.java を削除し、application.properties に Redis へ接続するための設定を追加する
- 動作確認
- Spring Boot のバージョンアップ時に Common Application properties に追加されたものを確認するには?
手順
RedisClusterConfig.java を削除し、application.properties に Redis へ接続するための設定を追加する
まず src/main/java/ksbysample/webapp/lending/config/RedisClusterConfig.java を削除します。
src/main/resources/application.properties を以下のように変更します。
spring.redis.client-name=ksbysample-webapp-lending
spring.redis.cluster.nodes=${host.ip.address}:6379,${host.ip.address}:6380,${host.ip.address}:6381,${host.ip.address}:6382,${host.ip.address}:6383,${host.ip.address}:6384
spring.redis.lettuce.cluster.refresh.period=5s
spring.redis.timeout=30s
- これまでは
spring.redis.cluster.nodes[0]=${host.ip.address}:6379、spring.redis.cluster.nodes[1]=${host.ip.address}:6380、... のようにspring.redis.cluster.nodesに添え字を付けて設定していましたが、spring.redis.cluster.nodes を見るとカンマ区切りで設定できると書いてあったので、spring.redis.cluster.nodes=${host.ip.address}:6379,${host.ip.address}:6380,...に変更します。 - 以下の設定を追加します。
spring.redis.client-name=ksbysample-webapp-lending- redis-cli で
client listコマンドを実行した時に Web アプリケーションから接続しているセッションの name にここで設定している文字列が表示されます。
- redis-cli で
spring.redis.lettuce.cluster.refresh.period=5s- この設定は実際には 60s 程度にしておいた方がよいでしょう。今は cluster 内で redis サーバを落とした時の切り替えを短時間で行うために 5s と短い時間に設定しています。
spring.redis.timeout=30s- あまり短い時間(例えば 5s)を設定すると Spring Session が Redis からデータを取得しようとして Command time out が発生した時に Tomcat のエラー画面が直接表示されることがあるので、ある程度長い時間を設定する必要があります。

- あまり短い時間(例えば 5s)を設定すると Spring Session が Redis からデータを取得しようとして Command time out が発生した時に Tomcat のエラー画面が直接表示されることがあるので、ある程度長い時間を設定する必要があります。
clean タスク実行 → Rebuild Project 実行 → build タスクを実行して BUILD SUCCESSFUL のメッセージが出力されることを確認します。

動作確認
IntelliJ IDEA から Web アプリを起動してログイン・ログアウトは問題なくできました。ログインしてから Web アプリを再起動した後画面を操作しても強制的にログアウトさせられることもありませんでした。
ログインしている状態で、

redis-cli で cluster nodes コマンドを実行して master になっている redis サーバを確認した後、

6379、6380、6381 を落とします。

その後 40秒程何もしなければ画面を操作してもエラーが出ませんでした。
40秒以下で画面を操作すると、spring.redis.timeout に設定した 30s が経過した後 500 Internal Server Error のエラー画面が表示されました。

Spring Boot のバージョンアップ時に Common Application properties に追加されたものを確認するには?
spring-boot-autoconfigure-x.x.x.jar の META-INF/spring-configuration-metadata.json を見れば一覧が分かります。

今回設定した spring.redis.lettuce.cluster.refresh.period がいつ追加されたのか確認するために 2.4.3、2.3.9、2.2.13 の spring-configuration-metadata.json を取得して比較したところ、2.3 から追加されていました。
履歴
2021/03/10
初版発行。
Spring Boot 2.3.x の Web アプリを 2.4.x へバージョンアップする ( その8 )( Docker コンテナの image をバージョンアップする )
概要
記事一覧はこちらです。
Spring Boot 2.3.x の Web アプリを 2.4.x へバージョンアップする ( その7 )( SpotBugs を 4.1.1 → 4.2.1 へバージョンアップする ) の続きです。
- 今回の手順で確認できるのは以下の内容です。
- Docker コンテナの image をバージョンアップします。
参照したサイト・書籍
目次
- docker-compose.yml を変更する
- docker-compose.app.yml を変更する
- .env を変更する
docker-compose up -dコマンドを実行する- 動作確認
手順
docker-compose.yml を変更する
services:
  prometheus:
    image: prom/prometheus:v2.25.0
    ..........

  grafana:
    image: grafana/grafana:7.4.3
    ..........

  redis_exporter:
    image: oliver006/redis_exporter:v1.17.1-alpine
    ..........

  haproxy:
    image: haproxy:${HAPROXY_VERSION}-alpine
- prometheus で
image: prom/prometheus:v2.23.0→image: prom/prometheus:v2.25.0に変更します。 - grafana で
image: grafana/grafana:7.3.6→image: grafana/grafana:7.4.3に変更します。 - redis_exporter で
image: oliver006/redis_exporter:v1.14.0-alpine→image: oliver006/redis_exporter:v1.17.1-alpineに変更します。 - haproxy で
image: haproxy:2.3.2-alpine→image: haproxy:${HAPROXY_VERSION}-alpineに変更します。
docker-compose.app.yml を変更する
  haproxy-app:
    image: haproxy:${HAPROXY_VERSION}-alpine
    ..........
- haproxy で
image: haproxy:2.3.2-alpine→image: haproxy:${HAPROXY_VERSION}-alpineに変更します。
.env を変更する
HOST_IP_ADDRESS=192.168.3.4
REDIS_VERSION=6.2.1
REDIS_CLUSTER_1_PORT=6379
REDIS_CLUSTER_2_PORT=6380
REDIS_CLUSTER_3_PORT=6381
REDIS_CLUSTER_4_PORT=6382
REDIS_CLUSTER_5_PORT=6383
REDIS_CLUSTER_6_PORT=6384

RABBITMQ_VERSION=3.8.14-management
RABBITMQ_ERLANG_COOKIE=Uzkm93w5e1Lz8AcP
RABBITMQ_DEFAULT_USER=rabbitmq
RABBITMQ_DEFAULT_PASS=12345678
RABBITMQ_DEFAULT_VHOST=/

HAPROXY_VERSION=2.3.6

POSTGRESQL_VERSION=12.6
PGADMIN4_VERSION=5.0

FLYWAY_VERSION=7.5.4
FLYWAY_URL=jdbc:postgresql://postgresql/ksbylending
FLYWAY_USER=ksbylending_user
FLYWAY_PASSWORD=xxxxxxxx

POSTGRES_EXPORTER_USER=postgres_exporter
POSTGRES_EXPORTER_PASSWORD=zzzzzzzz

MAILSERVER_VERSION=release-v7.2.0
REDIS_VERSION=6.0.9→REDIS_VERSION=6.2.1に変更します。RABBITMQ_VERSION=3.8.9-management→RABBITMQ_VERSION=3.8.14-managementに変更します。HAPROXY_VERSION=2.3.6を追加します。POSTGRESQL_VERSION=12.5→POSTGRESQL_VERSION=12.6に変更します。PGADMIN4_VERSION=4.29→PGADMIN4_VERSION=5.0に変更します。FLYWAY_VERSION=7.3.1→FLYWAY_VERSION=7.5.4に変更します。
docker-compose up -d コマンドを実行する
以下のコマンドを実行して docker image を更新・ダウンロードします(画面キャプチャはなし)。
docker-compose build --no-cacheコマンドを実行し、Dockerfile で作成している image を更新します。docker-compose up -dコマンドを実行してコンテナ一式(メールサーバ・rainloop を除く)を起動します。
動作確認
http://localhost:1936/haproxy?stats にアクセスして RabbitMQ が起動することを確認します。

http://localhost:15672/ にアクセスして rabbitmq / 12345678 でログインし、rabbitmq1~3 が正常に動作していることを確認します。

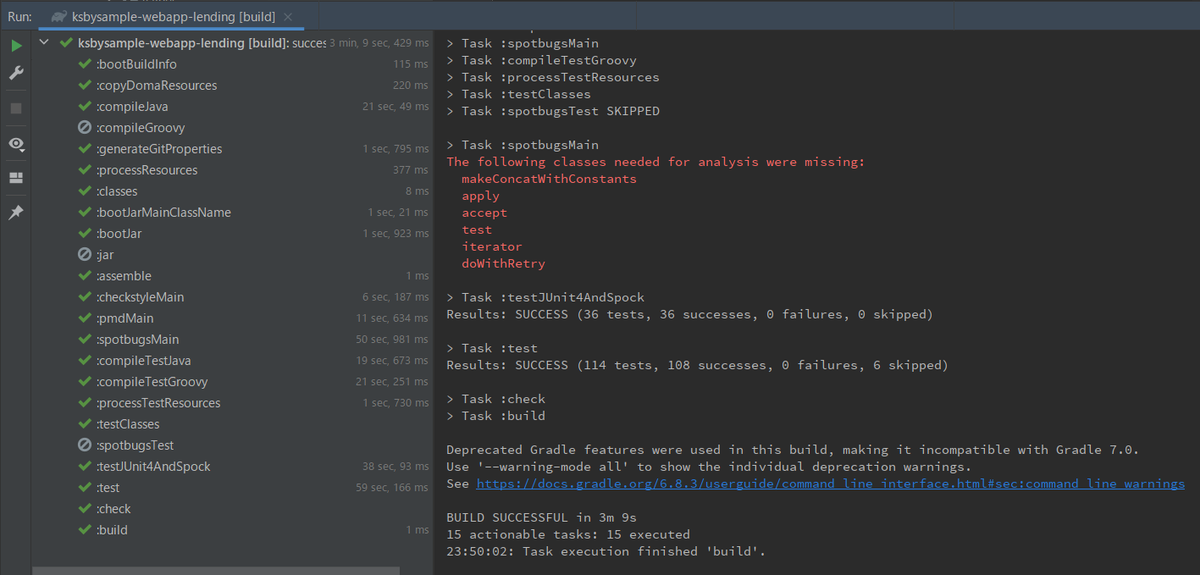
clean タスク実行 → Rebuild Project 実行 → build タスクを実行して BUILD SUCCESSFUL のメッセージが出力されることを確認します。
http://localhost:9090/graph にアクセスして Prometheus の画面が表示されることを確認します。

http://localhost:3000/ にアクセスして admin / admin でログインし、画面が表示されることを確認します。

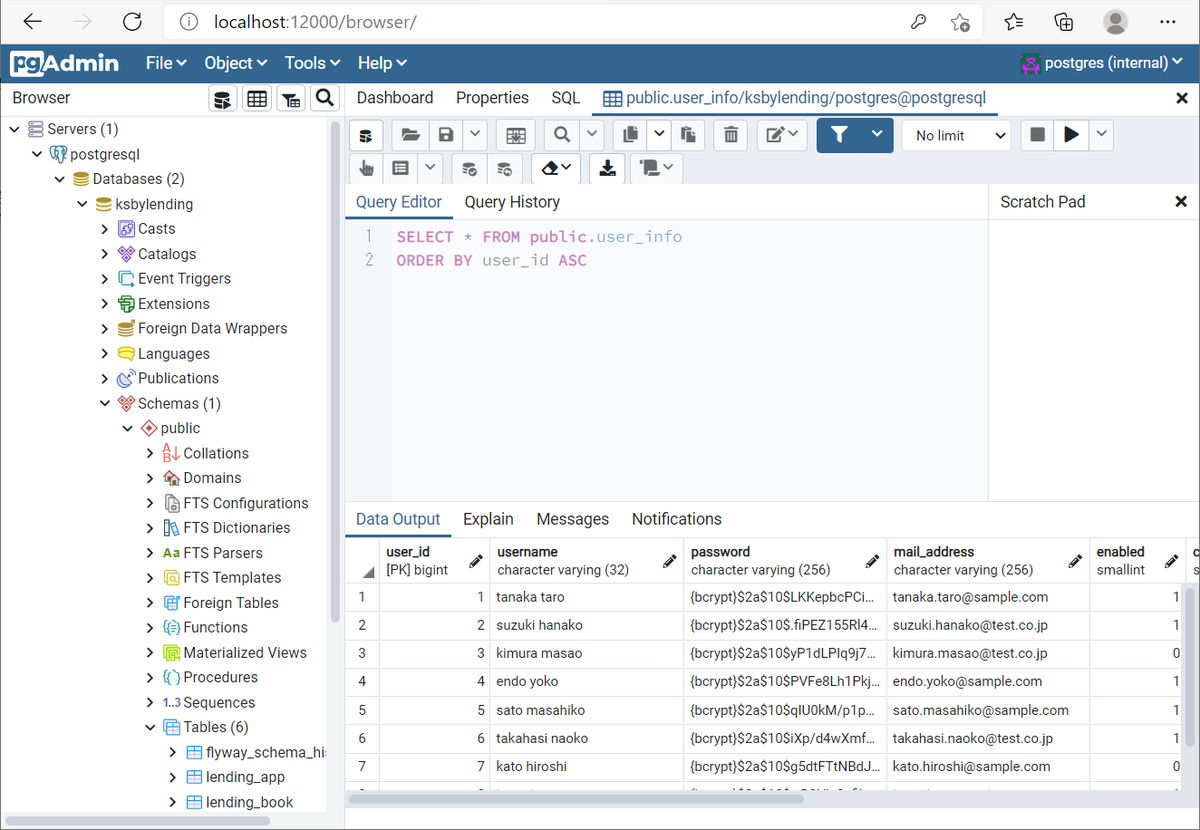
http://localhost:12000/ にアクセスして postgres@example.com / yyyyyyyy でログインし、画面が表示されることを確認します。
IntelliJ IDEA の Service から redis-cluster-6379 コンテナに Create Terminal で接続して、redis-cli → cluster nodes コマンドを実行してクラスタ構成になっていることを確認します。

特に問題はなさそうです。前回と違って今回は楽でした。。。
履歴
2021/03/06
初版発行。
Spring Boot 2.3.x の Web アプリを 2.4.x へバージョンアップする ( その7 )( SpotBugs を 4.1.1 → 4.2.1 へバージョンアップする )
概要
記事一覧はこちらです。
Spring Boot 2.3.x の Web アプリを 2.4.x へバージョンアップする ( その6 )( Error Prone を 2.4.0 → 2.5.1 へバージョンアップする ) の続きです。
- 今回の手順で確認できるのは以下の内容です。
- SpotBugs を 4.1.1 → 4.2.1 へバージョンアップします。
- SpotBugs 4.2.1 に対応する spotbugs-gradle-plugin のバージョンは 4.6.1 なので、このバージョンにします。対応バージョンは SpotBugs version mapping に記載されています。
- これまで build.gradle 内に SpotBugs のバージョン番号を直接記述していましたが、Refer the version in the build script に
${spotbugs.toolVersion.get()}で取れるとの記述がありましたので、今回からこの方法に切り替えます。
参照したサイト・書籍
SpotBugs
https://spotbugs.github.io/spotbugs / spotbugs
https://github.com/spotbugs/spotbugsspotbugs / spotbugs-gradle-plugin
https://github.com/spotbugs/spotbugs-gradle-pluginThe following classes needed for analysis were missing for method names
https://github.com/find-sec-bugs/find-sec-bugs/issues/440ati90ati / bugreport-spotbugs-gradle-plugin-logging
https://github.com/ati90ati/bugreport-spotbugs-gradle-plugin-logging
目次
手順
build.gradle を変更する
plugins {
    id "java"
    id "eclipse"
    id "idea"
    id "org.springframework.boot" version "2.4.3"
    id "io.spring.dependency-management" version "1.0.11.RELEASE"
    id "groovy"
    id "checkstyle"
    id "com.github.spotbugs" version "4.6.1"
    id "pmd"
    id "net.ltgt.errorprone" version "1.3.0"
    id "com.gorylenko.gradle-git-properties" version "2.2.4"
    id "org.seasar.doma.codegen" version "1.2.1"
}

..........

spotbugs {
    toolVersion = "${spotbugs.toolVersion.get()}"
    ignoreFailures = true
    spotbugsTest.enabled = false
}
spotbugsMain {
    reports {
        html {
            enabled = true
            stylesheet = "color.xsl"
        }
    }
}

..........

dependencies {
    def jdbcDriver = "org.postgresql:postgresql:42.2.19"
    def spockVersion = "1.3-groovy-2.5"
    def domaVersion = "2.45.0"
    def lombokVersion = "1.18.18"
    def errorproneVersion = "2.5.1"
    def powermockVersion = "2.0.9"

    ..........

    // for SpotBugs
    spotbugs(configurations.spotbugsPlugins.dependencies)
    annotationProcessor("com.github.spotbugs:spotbugs-annotations:${spotbugs.toolVersion.get()}")
    spotbugsPlugins("com.h3xstream.findsecbugs:findsecbugs-plugin:1.11.0")
}
- plugins block の以下の点を変更します。
id "com.github.spotbugs" version "4.5.0"→id "com.github.spotbugs" version "4.6.1"
- spotbugs block の以下の点を変更します。
toolVersion = "4.1.1"→toolVersion = "${spotbugs.toolVersion.get()}"
- dependencies block の以下の点を変更します。
def spotbugsVersion = "4.1.1"を削除します。spotbugs("com.github.spotbugs:spotbugs:${spotbugsVersion}")→spotbugs(configurations.spotbugsPlugins.dependencies)compileOnly("com.github.spotbugs:spotbugs-annotations:${spotbugsVersion}")→annotationProcessor("com.github.spotbugs:spotbugs-annotations:${spotbugs.toolVersion.get()}")spotbugsPlugins("com.h3xstream.findsecbugs:findsecbugs-plugin:1.10.1")→spotbugsPlugins("com.h3xstream.findsecbugs:findsecbugs-plugin:1.11.0")
Gradle Tool Window の左上にある「Refresh all Gradle projects」ボタンをクリックして更新した後、clean タスク実行 → Rebuild Project 実行 → build タスクを実行すると BUILD SUCCESSFUL のメッセージが出力されました。

履歴
2021/03/04
初版発行。