Spring Boot + Spring Integration でいろいろ試してみる ( その24 )( MessageSource からの Message 送信有無を制御する )
概要
記事一覧はこちらです。
org.springframework.integration.core.MessageSource からデータ取得して処理する処理を任意に stop したり start したりする方法を調べました。そのメモ書きです。
参照したサイト・書籍
- Is there a way to start the file:inbound-channel-adapter through code?
https://stackoverflow.com/questions/26708039/is-there-a-way-to-start-the-fileinbound-channel-adapter-through-code
目次
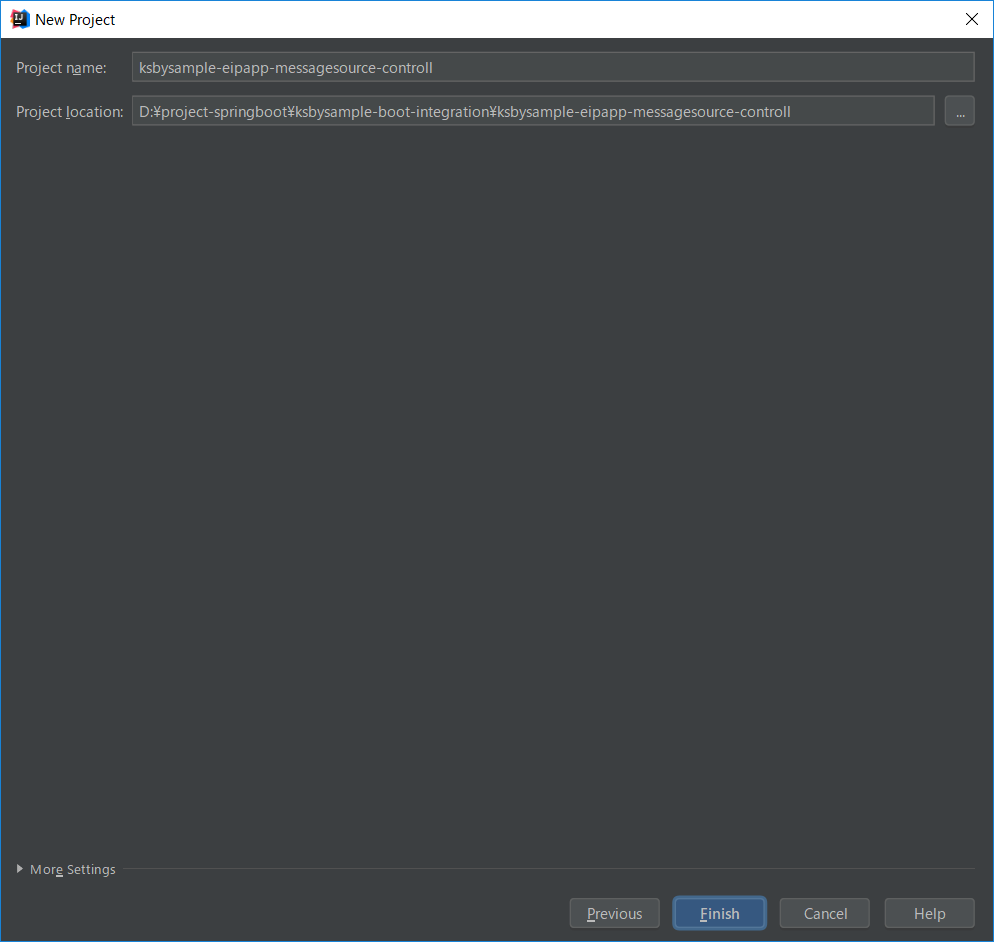
- ksbysample-eipapp-messagesource-controll プロジェクトを作成する
- まずは 1秒毎に hello を出力する処理を書いてみる
- MessageSource から null を返せば何も処理されないのか?
- MessageSource から Message を返すか否かを 5秒毎に切り替えてみる
- poller を stop、start して制御してみる
手順
ksbysample-eipapp-messagesource-controll プロジェクトを作成する
今回は Spring Initializr で作成します。


生成された build.gradle は以下のものですが、
buildscript {
    ext {
        springBootVersion = '2.0.4.RELEASE'
    }
    repositories {
        mavenCentral()
    }
    dependencies {
        classpath("org.springframework.boot:spring-boot-gradle-plugin:${springBootVersion}")
    }
}

apply plugin: 'java'
apply plugin: 'eclipse'
apply plugin: 'org.springframework.boot'
apply plugin: 'io.spring.dependency-management'

group = 'ksbysample'
version = '0.0.1-SNAPSHOT'
sourceCompatibility = 1.8

repositories {
    mavenCentral()
}


dependencies {
    compile('org.springframework.boot:spring-boot-starter-integration')
    testCompile('org.springframework.boot:spring-boot-starter-test')
}
lombok の @Slf4j を使いたいので dependencies block を以下のように変更します。Spring Initializr で生成された Gradle プロジェクトの Gradle は 4.8.1 だったので、記述も少し変更しました。
dependencies {
    def lombokVersion = "1.18.2"

    implementation('org.springframework.boot:spring-boot-starter-integration')
    testImplementation('org.springframework.boot:spring-boot-starter-test')

    // for lombok
    annotationProcessor("org.projectlombok:lombok:${lombokVersion}")
    compileOnly("org.projectlombok:lombok:${lombokVersion}")
}
build.gradle を変更後、Gradle Tool Window の左上にある「Refresh all Gradle projects」ボタンをクリックして更新します。
@SpringBootApplication が付与されているクラス名が長かったので、短く Application クラスに変更します。
まずは 1秒毎に hello を出力する処理を書いてみる
以下の仕様で実装します。
- MessageSource は "hello" の文字列が payload にセットされたメッセージを返す。
- IntegrationFlow を返す Bean の処理は、1秒毎に MessageSource からメッセージを取得してログに出力する。
src/main/java/ksbysample/eipapp/mscontroll の下に FlowConfig.java を新規作成し、以下の内容を記述します。
package ksbysample.eipapp.mscontroll;

import lombok.extern.slf4j.Slf4j;
import org.springframework.context.annotation.Bean;
import org.springframework.context.annotation.Configuration;
import org.springframework.integration.core.MessageSource;
import org.springframework.integration.dsl.IntegrationFlow;
import org.springframework.integration.dsl.IntegrationFlows;
import org.springframework.integration.dsl.Pollers;
import org.springframework.integration.support.MessageBuilder;

@Slf4j
@Configuration
public class FlowConfig {

    @Bean
    public MessageSource<String> helloMessageSource() {
        return () -> MessageBuilder.withPayload("hello").build();
    }

    @Bean
    public IntegrationFlow helloFlow() {
        return IntegrationFlows.from(helloMessageSource()
                , e -> e.poller(Pollers.fixedDelay(1000)))
                .handle((p, h) -> {
                    log.info("★★★ " + p);
                    return null;
                })
                .get();
    }

}
実行すると以下のようにログが出力されます。

MessageSource から null を返せば何も処理されないのか?
MessageSource から Message を返さずに null を返すと処理は何も起きない気がするので、試してみます。helloMessageSource メソッドを以下のように変更します。
    @Bean
    public MessageSource<String> helloMessageSource() {
//        return () -> MessageBuilder.withPayload("hello").build();
        return () -> null;
    }
実行してみると Started Application in 1.981 seconds が出力された後は何も出力されませんでした。

MessageSource から Message を返すか否かを 5秒毎に切り替えてみる
以下の仕様で実装し直してみます。
- MessageSource は boolean 型のフィールド変数を見て Message を返すか否かを切り替えられるようにする。
- フィールド変数の値は @Scheduled アノテーションを付与したメソッドで 5秒毎に変更する。
まずは @Scheduled アノテーションが使用できるよう src/main/java/ksbysample/eipapp/mscontroll/Application.java を以下のように変更します。
package ksbysample.eipapp.mscontroll;

import org.springframework.boot.SpringApplication;
import org.springframework.boot.autoconfigure.SpringBootApplication;
import org.springframework.scheduling.annotation.EnableScheduling;

@SpringBootApplication
@EnableScheduling
public class Application {

    public static void main(String[] args) {
        SpringApplication.run(Application.class, args);
    }

}
@EnableSchedulingを追加します。
src/main/java/ksbysample/eipapp/mscontroll/FlowConfig.java を以下のように変更します。
package ksbysample.eipapp.mscontroll;

import lombok.extern.slf4j.Slf4j;
import org.springframework.context.annotation.Bean;
import org.springframework.context.annotation.Configuration;
import org.springframework.integration.core.MessageSource;
import org.springframework.integration.dsl.IntegrationFlow;
import org.springframework.integration.dsl.IntegrationFlows;
import org.springframework.integration.dsl.Pollers;
import org.springframework.integration.support.MessageBuilder;
import org.springframework.scheduling.annotation.Scheduled;

@Slf4j
@Configuration
public class FlowConfig {

    private boolean messageSourceControlFlg = true;

    @Bean
    public MessageSource<String> helloMessageSource() {
        return () -> messageSourceControlFlg ? MessageBuilder.withPayload("hello").build() : null;
    }

    @Bean
    public IntegrationFlow helloFlow() {
        return IntegrationFlows.from(helloMessageSource()
                , e -> e.poller(Pollers.fixedDelay(1000)))
                .handle((p, h) -> {
                    log.info("★★★ " + p);
                    return null;
                })
                .get();
    }

    @Scheduled(initialDelay = 5000, fixedDelay = 5000)
    public void messageSourceControlFlgChanger() {
        messageSourceControlFlg = !messageSourceControlFlg;
        log.warn(String.valueOf(messageSourceControlFlg));
    }

}
private boolean messageSourceControlFlg = true;を追加します。- helloMessageSource Bean の処理を
return () -> MessageBuilder.withPayload("hello").build();→return () -> messageSourceControlFlg ? MessageBuilder.withPayload("hello").build() : null;に変更します。 - messageSourceControlFlgChanger メソッドを追加します。@Scheduled アノテーションを付与して 5秒毎に実行されるようにします。
実行すると 5秒間 hello のログが出力されて、true → false に変わると5秒間何も起きず、false → true に変わると再び hello が出力されるようになりました。やりたかったことは実現できました。

poller を stop、start して制御してみる
MessageSource ではなく、poller の方の処理を stop, start する方法もあります。
Control Bus で制御する
Spring Integration には Control Bus という Component の動作を制御するための機能が用意されており、これを利用することで poller の動作を制御できます。
src/main/java/ksbysample/eipapp/mscontroll/FlowConfig.java を以下のように変更します。
package ksbysample.eipapp.mscontroll;

import lombok.extern.slf4j.Slf4j;
import org.springframework.context.annotation.Bean;
import org.springframework.context.annotation.Configuration;
import org.springframework.integration.core.MessageSource;
import org.springframework.integration.dsl.IntegrationFlow;
import org.springframework.integration.dsl.IntegrationFlowDefinition;
import org.springframework.integration.dsl.IntegrationFlows;
import org.springframework.integration.dsl.Pollers;
import org.springframework.integration.support.MessageBuilder;
import org.springframework.messaging.Message;
import org.springframework.scheduling.annotation.Scheduled;

@Slf4j
@Configuration
public class FlowConfig {

    private boolean messageSourceControlFlg = false;

    @Bean
    public MessageSource<String> helloMessageSource() {
        return () -> MessageBuilder.withPayload("hello").build();
    }

    @Bean
    public IntegrationFlow helloFlow() {
        return IntegrationFlows.from(helloMessageSource()
                // poller に .id("xxx") を付与すると、Control Bus に "@xxx.stop()", "@xxx.start()" の SpEL のメッセージ
                // を送信することで poller の処理を停止・開始することができるようになる
                , e -> e.poller(Pollers.fixedDelay(1000))
                        .autoStartup(messageSourceControlFlg)
                        .id("helloPollingAdapter"))
                .handle((p, h) -> {
                    log.info("★★★ " + p);
                    return null;
                })
                .get();
    }

    @Bean
    public IntegrationFlow controlBus() {
        return IntegrationFlowDefinition::controlBus;
    }

    @Scheduled(initialDelay = 5000, fixedDelay = 5000)
    public void messageSourceControlFlgChanger() {
        messageSourceControlFlg = !messageSourceControlFlg;
        String payload = messageSourceControlFlg ? "@helloPollingAdapter.start()" : "@helloPollingAdapter.stop()";
        Message operation = MessageBuilder.withPayload(payload).build();
        controlBus().getInputChannel().send(operation);
        log.warn(payload);
    }

}
- messageSourceControlFlg の初期値を true → false に変更します。
- helloMessageSource メソッド内の処理を
return () -> messageSourceControlFlg ? MessageBuilder.withPayload("hello").build() : null;→return () -> MessageBuilder.withPayload("hello").build();に変更します。 - helloFlow メソッド内の処理で、
e -> e.poller(...)の後に.autoStartup(messageSourceControlFlg).id("helloPollingAdapter")を追加します。 - controlBus Bean を追加します。
- messageSourceControlFlgChanger メソッド内の処理を Control Bus にメッセージを送信して停止・再開する処理に変更します。
実際に動作させてみると、アプリが起動して 5秒経過した後に started helloPollingAdapter のログが出力されて hello の文字が出力されはじめ、5秒後に stopped helloPollingAdapter のログが出て hello の文字が出なくなります。

org.springframework.integration.endpoint.AbstractEndpoint#stop, start で制御する
実は e -> e.poller(...) の後に追加した .id("helloPollingAdapter") の名前で Bean が生成されているので、その Bean を取得して AbstractEndpoint#stop, AbstractEndpoint#start メソッドを呼び出すことで制御することもできます。
src/main/java/ksbysample/eipapp/mscontroll/FlowConfig.java を以下のように変更します。
package ksbysample.eipapp.mscontroll;

import lombok.extern.slf4j.Slf4j;
import org.springframework.context.ApplicationContext;
import org.springframework.context.annotation.Bean;
import org.springframework.context.annotation.Configuration;
import org.springframework.integration.core.MessageSource;
import org.springframework.integration.dsl.IntegrationFlow;
import org.springframework.integration.dsl.IntegrationFlows;
import org.springframework.integration.dsl.Pollers;
import org.springframework.integration.endpoint.SourcePollingChannelAdapter;
import org.springframework.integration.support.MessageBuilder;
import org.springframework.scheduling.annotation.Scheduled;

@Slf4j
@Configuration
public class FlowConfig {

    private final ApplicationContext context;

    public FlowConfig(ApplicationContext context) {
        this.context = context;
    }

    @Bean
    public MessageSource<String> helloMessageSource() {
        return () -> MessageBuilder.withPayload("hello").build();
    }

    @Bean
    public IntegrationFlow helloFlow() {
        return IntegrationFlows.from(helloMessageSource()
                , e -> e.poller(Pollers.fixedDelay(1000))
                        .autoStartup(false)
                        .id("helloPollingAdapter"))
                .handle((p, h) -> {
                    log.info("★★★ " + p);
                    return null;
                })
                .get();
    }

    @Scheduled(initialDelay = 5000, fixedDelay = 5000)
    public void messageSourceControlFlgChanger() {
        SourcePollingChannelAdapter adapter
                = (SourcePollingChannelAdapter) context.getBean("helloPollingAdapter");
        if (adapter.isRunning()) {
            adapter.stop();
        } else {
            adapter.start();
        }
    }

}
private boolean messageSourceControlFlg = false;を削除します。private final ApplicationContext context;を追加し、コンストランクタで DI するようにします。- helloFlow メソッド内の処理で、
.autoStartup(messageSourceControlFlg)→.autoStartup(false)に変更します。 - controlBus Bean を削除します。
- messageSourceControlFlgChanger メソッド内の処理を helloPollingAdapter Bean を取得して AbstractEndpoint#stop, AbstractEndpoint#start メソッドを呼び出して停止・再開する処理に変更します。
実行すると Control Bus の時と同じ動作になります。

履歴
2018/08/21
初版発行。
2018/08/22
* poller を stop、start して制御してみる を追加した。