Spring Boot 1.5.x の Web アプリを 2.0.x へバージョンアップする ( その14 )( Docker で Prometheus+Grafana の環境を構築して Spring Actuator で収集したメトリックスを表示する )
概要
記事一覧はこちらです。
Spring Boot 1.5.x の Web アプリを 2.0.x へバージョンアップする ( その13 )( Remember Me 認証が使えなくなっていたので調査・修正する ) の続きです。
- 今回の手順で確認できるのは以下の内容です。
- Docker で Prometheus+Grafana の環境を構築して Spring Actuator で収集したメトリックスを表示させてみます。
参照したサイト・書籍
Prometheus
https://prometheus.io/prometheus/prometheus
https://github.com/prometheus/prometheusprom/prometheus
https://hub.docker.com/r/prom/prometheus/Spring Boot Actuator metrics monitoring with Prometheus and Grafana
https://www.callicoder.com/spring-boot-actuator-metrics-monitoring-dashboard-prometheus-grafana/prometheus/config/testdata/conf.good.yml
https://github.com/prometheus/prometheus/blob/master/config/testdata/conf.good.ymlGrafana
https://grafana.com/grafana/grafana(GitHub)
https://github.com/grafana/grafanagrafana/grafana(docker hub)
https://hub.docker.com/r/grafana/grafana/
目次
手順
Prometheus の環境を構築する
prometheus.yml を作成する
プロジェクトのルートディレクトリの下に docker/prometheus のディレクトリを作成し、その下に prometheus.yml というファイルを新規作成して以下の内容を記述します。
global:
  scrape_interval: 15s # By default, scrape targets every 15 seconds.
  evaluation_interval: 15s # Evaluate rules every 15 seconds.

# A scrape configuration containing exactly one endpoint to scrape:
# Here it's Prometheus itself.
scrape_configs:
# The job name is added as a label `job=<job_name>` to any timeseries scraped from this config.
- job_name: 'prometheus'
  scrape_interval: 15s
  static_configs:
  - targets: ['localhost:9090']

- job_name: 'spring-actuator'
  metrics_path: '/actuator/prometheus'
  scrape_interval: 15s
  basic_auth:
    username: actuator
    password: xxxxxxxx
  static_configs:
  # Docker で起動した Prometheus からローカルPCで起動している Spring Boot のアプリケーション
  # にアクセスするので、localhost ではなくローカルPCに割り当てられているIPアドレスを設定する
  - targets: ['172.23.136.33:8080']
docker-compose.yml を作成する
プロジェクトのルートディレクトリの下に docker-compose.yml を新規作成して以下の内容を記述します。
version: '3'

services:
  prometheus:
    image: prom/prometheus:latest
    container_name: prometheus
    ports:
    - "9090:9090"
    volumes:
    - ./docker/prometheus/prometheus.yml:/etc/prometheus/prometheus.yml
prometheus を起動する
docker-compose up -d コマンドを実行します。

動作確認
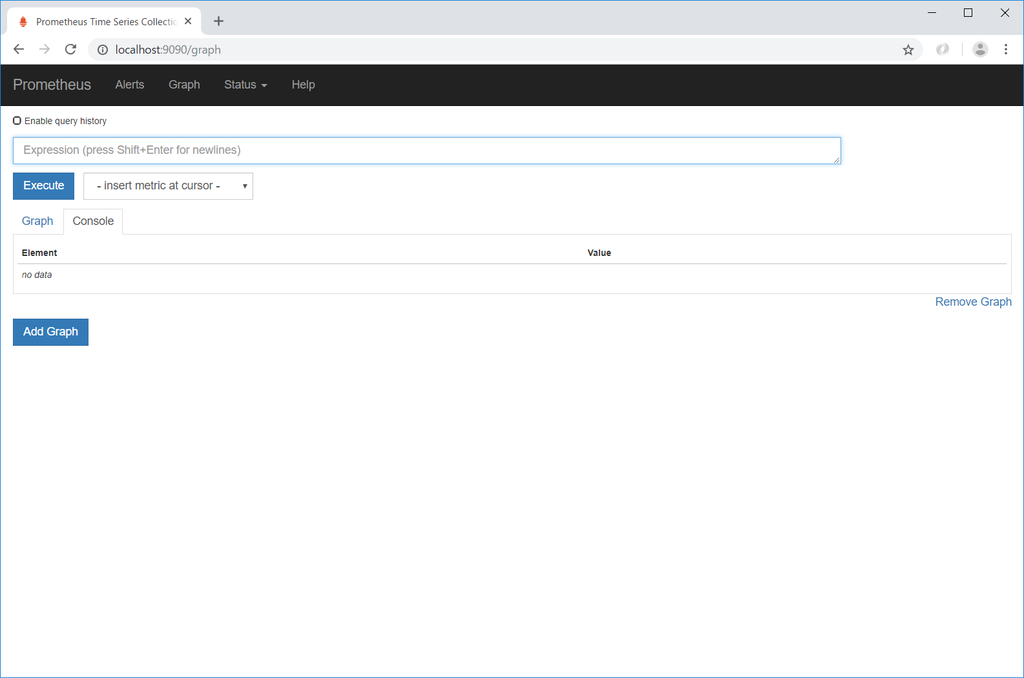
http://localhost:9090/ にアクセスすると http://localhost:9090/graph にリダイレクトされて以下の画面が表示されます。
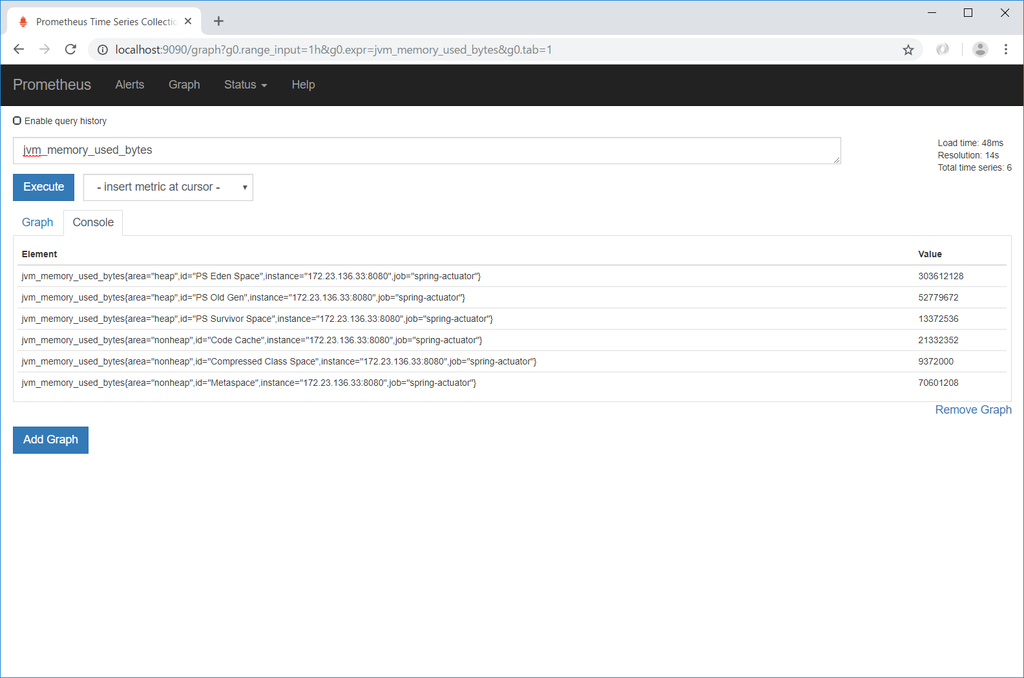
jvm と入力すると Spring Actuator から収集した jvm が含まれるメトリックスが表示されて、

jvm_memory_used_bytes を選択して「Execute」ボタンをクリックすると以下のように表示されます。
「Graph」タブをクリックするとグラフが表示されます(表示間隔をデフォルトの 1h から 15m に変更しています)。

Grafana の環境を構築する
docker-compose.yml に Grafana の設定を追加する
docker-compose.yml に Grafana の設定を追加します。
version: '3'

services:
  ..........

  grafana:
    image: grafana/grafana:latest
    container_name: grafana
    ports:
    - "3000:3000"
Grafana を起動する
docker-compose down コマンドを実行した後、docker-compose up -d コマンドを実行します。

設定&動作確認
http://localhost:3000/ にアクセスすると http://localhost:3000/login にリダイレクトされてログイン画面が表示されます。

admin / admin を入力した後「Log In」ボタンをクリックすると、今度はパスワードの変更を求められるのでパスワードを入力して「Save」ボタンをクリックします。

「Home Dashboard」画面が表示されるので「Add data source」をクリックします。

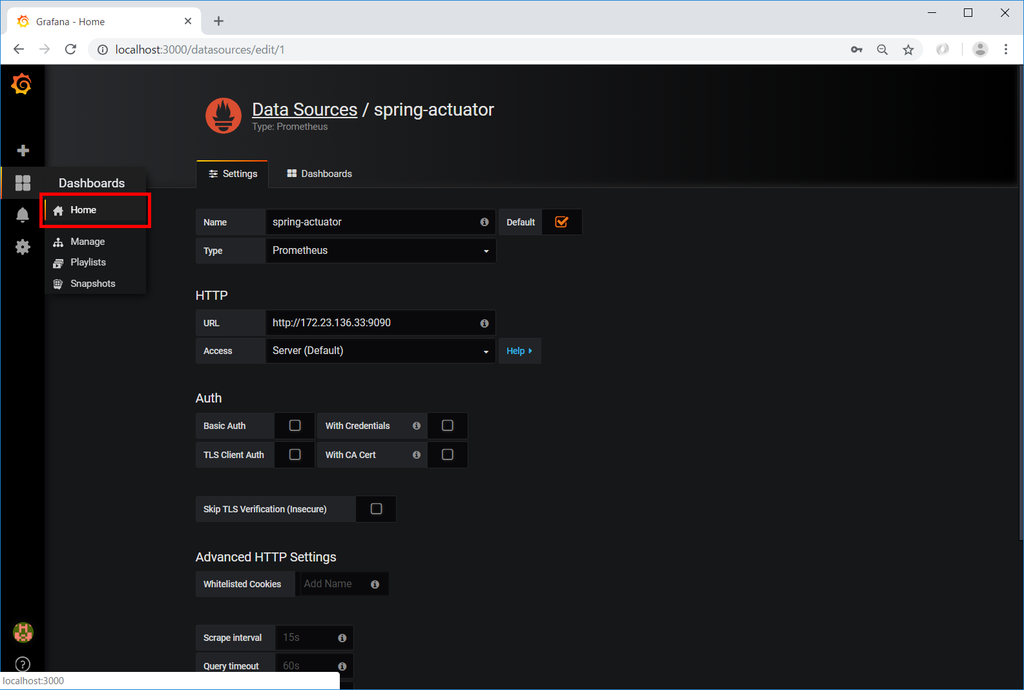
以下の画面の値を入力して「Save & Test」ボタンをクリックします。Prometheus は Docker の別コンテナで起動しているので、「HTTP」-「URL」には localhost 以外の IP アドレスを記述します。

画面左側から「Dashboards」-「Home」を選択します。
「New dashboard」をクリックします。

Panel を追加します。「Graph」をクリックします。

「Panel Title」-「Edit」を選択します。

jvm_memory_used_bytes を入力した後、画面右上の「Back to dashboard」ボタンをクリックします。
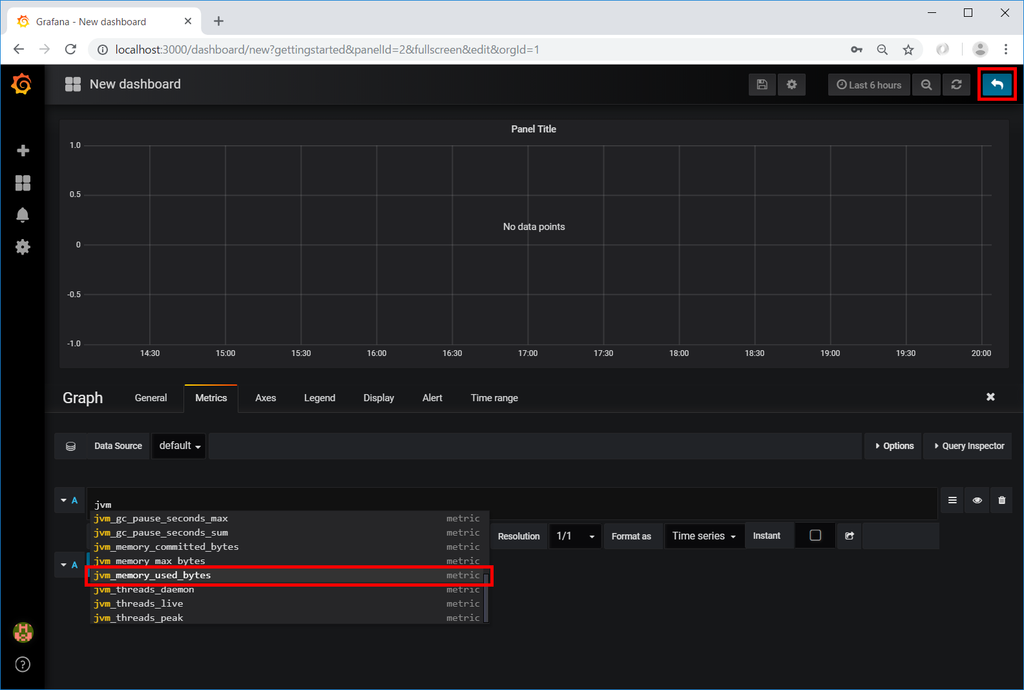
Panel 上に jvm_memory_used_bytes のメトリックスのグラフが表示されます。

グラフの表示期間がデフォルトでは Last 6 hours になっているので Last 1 hour に変更し、かつ自動リフレッシュされるようにします。画面右上の「Last 6 hours」と表示されているところをクリックした後、「Custom range」-「Refreshing every」で「5s」を選択して「Apply」ボタンをクリックし、「Quick ranges」で「Last 1 hour」をクリックします。


次回は。。。
Prometheus+Grafana が面白い!! もう少しいろいろ試してみたいので、Prometheus+Grafana で jvm 以外のデータを表示させてみます。
履歴
2018/11/04
初版発行。