Antora で PlantUML 等の diagram を埋め込む
Translate to English
https://translate.google.com/translate?sl=auto&tl=en&u=https%3A%2F%2Fksby.hatenablog.com%2Fentry%2F2021%2F02%2F13%2F194234
概要
記事一覧はこちらです。
Antora でも Kroki を利用して PlantUML 等の diagram を埋め込んでみます。
参照したサイト・書籍
Mogztter / asciidoctor-kroki
https://github.com/Mogztter/asciidoctor-krokiAsciiDoc Keys
https://docs.antora.org/antora/2.3/playbook/configure-asciidoc/#extensions
目次
- ksbysample-antora-playbook プロジェクトに Kroki のコンテナを起動するための docker-compose.yml をコピーしてコンテナを起動する
- ksbysample-antora プロジェクトに diagram のファイルと adoc ファイルをコピーする
- ksbysample-antora-playbook プロジェクトに asciidoctor-kroki をインストールする
npx antora --fetch antora-playbook.ymlを実行してドキュメントサイトを生成する
手順
ksbysample-antora-playbook プロジェクトに Kroki のコンテナを起動するための docker-compose.yml をコピーしてコンテナを起動する
ksbysample-asciidoctor プロジェクトに docker-compose.yml を作成し、Kroki のコンテナを起動するための設定を記述する で作成した docker-compose.yml を ksbysample-antora-playbook プロジェクトのルートディレクトリ直下にコピーします。
docker-compose up -d コマンドを実行し、Kroki のコンテナを起動します。

ksbysample-antora プロジェクトに diagram のファイルと adoc ファイルをコピーする
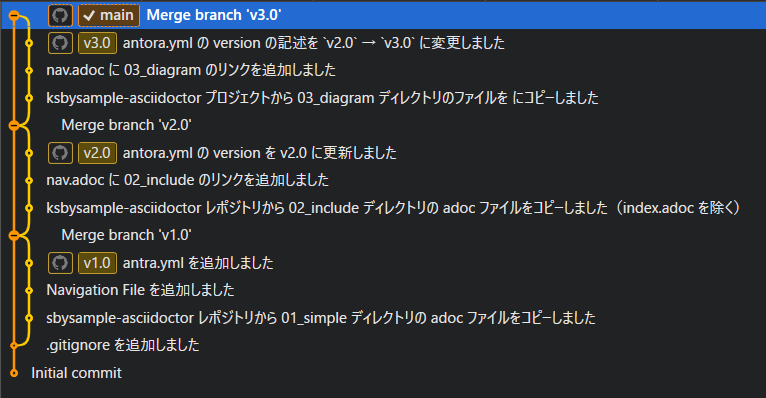
v3.0 ブランチを作成し、ksbysample-asciidoctor プロジェクトから 03_diagram ディレクトリのファイルを にコピーする
main ブランチから v3.0 ブランチを作成します。
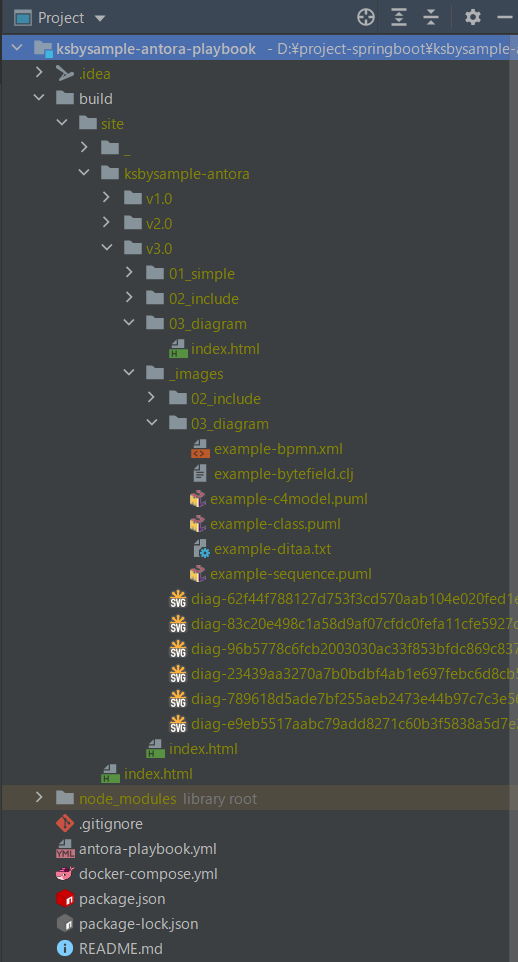
ksbysample-asciidoctor プロジェクトから 03_diagram ディレクトリのファイルをコピーします。adoc ファイルは pages ディレクトリの下にコピーし、diagram のファイルは images ディレクトリの下にコピーします(Hierarchy and reserved names に attachments や partials のディレクトリが記述されていますが diagram は svg になるので images ディレクトリにしました)。
- modules/ROOT/pages の下に 03_diagram ディレクトリを作成します。
- ksbysample-asciidoctor プロジェクトの src/docs/asciidoc/03_diagram/index.adoc を modules/ROOT/pages の下にコピーします。
- modules/ROOT/images の下に 03_diagram ディレクトリを作成します。
- modules/ROOT/images/03_diagram の下に ksbysample-asciidoctor プロジェクトの src/docs/asciidoc/03_diagram の下の diagram のファイルをコピーします。
- src/docs/asciidoc/03_diagram/example-bpmn.xml
- src/docs/asciidoc/03_diagram/example-bytefield.clj
- src/docs/asciidoc/03_diagram/example-c4model.puml
- src/docs/asciidoc/03_diagram/example-class.puml
- src/docs/asciidoc/03_diagram/example-ditaa.txt
- src/docs/asciidoc/03_diagram/example-sequence.puml
- modules/ROOT/images の下に 02_include ディレクトリを作成し、modules/ROOT/images の下の以下のファイルを移動します。
コピー後のディレクトリ構成は以下のようになります。
この時点では modules/ROOT/pages/03_diagram/index.adoc に赤波下線が出ており、AsciiDoc Plugin の preview にまだ diagram は表示されません。
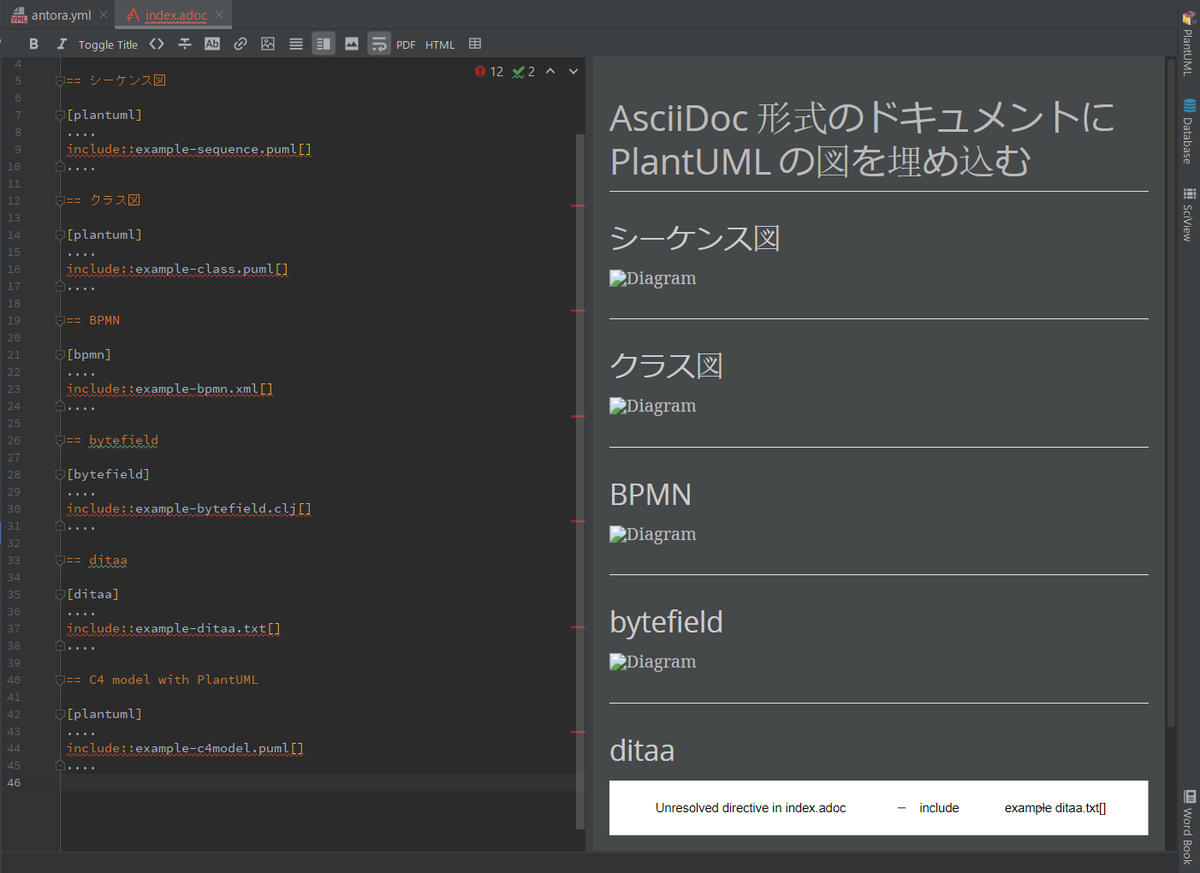
modules/ROOT/pages/03_diagram/index.adoc を変更する
AsciiDoc Plugin の preview に diagram が表示されるよう modules/ROOT/pages/03_diagram/index.adoc を変更します。
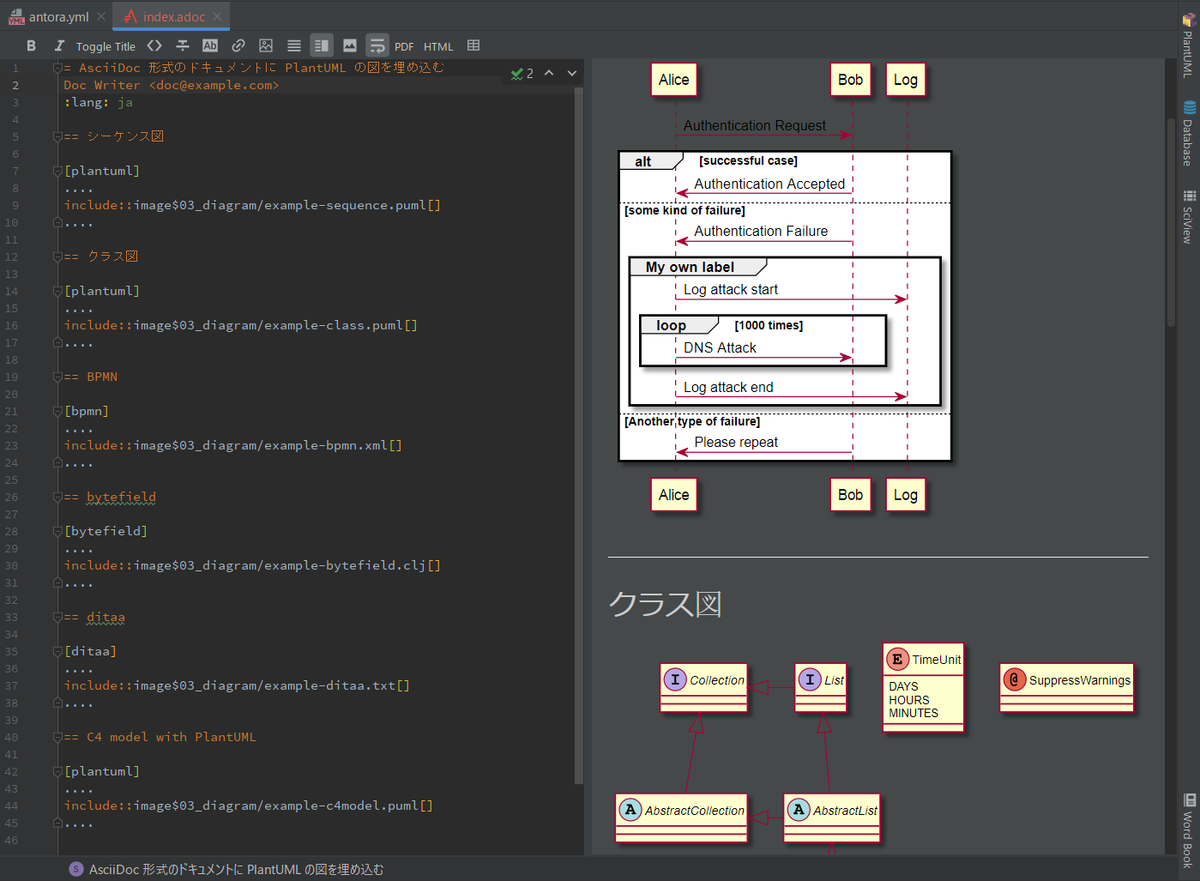
Antora の Document の Include a Page を参考に、今回 diagram のファイルは images ディレクトリの下に配置したので include::example-sequence.puml[] → include::image$03_diagram/example-sequence.puml[] のように image$03_diagram/ を追加します(ディレクトリ名の末尾の s を取り除いて $ を追加した文字列を付けると、そのディレクトリの下のファイルを参照できます)。
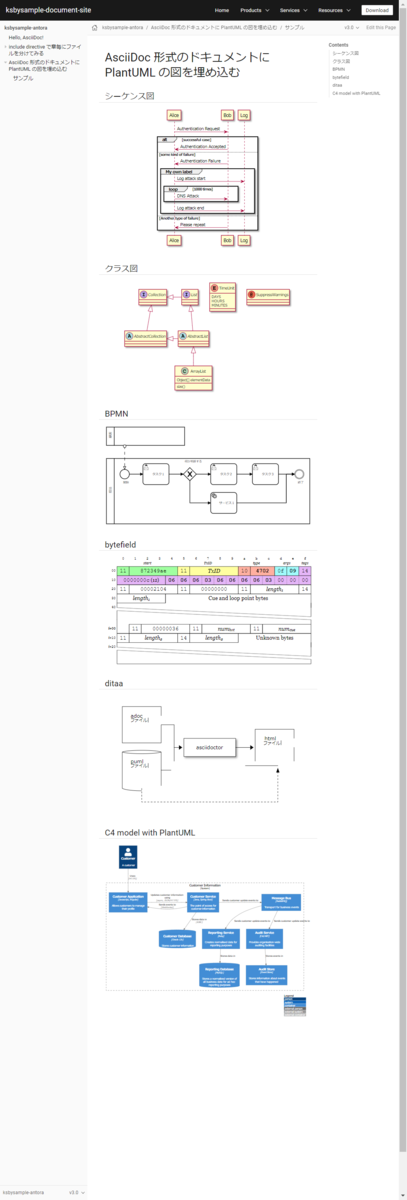
= AsciiDoc 形式のドキュメントに PlantUML の図を埋め込む
Doc Writer <doc@example.com>
:lang: ja

== シーケンス図

[plantuml]
....
include::image$03_diagram/example-sequence.puml[]
....

== クラス図

[plantuml]
....
include::image$03_diagram/example-class.puml[]
....

== BPMN

[bpmn]
....
include::image$03_diagram/example-bpmn.xml[]
....

== bytefield

[bytefield]
....
include::image$03_diagram/example-bytefield.clj[]
....

== ditaa

[ditaa]
....
include::image$03_diagram/example-ditaa.txt[]
....

== C4 model with PlantUML

[plantuml]
....
include::image$03_diagram/example-c4model.puml[]
....
そうすると adoc ファイル内の赤波下線が消えて AsciiDoc Plugin の preview に diagram が表示されるようになります。
modules/ROOT/pages/02_include/01.adoc を変更する
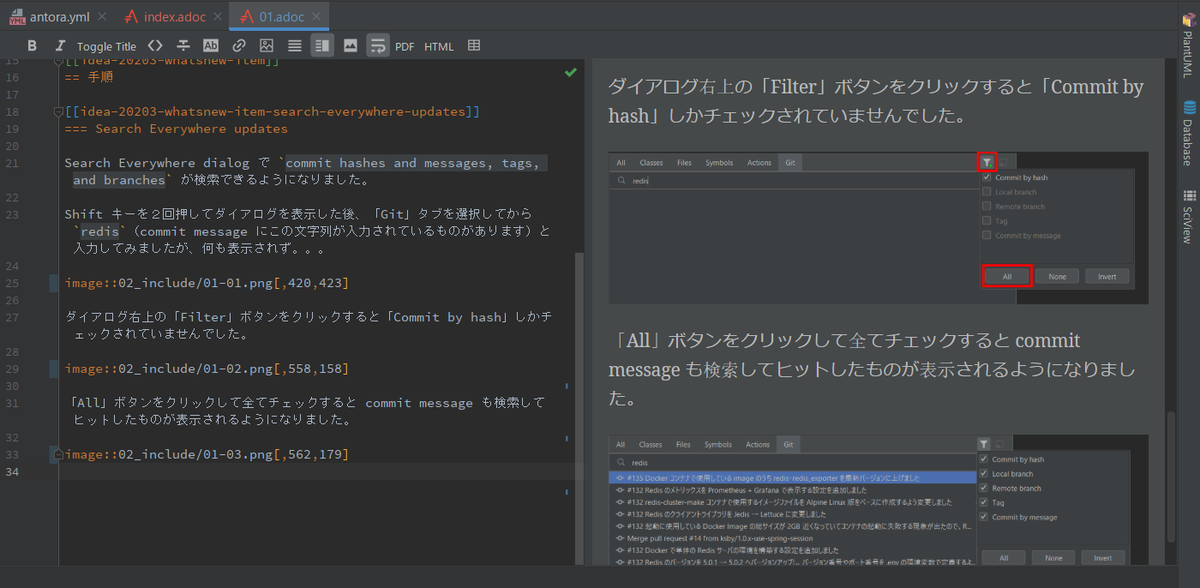
01-01.png ~ 01-03.png の画像ファイルを modules/ROOT/images/02_include の下へ移動したので modules/ROOT/pages/02_include/01.adoc の image::... のパスを image::01-01.png → 02_include/image::01-01.png のように変更します。
..........

Shift キーを2回押してダイアログを表示した後、「Git」タブを選択してから `redis`(commit message にこの文字列が入力されているものがあります)と入力してみましたが、何も表示されず。。。

image::02_include/01-01.png[,420,423]

ダイアログ右上の「Filter」ボタンをクリックすると「Commit by hash」しかチェックされていませんでした。

image::02_include/01-02.png[,558,158]

「All」ボタンをクリックして全てチェックすると commit message も検索してヒットしたものが表示されるようになりました。

image::02_include/01-03.png[,562,179]
こちらも AsciiDoc Plugin の preview に画像が表示されました。
modules/ROOT/nav.adoc を変更する
modules/ROOT/nav.adoc に modules/ROOT/pages/03_diagram/index.adoc へのリンク(.AsciiDoc 形式のドキュメントに PlantUML の図を埋め込む 以降の記述)を追加します。
* xref:ROOT:01_simple/index.adoc[Hello, AsciiDoc!]

.include directive で章毎にファイルを分けてみる
* xref:ROOT:02_include/01.adoc[IntelliJ IDEA 2020.3 新機能メモ書き]
* xref:ROOT:02_include/02.adoc[Asciidoctor+Gradle の環境で AsciiDoc 形式のドキュメントから HTML ファイルを生成してみる]

.AsciiDoc 形式のドキュメントに PlantUML の図を埋め込む
* xref:ROOT:03_diagram/index.adoc[サンプル]
antora.yml を変更する
antora.yml の version の記述を v2.0 → v3.0 に変更します。
name: ksbysample-antora
title: ksbysample-antora
version: v3.0
start_page: ROOT:01_simple/index.adoc
nav:
  - modules/ROOT/nav.adoc
v3.0 ブランチを main ブランチへマージする
v3.0 ブランチを main ブランチへマージします。
ksbysample-antora-playbook プロジェクトに asciidoctor-kroki をインストールする
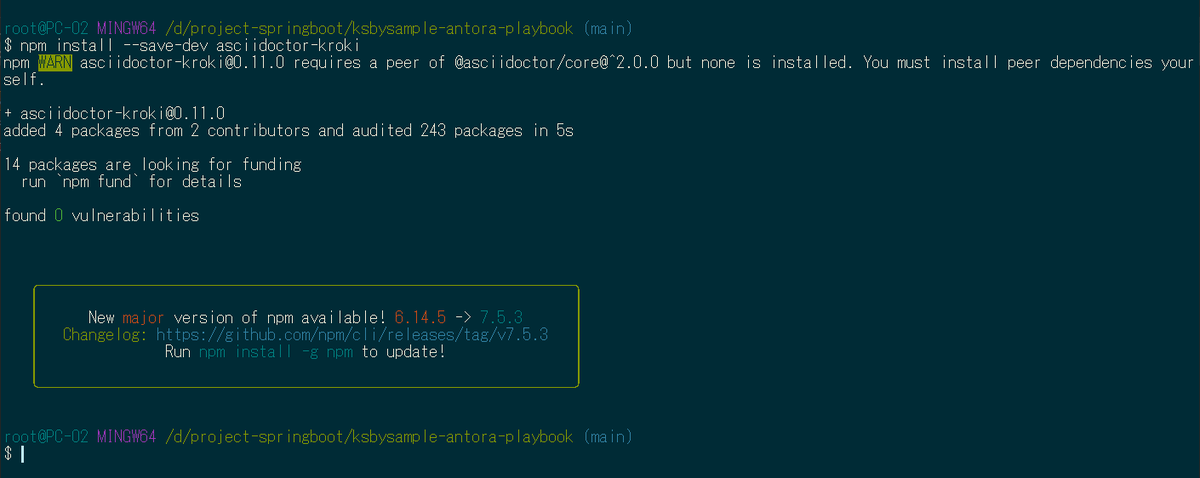
npm install --save-dev asciidoctor-kroki を実行する
Antora から Kroki のコンテナにアクセスするには asciidoctor-kroki を使用します。
ksbysample-antora-playbook プロジェクトで npm install --save-dev asciidoctor-kroki コマンドを実行してインストールします。
antora-playbook.yml を変更する
antora-playbook.yml で branches: [v2.0, v1.0] → branches: [v2.0, v1.0] に変更し、asciidoctor-kroki を利用するために asciidoc: の行以降の記述を追加します。
site:
  title: ksbysample-document-site
  start_page: ksbysample-antora::01_simple/index.adoc
content:
  sources:
    - url: https://github.com/ksby/ksbysample-antora.git
      branches: [v3.0, v2.0, v1.0]
ui:
  bundle:
    url: https://gitlab.com/antora/antora-ui-default/-/jobs/artifacts/master/raw/build/ui-bundle.zip?job=bundle-stable
    snapshot: true

asciidoc:
  attributes:
    kroki-server-url: http://localhost:8000
    kroki-fetch-diagram: true
  extensions:
    - asciidoctor-kroki
npx antora --fetch antora-playbook.yml を実行してドキュメントサイトを生成する
npx antora --fetch antora-playbook.yml を実行すると、Skipping preprocessing of PlantUML include, because reading the referenced ... というメッセージが出力されました。

modules/ROOT/images/03_diagram/example-c4model.puml を開いてみると、先頭に以下の記述があり、
@startuml "messagebus"
!include https://raw.githubusercontent.com/plantuml-stdlib/C4-PlantUML/master/C4_Container.puml
' uncomment the following line and comment the first to use locally
' !include C4_Container.puml
https://raw.githubusercontent.com/plantuml-stdlib/C4-PlantUML/master/C4_Container.puml を見てみると、以下の記述がありました。
' convert it with additional command line argument -DRELATIVE_INCLUDE="." to use locally
!if %variable_exists("RELATIVE_INCLUDE")
  !include %get_variable_value("RELATIVE_INCLUDE")/C4_Context.puml
!else
  !include https://raw.githubusercontent.com/plantuml-stdlib/C4-PlantUML/master/C4_Context.puml
!endif
調べてみると、最初は RELATIVE_INCLUDE という環境変数が設定されているから !include %get_variable_value("RELATIVE_INCLUDE")/C4_Context.puml が実行されていると思ったのですが、PlantUML の !include は Preprocessing なので最初に全て実行されている(!if ... !endif で実行されないように判断されるのは Preprocessing の後)だけのようです。
コマンド実行後の build ディレクトリの下のディレクトリ構成は以下のようになっており(Kroki で生成された svg ファイルは _images/03_diagram の下ではなく _images の下に生成されていました)、
build/site/index.html を開くと diagram は全て表示されました。
メッセージはエラー出力に出力されているので npx antora --fetch antora-playbook.yml 2>/dev/null で実行すれば出力されません。

履歴
2021/02/13
初版発行。