Grooy スクリプトをそのまま渡して実行する Spring Boot+Picocli ベースのコマンドラインアプリを作成する ( その10 )( GraalVM で groovy-script-executor の Windows 版 Native Image を作成する )
概要
記事一覧はこちらです。
- 今回の手順で確認できるのは以下の内容です。
- GraalVM で groovy-script-executor の Windows 版 Native Image を作成します。
参照したサイト・書籍
Using GraalVM and Native Image on Windows 10
https://medium.com/graalvm/using-graalvm-and-native-image-on-windows-10-9954dc071311Build Great Native CLI Apps in Java with Graalvm and Picocli
https://www.infoq.com/articles/java-native-cli-graalvm-picocli/2.3.2. Enabling the Annotation Processor
https://picocli.info/#_enabling_the_annotation_processorVisual Studio - ダウンロード
https://visualstudio.microsoft.com/ja/downloads/GraalVM
https://www.graalvm.org/
目次
- build.gradle に
annotationProcessor("info.picocli:picocli-codegen:${picocliVersion}")を追加する - Visual Studio 2022 Community をインストールする
- GraalVM Community 21.3.0 をインストールする
- groovy-script-executor の Windows 版 Native Image(gse.exe、gse-servlet.exe)を作成する
- 動作確認
手順
build.gradle に annotationProcessor("info.picocli:picocli-codegen:${picocliVersion}") を追加する
https://picocli.info/#_enabling_the_annotation_processor を参考に build.gradle を以下のように変更します。
..........

[compileJava, compileTestGroovy, compileTestJava]*.options*.encoding = "UTF-8"
[compileJava, compileTestGroovy, compileTestJava]*.options*.compilerArgs = [
        "-Xlint:all,-options,-processing,-path",
        "-Aproject=${project.group}/${project.name}"
]
..........

dependencies {
    ..........
    def picocliVersion = "4.6.2"
    ..........

    // for Picocli
    implementation("info.picocli:picocli-spring-boot-starter:${picocliVersion}")
    annotationProcessor("info.picocli:picocli-codegen:${picocliVersion}")

    ..........
[compileJava, compileTestGroovy, compileTestJava]*.options*.compilerArgsに"-Aproject=${project.group}/${project.name}"を追加します。- dependencies block に以下の行を追加します。
annotationProcessor("info.picocli:picocli-codegen:${picocliVersion}")
Gradle Tool Window の左上にある「Refresh all Gradle projects」ボタンをクリックして更新します。
clean タスク実行 → Rebuild Project 実行 → build タスクを実行して生成された build/libs/groovy-script-executor-1.0.0-RELEASE.jar を D:\tmp にコピーします。
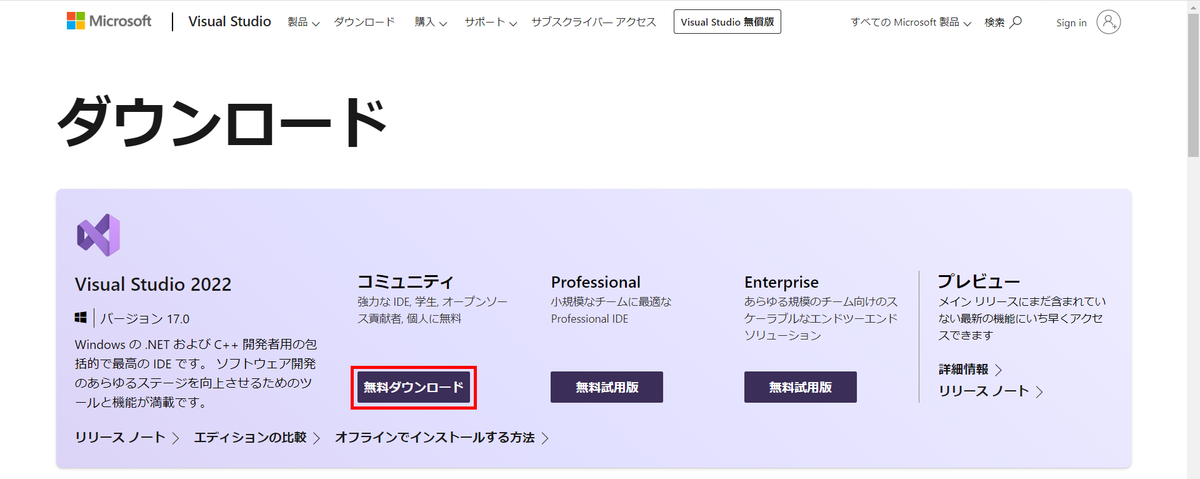
Visual Studio 2022 Community をインストールする
Windows 版 Native Image を作成するのに Visual Studio 2022 Community が必要なのでインストールします。
ダウンロード ページの「コミュニティ」の「無料ダウンロード」ボタンをクリックして vs_community__~.exe(~ の部分には英数字の文字列が入ります)をダウンロードします。
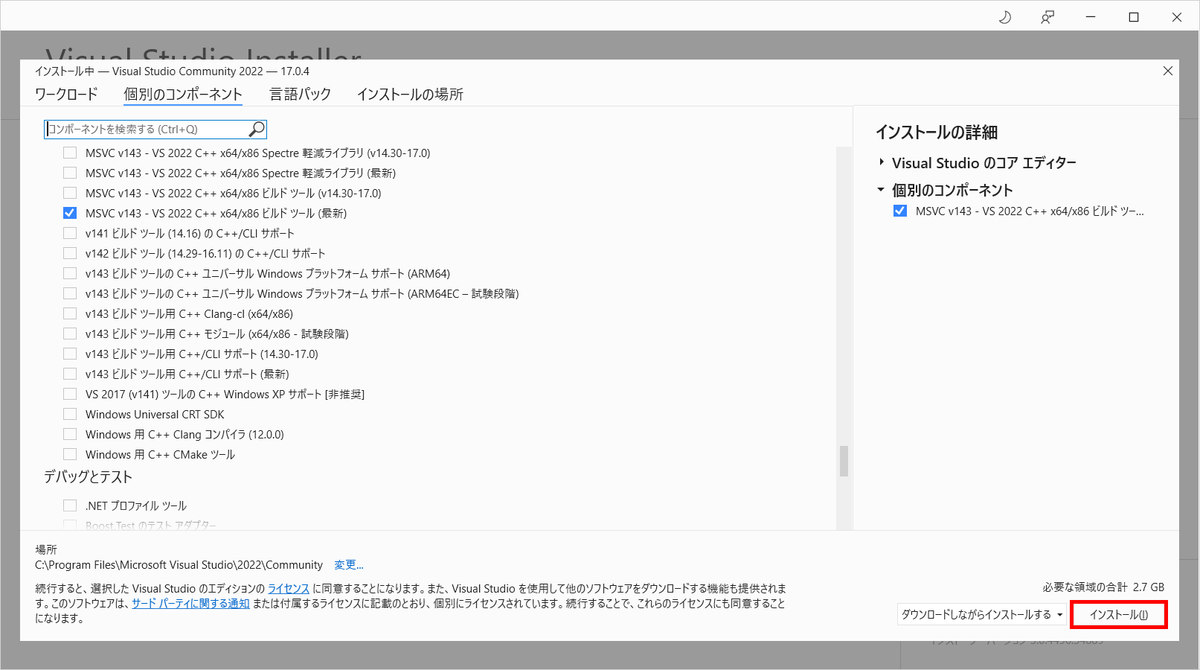
vs_community__~.exe を実行してインストールします。以下の画面が表示されたら「個別のコンポーネント」の「MSVC v143 VS 2022 C++ x64/x86 ビルドツール(最新)」をチェックした後「インストール」ボタンをクリックします。
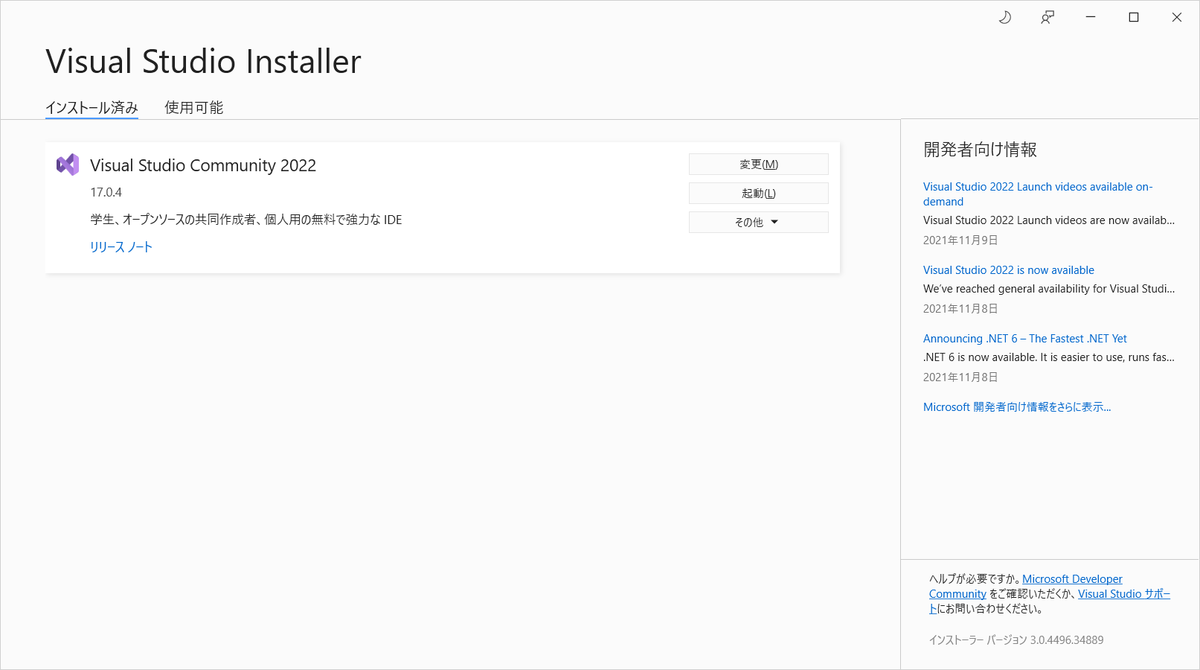
インストールが完了すると「Visual Studio Installer」に「Visual Studio Community 2022」が表示されます。
GraalVM Community 21.3.0 をインストールする
https://www.graalvm.org/downloads/ の「GraalVM Community 21.3.0」の「DOWNLOAD FROM GITHUB」ボタンをクリックすると https://github.com/graalvm/graalvm-ce-builds/releases/tag/vm-21.3.0 へ遷移するので、その下の「Java 17 based」の「Windows (amd64)」の link をクリックして graalvm-ce-java17-windows-amd64-21.3.0.zip をダウンロードします。
D:\graalvm フォルダを新規作成した後、graalvm-ce-java17-windows-amd64-21.3.0.zip を解凍して作成された graalvm-ce-java17-21.3.0 フォルダをその下に移動します。
groovy-script-executor の Windows 版 Native Image(gse.exe、gse-servlet.exe)を作成する
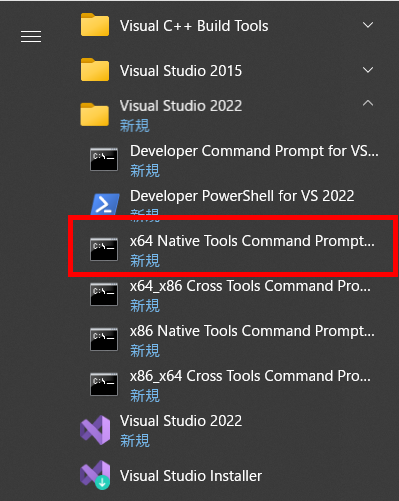
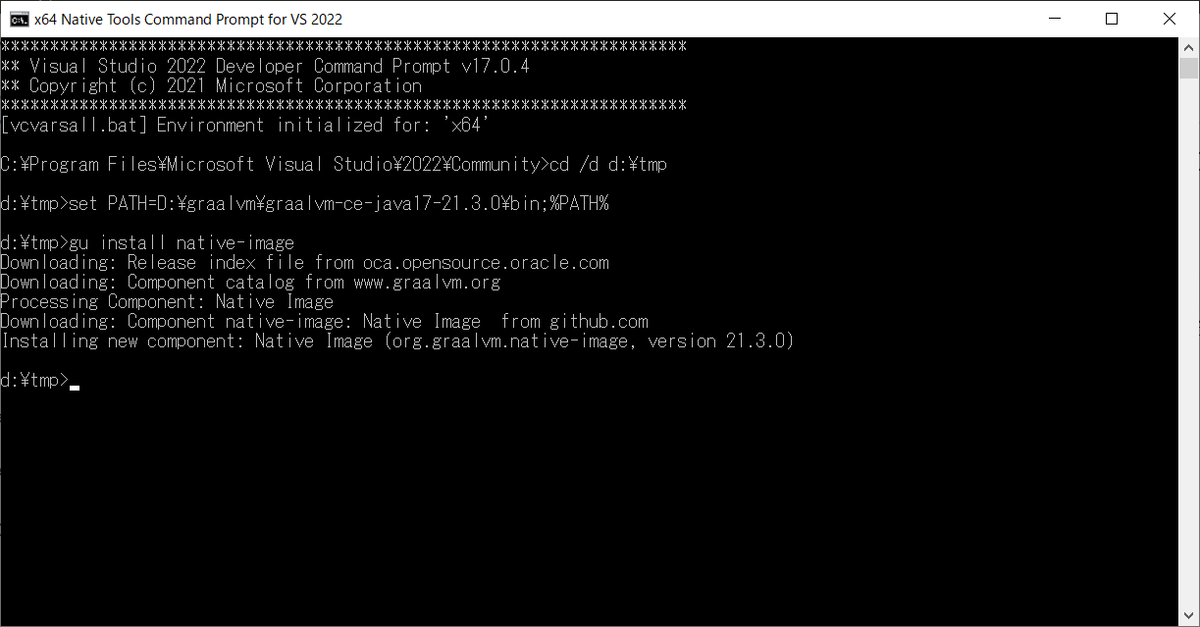
Windows メニューから「Visual Studio 2022」-「x64 Native Tools Command Prompt for VS 2022」をクリックして実行します。
以下のコマンドを実行し native-image コマンドを使用できるようにします。
> cd /d d:\tmp
> set PATH=D:\graalvm\graalvm-ce-java17-21.3.0\bin;%PATH%
> gu install native-image
以下のコマンドを実行し gse.exe を作成します。gse.exe の後に指定しているのは gse.bat 内に記述していた起動時オプションです。ただし -XX:TieredStopAtLevel=1 は指定できませんでした(エラーメッセージが出力されて Native Image の生成が失敗します)。
> native-image -jar groovy-script-executor-1.0.0-RELEASE.jar gse.exe -Dfile.encoding=UTF-8 -Dspring.main.lazy-initialization=true

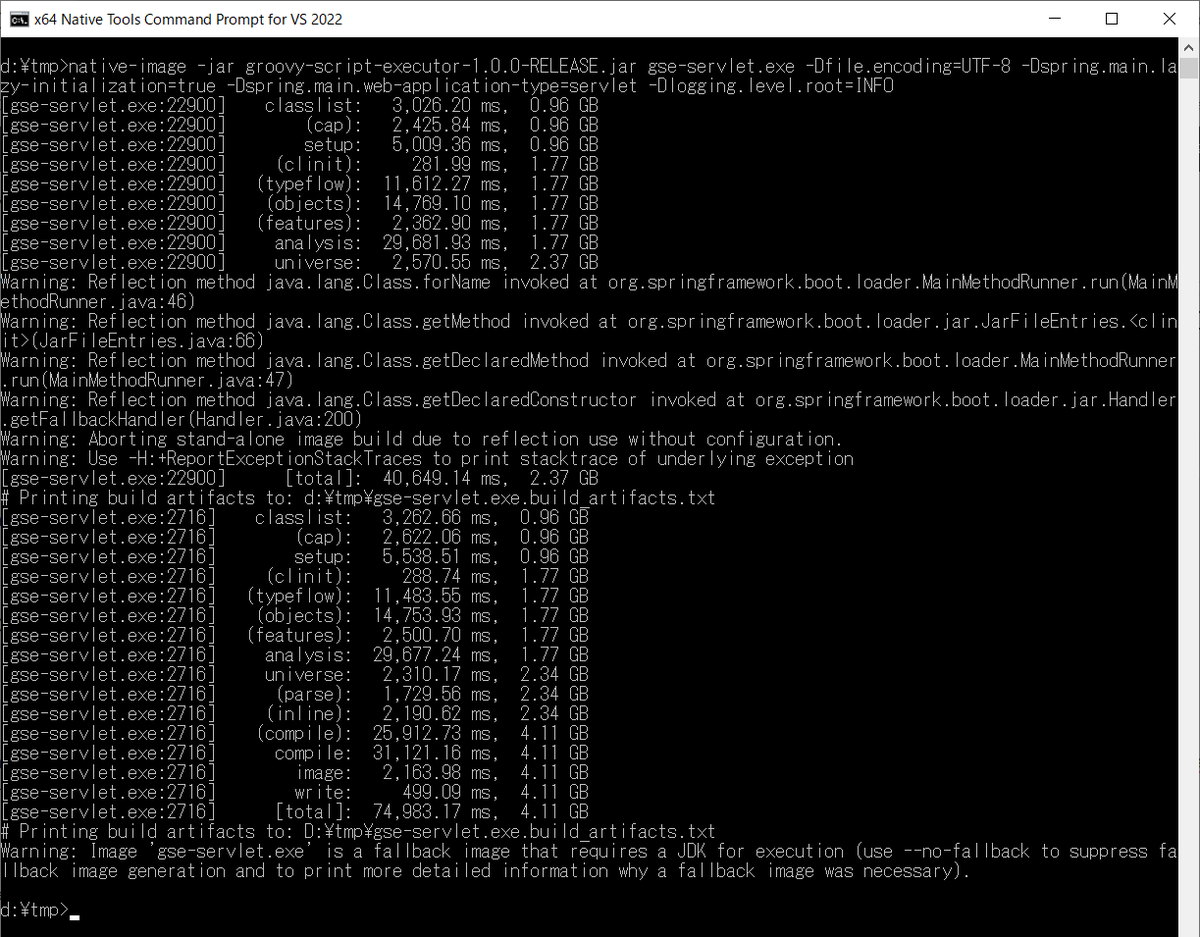
以下のコマンドを実行し gse-servlet.exe を作成します。gse-servlet.exe の後に指定しているのは gse-servlet.bat 内に記述していた起動時オプションです。
> native-image -jar groovy-script-executor-1.0.0-RELEASE.jar gse-servlet.exe -Dfile.encoding=UTF-8 -Dspring.main.lazy-initialization=true -Dspring.main.web-application-type=servlet -Dlogging.level.root=INFO
動作確認
まずは gse.exe の動作確認を行います。
gse.exe Helloworld.groovy を実行すると Hello, World の文字が出力されました。起動後に4~5秒かかるのは Groovy スクリプトを build している時間なので Native Image にしても変わりませんでした。

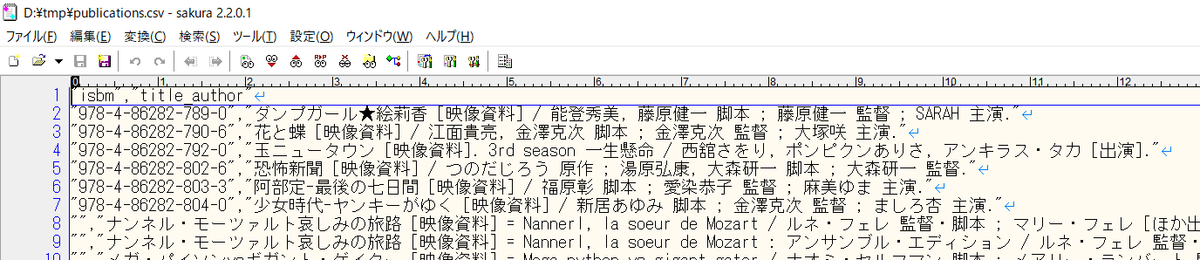
docker-compose up -d でコンテナを起動して publications.csv を削除してから gse.exe PublicationsTableToFileUsingUnivocityParsers.groovy を実行するとコマンドはエラーメッセージを出力せずに終了し、

publications.csv が生成されてデータが出力されていました。
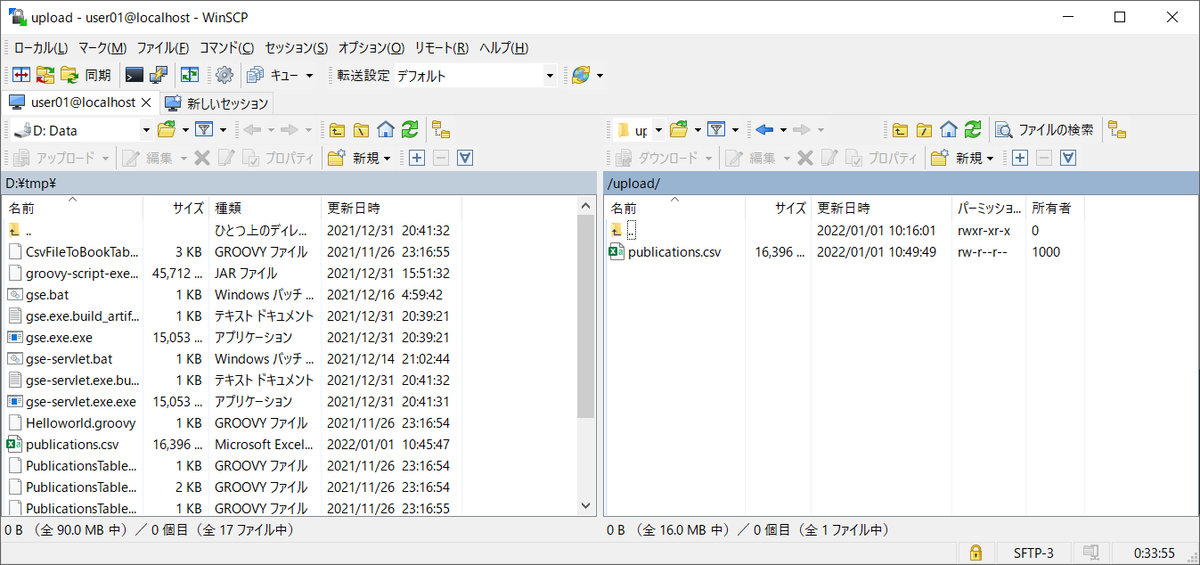
gse.exe SftpClient.groovy --user=user01 --password=pass01 --upload-dir=upload --upload-file=publications.csv コマンドを実行するとログが出力されて、

upload ディレクトリに publications.csv がアップロードされました。
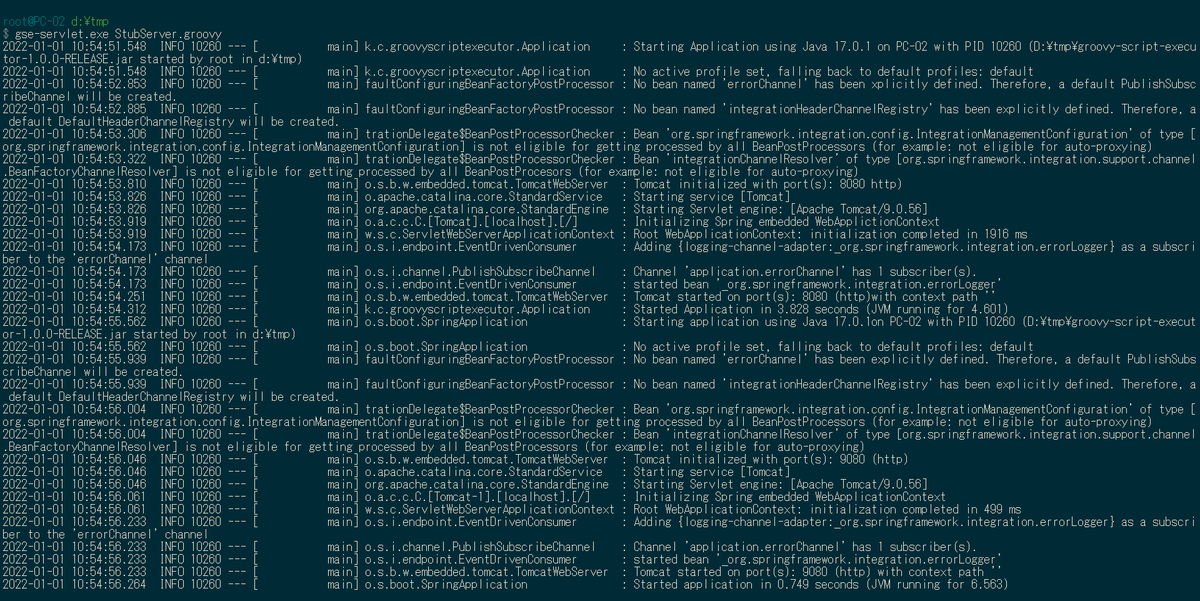
次に gse-servlet.exe の動作確認を行います。
gse.exe StubServer.groovy を実行すると何も出力されずにコマンドが終了しますが、

gse-servlet.exe StubServer.groovy を実行するとログが出力されて Tomcat が起動し、
curl -v http://localhost:9080/stub を実行すると {"key":123,"data":"xxxxxxxx"} が返ってきました。
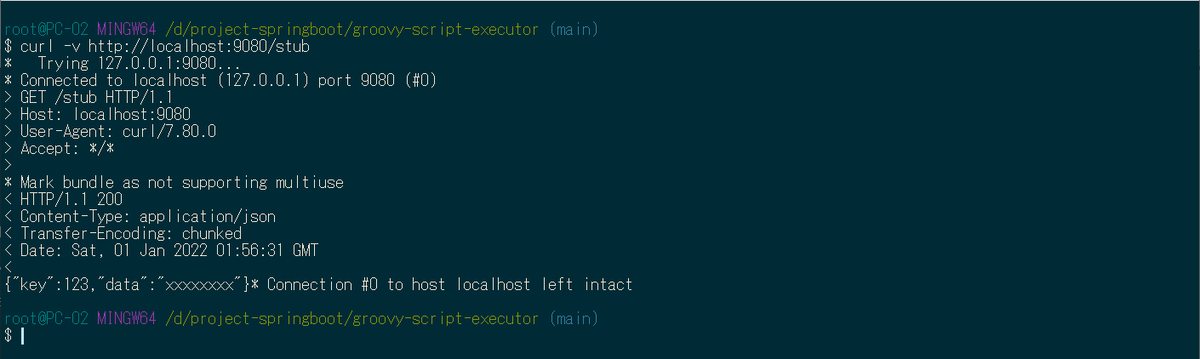
gse.exe、gse-servlet.exe どちらも問題なさそうです。
また環境変数 PATH から JDK(D:\java\jdk-17.0.1.12-hotspot\bin)への PATH を削除してから gse.exe Helloworld.groovy を実行してもコマンドが実行されました。作成された Native Image は JDK がなくても動作します(Groovy スクリプトの build にも JDK は必要ないようです)。

履歴
2022/01/01
初版発行。