Java SE を 8u162 → 8u172 へ、IntelliJ IDEA を 2017.3.4 → 2017.3.5 → 2018.1.2 へ、Git for Windows を 2.16.2 → 2.17.0 へバージョンアップ
※ksbysample-webapp-lending プロジェクトを開いた状態でバージョンアップしています。
Java SE を 8u162 → 8u172 へバージョンアップする
Oracle の Java SE Downloads を見ると 8u172 がダウンロードできるようになっていましたので、8u172 へバージョンアップします。
jdk-8u172-windows-x64.exe をダウンロードして C:\Java\jdk1.8.0_172 へインストールした後、環境変数 JAVA_HOME のパスを C:\Java\jdk1.8.0_172 へ変更します。
コマンドプロンプトから
java -versionを実行し、1.8.0_172に変更されていることを確認します。
開いているプロジェクトを閉じて「Welcome to IntelliJ IDEA」ダイアログを表示します。
ダイアログ下部の「Configure」-「Project Defaults」-「Project Structure」を選択します。

「Default Project Structure」ダイアログが表示されます。画面左側で「Project Settings」-「Project」を選択後、画面右側の「Project SDK」の「New...」ボタンをクリックし、表示されるメニューから「JDK」を選択します。

「Select Home Directory for JDK」ダイアログが表示されます。C:\Java\jdk1.8.0_172 を選択した後、「OK」ボタンをクリックします。

「Default Project Structure」ダイアログに戻るので、今度は「Project SDK」の「Edit」ボタンをクリックします。

画面左側で「Platform Settings」-「SDKs」が選択された状態になるので、画面右上の入力フィールドで "1.8" → "1.8.0_172" へ変更します。

次に中央のリストから「1.8.0_162」を選択した後、リストの上の「-」ボタンをクリックして削除します。

「OK」ボタンをクリックして「Default Project Structure」ダイアログを閉じます。
「Welcome to IntelliJ IDEA」ダイアログに戻ったら、ksbysample-webapp-lending プロジェクトを開きます。
IntelliJ IDEA のメイン画面が開いたら、メニューから「File」-「Project Structure...」を選択します。
「Project Structure」ダイアログが表示されます。以下の画像の状態になっているので、

「Project SDK」と「Project language level」を選択し直します。

「OK」ボタンをクリックして「Project Structure」ダイアログを閉じます。
メイン画面に戻ると画面右下に「Indexing...」の表示が出るので、終了するまで待ちます。

clean タスク実行 → Rebuild Project 実行 → build タスクを実行して、"BUILD SUCCESSFUL" のメッセージが出力されることを確認します。

Project Tool Window で src/test を選択した後、コンテキストメニューを表示して「Run ‘All Tests’ with Coverage」を選択し、テストが全て成功することを確認します。

特に問題は発生しませんでした。8u172 で開発を進めます。
IntelliJ IDEA を 2017.3.4 → 2017.3.5 へバージョンアップする
IntelliJ IDEA の最新版は 2018.1.2 ですが、メインメニューの「Check for Updates...」を選択すると 2017.3.5 へのバージョンアップが表示されるので、一旦 2017.3.5 へバージョンアップしてから 2018.1.2 へバージョンアップすることにします。
- IntelliJ IDEA 2017.3.5 Release Notes
https://confluence.jetbrains.com/display/IDEADEV/IntelliJ+IDEA+2017.3.5+Release+Notes
※ksbysample-webapp-lending プロジェクトを開いた状態でバージョンアップしています。
IntelliJ IDEA のメインメニューから「Help」-「Check for Updates...」を選択します。
「IDE and Plugin Updates」ダイアログが表示されます。左下に「Update and Restart」ボタンが表示されていますので、「Update and Restart」ボタンをクリックします。

Plugin の update も表示されました。このまま「Update and Restart」ボタンをクリックします。

Patch がダウンロードされて IntelliJ IDEA が再起動します。
IntelliJ IDEA が起動すると画面下部に「Indexing…」のメッセージが表示されますので、終了するまで待機します。

IntelliJ IDEA のメインメニューから「Help」-「About」を選択し、2017.3.5 へバージョンアップされていることを確認します。
Gradle Tool Window のツリーを見ると「Tasks」の下に「other」しかない状態になっているので、左上にある「Refresh all Gradle projects」ボタンをクリックして更新します。(キャプチャは省略します)
clean タスク実行 → Rebuild Project 実行 → build タスクを実行して、"BUILD SUCCESSFUL" のメッセージが出力されることを確認します。(キャプチャは省略します)
Project Tool Window で src/test を選択した後、コンテキストメニューを表示して「Run 'All Tests' with Coverage」を選択し、テストが全て成功することを確認します。(キャプチャは省略します)
IntelliJ IDEA を 2017.3.5 → 2018.1.2 へバージョンアップする
- 2018.1 (Mar 27)
https://www.jetbrains.com/idea/whatsnew/#v2018-1 - IntelliJ IDEA 2018.1.1 is released!
https://blog.jetbrains.com/idea/2018/04/intellij-idea-2018-1-1-is-released/ - IntelliJ IDEA 2018.1.2 is released!
https://blog.jetbrains.com/idea/2018/04/intellij-idea-2018-1-2-is-released/
※ksbysample-webapp-lending プロジェクトを開いた状態でバージョンアップしています。
IntelliJ IDEA のメインメニューから「Help」-「Check for Updates...」を選択します。
「IDE and Plugin Updates」ダイアログが表示されます。今回は左下に「Update and Restart」ボタンが表示されていないので、

「Download」ボタンを押して IntelliJ IDEA の Download ページを開いた後、「DOWNLOAD」ボタンを押して ideaIU-2018.1.2.exe をダウンロードします。

起動している IntelliJ IDEA を終了します。
ideaIU-2018.1.2.exe を実行します。
「IntelliJ IDEA Setup」ダイアログが表示されます。「Next >」ボタンをクリックします。

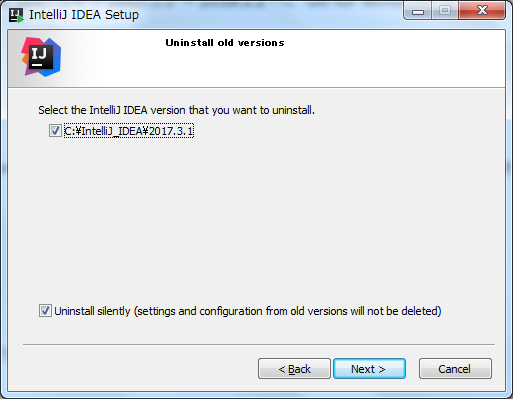
「Uninstall old versions」画面が表示されます。画面上の全てのチェックボックスをチェックした後、「Next >」ボタンをクリックします。
「Choose Install Location」画面が表示されます。「Destination Folder」を C:\IntelliJ_IDEA\2018.1.2 に変更した後、「Next >」ボタンをクリックします。

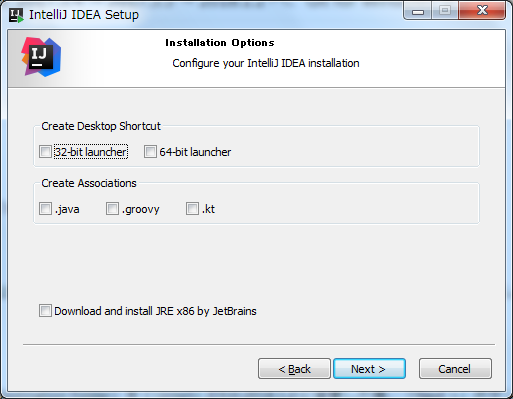
「Installation Options」画面が表示されます。何も変更せずに「Next >」ボタンをクリックします。
「Choose Start Menu Folder」画面が表示されます。何も変更せずに「Install」ボタンをクリックします。

「Installing」画面が表示されてインストールが始まりますので、完了するまで待ちます。
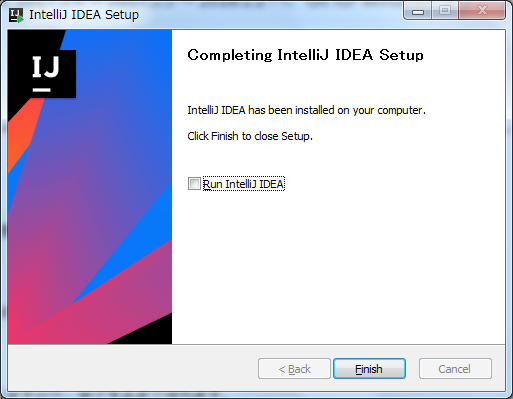
インストールが完了すると「Completing IntelliJ IDEA Setup」画面が表示されます。「Finish」ボタンをクリックしてダイアログを閉じます。
C:\IntelliJ_IDEA\2018.1.2\bin\idea64.exe を実行します。
「Complete Installation」ダイアログが表示されます。何も変更せずに「OK」ボタンをクリックします。

IntelliJ IDEA のメイン画面が表示され画面下部に「Indexing…」のメッセージが表示されますので、終了するまで待機します。

Plugin が全て最新にアップデートされていないようなので先にアップデートします。IntelliJ IDEA のメインメニューから「Help」-「Check for Updates...」を選択します。
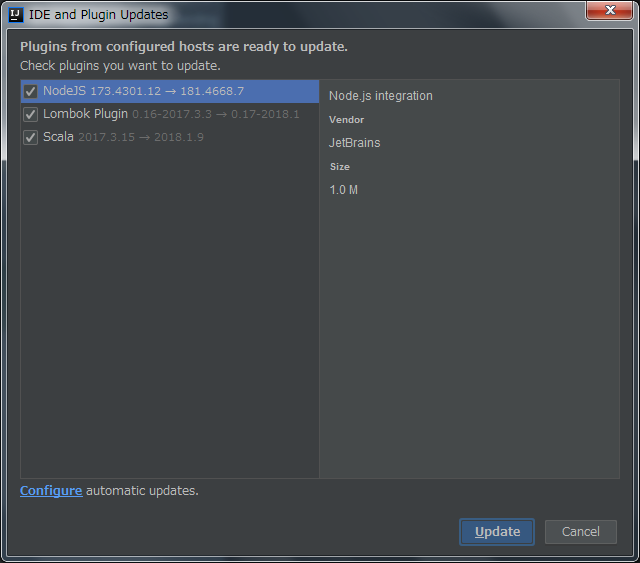
「IDE and Plugin Updates」ダイアログが表示されます。何も変更せずに「Update」ボタンをクリックします。
Patch がダウンロードされた後、IntelliJ IDEA を再起動します。再起動後、画面下部に「Indexing…」のメッセージが表示されますので、終了するまで待機します。
IntelliJ IDEA のメインメニューから「Help」-「About」を選択し、2018.1.2 へバージョンアップされていることを確認します。
Gradle Tool Window のツリーを見ると「Tasks」の下に「other」しかない状態になっているので、左上にある「Refresh all Gradle projects」ボタンをクリックして更新します。

clean タスク実行 → Rebuild Project 実行 → build タスクを実行して、"BUILD SUCCESSFUL" のメッセージが出力されることを確認します。
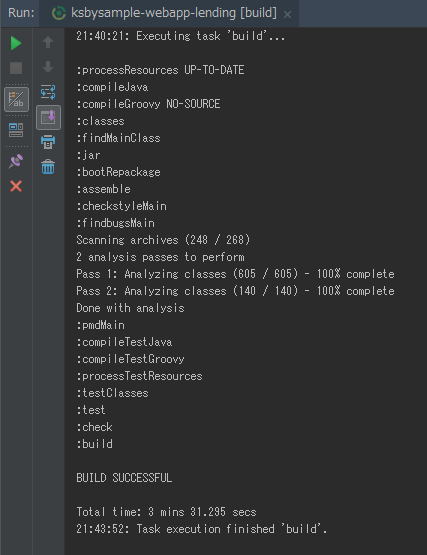
Project Tool Window で src/test を選択した後、コンテキストメニューを表示して「Run 'All Tests' with Coverage」を選択し、テストが全て成功することを確認します。。。が、かなりのテストが失敗しました。

java.lang.RuntimeException: java.nio.file.NoSuchFileException: src\test\resources\testdata\base\table-ordering.txtというエラーが出力されています。gradle からのテストは成功しているので、IntelliJ IDEA からテストを実行する時のカレントディレクトリが変わったような気がします。IntelliJ IDEA のメインメニューから「Run」-「Edit Configurations...」を選択して「Run/Debug Configurations」ダイアログを表示し、JUnit の設定を見ると「Working directory」という項目があり
$MODULE_DIR$という値が設定されています。
右側の「...」ボタンを押すと C:\project-springboot\ksbysample-webapp-lending.idea\modules が表示されました。プロジェクトのルートディレクトリではありませんね。。。

「Working directory」の設定をクリアしてテストが成功するようになるか試してみます。

IntelliJ IDEA の画面右上で「All in ksbysample-webapp-lending_test」の Configuration を選択した後 Run ボタンを押すと、

今度は全てのテストが成功しました。「Working directory」の設定をクリアしても問題なさそうです。

再び IntelliJ IDEA のメインメニューから「Run」-「Edit Configurations...」を選択して「Run/Debug Configurations」ダイアログを表示します。左の一覧から「Defaults」-「JUnit」を選択し、画面右側で「Working directory」を空にして「OK」ボタンをクリックします。

Project Tool Window で src/test を選択した後、コンテキストメニューを表示して「Run 'All Tests' with Coverage」を選択すると、今度はテストが全て成功しました。

前回のバージョンアップ時に削除しなかった C:\Users\root.IntelliJIdea2017.2 と、C:\Users\root.IntelliJIdea2017.3 を削除します。
Git for Windows を 2.16.2 → 2.17.0 へバージョンアップする
Git for Windows の 2.17.0 がリリースされていたのでバージョンアップします。
https://git-for-windows.github.io/ の「Download」ボタンをクリックして Git-2.17.0-64-bit.exe をダウンロードします。
「Git 2.17.0 Setup」ダイアログが表示されます。[Next >]ボタンをクリックします。
「Select Components」画面が表示されます。「Git LFS(Large File Support)」だけチェックした状態で [Next >]ボタンをクリックします。
「Choosing the default editor used by Git」画面が表示されます。「Use Vim (the ubiquitous text editor) as Git's default editor」が選択された状態で [Next >]ボタンをクリックします。
「Adjusting your PATH environment」画面が表示されます。中央の「Use Git from the Windows Command Prompt」が選択されていることを確認後、[Next >]ボタンをクリックします。
「Choosing HTTPS transport backend」画面が表示されます。「Use the OpenSSL library」が選択されていることを確認後、[Next >]ボタンをクリックします。
「Configuring the line ending conversions」画面が表示されます。一番上の「Checkout Windows-style, commit Unix-style line endings」が選択されていることを確認した後、[Next >]ボタンをクリックします。
「Configuring the terminal emulator to use with Git Bash」画面が表示されます。「Use Windows'default console window」が選択されていることを確認した後、[Next >]ボタンをクリックします。
「Configuring extra options」画面が表示されます。「Enable file system caching」だけがチェックされていることを確認した後、[Install]ボタンをクリックします。
インストールが完了すると「Completing the Git Setup Wizard」のメッセージが表示された画面が表示されます。中央の「View Release Notes」のチェックを外した後、「Finish」ボタンをクリックしてインストーラーを終了します。
コマンドプロンプトを起動して
git --versionを実行し、git のバージョンがgit version 2.17.0.windows.1になっていることを確認します。
git-cmd.exe を起動して日本語の表示・入力が問題ないかを確認します。

特に問題はないようですので、2.17.0 で作業を進めたいと思います。
Spring Boot + npm + Geb で入力フォームを作ってテストする ( その49 )( 入力画面3を作成する2 )
概要
記事一覧はこちらです。
Spring Boot + npm + Geb で入力フォームを作ってテストする ( その48 )( 入力画面3を作成する ) の続きです。
- 今回の手順で確認できるのは以下の内容です。
- 入力画面3の作成
- 「アンケート」の項目には、DB に専用のテーブルを作成して、そこに登録されたデータから動的に表示する処理を実装します。
参照したサイト・書籍
- Conditionally closing tag in Thymeleaf
https://stackoverflow.com/questions/36747620/conditionally-closing-tag-in-thymeleaf
目次
- アンケートに表示する項目を定義するテーブルを Database Tools で作成する
- 作成した create table 文を Flyway 用の SQL ファイル V1__init.sql に追加する
- Doma-Gen で entity クラス, dao インターフェースを生成する
- SurveyOptionsHelper クラスを作成する
- SurveyOptionsHelper クラスのテストを作成する
- input03.html を修正する&動作確認
手順
アンケートに表示する項目を定義するテーブルを Database Tools で作成する
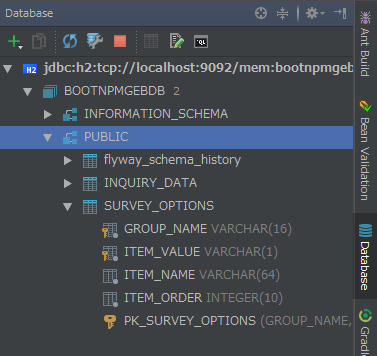
Spring Boot + npm + Geb で入力フォームを作ってテストする ( その16 )( H2 Database に Flyway でテーブルを作成する ) を参考に、Tomcat を起動して Database Tools で in-memory モードの H2 Database に接続し、PUBLIC スキーマを選択してコンテキストメニューを表示した後、「New」-「Table」を選択します。
「Create New Table」ダイアログが表示されるので、以下の画像のようにテーブルを定義します。

ダイアログの下の「SQL Script」に生成された SQL は以下のようになります。
CREATE TABLE SURVEY_OPTIONS
(
    group_name VARCHAR(16) NOT NULL,
    item_value VARCHAR(1) NOT NULL,
    item_name VARCHAR(64) NOT NULL,
    item_order INT NOT NULL,
    CONSTRAINT PK_SURVEY_OPTIONS PRIMARY KEY (group_name, item_value)
);
「Execute」ボタンをクリックするとテーブルが作成されて、Database Tools 上に SURVEY_OPTIONS テーブルが表示されます。
作成した create table 文を Flyway 用の SQL ファイル V1__init.sql に追加する
作成した create table 文とデータを投入する insert 文を src/main/resources/db/migration/V1__init.sql の中に記述します。
CREATE TABLE INQUIRY_DATA
(
    ..........
);

CREATE TABLE SURVEY_OPTIONS
(
  group_name VARCHAR(16) NOT NULL,
  item_value VARCHAR(1) NOT NULL,
  item_name VARCHAR(64) NOT NULL,
  item_order INT NOT NULL,
  CONSTRAINT PK_SURVEY_OPTIONS PRIMARY KEY (group_name, item_value)
);
INSERT INTO SURVEY_OPTIONS VALUES ('survey', '1', '選択肢1だけ長くしてみる', 1);
INSERT INTO SURVEY_OPTIONS VALUES ('survey', '2', '選択肢2', 2);
INSERT INTO SURVEY_OPTIONS VALUES ('survey', '3', '選択肢3', 3);
INSERT INTO SURVEY_OPTIONS VALUES ('survey', '4', '選択肢4', 4);
INSERT INTO SURVEY_OPTIONS VALUES ('survey', '5', '選択肢5が少し長い', 5);
INSERT INTO SURVEY_OPTIONS VALUES ('survey', '6', '選択肢6', 6);
INSERT INTO SURVEY_OPTIONS VALUES ('survey', '7', '選択肢7', 7);
INSERT INTO SURVEY_OPTIONS VALUES ('survey', '8', '8', 8);
Tomcat を再起動すると SURVEY_OPTIONS テーブルが作成されてデータもセットされていることが確認できます。


Doma-Gen で entity クラス, dao インターフェースを生成する
build.gradle の domaGen タスクを変更し、Tomcat を起動した状態で entity クラス, dao インターフェースを生成します。
build.gradle を以下のように変更します。
// for Doma-Gen
task domaGen {
    doLast {
        // まず変更が必要なもの
        def rootPackageName = 'ksbysample.webapp.bootnpmgeb'
        def rootPackagePath = 'src/main/java/ksbysample/webapp/bootnpmgeb'
        def dbUrl = 'jdbc:h2:tcp://localhost:9092/mem:bootnpmgebdb'
        def dbUser = 'sa'
        def dbPassword = ''
        def tableNamePattern = 'SURVEY_OPTIONS'
        // おそらく変更不要なもの
        ..........
- domaGen タスクの以下の点を変更します。
tableNamePatternを.*→SURVEY_OPTIONSに変更します。
Gradle Tool Window から domaGen タスクを実行します。"BUILD SUCCESSFUL" が表示されました。

Project Tool Window を見ると SurveyOptionsDao インターフェース、SurveyOptions クラスが作成されています。

domaGen タスクの tableNamePattern は .* に戻します。
SurveyOptionsHelper クラスを作成する
SURVEY_OPTIONS テーブルのデータを取得して Thymeleaf テンプレートに出力するための SurveyOptionsHelper クラスを作成します。
まずは src/main/java/ksbysample/webapp/bootnpmgeb/dao/SurveyOptionsDao.java の以下の点を変更します。
@Dao
@ComponentAndAutowiredDomaConfig
public interface SurveyOptionsDao {

    /**
     * @param groupName groupName
     * @param itemValue itemValue
     * @return the SurveyOptions entity
     */
    @Select
    SurveyOptions selectById(String groupName, String itemValue);

    /**
     * 指定されたグループ名のレコードのリストを取得する
     *
     * @param groupName グループ名
     * @return {@SurveyOptions} エンティティのリスト
     */
    @Select
    List<SurveyOptions> selectByGroupName(String groupName);

    ..........
- selectByGroupName メソッドを追加します。
src/main/resources/META-INF/ksbysample/webapp/bootnpmgeb/dao/SurveyOptionsDao/selectByGroupName.sql を新規作成し、以下の内容を記述します。
select
  /*%expand*/*
from
  SURVEY_OPTIONS
where
  GROUP_NAME = /* groupName */'survey'
order by
  ITEM_ORDER
ksbysample.webapp.bootnpmgeb.helper の下に db パッケージを新規作成します。その下に SurveyOptionsHelper.java を新規作成し、以下の内容を記述します。
package ksbysample.webapp.bootnpmgeb.helper.db;

import ksbysample.webapp.bootnpmgeb.dao.SurveyOptionsDao;
import ksbysample.webapp.bootnpmgeb.entity.SurveyOptions;
import org.springframework.stereotype.Component;
import org.springframework.util.CollectionUtils;

import java.util.List;

/**
 * SURVEY_OPTIONS テーブルデータ取得用 Helper クラス
 */
@Component("soh")
public class SurveyOptionsHelper {

    private final SurveyOptionsDao surveyOptionsDao;

    /**
     * コンストラクタ
     *
     * @param surveyOptionsDao {@SurveyOptionsDao} オブジェクト
     */
    public SurveyOptionsHelper(SurveyOptionsDao surveyOptionsDao) {
        this.surveyOptionsDao = surveyOptionsDao;
    }

    /**
     * SURVEY_OPTIONS テーブルから指定されたグループ名のリストを取得する
     *
     * @param groupName グループ名
     * @return {@SurveyOptions} オブジェクトのリスト
     */
    public List<SurveyOptions> selectItemList(String groupName) {
        List<SurveyOptions> surveyOptionsList = surveyOptionsDao.selectByGroupName(groupName);
        if (CollectionUtils.isEmpty(surveyOptionsList)) {
            throw new IllegalArgumentException("指定されたグループ名のデータは登録されていません");
        }
        return surveyOptionsList;
    }

}
SurveyOptionsHelper クラスのテストを作成する
src/main/java/ksbysample/webapp/bootnpmgeb/helper/db/SurveyOptionsHelper.java で Ctrl+Shift+T を押してコンテキストメニューを表示した後、「Create New Test...」を選択します。
src/test/groovy/ksbysample/webapp/bootnpmgeb/helper/db/SurveyOptionsHelperTest.groovy が新規作成されますので、以下の内容を記述します。
package ksbysample.webapp.bootnpmgeb.helper.db

import ksbysample.webapp.bootnpmgeb.entity.SurveyOptions
import org.springframework.beans.factory.annotation.Autowired
import org.springframework.boot.test.context.SpringBootTest
import spock.lang.Specification

@SpringBootTest
class SurveyOptionsHelperTest extends Specification {

    @Autowired
    private SurveyOptionsHelper soh

    def "登録されているグループ名を指定してselectItemListメソッドを呼ぶとリストが取得できる"() {
        setup:
        List<SurveyOptions> surveyOptionsList = soh.selectItemList("survey")

        expect:
        surveyOptionsList.size() == 8
        surveyOptionsList[0].itemValue == "1"
        surveyOptionsList[0].itemName == "選択肢1だけ長くしてみる"
        surveyOptionsList[7].itemValue == "8"
        surveyOptionsList[7].itemName == "8"
    }

    def "登録されていないグループ名を指定してselectItemListメソッドを呼ぶとIllegalArgumentExceptionがthrowされる"() {
        when:
        List<SurveyOptions> surveyOptionsList = soh.selectItemList("notexists")

        then:
        def e = thrown(IllegalArgumentException)
        e.getMessage() == "指定されたグループ名のデータは登録されていません"
    }

}
テストを実行して成功することを確認します。

input03.html を修正する&動作確認
「アンケート」の項目を SurveyOptionsHelper クラスを利用して SURVEY_OPTIONS テーブルのデータを出力するように src/main/resources/templates/web/inquiry/input03.html を以下のように変更します。
            <div class="form-group" id="form-group-survey">
              <div class="control-label col-sm-2">
                <label class="float-label">アンケート</label>
              </div>
              <div class="col-sm-10" id="multiline-checkbox">
                <th:block th:each="surveyOptions,iterStat : ${@soh.selectItemList('survey')}">
                  <th:block th:if="${iterStat.index % 3 == 0}">
                  <div class="row"><div class="col-sm-12">
                    <div class="checkbox">
                  </th:block>

                  <label><input type="checkbox" name="survey" th:value="${surveyOptions.itemValue}">
                    <th:block th:text="${surveyOptions.itemName}">選択肢1だけ長くしてみる</th:block>
                  </label>

                  <th:block th:if="${iterStat.index % 3 == 2 || iterStat .last}">
                    </div>
                  </div></div>
                  </th:block>
                </th:block>
              </div>
            </div>
Tomcat を起動して入力画面3を表示してみましたが、ボタンの表示位置がおかしいですね。。。

html を見ると、最初の <th:block th:if="${iterStat.index % 3 == 0}">...</th:block> は正常に動作していますが、後の <th:block th:if="${iterStat.index % 3 == 2 || iterStat.last}"></div>...</th:block> が最後しか出力されておらず正常に動作していませんでした。</th:block> も最後に2つそのまま出力されています。どうも Thymeleaf では閉じタグ側を動的に出力させる書き方ができないようです。
            <div class="form-group" id="form-group-survey">
              <div class="control-label col-sm-2">
                <label class="float-label">アンケート</label>
              </div>
              <div class="col-sm-10" id="multiline-checkbox">
                  <div class="row"><div class="col-sm-12">
                    <div class="checkbox">
                  <label><input type="checkbox" name="survey" value="1">
                    選択肢1だけ長くしてみる
                  </label>
                  <label><input type="checkbox" name="survey" value="2">
                    選択肢2
                  </label>
                  <label><input type="checkbox" name="survey" value="3">
                    選択肢3
                  </label>

                  <div class="row"><div class="col-sm-12">
                    <div class="checkbox">
                  <label><input type="checkbox" name="survey" value="4">
                    選択肢4
                  </label>
                  <label><input type="checkbox" name="survey" value="5">
                    選択肢5が少し長い
                  </label>
                  <label><input type="checkbox" name="survey" value="6">
                    選択肢6
                  </label>

                  <div class="row"><div class="col-sm-12">
                    <div class="checkbox">
                  <label><input type="checkbox" name="survey" value="7">
                    選択肢7
                  </label>
                  <label><input type="checkbox" name="survey" value="8">
                    8
                  </label>
                    </div>
                  </div></div>
                  </th:block>
                </th:block>
              </div>
stackoverflow で調べてみると Conditionally closing tag in Thymeleaf というページを見つけました。今回は th:utext を使用する方法に変更してみます。
src/main/resources/templates/web/inquiry/input03.html を以下のように変更します。
<div class="form-group" id="form-group-survey"> <div class="control-label col-sm-2"> <label class="float-label">アンケート</label> </div> <div class="col-sm-10" id="multiline-checkbox"> <th:block th:each="surveyOptions,iterStat : ${@soh.selectItemList('survey')}"> <th:block th:if="${iterStat.index % 3 == 0}" th:utext="'<div class="row"><div class="col-sm-12"><div class="checkbox">'"/> <label><input type="checkbox" name="survey" th:value="${surveyOptions.itemValue}"> <th:block th:text="${surveyOptions.itemName}">選択肢1だけ長くしてみる</th:block> </label> <th:block th:if="${iterStat.index % 3 == 2 || iterStat.last}" th:utext="'</div></div></div>'"/> </th:block> </div> </div>
- 上下の条件を満たした時に div タグを出力する処理を
<th:block th:if="..." th:utext="..."/>の形式に変更します。 th:utextの中に書く HTML 文は<→<へ、>→>へ、”→"へ変換します。
今度は画面も問題なく表示されました。

html を見てもきちんと閉じタグが出力されています。
            <div class="form-group" id="form-group-survey">
              <div class="control-label col-sm-2">
                <label class="float-label">アンケート</label>
              </div>
              <div class="col-sm-10" id="multiline-checkbox">
                  <div class="row"><div class="col-sm-12"><div class="checkbox">
                  <label><input type="checkbox" name="survey" value="1">
                    選択肢1だけ長くしてみる
                  </label>
                  <label><input type="checkbox" name="survey" value="2">
                    選択肢2
                  </label>
                  <label><input type="checkbox" name="survey" value="3">
                    選択肢3
                  </label>
                  </div></div></div>

                  <div class="row"><div class="col-sm-12"><div class="checkbox">
                  <label><input type="checkbox" name="survey" value="4">
                    選択肢4
                  </label>
                  <label><input type="checkbox" name="survey" value="5">
                    選択肢5が少し長い
                  </label>
                  <label><input type="checkbox" name="survey" value="6">
                    選択肢6
                  </label>
                  </div></div></div>

                  <div class="row"><div class="col-sm-12"><div class="checkbox">
                  <label><input type="checkbox" name="survey" value="7">
                    選択肢7
                  </label>
                  <label><input type="checkbox" name="survey" value="8">
                    8
                  </label>
                  </div></div></div>
              </div>
            </div>
履歴
2018/04/25
初版発行。
Spring Boot + npm + Geb で入力フォームを作ってテストする ( その48 )( 入力画面3を作成する )
概要
記事一覧はこちらです。
- 今回の手順で確認できるのは以下の内容です。
- 入力画面3の作成
参照したサイト・書籍
目次
- 入力画面3は何をする?
- 「お問い合わせの種類2」を必須にする
- 変換&入力チェック処理の仕様を決める
- お問い合わせの内容の textarea タグに maxlength 属性を追加する
- お問い合わせの種類1、お問い合わせの種類2の選択肢を表示する処理を追加する
手順
入力画面3は何をする?
久しぶりに画面の作成に戻ってきましたが、入力画面3で何をするつもりだったか忘れていました。。。 ということでまとめます。
- 「お問い合わせの種類1」はドロップダウンリストの、「お問い合わせの種類2」はチェックボックスのサンプルです。選択肢は固定です(Enum で定義します)。
- 「お問い合わせの内容」はテキストエリアのサンプルです。最大500文字の制限を付けます。
- 「アンケート」は専用のテーブルを作成して、そこに登録されたデータから動的に表示します。
- Spring Boot + npm + Geb で入力フォームを作ってテストする ( その9 )( 各画面の HTML を作成する2 ) で入力画面3を作成した時は「お問い合わせの種類1」「お問い合わせの内容」だけ必須にしていましたが、チェックボックスの必須チェックのサンプルも作成しておきたいので「お問い合わせの種類2」も必須に変更します。
「お問い合わせの種類2」を必須にする
src/main/resources/templates/web/inquiry/input03.html を以下のように変更します。
            <!-- お問い合わせの種類2 -->
            <div class="form-group" id="form-group-type2">
              <div class="control-label col-sm-2">
                <label class="float-label">お問い合わせの種類2</label>
                <div class="label label-required">必須</div>
              </div>
<div class="label label-required">必須</div>を追加します。
画面は以下のようになります。

変換&入力チェック処理の仕様を決める
各項目で以下の変換&入力チェック処理を行います。
| 項目 | 変換&入力チェック処理 |
|---|---|
| お問い合わせの種類1 | 必須チェック |
| お問い合わせの種類2 | 必須チェック |
| お問い合わせの内容 | 必須チェック |
- 「お問い合わせの内容」の最大文字数は maxlength 属性で制御されている前提とし、Javascript ではチェックしません(サーバ側では文字数チェックは行います)。
お問い合わせの内容の textarea タグに maxlength 属性を追加する
「お問い合わせ内容」の <textarea rows="5" name="inquiry" ...> に maxlength="500" を追加します。
お問い合わせの種類1、お問い合わせの種類2の選択肢を表示する処理を追加する
まずは「お問い合わせの種類1」からです。src/main/java/ksbysample/webapp/bootnpmgeb/values の下に Type1Values.java を新規作成し、以下の内容を記述します。
package ksbysample.webapp.bootnpmgeb.values;

import lombok.AllArgsConstructor;
import lombok.Getter;

@SuppressWarnings("MissingOverride")
@Getter
@AllArgsConstructor
public enum Type1Values implements Values {

    PRODUCT("1", "製品に関するお問い合わせ")
    , RECRUIT("2", "人事・採用情報")
    , OTHER("3", "その他");

    private final String value;
    private final String text;

}
src/main/resources/templates/web/inquiry/input03.html の「お問い合わせの種類1」の部分を以下のように変更します。
            <!-- お問い合わせの種類1 -->
            <div class="form-group" id="form-group-type1">
              <div class="control-label col-sm-2">
                <label class="float-label">お問い合わせの種類1</label>
                <div class="label label-required">必須</div>
              </div>
              <div class="col-sm-10">
                <div class="row"><div class="col-sm-10">
                  <select name="type1" id="type1" class="form-control" style="width: 250px;" autofocus>
                    <th:block th:each="type1Value,iterStat : ${@vh.values('Type1Values')}">
                      <option value="" th:if="${iterStat.first}">選択してください</option>
                      <option th:value="${type1Value.value}" th:text="${type1Value.text}"></option>
                    </th:block>
                  </select>
                </div></div>
                <div class="row hidden js-errmsg"><div class="col-sm-10"><p class="form-control-static text-danger"><small>ここにエラーメッセージを表示します</small></p></div></div>
              </div>
            </div>
次は「お問い合わせの種類2」です。src/main/java/ksbysample/webapp/bootnpmgeb/values の下に Type2Values.java を新規作成し、以下の内容を記述します。
package ksbysample.webapp.bootnpmgeb.values;

import lombok.AllArgsConstructor;
import lombok.Getter;

@SuppressWarnings("MissingOverride")
@Getter
@AllArgsConstructor
public enum Type2Values implements Values {

    ESTIMATE("1", "見積が欲しい")
    , CATALOGUE("2", "資料が欲しい")
    , OTHER("3", "その他の問い合わせ");

    private final String value;
    private final String text;

}
src/main/resources/templates/web/inquiry/input03.html の「お問い合わせの種類2」の部分を以下のように変更します。
            <!-- お問い合わせの種類2 -->
            <div class="form-group" id="form-group-type2">
              <div class="control-label col-sm-2">
                <label class="float-label">お問い合わせの種類2</label>
                <div class="label label-required">必須</div>
              </div>
              <div class="col-sm-10">
                <div class="row"><div class="col-sm-10">
                  <div class="checkbox">
                    <th:block th:each="type2Value : ${@vh.values('Type2Values')}">
                      <label>
                        <input type="checkbox" name="type2" th:value="${type2Value.value}">
                        <th:block th:text="${type2Value.text}">見積が欲しい</th:block>
                      </label>
                    </th:block>
                  </div>
                </div></div>
                <div class="row hidden js-errmsg"><div class="col-sm-10"><p class="form-control-static text-danger"><small>ここにエラーメッセージを表示します</small></p></div></div>
              </div>
            </div>
画面を表示すると「性別」「職業」どちらも問題なく表示されています。

履歴
2018/04/17
初版発行。
Spring Boot + npm + Geb で入力フォームを作ってテストする ( その47 )( Node.js を 8.9.1 → 8.9.4 へ、npm を 5.5.1 → 5.6.0 へバージョンアップする )
概要
記事一覧はこちらです。
- 今回の手順で確認できるのは以下の内容です。
- Javascript 側のライブラリ/モジュールをバージョンアップします。Node.js や npm も最新版にバージョンアップします。
参照したサイト・書籍
目次
- Node.js を 8.9.1 → 8.9.4 へ、npm を 5.5.1 → 5.6.0 へバージョンアップする
- モジュールを最新版にバージョンアップする
- eslint を 4.10.0 → 4.18.1 へバージョンアップする
- windows-build-tools を 1.3.2 → 2.2.1 へ、jest を 21.2.1 → 22.4.2 へバージョンアップする
手順
Node.js を 8.9.1 → 8.9.4 へ、npm を 5.5.1 → 5.6.0 へバージョンアップする
nodist dist コマンドを実行して 8.9.4 がインストール可能か確認します。


8.9.4 が表示されていますので、8.9.4 へバージョンアップします。

npm も最新版にバージョンアップします。npm の最新バージョンは https://docs.npmjs.com/ の一番下を見ると 5.6.0 とありましたので、

5.6.0 にバージョンアップします。

モジュールを最新版にバージョンアップする
バージョンアップ可能なモジュールを確認します。IntelliJ IDEA のメインメニューから「File」-「Settings...」を選択して「Settings」ダイアログを開き、画面左側で「Language & Frameworks」-「Node.js and NPM」を選択します。
画面右側にモジュールの一覧と現行バージョン、最新バージョン一覧が表示されます。

今回モジュール一覧には以下のように表示されました。


今回は以下の方針でバージョンアップします。
- bootstrap は現行のまま。4.0.0 にはバージョンアップしない。
- webpack は現行のまま。4.0.1 にはバージョンアップしない。
- バージョンアップは
npm updateではなくnpm install --save-dev autoprefixer@8.0.0(package.json の dependencies に記載されているものは --save、devDependencies に記載されているものは --save-dev にする) のようにバージョンを指定しながらバージョンアップする。 - 1つずつ上からバージョンアップする。関連しそうなところを動作確認しながら進める。
- eslint、jest + widows-build-tools は別に章を分けてバージョンアップする。
特に問題がでなければ画面キャプチャは撮りません。
npm install --save-dev autoprefixer@8.0.0npm install --save axios@0.18.0npm install --save-dev browser-sync@2.23.6npm install --save jquery@3.3.1npm install --save-dev jquery-mockjax@2.3.0npm install --save mobx@3.5.1npm install --save-dev nock@9.2.2npm install --save-dev npm-run-all@4.1.2- postcss-cli は 5.0.0 にバージョンアップすると画面の表示が崩れたので 4.1.1 のままにします。
npm install --save-dev stylelint@9.1.1npm install --save-dev stylelint-config-standard@18.1.0npm install --save-dev uglifyjs-webpack-plugin@1.2.2- xhr-mock は 2.2.0 にバージョンアップすると
npm run testでエラーが出たので 1.9.1 のままにします。
eslint を 4.10.0 → 4.18.1 へバージョンアップする
以下のコマンドを実行します。
npm install --save-dev eslint@4.18.1npm install --save-dev eslint-loader@2.0.0npm install --save-dev eslint-plugin-import@2.9.0
npm run build コマンドを実行してみると、特にエラーは出ずに終了しました。

windows-build-tools を 1.3.2 → 2.2.1 へ、jest を 21.2.1 → 22.4.2 へバージョンアップする
コマンドプロンプトを「管理者として実行...」で起動した後、npm install --global --production windows-build-tools@2.2.1 を実行します。

次に普通に起動したコマンドプロンプトで npm install --save-dev jest@22.4.2 を実行します。

npm install --save-dev jest-html-reporter@2.0.0 も実行します。

以前からバージョンアップ後に失敗していた Form.test.js のテストを実行すると、今度は成功しました。

Jest 用のテストを全て実行してみます。IntelliJ IDEA のメインメニューから「Run」-「Edit Configurations...」を選択して「Run/Debug Configurations」ダイアログを表示した後、以下の画像のように設定します。

テストを実行してみると1つだけ失敗しました。


失敗したテストは以下のコードです。

調査しましたが、原因が全く分かりませんでした。。。 以下の点は分かったのですが、そこからどうすれば良いのかが分かりません。先に進みたいのでコメントアウトすることにします。
$.ajaxでdataType: "jsonp"を指定していると 郵便番号検索API を呼び出してから戻ってこない。dataType: "jsonp"を削除するとError: Cross origin null forbiddenというエラーメッセージが表示される。
再度 IntelliJ IDEA から Jest 用のテストを全て実行すると今度は成功しました。

jest-html-reporter のレポートも問題なく表示されていました。npm run test を実行してレポートを生成すると、以下のように表示されました(エラーが出た時と正常時の時のキャプチャを載せておきます)。


履歴
2018/03/05
初版発行。
Spring Boot + npm + Geb で入力フォームを作ってテストする ( その46 )( Spring Boot を 1.5.9 → 1.5.10 へ、error-prone を 2.1.3 → 2.2.0 へ、Geb を 2.0 → 2.1 へバージョンアップする )
概要
記事一覧はこちらです。
- 今回の手順で確認できるのは以下の内容です。
- 入力画面3以降の作成を進める前にライブラリ/モジュールを一通りバージョンアップすることにします。
- 2回に分けて、今回は Java 側、次回は Javascript 側のライブラリ/モジュールをバージョンアップします。
参照したサイト・書籍
目次
- Spring Boot を 1.5.9 → 1.5.10 へバージョンアップする(他のライブラリもバージョンアップする)
- error-prone を 2.1.3 → 2.2.0 へバージョンアップする
- Geb を 2.0 → 2.1 へバージョンアップする
手順
Spring Boot を 1.5.9 → 1.5.10 へバージョンアップする(他のライブラリもバージョンアップする)
build.gradle の以下の点を変更します。
group 'ksbysample'
version '1.0.0-RELEASE'

buildscript {
    ext {
        springBootVersion = '1.5.10.RELEASE'
    }
    repositories {
        mavenCentral()
        maven { url "https://plugins.gradle.org/m2/" }
    }
    dependencies {
        classpath("org.springframework.boot:spring-boot-gradle-plugin:${springBootVersion}")
        // for Error Prone ( http://errorprone.info/ )
        classpath("net.ltgt.gradle:gradle-errorprone-plugin:0.0.13")
        classpath("com.moowork.gradle:gradle-node-plugin:1.2.0")
    }
}

apply plugin: 'java'
apply plugin: 'eclipse'
apply plugin: 'idea'
apply plugin: 'org.springframework.boot'
apply plugin: 'groovy'
apply plugin: 'net.ltgt.errorprone'
apply plugin: 'checkstyle'
apply plugin: 'findbugs'
apply plugin: 'pmd'
apply plugin: 'com.moowork.node'

sourceCompatibility = 1.8
targetCompatibility = 1.8

task wrapper(type: Wrapper) {
    gradleVersion = '3.5'
}

[compileJava, compileTestGroovy, compileTestJava]*.options*.compilerArgs = ['-Xlint:all,-options,-processing,-path']
compileJava.options.compilerArgs += [
        '-Xep:RemoveUnusedImports:WARN'
        , '-Xep:NestedInstanceOfConditions:OFF'
        , '-Xep:InstanceOfAndCastMatchWrongType:OFF'
        , '-Xep:ParameterName:OFF'
]

// for Doma 2
// JavaクラスとSQLファイルの出力先ディレクトリを同じにする
processResources.destinationDir = compileJava.destinationDir
// コンパイルより前にSQLファイルを出力先ディレクトリにコピーするために依存関係を逆転する
compileJava.dependsOn processResources

idea {
    module {
        inheritOutputDirs = false
        outputDir = file("$buildDir/classes/main/")
    }
}

configurations {
    // for Doma 2
    domaGenRuntime
}

checkstyle {
    configFile = file("${rootProject.projectDir}/config/checkstyle/google_checks.xml")
    toolVersion = '8.8'
    sourceSets = [project.sourceSets.main]
}

findbugs {
    toolVersion = '3.0.1'
    sourceSets = [project.sourceSets.main]
    ignoreFailures = true
    effort = "max"
    excludeFilter = file("${rootProject.projectDir}/config/findbugs/findbugs-exclude.xml")
}

tasks.withType(FindBugs) {
    // Gradle 3.3以降 + FindBugs Gradle Plugin を組み合わせると、"The following errors occurred during analysis:"
    // の後に "Cannot open codebase filesystem:..." というメッセージが大量に出力されるので、以下の doFirst { ... }
    // のコードを入れることで出力されないようにする
    doFirst {
        def fc = classes
        if (fc == null) {
            return
        }
        fc.exclude '**/*.properties'
        fc.exclude '**/*.sql'
        fc.exclude '**/*.xml'
        fc.exclude '**/META-INF/**'
        fc.exclude '**/static/**'
        fc.exclude '**/templates/**'
        classes = files(fc.files)
    }
    reports {
        xml.enabled = false
        html.enabled = true
    }
}

pmd {
    toolVersion = "6.1.0"
    sourceSets = [project.sourceSets.main]
    ignoreFailures = true
    consoleOutput = true
    ruleSetFiles = rootProject.files("/config/pmd/pmd-project-rulesets.xml")
    ruleSets = []
}

//task npmTest(type: NpmTask) {
//    args = ["test"]
//}
task npmTest(type: Exec) {
    commandLine "cmd", "/c", "npm test >NUL 2>&1"
}
task npmBuild(type: Exec) {
    commandLine "cmd", "/c", "npm run build >NUL 2>&1"
}
npmBuild.dependsOn npmTest
processResources.dependsOn npmBuild

repositories {
    mavenCentral()
}

dependencyManagement {
    imports {
        // BOM は https://repo.spring.io/release/io/spring/platform/platform-bom/Brussels-SR6/
        // の下を見ること
        mavenBom("io.spring.platform:platform-bom:Brussels-SR7") {
            bomProperty 'guava.version', '22.0'
            bomProperty 'thymeleaf.version', '3.0.9.RELEASE'
            bomProperty 'thymeleaf-extras-springsecurity4.version', '3.0.2.RELEASE'
            bomProperty 'thymeleaf-layout-dialect.version', '2.2.2'
            bomProperty 'thymeleaf-extras-data-attribute.version', '2.0.1'
            bomProperty 'thymeleaf-extras-java8time.version', '3.0.1.RELEASE'
        }
    }
}

bootRepackage {
    mainClass = 'ksbysample.webapp.lending.Application'
}

dependencies {
    def spockVersion = "1.1-groovy-2.4"
    def domaVersion = "2.19.1"
    def lombokVersion = "1.16.20"
    def errorproneVersion = "2.1.3"
    def powermockVersion = "1.7.3"
    def seleniumVersion = "3.6.0"

    // dependency-management-plugin によりバージョン番号が自動で設定されるもの
    // Appendix A. Dependency versions ( http://docs.spring.io/platform/docs/current/reference/htmlsingle/#appendix-dependency-versions ) 参照
    compile("org.springframework.boot:spring-boot-starter-web")
    compile("org.springframework.boot:spring-boot-starter-thymeleaf") {
        exclude group: "org.codehaus.groovy", module: "groovy"
    }
    compile("org.springframework.boot:spring-boot-starter-data-jpa")
    compile("org.springframework.boot:spring-boot-starter-freemarker")
    compile("org.springframework.boot:spring-boot-starter-mail")
    compile("org.springframework.boot:spring-boot-starter-security")
    compile("org.springframework.boot:spring-boot-devtools")
    compile("org.springframework.session:spring-session")
    compile("com.google.guava:guava")
    compile("org.apache.commons:commons-lang3")
    compile("org.codehaus.janino:janino")
    testCompile("org.springframework.boot:spring-boot-starter-test")
    testCompile("org.springframework.security:spring-security-test")
    testCompile("org.yaml:snakeyaml")
    testCompile("org.mockito:mockito-core")

    // dependency-management-plugin によりバージョン番号が自動で設定されないもの、あるいは最新バージョンを指定したいもの
    compile("com.integralblue:log4jdbc-spring-boot-starter:1.0.2")
    compile("org.flywaydb:flyway-core:5.0.7")
    compile("com.h2database:h2:1.4.192")
    compile("com.github.rozidan:modelmapper-spring-boot-starter:1.0.0")
    testCompile("org.dbunit:dbunit:2.5.4")
    testCompile("com.icegreen:greenmail:1.5.7")
    testCompile("org.assertj:assertj-core:3.9.1")
    testCompile("org.spockframework:spock-core:${spockVersion}")
    testCompile("org.spockframework:spock-spring:${spockVersion}")
    testCompile("com.google.code.findbugs:jsr305:3.0.2")
    testCompile("org.jsoup:jsoup:1.11.2")

    // for lombok
    compileOnly("org.projectlombok:lombok:${lombokVersion}")
    testCompileOnly("org.projectlombok:lombok:${lombokVersion}")

    // for Doma
    compile("org.seasar.doma:doma:${domaVersion}")
    domaGenRuntime("org.seasar.doma:doma-gen:${domaVersion}")
    domaGenRuntime("com.h2database:h2:1.4.192")

    // for Error Prone ( http://errorprone.info/ )
    errorprone("com.google.errorprone:error_prone_core:${errorproneVersion}")
    compileOnly("com.google.errorprone:error_prone_annotations:${errorproneVersion}")

    // PowerMock
    testCompile("org.powermock:powermock-module-junit4:${powermockVersion}")
    testCompile("org.powermock:powermock-api-mockito:${powermockVersion}")

    // for Geb + Spock
    testCompile("org.gebish:geb-spock:2.0")
    testCompile("org.seleniumhq.selenium:selenium-chrome-driver:${seleniumVersion}")
    testCompile("org.seleniumhq.selenium:selenium-firefox-driver:${seleniumVersion}")
    testCompile("org.seleniumhq.selenium:selenium-support:${seleniumVersion}")
    testCompile("org.seleniumhq.selenium:selenium-api:${seleniumVersion}")
    testCompile("org.seleniumhq.selenium:selenium-remote-driver:${seleniumVersion}")
}

..........
buildscriptの以下の点を変更します。springBootVersion = '1.5.9.RELEASE'→springBootVersion = '1.5.10.RELEASE'に変更します。
checkstyleの以下の点を変更します。toolVersion = '8.5'→toolVersion = '8.8'に変更します。
pmdの以下の点を変更します。toolVersion = "5.8.1"→toolVersion = "6.1.0"に変更します。
dependencyManagementの以下の点を変更します。mavenBom("io.spring.platform:platform-bom:Brussels-SR6")→mavenBom("io.spring.platform:platform-bom:Brussels-SR7")に変更します。
dependenciesの以下の点を変更します。def domaVersion = "2.16.1"→def domaVersion = "2.19.1"に変更します。def lombokVersion = "1.16.18"→def lombokVersion = "1.16.20"に変更します。compile("org.flywaydb:flyway-core:4.2.0")→compile("org.flywaydb:flyway-core:5.0.7")に変更します。testCompile("com.icegreen:greenmail:1.5.5")→testCompile("com.icegreen:greenmail:1.5.7")に変更します。testCompile("org.assertj:assertj-core:3.8.0")→testCompile("org.assertj:assertj-core:3.9.1")に変更します。
変更後、Gradle Tool Window の左上にある「Refresh all Gradle projects」ボタンをクリックして更新します。
clean タスク実行 → Rebuild Project 実行 → build タスクを実行してみますが、pmd がなんか大量のメッセージを出力します。。。

メジャーバージョンアップだけあって、結構大きな変更が行われているようです。今回 pmd は toolVersion = "5.8.1" に戻すことにします。
再度 clean タスク実行 → Rebuild Project 実行 → build タスクを実行すると "BUILD SUCCESSFUL" のメッセージが出力されました。

Project Tool Window で src/test/groovy/ksbysample を選択した後、コンテキストメニューを表示して「Run 'Tests in 'ksbysample'' with Coverage」を選択し、テストが全て成功することも確認できました。

error-prone を 2.1.3 → 2.2.0 へバージョンアップする
gradle-errorprone-plugin を見ると最新バージョンは 0.0.13、mvnrepository.com の error_prone_core のページ を見ると最新バージョンは 2.2.0 でした。
build.gradle の以下の点を変更します。
dependencies {
    def spockVersion = "1.1-groovy-2.4"
    def domaVersion = "2.19.1"
    def lombokVersion = "1.16.20"
    def errorproneVersion = "2.2.0"
    def powermockVersion = "1.7.3"
    def seleniumVersion = "3.6.0"

    ..........
dependencies内でdef errorproneVersion = "2.1.3"→def errorproneVersion = "2.2.0"に変更します。
変更後、Gradle Tool Window の左上にある「Refresh all Gradle projects」ボタンをクリックして更新します。
clean タスク実行 → Rebuild Project 実行 → build タスクを実行すると今回はエラーは出ずに "BUILD SUCCESSFUL" のメッセージが出力されました。


Geb を 2.0 → 2.1 へバージョンアップする
http://www.gebish.org/ を見ると 2.1 がリリースされていたので、バージョンアップします。
build.gradle の以下の点を変更します。
dependencies {
    def spockVersion = "1.1-groovy-2.4"
    def domaVersion = "2.19.1"
    def lombokVersion = "1.16.20"
    def errorproneVersion = "2.2.0"
    def powermockVersion = "1.7.3"
    def seleniumVersion = "3.9.1"

    ..........

    // for Geb + Spock
    testCompile("org.gebish:geb-spock:2.1")
    testCompile("org.seleniumhq.selenium:selenium-chrome-driver:${seleniumVersion}")
    testCompile("org.seleniumhq.selenium:selenium-firefox-driver:${seleniumVersion}")
    testCompile("org.seleniumhq.selenium:selenium-support:${seleniumVersion}")
    testCompile("org.seleniumhq.selenium:selenium-api:${seleniumVersion}")
    testCompile("org.seleniumhq.selenium:selenium-remote-driver:${seleniumVersion}")
}
dependenciesの以下の点を変更します。def seleniumVersion = "3.6.0"→def seleniumVersion = "3.9.1"に変更します。testCompile("org.gebish:geb-spock:2.0")→testCompile("org.gebish:geb-spock:2.1")に変更します。
変更後、Gradle Tool Window の左上にある「Refresh all Gradle projects」ボタンをクリックして更新します。
clean タスク実行 → Rebuild Project 実行 → build タスクを実行すると "BUILD SUCCESSFUL" のメッセージが出力されました(キャプチャは省略)。
Tomcat を起動した後 gebTest タスクを実行すると、こちらも "BUILD SUCCESSFUL" のメッセージが出力されました。

Tomcat を起動したまま、Project Tool Window で src/test/groovy/geb を選択した後、コンテキストメニューを表示して「Run 'Tests in 'geb''」を選択し、テストが全て成功することも確認できました。

履歴
2018/02/27
初版発行。
Java SE を 8u152 → 8u162 へ、IntelliJ IDEA を 2017.3.2 → 2017.3.4 へ、Git for Windows を 2.15.1(2) → 2.16.2 へバージョンアップ
※ksbysample-webapp-lending プロジェクトを開いた状態でバージョンアップしています。
Java SE を 8u152 → 8u162 へバージョンアップする
Oracle の Java SE Downloads を見ると 8u162 がダウンロードできるようになっていました。以下のページに説明があります。
- [Java] Updates for Java SE Platform
https://orablogs-jp.blogspot.jp/2018/01/updates-for-java-se-platform.html
8u162 へバージョンアップします。
- [Java] Updates for Java SE Platform
jdk-8u162-windows-x64.exe をダウンロードして C:\Java\jdk1.8.0_162 へインストールした後、環境変数 JAVA_HOME のパスを C:\Java\jdk1.8.0_162 へ変更します。
コマンドプロンプトから
java -versionを実行し、1.8.0_162に変更されていることを確認します。
開いているプロジェクトを閉じて「Welcome to IntelliJ IDEA」ダイアログを表示します。
ダイアログ下部の「Configure」-「Project Defaults」-「Project Structure」を選択します。

「Default Project Structure」ダイアログが表示されます。画面左側で「Project Settings」-「Project」を選択後、画面右側の「Project SDK」の「New...」ボタンをクリックし、表示されるメニューから「JDK」を選択します。

「Select Home Directory for JDK」ダイアログが表示されます。C:\Java\jdk1.8.0_162 を選択した後、「OK」ボタンをクリックします。
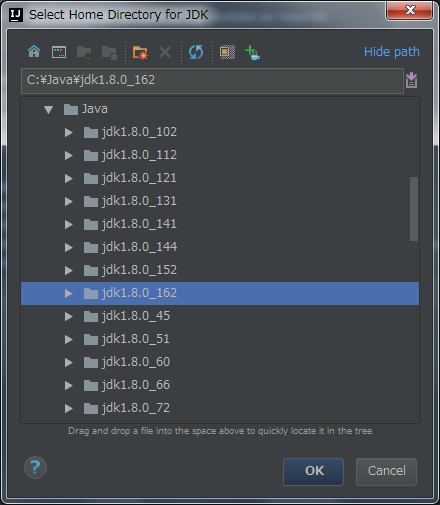
「Default Project Structure」ダイアログに戻るので、今度は「Project SDK」の「Edit」ボタンをクリックします。

画面左側で「Platform Settings」-「SDKs」が選択された状態になるので、画面右上の入力フィールドで "1.8" → "1.8.0_162" へ変更します。

次に中央のリストから「1.8.0_152」を選択した後、リストの上の「-」ボタンをクリックして削除します。
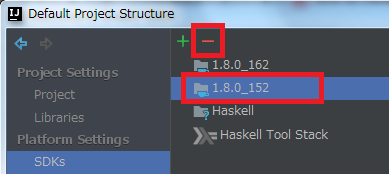
「OK」ボタンをクリックして「Default Project Structure」ダイアログを閉じます。
「Welcome to IntelliJ IDEA」ダイアログに戻ったら、ksbysample-webapp-lending プロジェクトを開きます。
IntelliJ IDEA のメイン画面が開いたら、メニューから「File」-「Project Structure...」を選択します。
「Project Structure」ダイアログが表示されます。以下の画像の状態になっているので、

「Project SDK」と「Project language level」を選択し直します。

「OK」ボタンをクリックして「Project Structure」ダイアログを閉じます。
メイン画面に戻ると画面右下に「Indexing...」の表示が出るので、終了するまで待ちます。

clean タスク実行 → Rebuild Project 実行 → build タスクを実行して、"BUILD SUCCESSFUL" のメッセージが出力されることを確認します。

Project Tool Window で src/test を選択した後、コンテキストメニューを表示して「Run ‘All Tests’ with Coverage」を選択し、テストが全て成功することを確認します。

特に問題は発生しませんでした。8u162 で開発を進めます。
IntelliJ IDEA を 2017.3.2 → 2017.3.4 へバージョンアップする
IntelliJ IDEA の 2017.3.4 がリリースされているのでバージョンアップします。
- IntelliJ IDEA 2017.3.3 Release Notes
https://confluence.jetbrains.com/display/IDEADEV/IntelliJ+IDEA+2017.3.3+Release+Notes - IntelliJ IDEA 2017.3.4 Release Notes
https://confluence.jetbrains.com/display/IDEADEV/IntelliJ+IDEA+2017.3.4+Release+Notes
※ksbysample-webapp-lending プロジェクトを開いた状態でバージョンアップしています。
IntelliJ IDEA のメインメニューから「Help」-「Check for Updates...」を選択します。
「IDE and Plugin Updates」ダイアログが表示されます。左下に「Update and Restart」ボタンが表示されていますので、「Update and Restart」ボタンをクリックします。

Plugin の update も表示されました。このまま「Update and Restart」ボタンをクリックします。

Patch がダウンロードされて IntelliJ IDEA が再起動します。再起動時に「Data Sharing Options」ダイアログが表示されるので、「Send anonymous usage statistics to JetBrains」をチェックして「OK」ボタンをクリックします。

IntelliJ IDEA が起動しましたが、今回は画面下部に「Indexing…」のメッセージは表示されませんでした。
IntelliJ IDEA のメインメニューから「Help」-「About」を選択し、2017.3.4 へバージョンアップされていることを確認します。
Gradle Tool Window のツリーを見ると「Tasks」の下に「other」しかない状態になっているので、左上にある「Refresh all Gradle projects」ボタンをクリックして更新します。

clean タスク実行 → Rebuild Project 実行 → build タスクを実行して、"BUILD SUCCESSFUL" のメッセージが出力されることを確認します。

Project Tool Window で src/test を選択した後、コンテキストメニューを表示して「Run 'All Tests' with Coverage」を選択し、テストが全て成功することを確認します。

Git for Windows を 2.15.1(2) → 2.16.2 へバージョンアップする
Git for Windows の 2.16.2 がリリースされていたのでバージョンアップします。
https://git-for-windows.github.io/ の「Download」ボタンをクリックして Git-2.16.2-64-bit.exe をダウンロードします。
「Git 2.16.2 Setup」ダイアログが表示されます。[Next >]ボタンをクリックします。
「Select Components」画面が表示されます。「Git LFS(Large File Support)」だけチェックした状態で [Next >]ボタンをクリックします。
「Choosing the default editor used by Git」画面が表示されます。「Use Vim (the ubiquitous text editor) as Git's default editor」が選択された状態で [Next >]ボタンをクリックします。
「Adjusting your PATH environment」画面が表示されます。中央の「Use Git from the Windows Command Prompt」が選択されていることを確認後、[Next >]ボタンをクリックします。
「Choosing HTTPS transport backend」画面が表示されます。「Use the OpenSSL library」が選択されていることを確認後、[Next >]ボタンをクリックします。
「Configuring the line ending conversions」画面が表示されます。一番上の「Checkout Windows-style, commit Unix-style line endings」が選択されていることを確認した後、[Next >]ボタンをクリックします。
「Configuring the terminal emulator to use with Git Bash」画面が表示されます。「Use Windows'default console window」が選択されていることを確認した後、[Next >]ボタンをクリックします。
「Configuring extra options」画面が表示されます。「Enable file system caching」だけがチェックされていることを確認した後、[Install]ボタンをクリックします。
インストールが完了すると「Completing the Git Setup Wizard」のメッセージが表示された画面が表示されます。中央の「View Release Notes」のチェックを外した後、「Finish」ボタンをクリックしてインストーラーを終了します。
コマンドプロンプトを起動して
git --versionを実行し、git のバージョンがgit version 2.16.2.windows.1になっていることを確認します。
git-cmd.exe を起動して日本語の表示・入力が問題ないかを確認します。

特に問題はないようですので、2.16.2 で作業を進めたいと思います。
Spring Boot + npm + Geb で入力フォームを作ってテストする ( その45 )( gradle の build タスク実行時に Javascript の build+テスト を実行する )
概要
記事一覧はこちらです。
Spring Boot + npm + Geb で入力フォームを作ってテストする ( 番外編 )( MobX を使用してみる2 ) の続きです。
- 今回の手順で確認できるのは以下の内容です。
- Flow を試してみようと思っていましたが、途中からちょっと入れて試すようなものではなさそうだったので、止めました。
- Gradle の build タスクを実行した時に、Jest のテストと webpack による build を一緒に実行できるようにする(エラーが出た場合には build タスクを中断する)方法を調べます。
参照したサイト・書籍
gradle-node-plugin 使って Sass をコンパイルしたりすればいいじゃない
https://qiita.com/macoshita/items/82aa006c75cdd2222abfsrs/gradle-node-plugin
https://github.com/srs/gradle-node-pluginjest-html-reporter
https://www.npmjs.com/package/jest-html-reporterHow can I set NODE_ENV=production on Windows?
https://stackoverflow.com/questions/9249830/how-can-i-set-node-env-production-on-windowscross-env
https://www.npmjs.com/package/cross-envwebpack-contrib/uglifyjs-webpack-plugin
https://github.com/webpack-contrib/uglifyjs-webpack-pluginGoogleChromeLabs/webpack-training-project
https://github.com/GoogleChromeLabs/webpack-training-projectGoogleChromeLabs/webpack-libs-optimizations
https://github.com/GoogleChromeLabs/webpack-libs-optimizations
目次
- 目標
- gradle から npm scripts を実行するのに gradle-node-plugin を使用する
- gradle から npm scripts を実行するのに
task ...(type: Exec) {...}を使用する - jest-html-reporter をインストールする
- gradle-node-plugin にするか
task ...(type: Exec) {...}にするか? - package.json に build 用の npm scripts を追加する
- build.gradle に npmBuild タスクを定義する
npm run buildを実行する時は webpack でソースマップを出力せず、uglify する- 次回は。。。
手順
目標
以下のことができるようにしてみたいと思います。
- build.gradle に npmTest, npmBuild というタスクを作成する。
- npmTest は
npm test、npmBuild はnpm run build(新規作成する)に関連させる。 - npmTest → npmBuild → processResources → ... の順に実行する。
npm run springbootを実行する時は webpack でソースマップを出力し、かつ uglify しない。npm run buildを実行する時は webpack でソースマップを出力せず、uglify する。
gradle から npm scripts を実行するのに gradle-node-plugin を使用する
gradle から npm scripts を実行するのに srs/gradle-node-plugin というプラグインがあるとのことなので、このプラグインを使用して npm test を実行してみます。
build.gradle を以下のように変更します。
buildscript {
    ext {
        springBootVersion = '1.5.9.RELEASE'
    }
    repositories {
        mavenCentral()
        maven { url "https://plugins.gradle.org/m2/" }
    }
    dependencies {
        classpath("org.springframework.boot:spring-boot-gradle-plugin:${springBootVersion}")
        // for Error Prone ( http://errorprone.info/ )
        classpath("net.ltgt.gradle:gradle-errorprone-plugin:0.0.13")
        classpath("com.moowork.gradle:gradle-node-plugin:1.2.0")
    }
}

apply plugin: 'java'
apply plugin: 'eclipse'
apply plugin: 'idea'
apply plugin: 'org.springframework.boot'
apply plugin: 'groovy'
apply plugin: 'net.ltgt.errorprone'
apply plugin: 'checkstyle'
apply plugin: 'findbugs'
apply plugin: 'pmd'
apply plugin: 'com.moowork.node'

..........

task npmTest(type: NpmTask) {
    args = ["test"]
}
processResources.dependsOn npmTest

..........
- buildscript に
classpath("com.moowork.gradle:gradle-node-plugin:1.2.0")を追加します。 apply plugin: 'com.moowork.node'を追加します。task npmTest(type: NpmTask) { ... }を追加します。processResources.dependsOn npmTestを追加します。
clean タスク → build タスクの順に実行してみます。現在 Jest のテストは全て成功する状態です。
 .....(長いので途中は省略します).....

npmTest タスクは正常終了し、"BUILD SUCCESSFUL" も出力されました。ただし、
- テストファイル1つに付き、
PASSの文字が付いた行が出力されます。出来れば Java のテストのように成功時は何も出力されないようにしたいです。 - Jest のテストに
console.log(....);を書いているものがあるのですが、コンソールにログが大量に出力されました。gradle-node-plugin や Gradle の Webサイトを見てみたのですが、ログを抑制する方法が分かりません。。。
gradle から npm scripts を実行するのに task ...(type: Exec) {...} を使用する
cmd.exe で npm コマンドを実行して標準出力/エラー出力を NUL へ送ればコンソールにログが出力されないはずなので、task ...(type: Exec) {...} でタスクを定義してみます。
build.gradle を以下のように変更します。
//task npmTest(type: NpmTask) {
//    args = ["test"]
//}
task npmTest(type: Exec) {
    commandLine "cmd", "/c", "npm test >NUL 2>&1"
}
processResources.dependsOn npmTest
task npmTest(type: NpmTask) { ... }はコメントアウトします。task npmTest(type: Exec) { ... }を追加します。>NUL 2>&1を付けてnpm testの標準出力、エラー出力を一切出ないようにします。
clean タスク → build タスクの順に実行してみます。

npmTest タスクは正常終了し、"BUILD SUCCESSFUL" も出力されました。余計なログも出力されません。個人的にはこの出力結果の方が理想です。
テストが途中で失敗した時にそこで止まって先のタスクに進まないのかが気になるので試してみます。
src/test/assets/tests/lib/util/ZipcloudApiHelper.test.js の以下の点を変更します。
    // zipcloudApiHeler.search の dataType: "jsonp" を削除しないと下のテストは成功しないので
    // コメントアウトしておく
    describe("jquery-mockjax でサーバ側をモックにして $.ajax をテストする", () => {

        afterEach(() => {
            mockjax.clear();
        });
describe("jquery-mockjax でサーバ側をモックにして $.ajax をテストする", () => { ... }の前後の/*、*/を削除し、コメントアウトを解除します。これで Jest のテストで失敗するものが出ます。
clean タスク → build タスクの順に実行してみると、npmTest タスクでエラーが出て止まりました。

ただしエラーがどこで出たのかレポートファイルで確認しようと思ったのですが、coverage のレポートしか出ていませんでした。Jest のページを見ましたが、テスト結果のレポートを出力させる方法がよく分かりません。。。

jest-html-reporter をインストールして試してみる
レポートファイルを生成する方法を調べてみたところ、jest-html-reporter というモジュールを見つけました。インストールして試してみます。
npm install --save-dev jest-html-reporter コマンドを実行してインストールします。

jest.config.json を以下のように変更します。
{
  "coverageDirectory": "build/reports/jest",
  "moduleDirectories": [
    "node_modules",
    "src/main/assets/js"
  ],
  "testResultsProcessor": "./node_modules/jest-html-reporter"
}
"testResultsProcessor": "./node_modules/jest-html-reporter"を追加します。
jest-html-reporter の設定は package.json に記述するようなので、package.json を以下のように変更します。
  "license": "ISC",
  "jest-html-reporter": {
    "outputPath": "build/reports/jest/jest-html-reporter.html",
    "includeFailureMsg": true
  },
  "dependencies": {
"jest-html-reporter": { ... }を追加します。
clean タスク → build タスクの順に実行してみます。先程と同様のエラーが出た後、build/reports/jest の下に jest-html-reporter.html が生成されていました。

jest-html-reporter.html をブラウザで表示させると、失敗したテストとエラーメッセージが表示されていました。
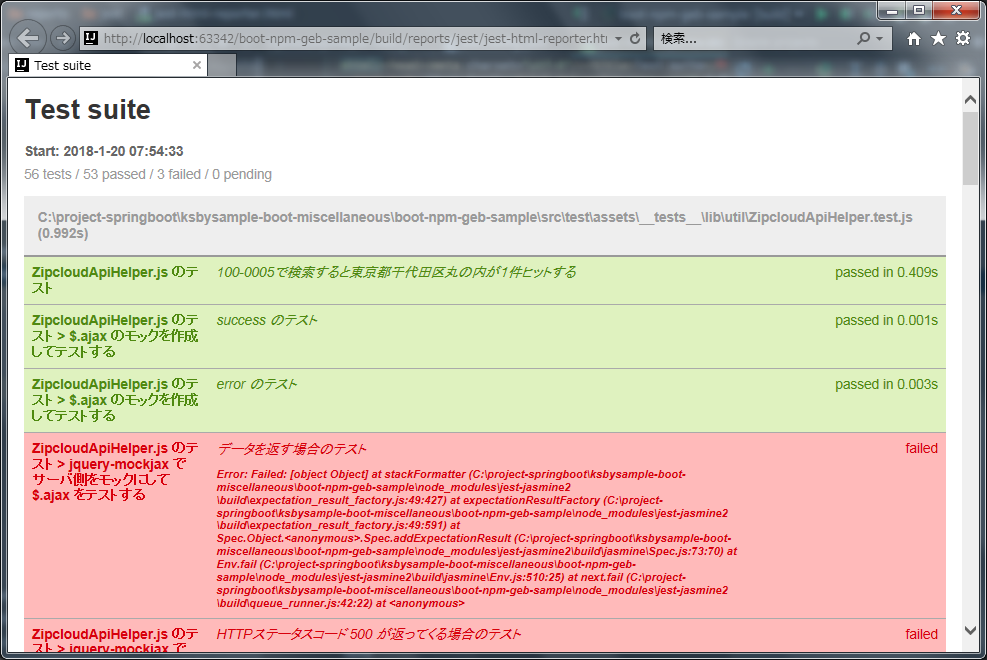
必要な情報が出ていて申し分がないので、jest-html-reporter をこのまま使用することにします。
gradle-node-plugin にするか task ...(type: Exec) {...} にするか?
環境依存しないと思われる gradle-node-plugin の方が良いとは思うのですが、task ...(type: Exec) {...} の方が不要な出力が出ず動作が好みなので、今回はこちらの方法を使用することにします。
package.json に build 用の npm scripts を追加する
package.json に npm run build で実行する npm scripts を定義します。
  "scripts": {
    "test": "jest --config=jest.config.json --coverage",
    "postinstall": "run-s clean:static-dir copy:all",
    "clean:static-dir": "rimraf src/main/resources/static/*",
    "clean:cssjs-dir": "rimraf src/main/resources/static/{css,js}/*",
    "copy:all": "run-p copy:bootstrap copy:admin-lte copy:font-awesome copy:ionicons copy:jquery-ui-css",
    "copy:bootstrap": "cpx node_modules/bootstrap/dist/**/* src/main/resources/static/vendor/bootstrap",
    "copy:admin-lte": "cpx node_modules/admin-lte/dist/**/* src/main/resources/static/vendor/admin-lte",
    "copy:font-awesome": "cpx node_modules/font-awesome/{css,fonts}/**/* src/main/resources/static/vendor/font-awesome",
    "copy:ionicons": "cpx node_modules/ionicons/dist/{css,fonts}/**/* src/main/resources/static/vendor/ionicons",
    "copy:jquery-ui-css": "cpx node_modules/jquery-ui/themes/base/**/* src/main/resources/static/vendor/jquery-ui/css",
    "postcss:build": "postcss src/main/assets/css/**/* -d src/main/resources/static/css -x .min.css",
    "postcss:watch": "postcss src/main/assets/css/**/* -d src/main/resources/static/css -x .min.css -w --poll",
    "webpack:build": "webpack",
    "webpack:watch": "webpack --watch",
    "browser-sync:start": "browser-sync start --config bs-config.js",
    "browser-sync:springboot": "browser-sync start --config bs-springboot-config.js",
    "server": "run-p postcss:watch webpack:watch browser-sync:start",
    "springboot": "run-p postcss:watch webpack:watch browser-sync:springboot",
    "build": "run-s clean:cssjs-dir postcss:build webpack:build"
  },
- 以下の4行を追加します。
"clean:cssjs-dir": "rimraf src/main/resources/static/{css,js}/*""postcss:build": "postcss src/main/assets/css/**/* -d src/main/resources/static/css -x .min.css""webpack:build": "webpack""build": "run-s clean:cssjs-dir postcss:build webpack:build"
コマンドプロンプトから npm run build を実行して正常に動作することを確認します。

build.gradle に npmBuild タスクを定義する
build.gradle を以下のように変更します。
..........

//task npmTest(type: NpmTask) {
//    args = ["test"]
//}
task npmTest(type: Exec) {
    commandLine "cmd", "/c", "npm test >NUL 2>&1"
}
task npmBuild(type: Exec) {
    commandLine "cmd", "/c", "npm run build >NUL 2>&1"
}
npmBuild.dependsOn npmTest
processResources.dependsOn npmBuild

repositories {
    mavenCentral()
}

..........
task npmBuild(type: Exec) { ... }を追加します。npmBuild.dependsOn npmTest、processResources.dependsOn npmBuildを追加します。
これで npmTest → npmBuild → processResources → ... の順にタスクが実行されるはずです。clean タスク → build タスクの順に実行してみます。

全てのタスクが正常終了し、"BUILD SUCCESSFUL" が出力されました。問題なさそうです。
npm run build を実行する時は webpack でソースマップを出力せず、uglify する
Windows で NODE_ENV 環境変数で webpack の設定を切り替えられるようにするために cross-env モジュールをインストールする
Spring Boot の spring.profiles.active のように webpack でも環境変数で設定を切り替えたい場合 NODE_ENV を使用しますが、npm scripts を "build": "NODE_ENV=product run-s clean:cssjs-dir postcss:build webpack:build" のように NODE_ENV=product を付けても Windows 環境では以下の画像のようにエラーになります。

エラーにならない方法を調べたところ、How can I set NODE_ENV=production on Windows? に cross-env モジュールを使う方法が書かれていました。
npm install --save-dev cross-env コマンドを実行してインストールします。

uglifyjs-webpack-plugin をインストールする
webpack で js ファイルを uglify するには uglifyjs-webpack-plugin を使えばいいようです。npm install --save-dev uglifyjs-webpack-plugin コマンドを実行してインストールします。

webpack.config.js を変更する
GoogleChromeLabs/webpack-training-project を参考に、NODE_ENV=product が設定されている時だけ uglifyjs-webpack-plugin が適用されるようにします。ソースマップは uglifyjs-webpack-plugin が適用されると webpack.config.js に devtool: "inline-source-map" が記述されていても出力されなくなります。
const webpack = require("webpack");
const UglifyJsPlugin = require("uglifyjs-webpack-plugin");
const isProduct = process.env.NODE_ENV === "product";

module.exports = {
    ..........
    plugins: [
        new webpack.ProvidePlugin({
            $: "jquery",
            jQuery: "jquery"
        })
    ].concat(
        isProduct
            ? [
                new UglifyJsPlugin()
            ]
            : []
    ),
    devtool: "inline-source-map"
};
- 以下の2行を追加します。
const UglifyJsPlugin = require("uglifyjs-webpack-plugin");const isProduct = process.env.NODE_ENV === "product";
- plugins に
.concat(isProduct ? [new UglifyJsPlugin()] : [])を追加します。
package.json を変更する
package.json を以下のように変更します。
  "scripts": {
    ..........
    "springboot": "run-p postcss:watch webpack:watch browser-sync:springboot",
    "build": "cross-env NODE_ENV=product run-s clean:cssjs-dir postcss:build webpack:build"
  },
- npm scripts の
buildの先頭にcross-env NODE_ENV=productを追加します。
動作確認
コマンドプロンプトから npm run build コマンドを実行してみます。

エラーが出ずに終了し、webpack でバンドルした後の js ファイルが 100KB 前後とかなり小さくなりました(上にある画像キャプチャを見ると cross-env NODE_ENV=product を指定していない npm run build コマンドでは 750KB ~ 1MB 程度でした)。ただし uglify するためか処理時間が 18秒もかかりますね。
ちなみに webpack.config.js から devtool: "inline-source-map" を削除して npm run build コマンドを実行しても生成される js ファイルのサイズは変わりません。

clean タスク → build タスクを実行すると、こちらも問題なく終了しました。

webpack によりバンドルされた input01.js を開いてみると、確かに uglify されています。

次回は。。。
入力画面3以降の作成を進めます。
履歴
2018/02/21
初版発行。