Spring Boot + Spring Integration でいろいろ試してみる ( その18 )( @MessagingGateway でメソッド呼び出しのインターフェースで MessageChannel へ Message を送信する2 )
概要
記事一覧はこちらです。
- Spring Boot + Spring Integration でいろいろ試してみる ( その17 )( @MessagingGateway でメソッド呼び出しのインターフェースで MessageChannel へ Message を送信する ) の続きです。
- 以下の内容を記載します。
- FTP アップロード処理へのリトライ処理の追加
- ErrorChannel の処理の実装
- 動作確認
参照したサイト・書籍
目次
手順
FTP アップロード処理にリトライ処理を追加する
前回作成した FTP サーバにアップロードする処理にリトライ処理を入れるのを忘れていたので、追加します。
- src/main/java/ksbysample/eipapp/messaginggateway の下の FlowConfig.java を リンク先のその1の内容 に変更します。
ErrorChannel の処理を作成する
Flow の処理中に例外が throw されると “errorChannel” という名前の MessageChannel に throw された例外がセットされた Message が送信されます。
“errorChannel” の MessageChannel は Spring Integration が自動的に生成します。生成しているのは org.springframework.integration.config.DefaultConfiguringBeanFactoryPostProcessor #postProcessBeanFactory です。
まず throw された例外の stacktrace をログに出力されるのと同じ適宜インデントされたフォーマットの文字列で取得したいので、Guava の Throwables#getStackTraceAsString を使用できるようにします。build.gradle を リンク先の文字列 に変更します。
変更後、Gradle Tool Window の左上にある「Refresh all Gradle projects」ボタンをクリックして更新します。
src/main/java/ksbysample/eipapp/messaginggateway の下の FlowConfig.java を リンク先のその2の内容 に変更します。
動作確認
事前準備
まずは clean タスク → Rebuild Project → build タスクを実行して正常終了することを確認します。

次に Xlight FTP Server, FreeFTPd, smtp4dev, zipkin を起動します。zipkin は最新の zipkin-server-1.20.1-exec.jar をダウンロードしています。


起動していて vagrant か docker で必要なサーバが起動する仮想サーバを作った方がいいな、と思いました。そのうち気が向いたらやってみます。
ログが見にくくなるので JavaMail の debug 機能を一旦 OFF にします。src/main/java/ksbysample/eipapp/messaginggateway の下の MailHelperConfig.java の sendMailFlow メソッドを以下のように変更します。
    @Bean
    public IntegrationFlow sendMailFlow() {
        return f -> f
                .handle(Mail.outboundAdapter(this.mailHost)
                        .port(this.mailPort)
                        .protocol(this.mailProtocol)
                        .defaultEncoding(this.mailDefaultEncoding)
                        .javaMailProperties(p -> p.put("mail.debug", "false")));
    }
.javaMailProperties(p -> p.put("mail.debug", "true")));→.javaMailProperties(p -> p.put("mail.debug", "false")));に変更します。
bootRun を実行して ksbysample-eipapp-messaginggateway を起動します。
1ファイルを SFTP サーバの /in ディレクトリに置いてみる
まずは testdata01.txt を SFTP サーバの send01 ユーザの /in ディレクトリに置いてみます。ファイルの文字コードは UTF-8、改行コードは CRLF で以下の内容です。
これはテストです。
今日は晴れています。

SFTP サーバからファイルがダウンロードされて処理が行われ、FTP サーバの recv01 ユーザの /out ディレクトリにファイルがアップロードされました。

アップロードされた testdata01.txt の内容は以下のようになっていました。文字コードは UTF-8、改行コードは CRLF です。
To: download@test.co.jp
Subject: testdata01.txt

これはテストです。
今日は晴れています。
IntelliJ IDEA のコンソールに出力されたログは以下のようになっており、特にエラーは出ていません。

smtp4dev に送信されたメールは以下の内容でした。こちらも特に問題ありませんでした。


Zipkin で処理状況を見ると以下のようになっていました。


2ファイルを SFTP サーバの /in ディレクトリに置いてみる
次は testdata01.txt, testdata02.txt の2ファイルを SFTP サーバの send01 ユーザの /in ディレクトリに置いてみます。testdata02.txt の内容は以下のものです。
緊急警報です。

明日は、
雨ですね。

2ファイルとも SFTP サーバからファイルがダウンロードされて処理が行われ、FTP サーバの recv01 ユーザの /out ディレクトリにファイルがアップロードされました。

アップロードされた testdata01.txt, testdata02.txt の内容は以下のようになっていました。
■testdata01.txt
To: download@test.co.jp
Subject: testdata01.txt

これはテストです。
今日は晴れています。
■testdata02.txt
To: download@test.co.jp
Subject: testdata02.txt

緊急警報です。

明日は、
雨ですね。
IntelliJ IDEA のコンソールに出力されたログは以下のようになっており、特にエラーは出ていません。traceId は1ファイル毎に 1 ID 発行されています。

smtp4dev に送信されたメールは以下の内容でした。こちらも特に問題ありませんでした。


FTP サーバを停止して errorChannel に Message が送信されるようにしてみる
Xlight FTP Server を停止します。

testdata01.txt を SFTP サーバの send01 ユーザの /in ディレクトリに置きます。
今度は FTP アップロードできなかったため、C:\eipapp\ksbysample-eipapp-messaginggateway\send ディレクトリにファイルが残ったままになりました。

IntelliJ IDEA のコンソールに出力されたログは以下のようになっていました。例外が throw されています。

smtp4dev に送信されたメールは以下の内容でした。今回は「エラーが発生しました」メールが送信されており、送信されたメールの本文を確認すると例外の内容が出力されています。


想定通りの動作になっていたので、動作確認を終わります。
メモ書き
.handle(Mail.outboundAdapter(...).~) と .handleWithAdapter(a -> a.mail(...).~) は同じです&使い方の説明や感想など
src/main/java/ksbysample/eipapp/messaginggateway の MailHelperConfig.java の中で以下のように記述していますが、
    @Bean
    public IntegrationFlow sendMailFlow() {
        return f -> f
                .handle(Mail.outboundAdapter(this.mailHost)
                        .port(this.mailPort)
                        .protocol(this.mailProtocol)
                        .defaultEncoding(this.mailDefaultEncoding)
                        .javaMailProperties(p -> p.put("mail.debug", "false")));
    }
これは以下と同じです。
    @Bean
    public IntegrationFlow sendMailFlow() {
        return f -> f
                .handleWithAdapter(a -> a.mail(this.mailHost)
                        .port(this.mailPort)
                        .protocol(this.mailProtocol)
                        .defaultEncoding(this.mailDefaultEncoding)
                        .javaMailProperties(p -> p.put("mail.debug", "false")));
    }
Mail 以外には Files, Ftp 等があり、以下の Web ページに説明があります。
Spring Integration Java DSL Reference - Using Protocol Adapters https://github.com/spring-projects/spring-integration-java-dsl/wiki/spring-integration-java-dsl-reference#using-protocol-adapters
.handleWithAdapter(a -> a.~) の “a” は “adapters” の略です。.handleWithAdapter(a -> a.~) の書き方の方が IDE の補完により使える Adapter が一覧表示されるので使いやすいと思います。

使い方ですが、Message に特定の header をセットして送信すると、その header と payload のデータを利用してメール送信したりファイル出力したりしてくれます。
例えば .handle(Mail.outboundAdapter(...).~) あるいは .handleWithAdapter(a -> a.mail(...).~) の場合ですが、
- メール本文は payload にセットする。
- From は header に “mail_from” をキーにしてセットする。
- To は header に “mail_to” をキーにしてセットする。
- Subject は header に “mail_subject” をキーにしてセットする。
- “mail_from”, “mail_to”, “mail_subject” 等は org.springframework.integration.mail の MailHeaders クラスに定義されている。通常は MailHeaders.FROM, MailHeaders.TO, MailHeaders.SUBJECT を使用する。
という Message を送信すると header にセットされた From, To, Subject で payload の内容でメール送信します。
どのような header が使用できるのかは、
Spring Integration Reference Manual
http://docs.spring.io/spring-integration/reference/html/
の中の「V. Integration Endpoints」の下にある 21. Mail Support のような「~ Adapters」「~ Support」というタイトルのページの中に記述があります(たぶん)。
また .handleWithAdapter(a -> a.file(...).~) と .handleWithAdapter(a -> a.fileGateway(...).~) のように “Gateway” という文字列が付くものと付かないものが表示される Adapter がありますが、これはその次の処理に Message を送信するか否かで分けます。"Gateway" は次に Message を送信しますが、付かないものは送信しません ( outboundAdapter なので次に Message は送信されません )。
付かないものは .handle(...) の中で return null; を返しているのと同じです。
    .handle((p, h) -> {
        .....(ここに処理を記述する).....
        return null;
    })
Adapter 関連は使いこなせれば便利なのかもしれませんが、まだ以下のような感想を抱いていて使いこなせていない感があります。もう少しいろいろ強制的に使ってみて慣れないとダメかな。
- outboundAdapter だとそこで処理が止まってしまうが、その後に処理は続けたい場合にどうしたらよいのか分かりづらい。
- outboundGateway にすればよいのかもしれないが、outboundAdapter の処理だけやって次に処理を流してくれればよいだけなのに outboundGateway だと追加で指定をしないといけなかったりして何か使いずらい印象がある。gateway の考え方にまだ慣れていないだけなのか?
.handle(Mail.outboundAdapter(...).~) のメール送信処理は spring.mail.~ の設定が反映されない。。。と思って調べたら MailSendingMessageHandler って何?
今回メール送信用の共通処理では以下のように実装していますが、これは Spring Integration Java DSL Reference のサンプルを見て書いています。
                .handle(Mail.outboundAdapter(this.mailHost)
                        .port(this.mailPort)
                        .protocol(this.mailProtocol)
                        .defaultEncoding(this.mailDefaultEncoding)
                        .javaMailProperties(p -> p.put("mail.debug", "false")));
Spring Boot を使っていて、かつ compile("org.springframework.boot:spring-boot-starter-mail") を入れているのだから、自動生成されている javaMailSender Bean が利用されていて application.properties の spring.mail.~ の設定が反映されないのかな? と思い、
- 上の
.defaultEncoding(this.mailDefaultEncoding)の部分を削除する。 - application.properties に
spring.mail.default-encoding=UTF-8を追加する。
としてみたのですが全く設定が反映されません。ソースを追ってみると、org.springframework.integration.dsl.mail.MailSendingMessageHandlerSpec の中で private final JavaMailSenderImpl sender = new JavaMailSenderImpl(); と実装されていて javaMailSender Bean は利用されていませんでした。
MailSendingMessageHandlerSpec クラスは MessageHandlerSpec<MailSendingMessageHandlerSpec, MailSendingMessageHandler> を継承していて、MailSendingMessageHandler クラスを見るとこちらはフィールドに private final MailSender mailSender; と書かれていて、かつコンストラクタに渡された MailSender インターフェースの実装クラスのインスタンスをセットしています。MailSendingMessageHandler クラスは javaMailSender Bean を DI しているんじゃ。。。と思いましたが、よく見たら MailSendingMessageHandler クラスには @Component アノテーションは付いていませんでした。こちらも javaMailSender Bean は使っていませんね。
なんか不便だな。。。 と思いましたが、javaMailSender Bean をコンストラクタに渡して MailSendingMessageHandler Bean を作成すればよいのでは?と思い、以下のテストコードを作成して動かしてみるとメールを送信することができました。
package ksbysample.eipapp.messaginggateway;

import org.junit.Test;
import org.junit.runner.RunWith;
import org.springframework.beans.factory.annotation.Autowired;
import org.springframework.beans.factory.annotation.Qualifier;
import org.springframework.context.annotation.Bean;
import org.springframework.context.annotation.ComponentScan;
import org.springframework.context.annotation.Configuration;
import org.springframework.integration.config.EnableIntegration;
import org.springframework.integration.dsl.IntegrationFlow;
import org.springframework.integration.mail.MailSendingMessageHandler;
import org.springframework.integration.support.MessageBuilder;
import org.springframework.mail.javamail.JavaMailSender;
import org.springframework.mail.javamail.MimeMessageHelper;
import org.springframework.messaging.MessageChannel;
import org.springframework.test.annotation.DirtiesContext;
import org.springframework.test.context.ContextConfiguration;
import org.springframework.test.context.TestPropertySource;
import org.springframework.test.context.junit4.SpringRunner;

import javax.mail.internet.MimeMessage;

@ContextConfiguration
@RunWith(SpringRunner.class)
@DirtiesContext
@TestPropertySource(properties = {
        "spring.mail.host=localhost"
        , "spring.mail.default-encoding=UTF-8"
})
public class MailHelperConfigTest {

    @Autowired
    private JavaMailSender mailSender;

    @Autowired
    @Qualifier("testFlow.input")
    private MessageChannel testFlowInput;

    @Test
    public void sendMailFlow() throws Exception {
        MimeMessage mimeMessage = this.mailSender.createMimeMessage();
        MimeMessageHelper message = new MimeMessageHelper(mimeMessage, false, "UTF-8");
        message.setFrom("from@test.co.jp");
        message.setTo("to@sample.com");
        message.setSubject("これはテストです");
        message.setText("本文です。\r\n改行してみます。");

        this.testFlowInput.send(MessageBuilder.withPayload(message.getMimeMessage()).build());
    }

    @Configuration
    @EnableIntegration
    @ComponentScan
    public static class ContextConfiguration {

        @Autowired
        private JavaMailSender mailSender;

        @Bean
        public MailSendingMessageHandler mailSendingMessageHandler() {
            return new MailSendingMessageHandler(this.mailSender);
        }

        @Bean
        public IntegrationFlow testFlow() {
            return f -> f
                    .handle(mailSendingMessageHandler());
        }

    }

}


メール送信には Mail.outboundAdapter(...) だけでなく MailSendingMessageHandler クラスが使えますね。発見です。このクラスだと SimpleMailMessage や MimeMailMessage クラスのインスタンスを payload にセットして Message を送信すればメール送信してくれるので添付ファイルがあるメールでも送れそうです。でもこのクラスって Spring Integration Reference Manual には記載されていないので、Spring Integration のソースを見ていないとさすがに分かりません。
またおそらくこれと同じように “~MessageHandler” というクラス名の AbstractMessageHandler インターフェースの実装クラスが他にも存在して、たぶん知っているとかなり便利なのでは?という気がしてきました。いつか調べてみたいと思います。
ソースコード
FlowConfig.java
■その1
@Configuration
public class FlowConfig {

    ..........

    /**
     * Message の payload にセットされた File オブジェクトが指し示すファイルを FTP サーバにアップロードする
     *
     * @return IntegrationFlow オブジェクト
     */
    @Bean
    public IntegrationFlow ftpUploadFlow() {
        return f -> f
                .handleWithAdapter(a -> a.ftp(ftpSessionFactory()).remoteDirectory(PATH_FTP_UPLOAD_DIR)
                        , e -> e.advice(ftpUploadRetryAdvice()));
    }

    ..........

    /**
     * リトライは最大5回 ( SimpleRetryPolicy で指定 )、
     * リトライ間隔は初期値2秒、最大10秒、倍数2.0 ( ExponentialBackOffPolicy で指定 )
     * の RequestHandlerRetryAdvice オブジェクトを生成する
     *
     * @return RequestHandlerRetryAdvice オブジェクト
     */
    @Bean
    public Advice ftpUploadRetryAdvice() {
        RetryTemplate retryTemplate = new RetryTemplate();
        retryTemplate.setRetryPolicy(
                new SimpleRetryPolicy(5, singletonMap(Exception.class, true)));
        ExponentialBackOffPolicy backOffPolicy = new ExponentialBackOffPolicy();
        backOffPolicy.setInitialInterval(2000);
        backOffPolicy.setMaxInterval(10000);
        backOffPolicy.setMultiplier(2.0);
        retryTemplate.setBackOffPolicy(backOffPolicy);

        RequestHandlerRetryAdvice advice = new RequestHandlerRetryAdvice();
        advice.setRetryTemplate(retryTemplate);

        return advice;
    }

}
- ftpUploadRetryAdvice メソッドを追加します。
- ftpUploadFlow メソッドで
, e -> e.advice(ftpUploadRetryAdvice())を追加します。
■その2
@Configuration
public class FlowConfig {

    ..........

    private static final String ERRORMAIL_FROM = "system@sample.com";
    private static final String ERRORMAIL_TO = "alert@test.co.jp";
    private static final String ERRORMAIL_SUBJECT = "エラーが発生しました";

    ..........

    /**
     * errorChannel に送信された Message からエラーメッセージを取得してメールする
     *
     * @return IntegrationFlow オブジェクト
     */
    @Bean
    public IntegrationFlow errorChannelFlow() {
        return IntegrationFlows.from("errorChannel")
                .<Exception>handle((p, h) -> {
                    String stacktrace = Throwables.getStackTraceAsString(p);
                    this.mailHelper.send(stacktrace
                            , new MapBuilder<>()
                                    .put(MailHeaders.FROM, ERRORMAIL_FROM)
                                    .put(MailHeaders.TO, ERRORMAIL_TO)
                                    .put(MailHeaders.SUBJECT, ERRORMAIL_SUBJECT)
                                    .get());

                    return null;
                })
                .get();
    }

}
- errorChannelFlow メソッドを追加します。
■完成形
package ksbysample.eipapp.messaginggateway;

import com.google.common.base.Throwables;
import com.jcraft.jsch.ChannelSftp;
import lombok.extern.slf4j.Slf4j;
import org.aopalliance.aop.Advice;
import org.apache.commons.net.ftp.FTPFile;
import org.springframework.context.annotation.Bean;
import org.springframework.context.annotation.Configuration;
import org.springframework.integration.dsl.IntegrationFlow;
import org.springframework.integration.dsl.IntegrationFlows;
import org.springframework.integration.dsl.core.Pollers;
import org.springframework.integration.dsl.support.MapBuilder;
import org.springframework.integration.dsl.support.Transformers;
import org.springframework.integration.file.FileHeaders;
import org.springframework.integration.file.filters.AcceptAllFileListFilter;
import org.springframework.integration.file.filters.IgnoreHiddenFileListFilter;
import org.springframework.integration.file.remote.session.CachingSessionFactory;
import org.springframework.integration.file.remote.session.SessionFactory;
import org.springframework.integration.ftp.session.DefaultFtpSessionFactory;
import org.springframework.integration.handler.advice.ExpressionEvaluatingRequestHandlerAdvice;
import org.springframework.integration.handler.advice.RequestHandlerRetryAdvice;
import org.springframework.integration.mail.MailHeaders;
import org.springframework.integration.sftp.session.DefaultSftpSessionFactory;
import org.springframework.integration.support.MessageBuilder;
import org.springframework.retry.backoff.ExponentialBackOffPolicy;
import org.springframework.retry.policy.SimpleRetryPolicy;
import org.springframework.retry.support.RetryTemplate;

import java.io.File;
import java.io.IOException;
import java.nio.file.Files;
import java.nio.file.Paths;

import static java.util.Collections.singletonMap;

@Slf4j
@Configuration
public class FlowConfig {

    private static final String PATH_SFTP_DOWNLOAD_DIR = "/in";
    private static final String PATH_LOCAL_DOWNLOAD_DIR = "C:/eipapp/ksbysample-eipapp-messaginggateway/recv";
    private static final String PATH_LOCAL_UPLOAD_DIR = "C:/eipapp/ksbysample-eipapp-messaginggateway/send";
    private static final String PATH_FTP_UPLOAD_DIR = "/out";

    private static final String DOWNLOADFILEMAIL_FROM = "system@sample.com";
    private static final String DOWNLOADFILEMAIL_TO = "download@test.co.jp";

    private static final String ERRORMAIL_FROM = "system@sample.com";
    private static final String ERRORMAIL_TO = "alert@test.co.jp";
    private static final String ERRORMAIL_SUBJECT = "エラーが発生しました";

    private static final String CRLF = "\r\n";

    private final MailHelperConfig.MailHelper mailHelper;

    public FlowConfig(MailHelperConfig.MailHelper mailHelper) {
        this.mailHelper = mailHelper;
    }

    /**
     * SFTP サーバに接続するための SessionFactory オブジェクトを生成する
     *
     * @return SFTP サーバ接続用の SessionFactory オブジェクト
     */
    @Bean
    public SessionFactory<ChannelSftp.LsEntry> sftpSessionFactory() {
        DefaultSftpSessionFactory factory = new DefaultSftpSessionFactory(true);
        factory.setHost("localhost");
        factory.setPort(22);
        factory.setUser("send01");
        factory.setPassword("send01");
        factory.setAllowUnknownKeys(true);
        return new CachingSessionFactory<>(factory);
    }

    /**
     * FTP サーバに接続するための SessionFactory オブジェクトを生成する
     *
     * @return FTP サーバ接続用の SessionFactory オブジェクト
     */
    @Bean
    public SessionFactory<FTPFile> ftpSessionFactory() {
        DefaultFtpSessionFactory factory = new DefaultFtpSessionFactory();
        factory.setHost("localhost");
        factory.setPort(21);
        factory.setUsername("recv01");
        factory.setPassword("recv01");
        return new CachingSessionFactory<>(factory);
    }

    /**
     * SFTP サーバにあるファイルをダウンロードした後、ファイルの内容をメールで送信して、
     * 送信したメールの内容をファイルに出力して FTP サーバにアップロードする
     *
     * @return IntegrationFlow オブジェクト
     */
    @Bean
    public IntegrationFlow sftpToMailToFtpFlow() {
        return IntegrationFlows
                // SFTP サーバの /in ディレクトリにファイルがあるか 5秒間隔でチェックする
                .from(s -> s.sftp(sftpSessionFactory())
                                .preserveTimestamp(true)
                                .deleteRemoteFiles(true)
                                .remoteDirectory(PATH_SFTP_DOWNLOAD_DIR)
                                .localDirectory(new File(PATH_LOCAL_DOWNLOAD_DIR))
                                .localFilter(new AcceptAllFileListFilter<>())
                                .localFilter(new IgnoreHiddenFileListFilter())
                        , e -> e.poller(Pollers.fixedDelay(5000)
                                .maxMessagesPerPoll(100)))
                .log()
                // ファイル名とファイルの絶対パスを Message の header にセットする
                .enrichHeaders(h -> h
                        .headerExpression(FileHeaders.FILENAME, "payload.name")
                        .headerExpression(FileHeaders.ORIGINAL_FILE, "payload.absolutePath"))
                // File の内容を読み込んで payload へセットする
                .transform(Transformers.fileToString())
                // ファイルの内容をメール本文とするメールを送信する
                .<String>handle((p, h) -> {
                    this.mailHelper.send(p
                            , new MapBuilder<>()
                                    .put(MailHeaders.FROM, DOWNLOADFILEMAIL_FROM)
                                    .put(MailHeaders.TO, DOWNLOADFILEMAIL_TO)
                                    .put(MailHeaders.SUBJECT, h.get(FileHeaders.FILENAME))
                                    .get());

                    return MessageBuilder.withPayload(p)
                            .setHeader(MailHeaders.TO, DOWNLOADFILEMAIL_TO)
                            .setHeader(MailHeaders.SUBJECT, h.get(FileHeaders.FILENAME))
                            .build();
                })
                .log()
                // メール送信した内容を payload にセットする
                .<String>handle((p, h) -> {
                    StringBuilder sb = new StringBuilder();
                    sb.append("To: " + h.get(MailHeaders.TO) + CRLF);
                    sb.append("Subject: " + h.get(MailHeaders.SUBJECT) + CRLF);
                    sb.append(CRLF);
                    sb.append(p);

                    return MessageBuilder.withPayload(sb.toString())
                            .build();
                })
                // /send ディレクトリの下に payload の内容を出力したファイルを生成する
                .handleWithAdapter(a -> a.fileGateway(new File(PATH_LOCAL_UPLOAD_DIR)))
                .log()
                // /recv ディレクトリの下のファイルを削除し、payload には /send ディレクトリの下の
                // ファイルを指す File オブジェクトをセットする
                .handle((p, h) -> {
                    try {
                        Files.delete(Paths.get((String) h.get(FileHeaders.ORIGINAL_FILE)));
                    } catch (IOException e) {
                        throw new RuntimeException(e);
                    }

                    return MessageBuilder
                            .withPayload(Paths.get(PATH_LOCAL_UPLOAD_DIR
                                    , (String) h.get(FileHeaders.FILENAME)).toFile())
                            .build();
                })
                // /send ディレクトリの下に作成したファイルを FTP サーバにアップロードする
                .bridge(e -> e.advice(ftpUploadAdvice()))
                .log()
                // /send ディレクトリの下に作成したファイルを削除する
                .<File>handle((p, h) -> {
                    try {
                        Files.delete(Paths.get(p.getAbsolutePath()));
                    } catch (IOException e) {
                        throw new RuntimeException(e);
                    }

                    return null;
                })
                .log()
                .get();
    }

    /**
     * Message の payload にセットされた File オブジェクトが指し示すファイルを FTP サーバにアップロードする
     *
     * @return IntegrationFlow オブジェクト
     */
    @Bean
    public IntegrationFlow ftpUploadFlow() {
        return f -> f
                .handleWithAdapter(a -> a.ftp(ftpSessionFactory()).remoteDirectory(PATH_FTP_UPLOAD_DIR)
                        , e -> e.advice(ftpUploadRetryAdvice()));
    }

    /**
     * ftpUploadFlow へ Message を送信する ExpressionEvaluatingRequestHandlerAdvice Bean
     *
     * @return ExpressionEvaluatingRequestHandlerAdvice オブジェクト
     */
    @Bean
    public Advice ftpUploadAdvice() {
        ExpressionEvaluatingRequestHandlerAdvice advice
                = new ExpressionEvaluatingRequestHandlerAdvice();
        advice.setOnSuccessExpressionString("payload");
        advice.setSuccessChannelName("ftpUploadFlow.input");
        return advice;
    }

    /**
     * リトライは最大5回 ( SimpleRetryPolicy で指定 )、
     * リトライ間隔は初期値2秒、最大10秒、倍数2.0 ( ExponentialBackOffPolicy で指定 )
     * の RequestHandlerRetryAdvice オブジェクトを生成する
     *
     * @return RequestHandlerRetryAdvice オブジェクト
     */
    @Bean
    public Advice ftpUploadRetryAdvice() {
        RetryTemplate retryTemplate = new RetryTemplate();
        retryTemplate.setRetryPolicy(
                new SimpleRetryPolicy(5, singletonMap(Exception.class, true)));
        ExponentialBackOffPolicy backOffPolicy = new ExponentialBackOffPolicy();
        backOffPolicy.setInitialInterval(2000);
        backOffPolicy.setMaxInterval(10000);
        backOffPolicy.setMultiplier(2.0);
        retryTemplate.setBackOffPolicy(backOffPolicy);

        RequestHandlerRetryAdvice advice = new RequestHandlerRetryAdvice();
        advice.setRetryTemplate(retryTemplate);

        return advice;
    }

    /**
     * errorChannel に送信された Message からエラーメッセージを取得してメールする
     *
     * @return IntegrationFlow オブジェクト
     */
    @Bean
    public IntegrationFlow errorChannelFlow() {
        return IntegrationFlows.from("errorChannel")
                .<Exception>handle((p, h) -> {
                    String stacktrace = Throwables.getStackTraceAsString(p);
                    this.mailHelper.send(stacktrace
                            , new MapBuilder<>()
                                    .put(MailHeaders.FROM, ERRORMAIL_FROM)
                                    .put(MailHeaders.TO, ERRORMAIL_TO)
                                    .put(MailHeaders.SUBJECT, ERRORMAIL_SUBJECT)
                                    .get());

                    return null;
                })
                .get();
    }

}
build.gradle
dependencies {
    ..........

    // dependency-management-plugin によりバージョン番号が自動で設定されないもの、あるいは最新バージョンを指定したいもの
    compile("org.springframework.integration:spring-integration-java-dsl:1.2.1.RELEASE")
    compile("org.projectlombok:lombok:1.16.14")
    compile("com.google.guava:guava:21.0")
    testCompile("org.assertj:assertj-core:3.6.2")
}
- dependencies に
compile("com.google.guava:guava:21.0")を追加します。
履歴
2017/02/26
初版発行。
Spring Boot + Spring Integration でいろいろ試してみる ( その17 )( @MessagingGateway でメソッド呼び出しのインターフェースで MessageChannel へ Message を送信する )
概要
記事一覧はこちらです。
- Spring Integration DSL のサンプルを作成します。今回は長くなったため2回に分けています。
- 以下の処理を行う常駐型アプリケーションを作成します。
- SFTPサーバに send01 ユーザでログインし /in ディレクトリにファイルがあるかチェックします。ファイルがあれば C:\eipapp\ksbysample-eipapp-messaginggateway\recv ディレクトリにダウンロードします。
- ダウンロードしたファイルの内容をメール本文とするメールを送信します。From は system@sample.com、To は download@test.co.jp、Subject はファイル名にします。
- メールした時の To, Subject, メール本文を出力したファイルを C:\eipapp\ksbysample-eipapp-messaginggateway\send ディレクトリに生成して FTP サーバへアップロードします。FTP サーバには recv01 ユーザでログインし /out ディレクトリにアップロードします。
- 今回は ErrorChannel の処理を実装します。ErrorChannel に送信されたエラーメッセージをメール本文とするメールを送信します。From は system@sample.com、To は alert@test.co.jp、Subject は “エラーが発生しました” にします。
- メール送信処理は共通の IntegrationFlow として作成します。
- FTP サーバは Xlight ftp server を、SFTP サーバは FreeFTPd を使用します。今回この記事を書いている途中で Xlight ftp server の試用期間が終了したのですが、「Personal edition is free for personal use.」と書かれていたので問題なく使えるものと思っていたら SFTP サーバは使用できなくなりました。。。 ( https://www.xlightftpd.com/purchase.htm に記載されていました )
- SMTPサーバは smtp4dev を使用します。
参照したサイト・書籍
Spring Integration Reference Manual - 8.4 Messaging Gateways
http://docs.spring.io/spring-integration/reference/html/messaging-endpoints-chapter.html#gatewayHow to access custom headers in Spring Integration after receiving http error
http://stackoverflow.com/questions/38482418/how-to-access-custom-headers-in-spring-integration-after-receiving-http-error- タイトルとは全然関係なくて、
.transform(...)の中で header にアクセスする方法を調べた時に参考にしました。
- タイトルとは全然関係なくて、
目次
- @MessagingGateway とは?
- recv, send ディレクトリを作成する
- ksbysample-eipapp-messaginggateway プロジェクトを作成する
- メール送信用の共通処理を作成する
- SFTP サーバからファイルをダウンロードする処理を作成する
- ファイルの内容をメール送信する処理を作成する
- メールの内容をファイルに出力する処理を作成する
- FTP サーバにアップロードする処理を作成する
- 続く。。。
手順
@MessagingGateway とは?
Spring Integration の Message 送信・受信を意識させずに、通常のメソッドを呼び出す方式で Message を送信・受信できるようにする仕組みです。
例えば以下の IntegrationFlow に Message を送信するには、
    @Bean
    public IntegrationFlow printFlow() {
        return f -> f
                .handle((p, h) -> {
                    System.out.println(p);
                    return null;
                });
    }
以下のように MessageChannel#send で Message を送信する必要があります。
    @Autowired
    @Qualifier("printFlow.input")
    private MessageChannel printFlowInput;

    @Test
    public void printFlow() throws Exception {
        this.printFlowInput.send(new GenericMessage<>("テストです"));
    }
これを以下のように @MessagingGateway アノテーションを付加した interface を用意することで、
    @MessagingGateway
    public interface PrintHelper {

        @Gateway(requestChannel = "printFlow.input")
        void print(String payload);

    }

    @Bean
    public IntegrationFlow printFlow() {
        return f -> f
                .handle((p, h) -> {
                    System.out.println(p);
                    return null;
                });
    }
以下のように通常のメソッドのように呼び出すことができるようになります。
    @Autowired
    private PrintHelper printHelper;

    @Test
    public void printFlow() throws Exception {
        this.printHelper.print("テストです");
    }
また別ファイルに定義した return f -> f.~ 形式の IntegrationFlow へ Message を送信しようとした時に、実行時に “~.input” の MessageChannel をうまく DI 出来ずエラーになる場合があります。この時も @MessagingGateway で inteface を定義すれば回避できます。
1点注意です。Spring Boot の 1.4 までは @IntegrationComponentScan を付加しないと ( 例えば @SpringBootApplication の下に記述します ) @MessagingGateway を付加した interface が Bean の生成対象として認識されません。1.5 からは省略できるようになりました。
recv, send ディレクトリを作成する
サンプルアプリケーションを作成します。常駐型アプリケーション用として以下の構成のディレクトリを作成します。
C:\eipapp\ksbysample-eipapp-messaginggateway
├ recv
└ send
ksbysample-eipapp-messaginggateway プロジェクトを作成する
IntelliJ IDEA で Gradle プロジェクトを作成し、build.gradle を リンク先の内容 に変更します。
ksbysample-eipapp-messaginggateway プロジェクトのルート直下に config/checkstyle, config/findbugs ディレクトリを作成します。
config/checkstyle の下に Spring Boot 1.3.x の Web アプリを 1.4.x へバージョンアップする ( その8 )( build.gradle への checkstyle, findbugs の導入+CheckStyle-IDEA, FindBugs-IDEA Plugin の導入 ) で作成した google_checks.xml を置きます。
config/findbugs の下に findbugs-exclude.xml を新規作成し、リンク先の内容 の内容に変更します。
src/main/java の下に ksbysample.eipapp.messaginggateway パッケージを作成します。
src/main/java/ksbysample/eipapp/messaginggateway の下に Application.java を作成し、リンク先の内容 を記述します。
src/main/resources の下に application.properties を作成し、リンク先の内容 を記述します。
src/main/resources の下に logback-spring.xml を作成し、リンク先の内容 を記述します。
メール送信用の共通処理を作成する
SFTP サーバからファイルをダウンロードする処理を作成する
- src/main/java/ksbysample/eipapp/messaginggateway の下に FlowConfig.java を新規作成し、リンク先のその1の内容 を記述します。
ファイルの内容をメール送信する処理を作成する
- src/main/java/ksbysample/eipapp/messaginggateway の下の FlowConfig.java を リンク先のその2の内容 に変更します。
メールの内容をファイルに出力する処理を作成する
- src/main/java/ksbysample/eipapp/messaginggateway の下の FlowConfig.java を リンク先のその3の内容 に変更します。
FTP サーバにアップロードする処理を作成する
- src/main/java/ksbysample/eipapp/messaginggateway の下の FlowConfig.java を リンク先のその4の内容 に変更します。
続く。。。
長くなったので続きます。次回は以下の予定です。
- ErrorChannel の処理を実装します。
- 動作確認します。
- FlowConfig.java の完成形は次回載せます。
ソースコード
build.gradle
group 'ksbysample'
version '1.0.0-RELEASE'

buildscript {
    ext {
        springBootVersion = '1.4.4.RELEASE'
    }
    repositories {
        mavenCentral()
        maven { url "http://repo.spring.io/repo/" }
        maven { url "https://plugins.gradle.org/m2/" }
    }
    dependencies {
        classpath("org.springframework.boot:spring-boot-gradle-plugin:${springBootVersion}")
        classpath("io.spring.gradle:dependency-management-plugin:0.6.1.RELEASE")
        // for Error Prone ( http://errorprone.info/ )
        classpath("net.ltgt.gradle:gradle-errorprone-plugin:0.0.9")
    }
}

apply plugin: 'java'
apply plugin: 'eclipse'
apply plugin: 'idea'
apply plugin: 'org.springframework.boot'
apply plugin: 'io.spring.dependency-management'
apply plugin: 'groovy'
apply plugin: 'net.ltgt.errorprone'
apply plugin: 'checkstyle'
apply plugin: 'findbugs'

sourceCompatibility = 1.8
targetCompatibility = 1.8

[compileJava, compileTestGroovy, compileTestJava]*.options*.compilerArgs = ['-Xlint:all,-options,-processing,-path']

idea {
    module {
        inheritOutputDirs = false
        outputDir = file("$buildDir/classes/main/")
    }
}

configurations {
    // for Error Prone ( http://errorprone.info/ )
    errorprone {
        resolutionStrategy.force 'com.google.errorprone:error_prone_core:2.0.15'
    }
}

checkstyle {
    configFile = file("${rootProject.projectDir}/config/checkstyle/google_checks.xml")
    toolVersion = '7.5.1'
    sourceSets = [project.sourceSets.main]
}

findbugs {
    toolVersion = '3.0.1'
    sourceSets = [project.sourceSets.main]
    ignoreFailures = true
    effort = "max"
    excludeFilter = file("${rootProject.projectDir}/config/findbugs/findbugs-exclude.xml")
}

tasks.withType(FindBugs) {
    reports {
        xml.enabled = false
        html.enabled = true
    }
}

repositories {
    mavenCentral()
    maven { url "http://repo.spring.io/repo/" }
}

dependencyManagement {
    imports {
        mavenBom 'io.spring.platform:platform-bom:Athens-SR3'
        mavenBom 'org.springframework.cloud:spring-cloud-dependencies:Camden.RELEASE'
    }
}

dependencies {
    // dependency-management-plugin によりバージョン番号が自動で設定されるもの
    // Appendix A. Dependency versions ( http://docs.spring.io/platform/docs/current/reference/htmlsingle/#appendix-dependency-versions ) 参照
    compile("org.springframework.boot:spring-boot-starter-integration")
    compile("org.springframework.boot:spring-boot-starter-mail")
    compile("org.springframework.integration:spring-integration-ftp")
    compile("org.springframework.integration:spring-integration-mail")
    compile("org.springframework.integration:spring-integration-sftp")
    compile("org.codehaus.janino:janino")
    testCompile("org.springframework.boot:spring-boot-starter-test")
    testCompile("org.spockframework:spock-core")
    testCompile("org.spockframework:spock-spring")

    // org.springframework.cloud:spring-cloud-dependencies によりバージョン番号が自動で設定されるもの
    // http://projects.spring.io/spring-cloud/ の「Release Trains」参照
    compile("org.springframework.cloud:spring-cloud-starter-zipkin") {
        exclude module: 'spring-boot-starter-web'
    }

    // dependency-management-plugin によりバージョン番号が自動で設定されないもの、あるいは最新バージョンを指定したいもの
    compile("org.springframework.integration:spring-integration-java-dsl:1.2.1.RELEASE")
    compile("org.projectlombok:lombok:1.16.14")
    testCompile("org.assertj:assertj-core:3.6.2")
}
findbugs-exclude.xml
<?xml version="1.0" encoding="UTF-8"?>
<FindBugsFilter>
</FindBugsFilter>
Application.java
package ksbysample.eipapp.messaginggateway;

import org.springframework.boot.SpringApplication;
import org.springframework.boot.autoconfigure.SpringBootApplication;
import org.springframework.integration.annotation.IntegrationComponentScan;

@SpringBootApplication
@IntegrationComponentScan
public class Application {

    public static void main(String[] args) {
        SpringApplication.run(Application.class, args);
    }

}
application.properties
spring.application.name=messaginggateway
spring.zipkin.base-url=http://localhost:9411/
spring.sleuth.sampler.percentage=1.0
logback-spring.xml
<?xml version="1.0" encoding="UTF-8"?>
<configuration>
    <include resource="org/springframework/boot/logging/logback/defaults.xml"/>

    <springProperty scope="context" name="springAppName" source="spring.application.name"/>
    <property name="CONSOLE_LOG_PATTERN"
              value="%clr(%d{yyyy-MM-dd HH:mm:ss.SSS}){faint} %clr(${level:-%5p}) %clr([${springAppName:-},%X{X-B3-TraceId:-},%X{X-B3-SpanId:-},%X{X-Span-Export:-}]){yellow} %clr(${PID:- }){magenta} %clr(---){faint} %clr([%15.15t]){faint} %clr(%-40.40logger{39}){cyan} %clr(:){faint} %m%n${LOG_EXCEPTION_CONVERSION_WORD:-%wEx}"/>

    <appender name="CONSOLE" class="ch.qos.logback.core.ConsoleAppender">
        <encoder>
            <pattern>${CONSOLE_LOG_PATTERN}</pattern>
            <charset>UTF-8</charset>
        </encoder>
    </appender>

    <root level="INFO">
        <appender-ref ref="CONSOLE"/>
    </root>
    <logger name="org.springframework.integration.expression.ExpressionUtils" level="ERROR"/>
    <logger name="com.jcraft.jsch" level="ERROR"/>
</configuration>
MailHelperConfig.java
package ksbysample.eipapp.messaginggateway;

import org.springframework.beans.factory.annotation.Value;
import org.springframework.context.annotation.Bean;
import org.springframework.context.annotation.Configuration;
import org.springframework.integration.annotation.Gateway;
import org.springframework.integration.annotation.MessagingGateway;
import org.springframework.integration.dsl.IntegrationFlow;
import org.springframework.integration.dsl.mail.Mail;

import java.util.Map;

@Configuration
public class MailHelperConfig {

    @Value("${spring.mail.default-encoding:UTF-8}")
    private String mailDefaultEncoding;

    @Value("${spring.mail.host:localhost}")
    private String mailHost;

    @Value("${spring.mail.port:25}")
    private int mailPort;

    @Value("${spring.mail.protocol:smtp}")
    private String mailProtocol;

    @MessagingGateway
    public interface MailHelper {

        @Gateway(requestChannel = "sendMailFlow.input")
        void send(String payload, Map<Object, Object> headers);

    }

    /**
     * メールを送信する
     * メールの From, To, Subject 等は Message の header に、メール本文は payload にセットする
     * ヘッダーにセットする時の key 文字列は org.springframework.integration.mail.MailHeaders クラス参照
     *
     * @return IntegrationFlow オブジェクト
     */
    @Bean
    public IntegrationFlow sendMailFlow() {
        return f -> f
                .handle(Mail.outboundAdapter(this.mailHost)
                        .port(this.mailPort)
                        .protocol(this.mailProtocol)
                        .defaultEncoding(this.mailDefaultEncoding)
                        .javaMailProperties(p -> p.put("mail.debug", "true")));
    }

}
FlowConfig.java
■その1
package ksbysample.eipapp.messaginggateway;

import com.jcraft.jsch.ChannelSftp;
import org.springframework.context.annotation.Bean;
import org.springframework.context.annotation.Configuration;
import org.springframework.integration.dsl.IntegrationFlow;
import org.springframework.integration.dsl.IntegrationFlows;
import org.springframework.integration.dsl.core.Pollers;
import org.springframework.integration.file.filters.AcceptAllFileListFilter;
import org.springframework.integration.file.filters.IgnoreHiddenFileListFilter;
import org.springframework.integration.file.remote.session.CachingSessionFactory;
import org.springframework.integration.file.remote.session.SessionFactory;
import org.springframework.integration.sftp.session.DefaultSftpSessionFactory;

import java.io.File;

@Configuration
public class FlowConfig {

    private static final String PATH_SFTP_DOWNLOAD_DIR = "/in";
    private static final String PATH_LOCAL_DOWNLOAD_DIR = "C:/eipapp/ksbysample-eipapp-messaginggateway/recv";

    /**
     * SFTP サーバに接続するための SessionFactory オブジェクトを生成する
     *
     * @return SFTP サーバ接続用の SessionFactory オブジェクト
     */
    @Bean
    public SessionFactory<ChannelSftp.LsEntry> sftpSessionFactory() {
        DefaultSftpSessionFactory factory = new DefaultSftpSessionFactory(true);
        factory.setHost("localhost");
        factory.setPort(22);
        factory.setUser("send01");
        factory.setPassword("send01");
        factory.setAllowUnknownKeys(true);
        return new CachingSessionFactory<>(factory);
    }

    /**
     * SFTP サーバにあるファイルをダウンロードした後、ファイルの内容をメールで送信して、
     * 送信したメールの内容をファイルに出力して FTP サーバにアップロードする
     *
     * @return IntegrationFlow オブジェクト
     */
    @Bean
    public IntegrationFlow sftpToMailToFtpFlow() {
        return IntegrationFlows
                // SFTP サーバの /in ディレクトリにファイルがあるか 5秒間隔でチェックする
                .from(s -> s.sftp(sftpSessionFactory())
                                .preserveTimestamp(true)
                                .deleteRemoteFiles(true)
                                .remoteDirectory(PATH_SFTP_DOWNLOAD_DIR)
                                .localDirectory(new File(PATH_LOCAL_DOWNLOAD_DIR))
                                .localFilter(new AcceptAllFileListFilter<>())
                                .localFilter(new IgnoreHiddenFileListFilter())
                        , e -> e.poller(Pollers.fixedDelay(5000)
                                .maxMessagesPerPoll(100)))
                .log()
                .<File>handle((p, h) -> {
                    p.delete();
                    return null;
                })
                .get();
    }

}
■その2
@Configuration
public class FlowConfig {

    ..........

    private static final String DOWNLOADFILEMAIL_FROM = "system@sample.com";
    private static final String DOWNLOADFILEMAIL_TO = "download@test.co.jp";

    private final MailHelperConfig.MailHelper mailHelper;

    public FlowConfig(MailHelperConfig.MailHelper mailHelper) {
        this.mailHelper = mailHelper;
    }

    ..........

    /**
     * SFTP サーバにあるファイルをダウンロードした後、ファイルの内容をメールで送信して、
     * 送信したメールの内容をファイルに出力して FTP サーバにアップロードする
     *
     * @return IntegrationFlow オブジェクト
     */
    @Bean
    public IntegrationFlow sftpToMailToFtpFlow() {
        return IntegrationFlows
                ..........
                // ファイル名とファイルの絶対パスを Message の header にセットする
                .enrichHeaders(h -> h
                        .headerExpression(FileHeaders.FILENAME, "payload.name")
                        .headerExpression(FileHeaders.ORIGINAL_FILE, "payload.absolutePath"))
                // File の内容を読み込んで payload へセットする
                .transform(Transformers.fileToString())
                // ファイルの内容をメール本文とするメールを送信する
                .<String>handle((p, h) -> {
                    this.mailHelper.send(p
                            , new MapBuilder<>()
                                    .put(MailHeaders.FROM, DOWNLOADFILEMAIL_FROM)
                                    .put(MailHeaders.TO, DOWNLOADFILEMAIL_TO)
                                    .put(MailHeaders.SUBJECT, h.get(FileHeaders.FILENAME))
                                    .get());

                    return MessageBuilder.withPayload(new File((String) h.get(FileHeaders.ORIGINAL_FILE)))
                            .setHeader(MailHeaders.TO, DOWNLOADFILEMAIL_TO)
                            .setHeader(MailHeaders.SUBJECT, h.get(FileHeaders.FILENAME))
                            .build();
                })
                .log()
                ..........
                .get();
    }

}
- MapBuilder は org.springframework.integration.dsl.support パッケージにあるクラスです。
■その3
@Configuration
public class FlowConfig {

    ..........
    private static final String PATH_LOCAL_UPLOAD_DIR = "C:/eipapp/ksbysample-eipapp-messaginggateway/send";

    ..........

    private static final String CRLF = "\r\n";

    ..........

    /**
     * SFTP サーバにあるファイルをダウンロードした後、ファイルの内容をメールで送信して、
     * 送信したメールの内容をファイルに出力して FTP サーバにアップロードする
     *
     * @return IntegrationFlow オブジェクト
     */
    @Bean
    public IntegrationFlow sftpToMailToFtpFlow() {
        return IntegrationFlows
                ..........
                // メール送信した内容を payload にセットする
                .<String>handle((p, h) -> {
                    StringBuilder sb = new StringBuilder();
                    sb.append("To: " + h.get(MailHeaders.TO) + CRLF);
                    sb.append("Subject: " + h.get(MailHeaders.SUBJECT) + CRLF);
                    sb.append(CRLF);
                    sb.append(p);

                    return MessageBuilder.withPayload(sb.toString())
                            .build();
                })
                // /send ディレクトリの下に payload の内容を出力したファイルを生成する
                .handleWithAdapter(a -> a.fileGateway(new File(PATH_LOCAL_UPLOAD_DIR)))
                .log()
                // /recv ディレクトリの下のファイルを削除し、payload には /send ディレクトリの下の
                // ファイルを指す File オブジェクトをセットする
                .handle((p, h) -> {
                    try {
                        Files.delete(Paths.get((String) h.get(FileHeaders.ORIGINAL_FILE)));
                    } catch (IOException e) {
                        throw new RuntimeException(e);
                    }

                    return MessageBuilder
                            .withPayload(Paths.get(PATH_LOCAL_UPLOAD_DIR
                                    , (String) h.get(FileHeaders.FILENAME)).toFile())
                            .build();
                })
                .channel("nullChannel")
                .get();
    }

}
■その4
@Configuration
public class FlowConfig {

    ..........
    private static final String PATH_FTP_UPLOAD_DIR = "/out";

    ..........

    /**
     * FTP サーバに接続するための SessionFactory オブジェクトを生成する
     *
     * @return FTP サーバ接続用の SessionFactory オブジェクト
     */
    @Bean
    public SessionFactory<FTPFile> ftpSessionFactory() {
        DefaultFtpSessionFactory factory = new DefaultFtpSessionFactory();
        factory.setHost("localhost");
        factory.setPort(21);
        factory.setUsername("recv01");
        factory.setPassword("recv01");
        return new CachingSessionFactory<>(factory);
    }

    /**
     * SFTP サーバにあるファイルをダウンロードした後、ファイルの内容をメールで送信して、
     * 送信したメールの内容をファイルに出力して FTP サーバにアップロードする
     *
     * @return IntegrationFlow オブジェクト
     */
    @Bean
    public IntegrationFlow sftpToMailToFtpFlow() {
        return IntegrationFlows
                ..........
                // /send ディレクトリの下に作成したファイルを FTP サーバにアップロードする
                .bridge(e -> e.advice(ftpUploadAdvice()))
                .log()
                // /send ディレクトリの下に作成したファイルを削除する
                .<File>handle((p, h) -> {
                    try {
                        Files.delete(Paths.get(p.getAbsolutePath()));
                    } catch (IOException e) {
                        throw new RuntimeException(e);
                    }

                    return null;
                })
                .log()
                .get();
    }

    /**
     * Message の payload にセットされた File オブジェクトが指し示すファイルを FTP サーバにアップロードする
     *
     * @return IntegrationFlow オブジェクト
     */
    @Bean
    public IntegrationFlow ftpUploadFlow() {
        return f -> f
                .handleWithAdapter(a -> a.ftp(ftpSessionFactory()).remoteDirectory(PATH_FTP_UPLOAD_DIR));
    }

    /**
     * ftpUploadFlow へ Message を送信する ExpressionEvaluatingRequestHandlerAdvice Bean
     *
     * @return ExpressionEvaluatingRequestHandlerAdvice オブジェクト
     */
    @Bean
    public Advice ftpUploadAdvice() {
        ExpressionEvaluatingRequestHandlerAdvice advice
                = new ExpressionEvaluatingRequestHandlerAdvice();
        advice.setOnSuccessExpressionString("payload");
        advice.setSuccessChannelName("ftpUploadFlow.input");
        return advice;
    }

}
履歴
2017/02/25
初版発行。
Spring Boot 1.3.x の Web アプリを 1.4.x へバージョンアップする ( その9 )( 1.3系 → 1.4系で実装方法が変更された点を修正する )
概要
記事一覧はこちらです。
- 今回の手順で確認できるのは以下の内容です。
- 1.3系 → 1.4系で実装方法が変更された点を修正します。
- 今回は変更が軽微なものだけで、フィールドへの @Autowired 付加 → コンストラクタインジェクションへの変更、及びテストクラスのアノテーションの変更は次回以降にやります。
参照したサイト・書籍
Spring Boot 1.4 Release Notes
https://github.com/spring-projects/spring-boot/wiki/Spring-Boot-1.4-Release-NotesSpring Boot 1.4+でRestTemplate(HTTPクライアント)を使う
http://qiita.com/kazuki43zoo/items/7cf3c8ca4f6f2283cefb
目次
- spring-boot-starter で名前が変更されたものを反映する
- application.properties に spring.session.store-type の設定を追加する
- application.properties の spring.datasource の項目名を変更する
- @RequestMapping を変更可能なところは @GetMapping, @PostMapping に変更する
- RestTemplate オブジェクトを生成する処理を
new RestTemplate(...)→RestTemplateBuilder#buildへ変更する - 次回は。。。
手順
spring-boot-starter で名前が変更されたものを反映する
1.4 から spring-boot-starter-redis → spring-boot-starter-data-redis へ変更されたので反映します。
build.gradle を リンク先の内容 に変更します。
Gradle Tool Window の左上にある「Refresh all Gradle projects」ボタンをクリックして更新します。
Project Tool Window の External Libraries を見ると
spring-boot-starter-redisが消えてspring-boot-starter-data-redisが入ったことが確認できます。
application.properties に spring.session.store-type の設定を追加する
Spring Session のデータ保存先を application.properties で設定できるようになったので、その設定を追加します。
application.properties を リンク先の内容 に変更します。
設定する時に IntelliJ IDEA で候補を表示させてみたのですが、
hash_mapやnoneといった選択肢もありました。一時的に Spring Session を試したいだけならサーバを立てずにhash_mapを選択するのもありなのかもしれません。noneは何だろう?と思ったら、39. Spring Session に Spring Session を無効化したい時に設定するよう記述がありました。
application.properties の spring.datasource の項目名を変更する
使用しているコネクションプーリングのライブラリに応じた namespace が増えました。Spring Boot では特に指定をしていなければ Tomcat JDBC Connection Pool が使用されるので、spring.datasource → spring.datasource.tomcat へ変更します。
Appendix A. Common application properties には「spring.datasource.tomcat.*= # Tomcat datasource specific settings」としか記述がありませんが、IntelliJ IDEA で設定項目を表示させてみたところ、以下の項目が表示されました。


知らない設定がいろいろ表示されています。次回以降で設定しておいた方がよいものがあるのか調べてみたいと思います。Tomcat JDBC Connection Pool の URL もメモしておきます。
The Tomcat JDBC Connection Pool
https://tomcat.apache.org/tomcat-8.5-doc/jdbc-pool.html
application-develop.properties, application-product.properties, application-unittest.properties を リンク先の内容 に変更します。
src/main/java/ksbysample/webapp/lending/config の下の ApplicationConfig.java を リンク先のその1の内容 に変更します。
※org.springframework.boot.autoconfigure.jdbc.DataSourceAutoConfiguration クラスが dataSource Bean を生成して spring.datasource.tomcat の設定を反映してくれると思ったのですが、なぜかうまく行きませんでした。。。 ので、自分で dataSource Bean を定義しています。
@RequestMapping を変更可能なところは @GetMapping, @PostMapping に変更する
ksbysample-webapp-lending のソースを見てみると @RequestMapping(value = "...", method = RequestMethod.POST) のように POST のみに制限しているところはあっても、GET のみで制限しているところはありませんでした。今回は @RequestMapping(value = "...", method = RequestMethod.POST) → @PostMapping("...") にのみ変更することにします。
以下のクラスのメソッドで
@RequestMapping(value = "...", method = RequestMethod.POST)→@PostMapping("...")へ変更します。- ksbysample.webapp.lending.web.confirmresult.ConfirmresultController#filedownloadByResponse
- ksbysample.webapp.lending.web.confirmresult.ConfirmresultController#filedownloadByView
- ksbysample.webapp.lending.web.lendingapp.LendingappController#apply
- ksbysample.webapp.lending.web.lendingapp.LendingappController#temporarySave
- ksbysample.webapp.lending.web.lendingapproval.LendingapprovalController#complete
RestTemplate オブジェクトを生成する処理を new RestTemplate(...) → RestTemplateBuilder#build へ変更する
RestTemplate オブジェクトを生成するための RestTemplateBuilder クラスが提供されています。タイムアウトを設定するのも RestTemplateBuilder クラスを使用した方が簡単で分かりやすいので、RestTemplateBuilder クラスを利用する方法に変更します。
MappingJackson2XmlHttpMessageConverter を生成する部分は Bean にします。src/main/java/ksbysample/webapp/lending/config の下の ApplicationConfig.java を リンク先のその2の内容 に変更します。
src/main/java/ksbysample/webapp/lending/service/calilapi の下の CalilApiService.java を リンク先の内容 に変更します。
※src/main/java/ksbysample/webapp/lending/service/openweathermapapi の下の OpenWeatherMapApiService.java は使用していないのとテストも動かないので、変更しません。
次回は。。。
引き続き 1.3系 → 1.4系で実装方法が変更された点を修正します。
次回はフィールドへの @Autowired 付加 → コンストラクタインジェクションへの変更、その次にテストクラスのアノテーションの変更をやる予定です。
ソースコード
build.gradle
dependencies {
    ..........

    // dependency-management-plugin によりバージョン番号が自動で設定されるもの
    // Appendix A. Dependency versions ( http://docs.spring.io/platform/docs/current/reference/htmlsingle/#appendix-dependency-versions ) 参照
    ..........
    compile("org.springframework.boot:spring-boot-starter-security")
    compile("org.springframework.boot:spring-boot-starter-data-redis")
    compile("org.springframework.boot:spring-boot-starter-amqp")
    ..........
spring-boot-starter-redis→spring-boot-starter-data-redisへ変更します。
application.properties
hibernate.dialect=org.hibernate.dialect.PostgreSQL9Dialect
doma.dialect=org.seasar.doma.jdbc.dialect.PostgresDialect

spring.jpa.hibernate.ddl-auto=none
spring.jpa.hibernate.naming_strategy=org.hibernate.cfg.ImprovedNamingStrategy

spring.session.store-type=redis

spring.freemarker.cache=true
spring.freemarker.charset=UTF-8
spring.freemarker.enabled=false
spring.freemarker.prefer-file-system-access=false
spring.session.store-type=redisを追加します。
application-develop.properties, application-product.properties, application-unittest.properties
■application-develop.properties
spring.datasource.tomcat.url=jdbc:log4jdbc:postgresql://localhost/ksbylending
spring.datasource.tomcat.username=ksbylending_user
spring.datasource.tomcat.password=xxxxxxxx
spring.datasource.tomcat.driverClassName=net.sf.log4jdbc.sql.jdbcapi.DriverSpy
■application-product.properties
spring.datasource.tomcat.url=jdbc:postgresql://localhost/ksbylending
spring.datasource.tomcat.username=ksbylending_user
spring.datasource.tomcat.password=xxxxxxxx
spring.datasource.tomcat.driverClassName=org.postgresql.Driver
■application-unittest.properties
spring.datasource.tomcat.url=jdbc:postgresql://localhost/ksbylending
spring.datasource.tomcat.username=ksbylending_user
spring.datasource.tomcat.password=xxxxxxxx
spring.datasource.tomcat.driverClassName=org.postgresql.Driver
- 全て
spring.datasource→spring.datasource.tomcatへ変更します。尚、上で設定している url, username, password, driverClassName のような全てのコネクションプーリングで共通の設定の場合にはspring.datasourceのままでも構いません。
ApplicationConfig.java
■その1
..........
import org.springframework.boot.autoconfigure.jdbc.DataSourceBuilder;
..........

import javax.sql.DataSource;

@Configuration
public class ApplicationConfig {

    ..........

    /**
     * @return Tomcat JDBC Connection Pool の DataSource オブジェクト
     */
    @Bean
    @ConfigurationProperties("spring.datasource.tomcat")
    public DataSource dataSource() {
        return DataSourceBuilder.create()
                .type(org.apache.tomcat.jdbc.pool.DataSource.class)
                .build();
    }

}
- dataSource メソッドを追加します。この時
@ConfigurationProperties("spring.datasource.tomcat")アノテーションを付加してspring.datasource.tomcatの設定が DataSource オブジェクトに設定されるようにします。
■その2
@Configuration
public class ApplicationConfig {

    ..........

    /**
     * 外部のWebAPIとXMLフォーマットで通信するために使用する MessageConverter
     * build.gralde に compile("com.fasterxml.jackson.dataformat:jackson-dataformat-xml:...") を記述して
     * jackson-dataformat-xml が使用できるように設定しないと Bean は生成されない
     *
     * @return MappingJackson2XmlHttpMessageConverter オブジェクト
     */
    @Bean
    @ConditionalOnClass(com.fasterxml.jackson.dataformat.xml.XmlMapper.class)
    public MappingJackson2XmlHttpMessageConverter mappingJackson2XmlHttpMessageConverter() {
        // findAndRegisterModules メソッドを呼び出して jackson-dataformat-xml が機能するようにする
        return new MappingJackson2XmlHttpMessageConverter(new XmlMapper().findAndRegisterModules());
    }

}
- mappingJackson2XmlHttpMessageConverter Bean を追加します。
- 以前 ksbysample.webapp.lending.service.calilapi.CalilApiService#getMessageConvertersforJackson2Xml に実装していた内容を持ってきて、以下の点を変更しました。
assert(...)は削除して@ConditionalOnClass(com.fasterxml.jackson.dataformat.xml.XmlMapper.class)に変更しました。- MappingJackson2XmlHttpMessageConverter#setObjectMapper を呼び出すのではなく、
new MappingJackson2XmlHttpMessageConverter(...)の引数で渡すように変更しました。 - spring-framework/spring-web/src/main/java/org/springframework/http/converter/xml/MappingJackson2XmlHttpMessageConverter.java を見ると、デフォルトで必要な MediaType がセットされていたので、MappingJackson2XmlHttpMessageConverter#setSupportedMediaTypes でセットしていた処理を削除しました。
- 以前 ksbysample.webapp.lending.service.calilapi.CalilApiService#getMessageConvertersforJackson2Xml に実装していた内容を持ってきて、以下の点を変更しました。
CalilApiService.java
package ksbysample.webapp.lending.service.calilapi;

import com.google.common.base.Joiner;
import ksbysample.webapp.lending.service.calilapi.response.Book;
import ksbysample.webapp.lending.service.calilapi.response.CheckApiResponse;
import ksbysample.webapp.lending.service.calilapi.response.Libraries;
import ksbysample.webapp.lending.service.calilapi.response.LibrariesForJackson2Xml;
import org.simpleframework.xml.Serializer;
import org.simpleframework.xml.core.Persister;
import org.slf4j.Logger;
import org.slf4j.LoggerFactory;
import org.springframework.beans.factory.annotation.Qualifier;
import org.springframework.beans.factory.annotation.Value;
import org.springframework.boot.web.client.RestTemplateBuilder;
import org.springframework.context.annotation.Bean;
import org.springframework.context.annotation.Configuration;
import org.springframework.context.annotation.PropertySource;
import org.springframework.http.ResponseEntity;
import org.springframework.http.converter.xml.MappingJackson2XmlHttpMessageConverter;
import org.springframework.stereotype.Service;
import org.springframework.web.client.RestTemplate;

import java.util.HashMap;
import java.util.List;
import java.util.Map;

@Service
@PropertySource("classpath:calilapi.properties")
public class CalilApiService {

    private final Logger logger = LoggerFactory.getLogger(this.getClass());

    private static final int RETRY_MAX_CNT = 5;
    private static final long RETRY_SLEEP_MILLS = 3000;

    private static final String URL_CALILAPI_ROOT = "http://api.calil.jp";
    private static final String URL_CALILAPI_LIBRALY
            = URL_CALILAPI_ROOT + "/library?appkey={appkey}&pref={pref}";
    private static final String URL_CALILAPI_CHECK
            = URL_CALILAPI_ROOT + "/check?appkey={appkey}&systemid={systemid}&isbn={isbn}&format=xml";
    private static final String URL_CALILAPI_CHECK_FOR_RETRY
            = URL_CALILAPI_ROOT + "/check?session={session}&format=xml";

    @Value("${calil.apikey}")
    private String calilApiKey;

    private final RestTemplate restTemplateForCalilApi;

    private final RestTemplate restTemplateForCalilApiByXml;

    public CalilApiService(@Qualifier("restTemplateForCalilApi") RestTemplate restTemplateForCalilApi
            , @Qualifier("restTemplateForCalilApiByXml") RestTemplate restTemplateForCalilApiByXml) {
        this.restTemplateForCalilApi = restTemplateForCalilApi;
        this.restTemplateForCalilApiByXml = restTemplateForCalilApiByXml;
    }

    /**
     * @param pref ???
     * @return ???
     * @throws Exception
     */
    public Libraries getLibraryList(String pref) throws Exception {
        // 図書館データベースAPIを呼び出して XMLレスポンスを受信する
        ResponseEntity<String> response
                = this.restTemplateForCalilApi.getForEntity(URL_CALILAPI_LIBRALY
                , String.class, this.calilApiKey, pref);

        // 受信した XMLレスポンスを Javaオブジェクトに変換する
        Serializer serializer = new Persister();
        Libraries libraries = serializer.read(Libraries.class, response.getBody());

        return libraries;
    }

    /**
     * @param pref ???
     * @return ???
     * @throws Exception
     */
    public LibrariesForJackson2Xml getLibraryListByJackson2Xml(String pref) throws Exception {
        // 図書館データベースAPIを呼び出して XMLレスポンスを受信する
        ResponseEntity<LibrariesForJackson2Xml> response
                = this.restTemplateForCalilApiByXml.getForEntity(URL_CALILAPI_LIBRALY
                , LibrariesForJackson2Xml.class, this.calilApiKey, pref);
        return response.getBody();
    }

    /**
     * @param systemid ???
     * @param isbnList ???
     * @return ???
     */
    public List<Book> check(String systemid, List<String> isbnList) {
        Map<String, String> vars = new HashMap<>();
        vars.put("appkey", this.calilApiKey);
        vars.put("systemid", systemid);
        vars.put("isbn", Joiner.on(",").join(isbnList));

        ResponseEntity<CheckApiResponse> response = null;
        String url = URL_CALILAPI_CHECK;
        for (int retry = 0; retry < RETRY_MAX_CNT; retry++) {
            // 蔵書検索APIを呼び出して蔵書の有無と貸出状況を取得する
            response = this.restTemplateForCalilApiByXml.getForEntity(url, CheckApiResponse.class, vars);
            logger.info("カーリルの蔵書検索API を呼び出し、レスポンスを取得しました。{}", response.getBody().toString());
            if (response.getBody().getContinueValue() == 0) {
                break;
            }

            // continue の値が 0 でない場合には2秒以上待機した後、URLパラメータを session に変更して再度リクエストを送信する
            try {
                Thread.sleep(RETRY_SLEEP_MILLS);
            } catch (InterruptedException e) {
                logger.warn("カーリルの蔵書検索APIのsleep中にInterruptedExceptionが発生しましたが、処理は継続します。", e);
            }
            url = URL_CALILAPI_CHECK_FOR_RETRY;
            vars.clear();
            vars.put("session", response.getBody().getSession());
        }

        return response.getBody().getBookList();
    }

    @Configuration
    public static class CalilApiConfig {

        private static int CONNECT_TIMEOUT = 5000;
        private static int READ_TIMEOUT = 5000;

        private final RestTemplateBuilder restTemplateBuilder;

        private final MappingJackson2XmlHttpMessageConverter mappingJackson2XmlHttpMessageConverter;

        /**
         * コンストラクタ
         *
         * @param restTemplateBuilder                    restTemplateBuilder Bean
         * @param mappingJackson2XmlHttpMessageConverter mappingJackson2XmlHttpMessageConverter Bean
         */
        public CalilApiConfig(RestTemplateBuilder restTemplateBuilder
                , MappingJackson2XmlHttpMessageConverter mappingJackson2XmlHttpMessageConverter) {
            this.restTemplateBuilder = restTemplateBuilder;
            this.mappingJackson2XmlHttpMessageConverter = mappingJackson2XmlHttpMessageConverter;
        }

        /**
         * カーリルの図書館API呼び出し用 RestTemplate
         * JSON フォーマットで結果を受信する
         *
         * @return RestTemplate オブジェクト
         */
        @Bean
        public RestTemplate restTemplateForCalilApi() {
            return this.restTemplateBuilder
                    .setConnectTimeout(CONNECT_TIMEOUT)
                    .setReadTimeout(READ_TIMEOUT)
                    .rootUri(URL_CALILAPI_ROOT)
                    .build();
        }

        /**
         * カーリルの図書館API呼び出し用 RestTemplate
         * XML フォーマットで結果を受信する
         *
         * @return RestTemplate オブジェクト
         */
        @Bean
        public RestTemplate restTemplateForCalilApiByXml() {
            return this.restTemplateBuilder
                    .setConnectTimeout(CONNECT_TIMEOUT)
                    .setReadTimeout(READ_TIMEOUT)
                    .rootUri(URL_CALILAPI_ROOT)
                    .messageConverters(this.mappingJackson2XmlHttpMessageConverter)
                    .build();
        }

    }

}
@Configuration public static class CalilApiConfig { ... }を追加して、その中で restTemplateForCalilApi Bean, restTemplateForCalilApiByXml Bean を定義するようにします。- RETRY_MAX_CNT, RETRY_SLEEP_MILLS の定義は CalilApiConfig クラス内へ移動します。
- URL_CALILAPI_ROOT の定義を追加し、URL_CALILAPI_LIBRALY, URL_CALILAPI_CHECK, URL_CALILAPI_CHECK_FOR_RETRY の URL の定義を URL_CALILAPI_ROOT を使うように変更しました。URL_CALILAPI_ROOT は restTemplateForCalilApi Bean, restTemplateForCalilApiByXml Bean の生成時に RestTemplateBuilder#rootUri を呼び出す時に使用します。
- DI 用の以下のフィールドと、インジェクションするためのコンストラクタを追加します。
private final RestTemplate restTemplateForCalilApi;private final RestTemplate restTemplateForCalilApiByXml;
- 各メソッド内で
new RestTemplate(...)を呼び出して RestTemplate オブジェクトを生成している処理を削除しました。
履歴
2017/02/22
初版発行。
Spring Boot 1.3.x の Web アプリを 1.4.x へバージョンアップする ( その8 )( build.gradle への checkstyle, findbugs の導入+CheckStyle-IDEA, FindBugs-IDEA Plugin の導入 )
概要
記事一覧はこちらです。
- 今回の手順で確認できるのは以下の内容です。
- 前回 Error Prone を導入してみてコードチェックツールはいれた方が良さそうに感じたので、有名な checkstyle と FindBugs を入れてみます。
- 最初に build.gradle に checkstyle, findbugs を導入してみます。
- その後で IntelliJ IDEA の Plugin である CheckStyle-IDEA, FindBugs-IDEA を導入してみます。
参照したサイト・書籍
Google’s Java Style の CheckStyle を使う
http://create-something.hatenadiary.jp/entry/2015/01/31/121332checkstyle/src/main/resources/google_checks.xml
https://github.com/checkstyle/checkstyle/blob/master/src/main/resources/google_checks.xmlGoogle Java Style Guide
https://google.github.io/styleguide/javaguide.htmlHow can I disable checkstyle rules for tests in gradle?
http://stackoverflow.com/questions/32772872/how-can-i-disable-checkstyle-rules-for-tests-in-gradleFindBugsExtension http://gradle.monochromeroad.com/docs/dsl/org.gradle.api.plugins.quality.FindBugsExtension.html
- build.gradle へ findbugs を導入する時の設定はこちらを参照しました。
JavaのバグをFindBugsで見つける
https://internetcom.jp/developer/20081017/26.htmlJenkins+GradleでJavaのCIのための基本build.gradle設定 (JUnit,PMD,FindBugs,CPD,JaCoCo)
http://qiita.com/mychaelstyle/items/74baa62b7bf2fe81e309How to generate HTML output using Gradle FindBugs Plugin
http://stackoverflow.com/questions/15406469/how-to-generate-html-output-using-gradle-findbugs-plugin第8章 フィルターファイル
http://findbugs.sourceforge.net/ja/manual/filter.html
目次
- build.gradle に checkstyle を導入してみる
- Google Java Style の checkstyle 用XMLファイル google_checks.xml をダウンロードする
- build.gradle を変更する
- build タスクを実行する
のための間違った辞書式順序 '...' インポート。 ... [CustomImportOrder]、のインポート文 '...' は、間違った順序です。 ... [CustomImportOrder]行が 100 文字を超えています。 [LineLength]インデント階層 ... の ... が正しいインデント ... にありません [Indentation]Javadoc コメントがありません。 [JavadocMethod]',' は前の行にあるべきです。 [SeparatorWrap]Javadocのの??最初の文は、(期間が欠落している)、または存在しない不完全です。 [SummaryJavadoc]アット節非空の記述を持っている必要があります。 [NonEmptyAtclauseDescription]'METHOD_DEF' 前の文から分離する必要があります。 [EmptyLineSeparator]オーバーロードメソッドは、分割すべきではありません。 ... [OverloadMethodsDeclarationOrder]- 再び build タスクを実行するも、まだエラーが出ます
'.*' 形式のインポートの使用は避けるべきです ... [AvoidStarImport]名前に略語は '...' 以下にする必要があります ... [AbbreviationAsWordInName]Member name '...' must match pattern '^[a-z][a-z0-9][a-zA-Z0-9]*$'. [MemberName]'}' 欄で ... はマルチブロック文を直接複数のブロックが含まれています ... [RightCurly]変数 '...' の宣言と、その変数の使用開始位置までの距離が 7 です。許可された距離 は 3 です。... [VariableDeclarationUsageDistance]- 再び build タスクを実行し警告もエラーも出なくなりました
- build.gradle に findbugs を導入してみる
- CheckStyle-IDEA Plugin を導入してみる
- FindBugs-IDEA Plugin を導入してみる
- 次回は。。。
手順
build.gradle に checkstyle を導入してみる
Google Java Style の checkstyle 用XMLファイル google_checks.xml をダウンロードする
Google Java Style 用の chekstyle の XMLファイルがダウンロードできますので、それをベースに自分向けの変更を加えて導入してみます。
プロジェクトのルートから config/checkstyle ディレクトリを作成します。
checkstyle/src/main/resources/google_checks.xml から google_checks.xml をダウンロードし、config/checkstyle の下に配置します。
build.gradle を変更する
build.gradle を リンク先のその1の内容 に変更します。
変更後、Gradle Tool Window の左上にある「Refresh all Gradle projects」ボタンをクリックして更新します。
build タスクを実行する
clean タスク → Rebuild Project → build タスク の順に実行します。
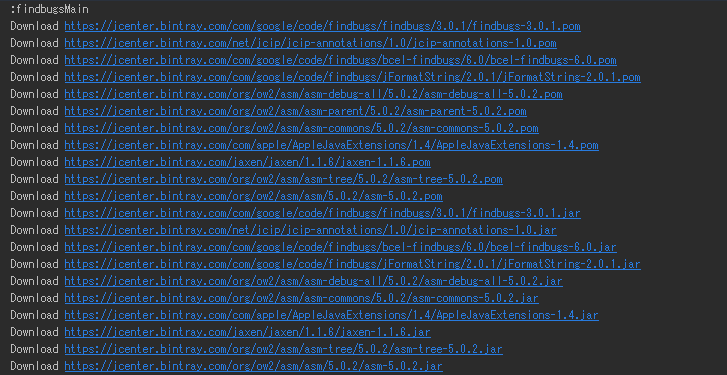
build タスクが実行されるといろいろダウンロードされます。

その後に大量の WARN メッセージが出力されました。

出力されているのは以下の WARN メッセージです。1つずつ対応していきます。
- インポートの順番間違いに関するメッセージ
- のための間違った辞書式順序 ‘…’ インポート。の前にすべきである … [CustomImportOrder]
- のインポート文 ‘…’ は、間違った順序です。 … [CustomImportOrder]
- 行が 100 文字を超えています。 [LineLength]
- インデント階層 … の … が正しいインデント … にありません [Indentation]
- Javadoc コメントがありません。 [JavadocMethod]
- ‘,’ は前の行にあるべきです。 [SeparatorWrap]
- Javadocのの??最初の文は、(期間が欠落している)、または存在しない不完全です。 [SummaryJavadoc]
- アット節非空の記述を持っている必要があります。 [NonEmptyAtclauseDescription]
- ‘METHOD_DEF’ 前の文から分離する必要があります。 [EmptyLineSeparator]
- オーバーロードメソッドは、分割すべきではありません。 … [OverloadMethodsDeclarationOrder]
- インポートの順番間違いに関するメッセージ
のための間違った辞書式順序 '...' インポート。 ... [CustomImportOrder]、のインポート文 '...' は、間違った順序です。 ... [CustomImportOrder]
import 文の順序は IntelliJ IDEA 任せにしているので checkstyle ではチェックしないようにします。以下の部分をコメントアウトします。
        <!-- import 文の順序は IntelliJ IDEA 任せにしているのでチェックしない -->
        <!--<module name="CustomImportOrder">-->
            <!--<property name="sortImportsInGroupAlphabetically" value="true"/>-->
            <!--<property name="separateLineBetweenGroups" value="true"/>-->
            <!--<property name="customImportOrderRules" value="STATIC###THIRD_PARTY_PACKAGE"/>-->
        <!--</module>-->
行が 100 文字を超えています。 [LineLength]
IntelliJ IDEA のエディタの右側に縦線が引かれていますが、これは 120 文字の位置に引かれています。

この設定を変える気はありませんので、checkstyle によるチェックも 120 文字に変更します。
        <module name="LineLength">
            <property name="max" value="120"/>
            <property name="ignorePattern" value="^package.*|^import.*|a href|href|http://|https://|ftp://"/>
        </module>
<property name="max" value="100"/>→<property name="max" value="120"/>に変更します。
また 120 文字を超えている行がある場合にはソースを変更します。
インデント階層 ... の ... が正しいインデント ... にありません [Indentation]
Google Java Style のインデントのデフォルトは 2 ですが、IntelliJ IDEA のフォーマットではインデントは 4 なので 4 に変更します。
        <module name="Indentation">
            <property name="basicOffset" value="4"/>
            <property name="braceAdjustment" value="0"/>
            <property name="caseIndent" value="4"/>
            <property name="throwsIndent" value="4"/>
            <property name="lineWrappingIndentation" value="4"/>
            <property name="arrayInitIndent" value="4"/>
        </module>
value="2"→value="4"に変更します。
Javadoc コメントがありません。 [JavadocMethod]
これは checkstyle のルールは変更せずにソースに Javadoc を付ける方針とします。今回は詳細なコメントは書かずに単に Javadoc のヘッダだけ書いておきます。
',' は前の行にあるべきです。 [SeparatorWrap]
自分は “,” を前に付ける方が好みなので checkstyle のルールを変更します。
        <module name="SeparatorWrap">
            <property name="id" value="SeparatorWrapComma"/>
            <property name="tokens" value="COMMA"/>
            <property name="option" value="nl"/>
        </module>
- SeparatorWrapComma の option の
value="EOL"→value="nl"へ変更します。
Javadocのの??最初の文は、(期間が欠落している)、または存在しない不完全です。 [SummaryJavadoc]
Google Java Style だと Javadoc のコメントの1行目には、このメソッドが何を返すのか、あるいは何をするメソッドなのかを記述することを強制するルールのようです。あとから真似るかもしれませんが、今はコメントアウトしておきます。
        <!-- Javadoc の1行目のフォーマットを指定するルールだが、今はそこまで真似られないのでコメントアウトする -->
        <!--<module name="SummaryJavadoc">-->
            <!--<property name="forbiddenSummaryFragments" value="^@return the *|^This method returns |^A [{]@code [a-zA-Z0-9]+[}]( is a )"/>-->
        <!--</module>-->
アット節非空の記述を持っている必要があります。 [NonEmptyAtclauseDescription]
最初に日本語のメッセージを見た時は何を言っているのか分かりませんでしたが、Javadoc で @param, @return 等の @ から始まるタグの説明が空の場合に警告を出すルールでした。
ルールとしては入れておきたいので checkstyle の XMLファイルはこのままにしますが、今からソースの Javadoc に説明を追加するのはさすがに手間なので今は “???” だけ書いておくことにします。
。。。と思ったのですが、"???“ を書いていて @throws だけこの対象から外しておきたくなったので checkstyle のルールを以下のように変更します。
        <module name="NonEmptyAtclauseDescription">
            <!-- @throws はチェックの対象から外す -->
            <property name="javadocTokens" value="PARAM_LITERAL,RETURN_LITERAL,DEPRECATED_LITERAL"/>
        </module>
<property name="javadocTokens" value="PARAM_LITERAL,RETURN_LITERAL,DEPRECATED_LITERAL"/>を追加します。
'METHOD_DEF' 前の文から分離する必要があります。 [EmptyLineSeparator]
この警告はここまで修正したら消えてしまったので無視します。
オーバーロードメソッドは、分割すべきではありません。 ... [OverloadMethodsDeclarationOrder]
ksbysample.webapp.lending.dao.LendingAppDao クラス等 Doma 2 の interface で出力されていて対応のしようがないので、ルールをコメントアウトすることにします。
        <!-- Doma2 の Dao interface で警告が出て対応のしようがないのでコメントアウトする -->
        <!--<module name="OverloadMethodsDeclarationOrder"/>-->
再び build タスクを実行するも、まだエラーが出ます
出ていた警告には対応したので、再び clean タスク → Rebuild Project → build タスク の順に実行します。
まだ警告が出力されており、出力されたのは以下の WARN メッセージでした。1つずつ対応していきます。
- ‘.*’ 形式のインポートの使用は避けるべきです … [AvoidStarImport]
- 名前に略語は ‘…’ 以下にする必要があります … [AbbreviationAsWordInName]
- Member name ‘…’ must match pattern ‘^[a-z][a-z0-9][a-zA-Z0-9]*$’. [MemberName]
- ‘}’ 欄で … はマルチブロック文を直接複数のブロックが含まれています … [RightCurly]
- 変数 ‘…’ の宣言と、その変数の使用開始位置までの距離が 7 です。許可された距離 は 3 です。… [VariableDeclarationUsageDistance]
'.*' 形式のインポートの使用は避けるべきです ... [AvoidStarImport]
import 文の記述は IntelliJ IDEA 任せにしているので checkstyle ではチェックしないようにします。以下の部分をコメントアウトします。
        <!-- import 文の記述は IntelliJ IDEA 任せにしているのでチェックしない -->
        <!--<module name="AvoidStarImport"/>-->
名前に略語は '...' 以下にする必要があります ... [AbbreviationAsWordInName]
2種類の意味で出力されていました。
まず1種類目は 名前に略語は 'TEMPLATE_LOCATION_TEXTMAIL' 以下にする必要があります '1' 大文字を。 [AbbreviationAsWordInName] のように定数文字列で出力されているもので、これはソースの記述で private static final ... ではなく private final ... にしていたためでした。。。 ( 定数でないのでキャメルケースを使用しているのが NG と判断されています ) static を追加します。
2種類目は 名前に略語は 'BooklistCSVRecord' 以下にする必要があります '1' 大文字を。 [AbbreviationAsWordInName] のようにクラス名等で “CSV” のように大文字続きの名称にしていたためでした。CSV → Csv にように全てスネークケースになるよう変更します。
この警告については checkstyle のルールは変更しません。
Member name '...' must match pattern '^[a-z][a-z0-9][a-zA-Z0-9]*$'. [MemberName]
これは上の 名前に略語は '...' 以下にする必要があります ... [AbbreviationAsWordInName] の警告を修正したら出なくなりましたので checkstyle のルールもソースも変更しません。
'}' 欄で ... はマルチブロック文を直接複数のブロックが含まれています ... [RightCurly]
これはソースのオートフォーマット忘れで、
        }
        else {
と書かれていたためでした。オートフォーマットするとこうなります。
} else {
checkstyle のルールは変更しません。
変数 '...' の宣言と、その変数の使用開始位置までの距離が 7 です。許可された距離 は 3 です。... [VariableDeclarationUsageDistance]
変数が宣言された位置と実際に使用されている位置が 4 行以上離れているため出ている警告でした。ただし実際に指摘を受けた箇所を見てみたのですが、位置を修正したくなかったので以下のようにチェックされてる行数を少し拡大することにします ( 実際にはこのルール通り書けた方がよいと思うのですが、サンプルとして作っているソースでこのルールを厳密に適用しようとするとちょっと辛いかなと思ったので緩くします )。
        <module name="VariableDeclarationUsageDistance">
            <!-- allowedDistance のデフォルト値は 3 だが、少し短すぎるので 10 に変更する -->
            <property name="allowedDistance" value="10"/>
        </module>
再び build タスクを実行し警告もエラーも出なくなりました
再び clean タスク → Rebuild Project → build タスク の順に実行します。
今度は1つも警告、エラーが出ずに “BUILD SUCCESSFUL” の文字が出力されました。

checkstyle も Error Prone 同様に修正した方がよいと思われる箇所を結構いろいろ指摘してくれるので気に入りました。こちらも今後は積極的に入れていきたいと思います。
build.gradle に findbugs を導入してみる
build.gradle を変更する
build.gradle を リンク先のその2の内容 に変更します。
変更後、Gradle Tool Window の左上にある「Refresh all Gradle projects」ボタンをクリックして更新します。
build タスクを実行する
clean タスク → Rebuild Project → build タスク の順に実行します。
build タスクが実行されるといろいろダウンロードされます。
build タスク自体は “BUILD SUCCESSFUL” のメッセージが出て終了しましたが、FindBugs が何か検知して
FindBugs rule violations were found.のメッセージも出力されていました。
デフォルトの設定では build/reports/findbugs ディレクトリにレポートの XML ファイルが生成されます。生成されたレポートファイル main.xml を開いてみたのですが、Error Prone や checkstyle のメッセージと比較するとすごく見にくいですね。findbugs を導入している人って毎回このレポートを見ているのでしょうか。。。?

さすがに毎回このレポートファイルを見るのはちょっとつらそうな気がする&絶対見やすくする方法があるはず、と思ったので調べてみます。
レポートの出力形式を xml ではなく html に変更する
古い記事ですが JavaのバグをFindBugsで見つける にレポートを XML 形式ではなく HTML 形式で出力できるという記述を見かけました。stackoverflow で gradle での設定方法を探したところ How to generate HTML output using Gradle FindBugs Plugin という QA を見つけましたので、これで試してみたいと思います。
build.gradle を リンク先のその3の内容 に変更します。
変更後、Gradle Tool Window の左上にある「Refresh all Gradle projects」ボタンをクリックして更新します。
clean タスク → Rebuild Project → build タスク の順に実行します。
build/reports/findbugs ディレクトリの下に main.html が生成されました。

main.html を開くと警告が4件あることが分かります。html だと結果が分かりやすいです。

ただしこの HTML 形式のレポートファイルですが、meta タグで文字コードが出力されていないため Chrome で開くと文字化けしますね。上のは IE で開いています。自動で meta タグを追加する方法は探してみましたが見つからなかったので、IE で開くことにします。

出力された4件は以下の内容でした。種類としては2種類のようです。確認してみます。

... は、static 内部クラスにすべきです。
メッセージ通り static の付け忘れでした。修正します。
- src/main/java/ksbysample/webapp/lending/web/booklist の下の RegisterBooklistForm.java を リンク先の内容 に変更します。
... への無効な代入です。
メッセージが出力されたのはデータロックのために実行している部分の処理で、確かに変数へ代入するだけで使用していません。ただし削除する訳にもいかないので、FindBugs の フィルターファイル を作成してチェックの対象にならないようにします。
config/findbugs の下に findbugs-exclude.xml を作成し、リンク先の内容 の内容を記載します。
build.gradle を リンク先のその4の内容 に変更します。
再び build タスクを実行し何も警告が出なくなりました
再び clean タスク → Rebuild Project → build タスク の順に実行します。
今度は
FindBugs rule violations were found.のメッセージが出ずに “BUILD SUCCESSFUL” の文字が出力されました。
findbugs もこのまま入れておくことにします。また XML 形式のレポートファイルについて調べてみたところ、Jenkins で実行する際に Plugin で警告数を取得する時には HTML 形式ではなく XML 形式で出力する必要があるようです。覚えておきます。
CheckStyle-IDEA Plugin を導入してみる
CheckStyle-IDEA Plugin をインストールする
IntelliJ IDEA のメインメニューから「File」-「Settings…」を選択します。
「Settings」ダイアログが表示されます。画面左側のリストから「Plugins」を選択した後、画面中央下の「Browse repositories…」ボタンをクリックします。
「Browse Repositories」ダイアログが表示されます。画面左上の検索フィールドに “checkstyle” と入力すると「CheckStyle-IDEA」が表示されますので、選択して「Install」ボタンをクリックします。

プラグインがダウンロードされて「Install」ボタンが「Restart IntelliJ IDEA」ボタンに切り替わりますのでクリックします。
「Settings」ダイアログに戻りますので「OK」ボタンをクリックします。
「Platform and Plugin Updates」ダイアログが表示されますので「Restart」ボタンをクリックします。
IntelliJ IDEA が再起動します。再起動しただけではまだ設定が不足しているので設定します。
再度 IntelliJ IDEA のメインメニューから「File」-「Settings…」を選択します。
「Settings」ダイアログが表示されます。画面左側のリストから「Other Settings」-「Checkstyle」を選択した後、画面右側の「Configuration File」の「+」ボタンをクリックします。

設定用のダイアログが表示されますので、以下の値を入力した後「Next」ボタンをクリックします。

- 「Description」に
google_checks.xmlと入力します。 - 「Use a local Checkstyle file」の下の「File」に
C:\project-springboot\ksbysample-webapp-lending\config\checkstyle\google_checks.xmlと入力します。 - 「Store relative to project location」をチェックします。
次の画面が表示されたら「Finish」ボタンをクリックします。

- 「Description」に
「Settings」ダイアログに戻ります。「Configuration File」に登録した google_checks.xml が表示されていますので、選択してから左側のチェックボックスをチェックします。チェック後「OK」ボタンをクリックしてダイアログを閉じます。

以上でインストール、設定は完了です。
Plugin から checkstyle を実行する
CheckStyle-IDEA Plugin をインストールすると IntelliJ IDEA のメイン画面の左下に「CheckStyle」メニューが表示されます。

「CheckStyle」メニューをクリックします。
CheckStyle-IDEA Plugin の画面が表示されます。画面左側の「Check Project」ボタンをクリックします。

チェックが実行された後、結果が表示されます。今は gradle で checkstyle を実行して警告を取り除いているので何も引っかかりませんでした。

以前 checkstyle で指摘を受けた箇所を元に戻して「Check Project」ボタンをクリックしてみます。
以下のようにファイルとメッセージが表示されました。

使ってみた感想としては、
- 表示されているメッセージをダブルクリックするとソースの該当箇所にジャンプします。gradle で checkstyle を実行した時には警告が出た箇所を表示するのにちょっと面倒だったので、これはかなり便利です。
- 画面左側に緑の矢印が表示されていますが、これは「Check Current File」ボタンで現在表示しているファイルだけチェックできます。
- 同じく画面左側の下矢印があるボタンですが、これは「Autoscroll to Source」ボタンでクリックした状態にしておけばメッセージを選択するとすぐにソースの該当箇所が表示されます。たぶんクリックしておいた方が便利だと思います。
CheckStyle-IDEA Plugin の方がチェック&修正がやりやすいので、gradle の checkstyle は最終チェックとして実行することにして、通常は CheckStyle-IDEA Plugin を使った方が便利ですね。
FindBugs-IDEA Plugin を導入してみる
FindBugs-IDEA Plugin をインストールする
IntelliJ IDEA のメインメニューから「File」-「Settings…」を選択します。
「Settings」ダイアログが表示されます。画面左側のリストから「Plugins」を選択した後、画面中央下の「Browse repositories…」ボタンをクリックします。
「Browse Repositories」ダイアログが表示されます。画面左上の検索フィールドに “findbugs” と入力すると「FindBugs-IDEA」が表示されますので、選択して「Install」ボタンをクリックします。

プラグインがダウンロードされて「Install」ボタンが「Restart IntelliJ IDEA」ボタンに切り替わりますのでクリックします。
「Settings」ダイアログに戻りますので「OK」ボタンをクリックします。
「Platform and Plugin Updates」ダイアログが表示されますので「Restart」ボタンをクリックします。
IntelliJ IDEA が再起動します。FindBugs-IDEA Plugin はこれだけでも使用可能ですが、gradle に findbugs を設定した時に作成した findbugs-exclude.xml を設定します。
再度 IntelliJ IDEA のメインメニューから「File」-「Settings…」を選択します。
「Settings」ダイアログが表示されます。画面左側のリストから「Other Settings」-「FindBugs-IDEA」を選択した後、画面右側で「Filter」タブをクリックして中央の「Exclude filter files」の「+」ボタンをクリックします。

「Exclude Filter Files」ダイアログが表示されますので、
C:\project-springboot\ksbysample-webapp-lending\config\findbugs\findbugs-exclude.xmlを選択して「OK」ボタンをクリックします。
「Settings」ダイアログに戻ります。「OK」ボタンをクリックしてダイアログを閉じます。
以上でインストール、設定は完了です。
Plugin から FindBugs を実行する
FindBugs-IDEA Plugin をインストールすると IntelliJ IDEA のメイン画面の左下に「FindBugs-IDEA」メニューが表示されます。

「FindBugs-IDEA」メニューをクリックします。
FindBugs-IDEA Plugin の画面が表示されます。画面左側の「Analyze Project Files」ボタンをクリックします。

「Test Sources」ダイアログが表示されます。テストは FindBugs の対象には入れないので「No」ボタンをクリックします。

チェックが実行された後、結果が表示されます。今は gradle で findbugs を実行して警告を取り除いているので何も引っかかりませんでした。

以前 findbugs で指摘を受けた箇所を元に戻して「Analyze Project Files」ボタンをクリックしてみます。
以下のようにファイルとメッセージが表示されました。

使ってみた感想としては、
- 指摘を受けている部分、内容が分かりやすいです。gradle の findbugs が出力するレポートファイルと比較すると圧倒的にこちらの方がいいですね。
- 画面左側の下矢印がある「Autoscroll to Source」ボタンが最初からクリックされている状態になっており、Plugin の画面に表示されているファイル名をクリックするとエディタで対象ファイルが開き該当箇所にジャンプします。
- 画面左側の一番左上にある「Analyze Current File」ボタンを押せば CheckStyle-IDEA Plugin と同じく現在表示しているファイルだけチェックできます。
こちらも CheckStyle-IDEA Plugin と同様に gradle の findbugs は最終チェックとして実行することにして、通常は FindBugs-IDEA Plugin を使った方が便利ですね。
次回は。。。
1.4 系ではこう書くべきという点があるか確認し、変更した方がよいところを修正します。
最後に。後からコードチェックツールを導入してたくさん指摘を受けると結構堪えます。出来れば最初から導入しましょう。今回本当にそう思いました。。。
ソースコード
build.gradle
■その1
apply plugin: 'java'
apply plugin: 'eclipse'
apply plugin: 'idea'
apply plugin: 'org.springframework.boot'
apply plugin: 'io.spring.dependency-management'
apply plugin: 'de.undercouch.download'
apply plugin: 'groovy'
apply plugin: 'net.ltgt.errorprone'
apply plugin: 'checkstyle'

..........

configurations {
    // for Doma 2
    domaGenRuntime

    // for Error Prone ( http://errorprone.info/ )
    errorprone {
        resolutionStrategy.force 'com.google.errorprone:error_prone_core:2.0.15'
    }
}

checkstyle {
    configFile = file("${rootProject.projectDir}/config/checkstyle/google_checks.xml")
    toolVersion = '7.5.1'
    sourceSets = [project.sourceSets.main]
}

repositories {
    jcenter()
}
apply plugin: 'checkstyle'を追加します。checkstyle { ... }を追加します。checkstyle によるチェックは main だけとし、test は対象外にします ( JUnit の日本語のメソッド名等で警告が出たり、Javadoc がないので警告が出たりしますが、出ても対応しないからです )。
■その2
apply plugin: 'java'
apply plugin: 'eclipse'
apply plugin: 'idea'
apply plugin: 'org.springframework.boot'
apply plugin: 'io.spring.dependency-management'
apply plugin: 'de.undercouch.download'
apply plugin: 'groovy'
apply plugin: 'net.ltgt.errorprone'
apply plugin: 'checkstyle'
apply plugin: 'findbugs'

..........

findbugs {
    toolVersion = '3.0.1'
    sourceSets = [project.sourceSets.main]
    ignoreFailures = true
    effort = "max"
}

repositories {
    jcenter()
}
apply plugin: 'findbugs'を追加します。findbugs { ... }を追加します。
■その3
findbugs {
    toolVersion = '3.0.1'
    sourceSets = [project.sourceSets.main]
    ignoreFailures = true
    effort = "max"
}

tasks.withType(FindBugs) {
    reports {
        xml.enabled = false
        html.enabled = true
    }
}

repositories {
    jcenter()
}
tasks.withType(FindBugs) { ... }を追加します。
■その4
findbugs {
    toolVersion = '3.0.1'
    sourceSets = [project.sourceSets.main]
    ignoreFailures = true
    effort = "max"
    excludeFilter = file("${rootProject.projectDir}/config/findbugs/findbugs-exclude.xml")
}
excludeFilter = file("${rootProject.projectDir}/config/findbugs/findbugs-exclude.xml")を追加します。
RegisterBooklistForm.java
public class RegisterBooklistForm {

    ..........

    @Data
    public static class RegisterBooklistRow {
public class RegisterBooklistRow {→public static class RegisterBooklistRow {へ変更します。
findbugs-exclude.xml
<?xml version="1.0" encoding="UTF-8"?>
<FindBugsFilter>
    <Match>
        <Class name="ksbysample.webapp.lending.web.lendingapp.LendingappService"/>
        <Bug pattern="DLS_DEAD_LOCAL_STORE"/>
    </Match>
</FindBugsFilter>
履歴
2017/02/19
初版発行。
2017/03/23
* Plugin の名前を間違えていました。CheckStyle-IDE, FindBugs-IDE → CheckStyle-IDEA, FindBugs-IDEA へ修正しました。
Spring Boot 1.3.x の Web アプリを 1.4.x へバージョンアップする ( その7 )( Google の Java コンパイル時バグチェックツール? Error Prone を試してみる )
概要
記事一覧はこちらです。
- 今回の手順で確認できるのは以下の内容です。
参照したサイト・書籍
google/error-prone
https://github.com/google/error-pronetbroyer/gradle-errorprone-plugin
https://github.com/tbroyer/gradle-errorprone-pluginerror-prone/examples/gradle/build.gradle
https://github.com/google/error-prone/blob/master/examples/gradle/build.gradle- build.gradle に Error Prone を導入する時のサンプルです。
How To Find Bugs, Part 1: A Minimal Bug Detector
https://www.lmax.com/blog/staff-blogs/2016/04/01/find-bugs-part-1-minimal-bug-detector/guava - warning: Cannot find annotation method - Warnings as errors causes builds to fail
https://github.com/robolectric/robolectric/issues/2446Adding the gradle-errorprone-plugin causes “bad path element” warnings, need to add “-Xlint:-path” to compilerArgs
https://github.com/tbroyer/gradle-errorprone-plugin/issues/15
目次
- Error Prone を導入してみる
- Error Prone とは?
- build.gradle を変更する
- build タスクを実行する
- ClassNewInstance の警告を修正する
- MissingOverride の警告を修正する
- GetClassOnClass のエラーを修正する
- 再び build タスクを実行するも、なぜかまだエラーが。。。
- MissingOverride の警告を修正する
警告: タイプ'GuardedBy'内に注釈メソッド'value()'が見つかりません: javax.annotation.concurrent.GuardedByのクラス・ファイルが見つかりませんの警告を修正する- Finally の警告を修正する
- GetClassOnAnnotation のエラーを修正する
- 再び build タスクを実行するもまだエラーが出ます
警告: [path] 不正なパス要素"C:\project-springboot\ksbysample-webapp-lending\build\resources\main": そのファイルまたはディレクトリはありませんの警告を修正する- BoxedPrimitiveConstructor の警告を修正する
- MissingOverride の警告を修正する
- 再び build タスクを実行し、やっと警告もエラーも出なくなりました
- Error-prone Compiler Integration Plugin を導入してみる
- 次回は。。。
手順
Error Prone を導入してみる
Error Prone とは?
- Google の バグチェックツール。
- バージョン 2.0.6 以降は Java 1.8 以降でしか動作しません。
- ソースコードを静的解析するのではなく、Java コンパイラの機能で抽象構文ツリー (Abstract Syntax Tree、AST) にしてチェックするらしいです。
- 検出できるバグの種類は FindBugs と比較すると少ないですが、plugin を作成して追加できます。
- 検出できるバグの一覧は Bug patterns のページに記載されています。詳細ページには説明以外にサンプルコードも書かれており、内容が分かりやすいです。
- FindBugs 3.0.1 では検出できない
Files.lines(...)の try-with-resources 構文使用漏れが検出できます。ちなみに FindBugs で検出させるための記事が How To Find Bugs, Part 1: A Minimal Bug Detector にありました。 - ClassNewInstance を見ると “deprecation in JDK 9” という記述も。JDK 9 も見据えて使用すべきではないコードも検出できるようです。
build.gradle を変更する
error-prone/examples/gradle/build.gradle を参考にして build.gradle を リンク先のその1の内容 に変更します。
変更後、Gradle Tool Window の左上にある「Refresh all Gradle projects」ボタンをクリックして更新します。
build タスクを実行する
clean タスク → Rebuild Project → build タスク の順に実行します。
build タスクが実行されるといろいろダウンロードされます。
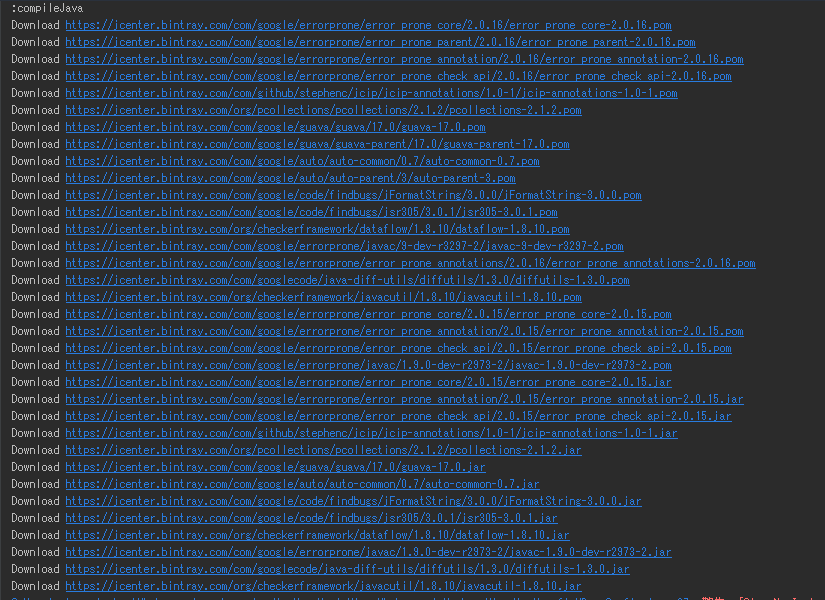
その後コンパイルエラーが出力されて、最後に “BUILD FAILED” が出力されました。結構ありますね。。。
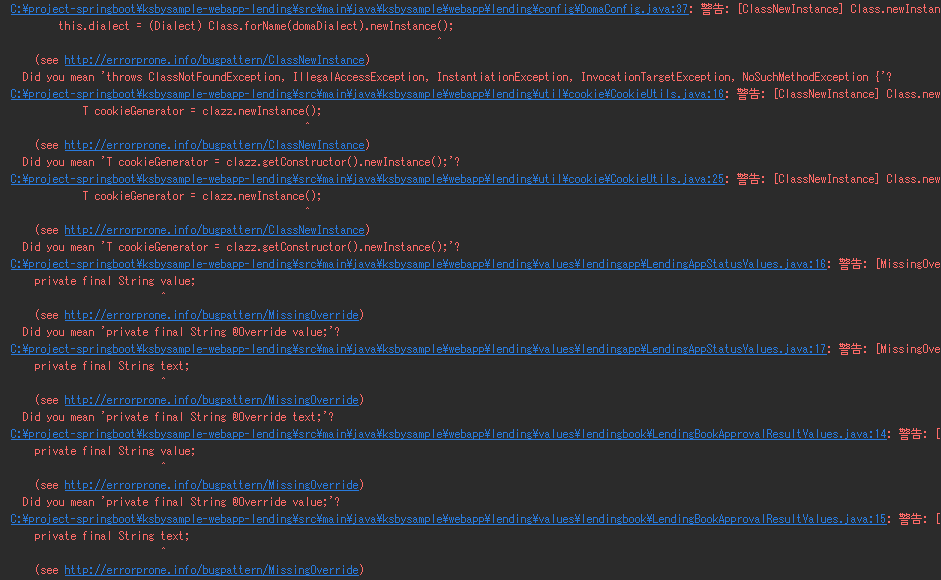
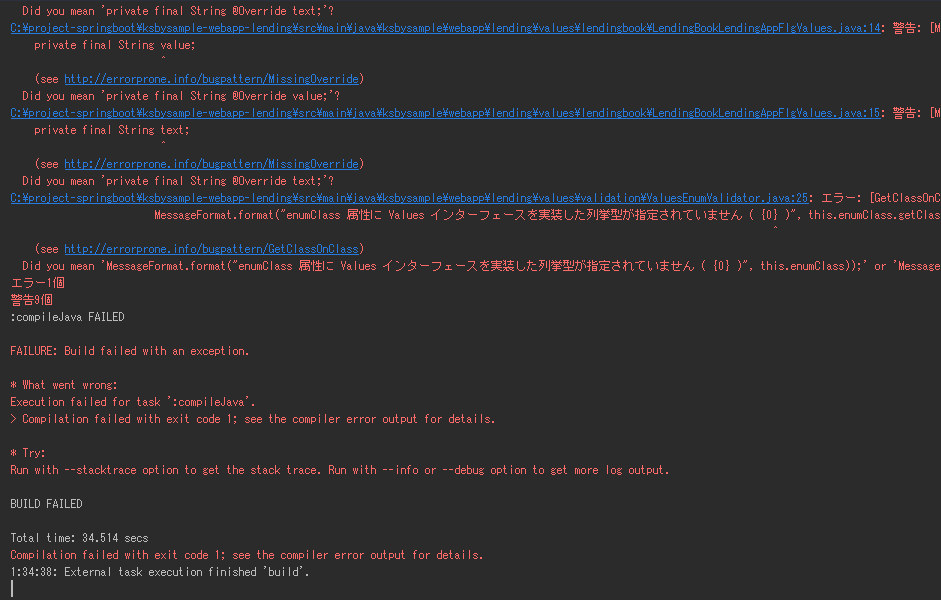
ソースファイルと行数、エラーか警告か、エラーの種類 ( [ClassNewInstance] 等 )、エラーと判定されたソースの位置が出力されます。
またエラーの詳細は各エラー毎に出力されている
(see http://errorprone.info/bugpattern/...)のリンクをクリックすると Web ページが表示されて確認できます。かなり分かりやすいです。出力されたエラーはエラー1個、警告9個で、種類は以下の3種類でした。
ClassNewInstance の警告を修正する
Class#newInstance は問題があって JDK 9 から非推奨になるらしいので修正します。
src/main/java/ksbysample/webapp/lending/config の下の DomaConfig.java を リンク先の内容 に変更します。
src/main/java/ksbysample/webapp/lending/util/cookie の下の CookieUtils.java を リンク先の内容 に変更します。
MissingOverride の警告を修正する
Values オブジェクトはかなりトリッキーなことをしているので @SuppressWarnings("MissingOverride") を付けて警告を回避します。
src/main/java/ksbysample/webapp/lending/values/lendingapp の下の LendingAppStatusValues.java を リンク先の内容 に変更します。
src/main/java/ksbysample/webapp/lending/values/lendingbook の下の LendingBookApprovalResultValues.java を リンク先の内容 に変更します。
src/main/java/ksbysample/webapp/lending/values/lendingbook の下の LendingBookLendingAppFlgValues.java を リンク先の内容 に変更します。
GetClassOnClass のエラーを修正する
こちらは単純なミスでした。
- src/main/java/ksbysample/webapp/lending/values/validation の下の ValuesEnumValidator.java を リンク先の内容 に変更します。
再び build タスクを実行するも、なぜかまだエラーが。。。
これでエラーが全て解消されたはずなので、再び clean タスク → Rebuild Project → build タスク の順に実行します。
が、なぜかまた大量にエラーが出ました。エラーの数が一定数を超えるとそれ以上のエラーは出なくなるのでしょうか?
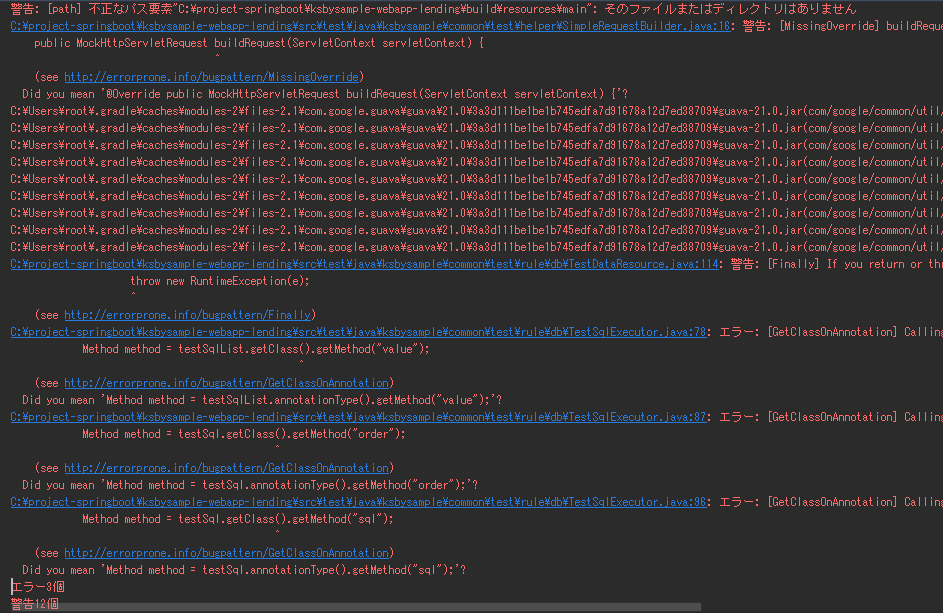
出力されたエラーはエラー3個、警告12個で、種類は以下の4種類でした。
- http://errorprone.info/bugpattern/MissingOverride
- 警告: タイプ'GuardedBy'内に注釈メソッド'value()‘が見つかりません: javax.annotation.concurrent.GuardedByのクラス・ファイルが見つかりません
- http://errorprone.info/bugpattern/Finally
- http://errorprone.info/bugpattern/GetClassOnAnnotation
MissingOverride の警告を修正する
単純な @Override つけ忘れでした。
警告: タイプ'GuardedBy'内に注釈メソッド'value()'が見つかりません: javax.annotation.concurrent.GuardedByのクラス・ファイルが見つかりません の警告を修正する
Web で検索したら guava - warning: Cannot find annotation method - Warnings as errors causes builds to fail という GitHub の Issue が見つかりました。testCompile 'com.google.code.findbugs:jsr305:1.3.9' を付ければ警告が消えると書いてありますので、同じように対応します。。
build.gradle を リンク先のその2の内容 に変更します。
変更後、Gradle Tool Window の左上にある「Refresh all Gradle projects」ボタンをクリックして更新します。
Finally の警告を修正する
finally 内で throw していることが原因による警告です。テスト用のクラスでエラーを検出する方を優先したいので @SuppressWarnings("Finally") を付けて警告が出ないようにします。
GetClassOnAnnotation のエラーを修正する
getClass() ではなく annotationType() を使え、というエラーでした。annotationType() は知りませんでしたね。
再び build タスクを実行するもまだエラーが出ます
出ていたエラーを解消したので、再び clean タスク → Rebuild Project → build タスク の順に実行します。
が、まだエラーが出ますね。見た感じ、軽微そうな警告のみになってきました。
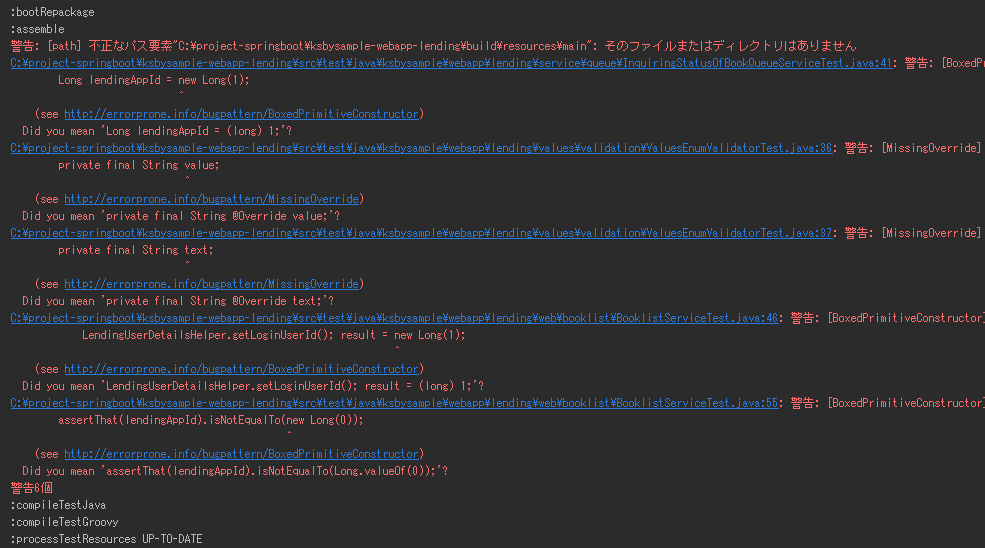
出力されたエラーは警告6個で、種類は以下の3種類でした。最初の “[path] 不正なパス要素…” は最初から出ていたのですが、"(see http://errorprone.info/bugpattern/…)“ が出力されていなかったのでスルーしていました。今回はこちらも修正します。
- 警告: [path] 不正なパス要素"C:\project-springboot\ksbysample-webapp-lending\build\resources\main": そのファイルまたはディレクトリはありません
- http://errorprone.info/bugpattern/BoxedPrimitiveConstructor
- http://errorprone.info/bugpattern/MissingOverride
警告: [path] 不正なパス要素"C:\project-springboot\ksbysample-webapp-lending\build\resources\main": そのファイルまたはディレクトリはありません の警告を修正する
Web で検索したら Adding the gradle-errorprone-plugin causes “bad path element” warnings, need to add “-Xlint:-path” to compilerArgs という GitHub の Issue が見つかりました。Java コンパイル時の -Xlint オプションに -path を付ければよいようです。
- build.gradle を リンク先のその3の内容 に変更します。
BoxedPrimitiveConstructor の警告を修正する
new Long(...) は JDK 9 から非推奨になるので Long.valueOf(...) を使った方がよいという警告です。
src/main/java/ksbysample/webapp/lending/service/queue の下の InquiringStatusOfBookQueueServiceTest.java を リンク先の内容 に変更します。
src/main/java/ksbysample/webapp/lending/web/booklist の下の BooklistServiceTest.java を リンク先の内容 に変更します。
MissingOverride の警告を修正する
こちらは前と同じでした。@SuppressWarnings("MissingOverride") を付けて警告を回避します。
- src/test/java/ksbysample/webapp/lending/values/validation の下の ValuesEnumValidatorTest.java を リンク先の内容 に変更します。
再び build タスクを実行し、やっと警告もエラーも出なくなりました
出ていたエラーを解消したので、再び clean タスク → Rebuild Project → build タスク の順に実行します。
今度は1つも警告、エラーが出ずに “BUILD SUCCESSFUL” の文字が出力されました。FindBugs より検出できるバグは少ないと聞いていましたが、結構検出されましたね。。。 また JDK 9 から非推奨になる部分に警告が出て、修正内容も Bug patterns のページで分かるのはかなり良さそうな感触でした。
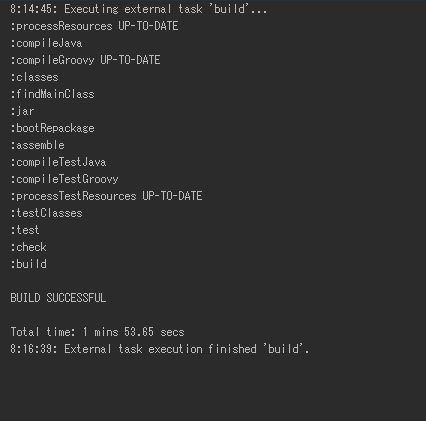
Error Prone は個人的にはかなり気に入りましたので、今後は積極的に入れていきたいと思います。
Error-prone Compiler Integration Plugin を導入してみる
Error-prone Compiler Integration Plugin をインストールする
IntelliJ IDEA のメインメニューから「File」-「Settings…」を選択します。
「Settings」ダイアログが表示されます。画面左側のリストから「Plugins」を選択した後、画面中央下の「Browse repositories…」ボタンをクリックします。
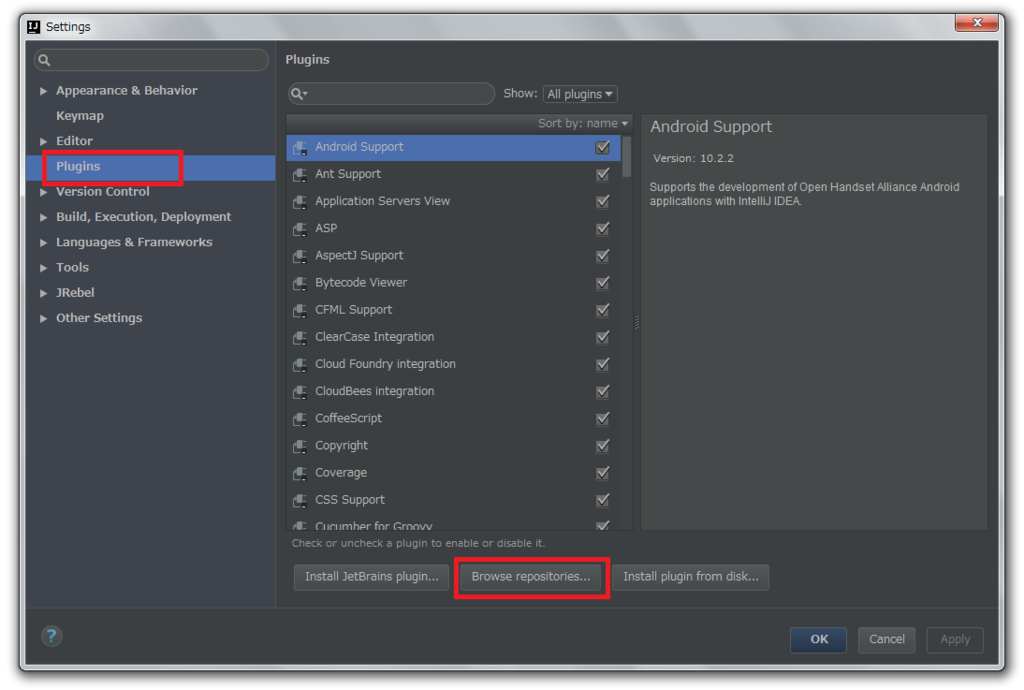
「Browse Repositories」ダイアログが表示されます。画面左上の検索フィールドに “Error-prone” と入力すると「Error-prone Compiler Integration」が表示されますので、選択して「Install」ボタンをクリックします。
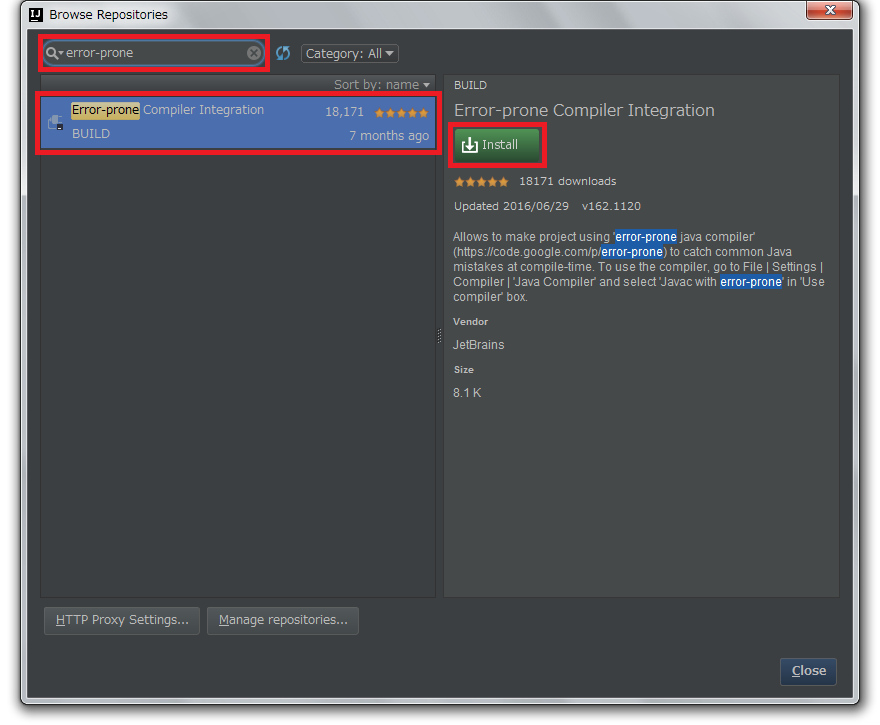
プラグインがダウンロードされて「Install」ボタンが「Restart IntelliJ IDEA」ボタンに切り替わりますのでクリックします。
「Settings」ダイアログに戻りますので「OK」ボタンをクリックします。
「Platform and Plugin Updates」ダイアログが表示されますので「Restart」ボタンをクリックします。
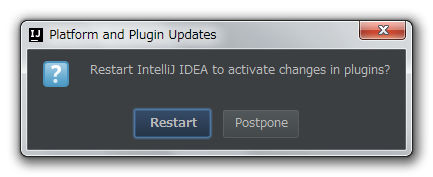
IntelliJ IDEA が再起動します。再起動しただけではまだ有効になっていません。設定を変更します。
再度 IntelliJ IDEA のメインメニューから「File」-「Settings…」を選択します。
「Settings」ダイアログが表示されます。画面左上の検索フィールドに “java compiler” と入力した後、画面左側のリストから「Java Compiler」を選択して、画面中央上の「Use compiler」で “Javac” → “Javac with error-prone” へ変更します。変更後「OK」ボタンをクリックしてダイアログを閉じます。
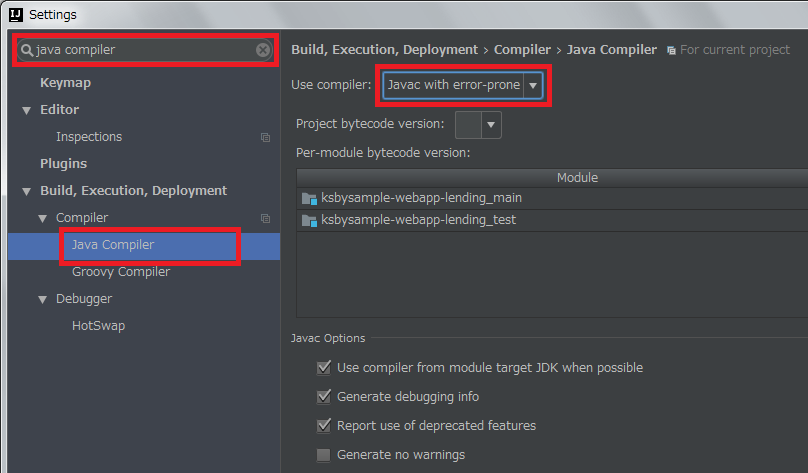
以上でインストール、設定は完了です。
Rebuild Project を実行する
IntelliJ IDEA のメインメニューから「Build」-「Rebuild Project」を選択します。
gradle からのコンパイル時エラーは全て解消したので大丈夫だろうと思っていたら、1件だけ警告が出ました。

出た警告は以下のものでした。
TypeParameterUnusedInFormals の警告を修正する
警告が出たのは src/main/java/ksbysample/webapp/lending/webapi/common の下の CommonWebApiResponse.java で、
@Data
public class CommonWebApiResponse<T> {

    private int errcode = 0;

    private String errmsg = "";

    private T content;

}
という書き方だと private T content; の T は型チェックが機能しないらしいです。きちんと型チェックを機能させるためには以下のように書くべきらしいですが、このクラスは Jackson が JSON に自動変換する際に使用するためのもので以下の実装にしても public <T> T getContent(Class<T> clazz) メソッドは呼び出されないので、@SuppressWarnings("TypeParameterUnusedInFormals") を付加して回避することにします。
@Data
public class CommonWebApiResponse<T> {

    private int errcode = 0;

    private String errmsg = "";

    private T content;

    public <T> T getContent(Class<T> clazz) {
        return clazz.cast(this.content);
    }

}
src/main/java/ksbysample/webapp/lending/webapi/common の下の CommonWebApiResponse.java を リンク先の内容 に変更します。
IntelliJ IDEA のメインメニューから「Build」-「Rebuild Project」を選択して実行すると今度はエラー、警告は1件も出ませんでした。
次回は。。。
コードチェックツールに興味が湧いたので、IntelliJ IDEA の Plugin である CheckStyle-IDEA, FindBugs-IDEA の導入、及び build.gradle への checkstyle の導入をしてみます。
ソースコード
build.gradle
■その1
buildscript {
    ext {
        springBootVersion = '1.4.4.RELEASE'
    }
    repositories {
        jcenter()
        maven { url "http://repo.spring.io/repo/" }
        maven { url "https://plugins.gradle.org/m2/" }
    }
    dependencies {
        classpath("org.springframework.boot:spring-boot-gradle-plugin:${springBootVersion}")
        classpath("io.spring.gradle:dependency-management-plugin:0.6.1.RELEASE")
        // for Error Prone ( http://errorprone.info/ )
        classpath("net.ltgt.gradle:gradle-errorprone-plugin:0.0.8")
        // for Grgit
        classpath("org.ajoberstar:grgit:1.8.0")
        // Gradle Download Task
        classpath("de.undercouch:gradle-download-task:3.2.0")
    }
}

apply plugin: 'java'
apply plugin: 'eclipse'
apply plugin: 'idea'
apply plugin: 'org.springframework.boot'
apply plugin: 'io.spring.dependency-management'
apply plugin: 'de.undercouch.download'
apply plugin: 'groovy'
apply plugin: 'net.ltgt.errorprone'

..........

configurations {
    // for Doma 2
    domaGenRuntime

    // for Error Prone ( http://errorprone.info/ )
    errorprone {
        resolutionStrategy.force 'com.google.errorprone:error_prone_core:2.0.15'
    }
}

repositories {
    jcenter()
}
- buildscript の以下の点を変更します。
- repositories に
maven { url "https://plugins.gradle.org/m2/" }を追加します。 - dependencies に
classpath("net.ltgt.gradle:gradle-errorprone-plugin:0.0.8")を追加します。
- repositories に
apply plugin: 'net.ltgt.errorprone'を追加します。- configurations に
errorprone { resolutionStrategy.force 'com.google.errorprone:error_prone_core:2.0.15' }を追加します。
■その2
dependencies {
    ..........

    // dependency-management-plugin によりバージョン番号が自動で設定されないもの、あるいは最新バージョンを指定したいもの
    ..........
    testCompile("org.spockframework:spock-core:${spockVersion}") {
        exclude module: "groovy-all"
    }
    testCompile("org.spockframework:spock-spring:${spockVersion}") {
        exclude module: "groovy-all"
    }
    testCompile("com.google.code.findbugs:jsr305:3.0.1")
testCompile("com.google.code.findbugs:jsr305:3.0.1")を追加します。
■その3
[compileJava, compileTestGroovy, compileTestJava]*.options*.compilerArgs = ['-Xlint:all,-options,-processing,-path']
,-pathを追加します。
DomaConfig.java
@Component
public class DomaConfig implements Config {

    ..........

    @Autowired
    public void setDialect(@Value("${doma.dialect}") String domaDialect)
            throws ClassNotFoundException, IllegalAccessException, InstantiationException
            , NoSuchMethodException, InvocationTargetException {
        this.dialect = (Dialect) Class.forName(domaDialect).getConstructor().newInstance();
    }
Class.forName(domaDialect).newInstance();→Class.forName(domaDialect).getConstructor().newInstance();に変更します。- setDialect メソッドの throws に
, NoSuchMethodException, InvocationTargetExceptionを追加します。
CookieUtils.java
public class CookieUtils {

    public static <T extends CookieGenerator> void addCookie(Class<T> clazz, HttpServletResponse response, String cookieValue) {
        try {
            T cookieGenerator = clazz.getConstructor().newInstance();
            cookieGenerator.addCookie(response, cookieValue);
        } catch (InstantiationException | IllegalAccessException | NoSuchMethodException | InvocationTargetException e) {
            throw new RuntimeException(e);
        }
    }

    public static <T extends CookieGenerator> void removeCookie(Class<T> clazz, HttpServletResponse response) {
        try {
            T cookieGenerator = clazz.getConstructor().newInstance();
            cookieGenerator.removeCookie(response);
        } catch (InstantiationException | IllegalAccessException | NoSuchMethodException | InvocationTargetException e) {
            throw new RuntimeException(e);
        }
    }
- addCookie, removeCookie メソッド内の以下の点を変更します。
clazz.newInstance();→clazz.getConstructor().newInstance();へ変更します。- catch に列挙する例外に
| NoSuchMethodException | InvocationTargetExceptionを追加します。
LendingAppStatusValues.java
@SuppressWarnings("MissingOverride")
@Getter
@AllArgsConstructor
public enum LendingAppStatusValues implements Values {
@SuppressWarnings("MissingOverride")を追加します。
LendingBookApprovalResultValues.java
@SuppressWarnings("MissingOverride")
@Getter
@AllArgsConstructor
public enum LendingBookApprovalResultValues implements Values {
@SuppressWarnings("MissingOverride")を追加します。
LendingBookLendingAppFlgValues.java
@SuppressWarnings("MissingOverride")
@Getter
@AllArgsConstructor
public enum LendingBookLendingAppFlgValues implements Values {
@SuppressWarnings("MissingOverride")を追加します。
ValuesEnumValidator.java
public class ValuesEnumValidator implements ConstraintValidator<ValuesEnum, String> {

    ..........

    @Override
    public void initialize(ValuesEnum constraintAnnotation) {
        this.enumClass = constraintAnnotation.enumClass();
        this.allowEmpty = constraintAnnotation.allowEmpty();

        // enumClass 属性に Values インターフェースを実装していない列挙型が指定されている場合にはエラーにする
        try {
            if (!Values.class.isAssignableFrom(Class.forName(this.enumClass.getName()))) {
                throw new RuntimeException(
                        MessageFormat.format("enumClass 属性に Values インターフェースを実装した列挙型が指定されていません ( {0} )"
                                , this.enumClass.getName()));
            }
        } catch (ClassNotFoundException e) {
            throw new RuntimeException(e);
        }
    }
MessageFormat.format(...)のthis.enumClass.getClass()→this.enumClass.getName()に変更します。
SimpleRequestBuilder.java
public class SimpleRequestBuilder implements RequestBuilder {

    private final MockHttpServletRequest request;

    public SimpleRequestBuilder(MockHttpServletRequest request) {
        this.request = request;
    }

    @Override
    public MockHttpServletRequest buildRequest(ServletContext servletContext) {
        return request;
    }

}
- buildRequest メソッドに
@Overrideを付加します。
TestDataResource.java
@Component
public class TestDataResource extends TestWatcher {

    ..........

    @SuppressWarnings("Finally")
    @Override
    protected void finished(Description description) {
- finished メソッドに
@SuppressWarnings("Finally")を付加します。
TestSqlExecutor.java
public class TestSqlExecutor<L extends Annotation, I extends Annotation> {

    ..........

    @SuppressWarnings("unchecked")
    private I[] value(L testSqlList) {
        try {
            Method method = testSqlList.annotationType().getMethod("value");
            return (I[]) method.invoke(testSqlList);
        } catch (NoSuchMethodException | InvocationTargetException | IllegalAccessException e) {
            throw new RuntimeException(e);
        }
    }

    private long order(I testSql) {
        try {
            Method method = testSql.annotationType().getMethod("order");
            return (long) method.invoke(testSql);
        } catch (NoSuchMethodException | InvocationTargetException | IllegalAccessException e) {
            throw new RuntimeException(e);
        }
    }

    private String sql(I testSql) {
        try {
            Method method = testSql.annotationType().getMethod("sql");
            return (String) method.invoke(testSql);
        } catch (NoSuchMethodException | InvocationTargetException | IllegalAccessException e) {
            throw new RuntimeException(e);
        }
    }

}
- value メソッド内の
testSqlList.getClass().getMethod("value");→testSqlList.annotationType().getMethod("value");へ変更しました。 - order メソッド内の
testSql.getClass().getMethod("order");→testSql.annotationType().getMethod("order");へ変更しました。 - sql メソッド内の
testSql.getClass().getMethod("sql");→testSql.annotationType().getMethod("sql");へ変更しました。
InquiringStatusOfBookQueueServiceTest.java
public class InquiringStatusOfBookQueueServiceTest {

    ..........

    @Test
    public void testSendMessage() throws Exception {
        RabbitAdmin rabbitAdmin = new RabbitAdmin(connectionFactory);
        rabbitAdmin.deleteQueue(Constant.QUEUE_NAME_INQUIRING_STATUSOFBOOK);
        rabbitAdmin.declareQueue(queue);

        Long lendingAppId = Long.valueOf(1L);
        inquiringStatusOfBookQueueService.sendMessage(lendingAppId);

        InquiringStatusOfBookQueueMessage message
                = (InquiringStatusOfBookQueueMessage) rabbitTemplate.receiveAndConvert(Constant.QUEUE_NAME_INQUIRING_STATUSOFBOOK);
        assertThat(message.getLendingAppId()).isEqualTo(lendingAppId);
    }
}
- testSendMessage メソッド内の
new Long(1);→Long.valueOf(1L);へ変更します。
BooklistServiceTest.java
public class BooklistServiceTest {

    ..........

    @Test
    public void testTemporarySaveBookListCsvFile() throws Exception {
        new Expectations(LendingUserDetailsHelper.class) {{
            LendingUserDetailsHelper.getLoginUserId(); result = Long.valueOf(1L);
        }};

        ..........

        Long lendingAppId = booklistService.temporarySaveBookListCsvFile(uploadBooklistForm);
        assertThat(lendingAppId).isNotEqualTo(Long.valueOf(0L));
        IDataSet dataSet = new CsvDataSet(new File("src/test/resources/ksbysample/webapp/lending/web/booklist/assertdata/001"));
- testTemporarySaveBookListCsvFile メソッド内の以下の点を変更します。
new Long(1);→Long.valueOf(1L);へ変更します。new Long(0);→Long.valueOf(0L);へ変更します。
ValuesEnumValidatorTest.java
public class ValuesEnumValidatorTest {

    // テスト用 Value 列挙型
    @SuppressWarnings("MissingOverride")
    @Getter
    @AllArgsConstructor
    private enum TestValues implements Values {
        FIRST("1", "1番目")
        , SECOND("2", "2番目")
        , THIRD("3", "3番目");

        private final String value;
        private final String text;
    }
- TestValues 列挙型に
@SuppressWarnings("MissingOverride")を付加します。
CommonWebApiResponse.java
package ksbysample.webapp.lending.webapi.common;

import lombok.Data;

@SuppressWarnings("TypeParameterUnusedInFormals")
@Data
public class CommonWebApiResponse<T> {

    private int errcode = 0;

    private String errmsg = "";

    private T content;

}
@SuppressWarnings("TypeParameterUnusedInFormals")を追加します。
履歴
2017/02/18
初版発行。
Spring Boot 1.3.x の Web アプリを 1.4.x へバージョンアップする ( その6 )( 「Run 'All Tests' with Coverage」実行時のエラーを解消する+build タスク実行時の警告を解消する )
概要
記事一覧はこちらです。
- 今回の手順で確認できるのは以下の内容です。
- 「Run ‘All Tests’ with Coverage」実行時のエラーの解消
- 上の対応にそんなに時間がかからなかったので、build タスク実行時に出る警告も解消します
参照したサイト・書籍
How to load freemarker templates from external file system folder with Spring Boot
http://www.sandc.software/blog/how-to-load-freemarker-templates-from-external-file-system-folder-with-spring-boot/Compilation error while upgrading from Guava 19 to 20
http://stackoverflow.com/questions/40364635/compilation-error-while-upgrading-from-guava-19-to-20google/error-prone
https://github.com/google/error-prone- このページを見ると Guava 20 から依存している error_prone_annotations ライブラリは Google の静的解析ツール関連のライブラリのようです。
目次
- 何のエラーが出ているのか?
java.lang.RuntimeException: freemarker.template.TemplateNotFoundException: Template not found for name ...- 「Run ‘All Tests’ with Coverage」実行時のエラーが解消したので build タスクも試してみる
警告: タイプ'CompatibleWith'内に注釈メソッド'value()'が見つかりません: com.google.errorprone.annotations.CompatibleWithのクラス・ファイルが見つかりません- 次回は。。。
手順
何のエラーが出ているのか?
失敗しているテストは 7 個、種類は以下の3種類でした。
- Mail001HelperTest, Mail002HelperTest, Mail003HelperTest, InquiringStatusOfBookQueueListenerTest
java.lang.RuntimeException: freemarker.template.TemplateNotFoundException: Template not found for name "mail/mail001-body.ftl".のようにテンプレートファイルが見つからないというエラーが出ています。
- LendingappControllerTest$貸出申請画面の正常処理時のテスト
- java.lang.AssertionError: View name
- Expected :lendingapp/lendingapp
- Actual :error
- LendingapprovalControllerTest$貸出承認画面の正常処理時のテスト
- java.lang.AssertionError: View name
- Expected :lendingapproval/lendingapproval
- Actual :error
java.lang.RuntimeException: freemarker.template.TemplateNotFoundException: Template not found for name ...
上のエラーと一緒に
The name was interpreted by this TemplateLoader: MultiTemplateLoader(loader1 = FileTemplateLoader(baseDir=“C:\project-springboot\ksbysample-webapp-lending\build\resources\test\templates”, canonicalBasePath=“C:\project-springboot\ksbysample-webapp-lending\build\resources\test\templates\”), loader2 = ClassTemplateLoader(resourceLoaderClass=org.springframework.web.servlet.view.freemarker.FreeMarkerConfigurer, basePackagePath=“” / relatively to resourceLoaderClass pkg /)).
というエラーメッセージも出ています。テストクラスからテストを実行した時に src/main/resources/templates の下に配置したテンプレートファイルを参照できていないように見えます。
Web で何か情報がないかいろいろ検索するも見つからず。。。
どうしてよいのか困ってしまいましたが、設定で何とかなるように作られているはずと思い Spring Boot Reference Guide の Appendix A. Common application properties に記載されている spring.freemarker.~ の設定項目をいろいろ試してみました。
結論として以下の設定を application.properties に追加するとテストが成功するようになりました。
spring.freemarker.prefer-file-system-access=false

しかも他に出ていた java.lang.AssertionError: View name のエラーも消えました。上の設定を入れた後に「Run ‘All Tests’ with Coverage」を実行した結果が以下の画像です。failed のテストが1つもありません。

Velocity → FreeMarker への移行方法は前回の記事にまとめておきたいので、Spring Boot 1.3.x の Web アプリを 1.4.x へバージョンアップする ( その5 )( メールのテンプレートに使用していた Velocity を FreeMarker に変更する ) にもこの内容を反映しました。
デフォルト値は false にした方が良さそうな気がしますが、なぜ true なのでしょうか? 自分の実装に今まで気付いていない問題があるのかもしれませんが、現時点では分かりませんでした。。。
「Run ‘All Tests’ with Coverage」実行時のエラーが解消したので build タスクも試してみる
「Run ‘All Tests’ with Coverage」でテストが全て成功するようになり、build タスクも通るのでは?と思ったので試してみます。
無事 “BUILD SUCCESSFUL” のメッセージが表示されました! ただし guava で警告が 10 個出力されているので、その原因を調査します。
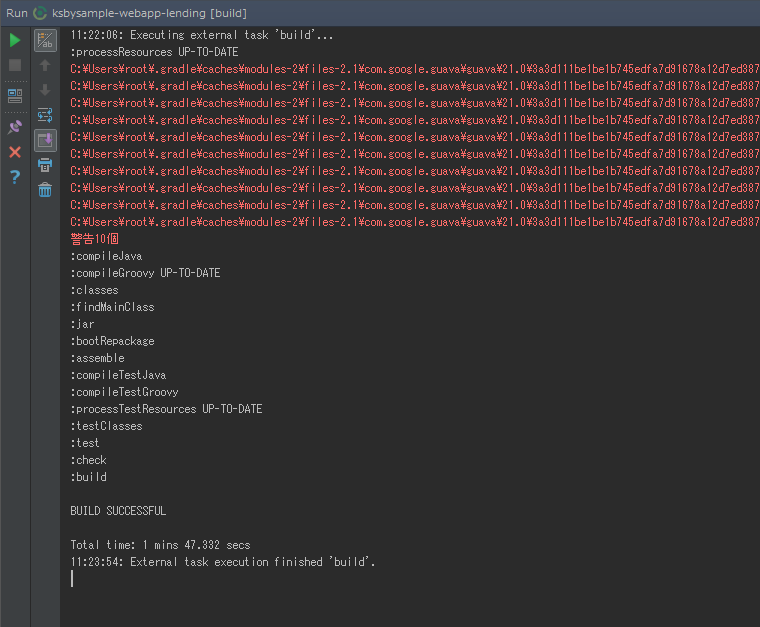
警告: タイプ'CompatibleWith'内に注釈メソッド'value()'が見つかりません: com.google.errorprone.annotations.CompatibleWithのクラス・ファイルが見つかりません
出力されている警告は以下のものでした。
C:\Users\root.gradle\caches\modules-2\files-2.1\com.google.guava\guava\21.0\3a3d111be1be1b745edfa7d91678a12d7ed38709\guava-21.0.jar(com/google/common/collect/Multiset.class): 警告: タイプ'CompatibleWith'内に注釈メソッド'value()‘が見つかりません: com.google.errorprone.annotations.CompatibleWithのクラス・ファイルが見つかりません
調べると stackoverflow の QA で Compilation error while upgrading from Guava 19 to 20 が見つかりました。Guava の 20 から error_prone_annotations ライブラリに依存していると書かれているので、build.gradle に追加してみます。
build.gradle を リンク先の内容 に変更します。変更後、Gradle Tool Window の左上にある「Refresh all Gradle projects」ボタンをクリックして更新します。
clean タスク → Rebuild Project → build タスク の順に実行すると今度は警告が出ませんでした。
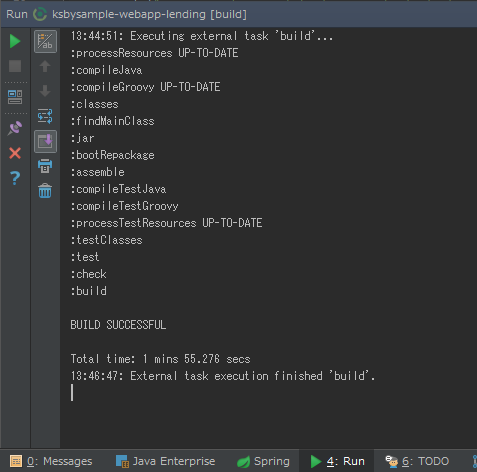
次回は。。。
今回初めて知った Google の Java 静的解析ツール Error Prone に興味が湧いたので試してみたいと思います。
ソースコード
build.gradle
dependencies {
    ..........

    // dependency-management-plugin によりバージョン番号が自動で設定されないもの、あるいは最新バージョンを指定したいもの
    runtime("${jdbcDriver}")
    compile("org.seasar.doma:doma:2.15.0")
    compile("org.bgee.log4jdbc-log4j2:log4jdbc-log4j2-jdbc4.1:1.16")
    compile("org.apache.commons:commons-lang3:3.5")
    compile("com.google.guava:guava:21.0")
    compileOnly("com.google.errorprone:error_prone_annotations:2.0.15")
    compile("org.simpleframework:simple-xml:2.7.1")
compileOnly("com.google.errorprone:error_prone_annotations:2.0.15")を追加します。
履歴
2017/02/12
初版発行。
Spring Boot 1.3.x の Web アプリを 1.4.x へバージョンアップする ( その5 )( メールのテンプレートに使用していた Velocity を FreeMarker に変更する )
概要
記事一覧はこちらです。
- 今回の手順で確認できるのは以下の内容です。
java: org.springframework.ui.velocityのorg.springframework.ui.velocity.VelocityEngineUtilsは非推奨になりましたの対応として、これまでメールのテンプレートに使用していた Velocity を FreeMarker に変更します。- 今後のサンプル作成で Thymeleaf 3 は必ずさわると思うので、今回は FreeMarker を使用する場合の対応方法を調べたいと思います。
参照したサイト・書籍
FreeMarker Java Template Engine
http://freemarker.org/Spring BootアプリのテストをSpockで書く
http://int128.hatenablog.com/entry/2016/12/13/003600Spring Boot Security + Thymeleaf : IProcessorDialect class missing
http://stackoverflow.com/questions/37270322/spring-boot-security-thymeleaf-iprocessordialect-class-missingHow to check if a variable exists in a FreeMarker template?
http://stackoverflow.com/questions/306732/how-to-check-if-a-variable-exists-in-a-freemarker-templateThe Move from Velocity to FreeMarker with Spring Boot
http://nixmash.com/java/the-move-from-velocity-to-freemarker-with-spring-boot/
目次
- build.gradle を変更する
- spring-boot-starter-freemarker では何が auto-configuration されるのか?
- application.properties を変更する
- VelocityUtils → FreeMarkerUtils へ変更する
- FreeMarkerUtilsTest クラスを作成して動作確認する
- メールのテンプレートファイルを変更する
- ksbysample.webapp.lending.helper.mail パッケージの下の MailxxxHelper クラスを変更する
- 動作確認はまだできないので Rebuild Project の確認だけ行う
- 次回は。。。
手順
build.gradle を変更する
build.gradle を リンク先のその1の内容 に変更します。
Gradle Tool Window の左上にある「Refresh all Gradle projects」ボタンをクリックして更新します。
FreeMaker のホームページ を見ると最新版は Latest stable release: 2.3.25-incubating と書かれていますが、spring-boot-starter-freemarker を追加してダウンロードされたバージョンも同じでした。
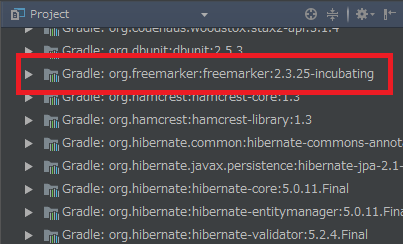
spring-boot-starter-freemarker では何が auto-configuration されるのか?
Spring Boot でメール送信する Web アプリケーションを作る ( その6 )( メール送信画面の作成 ) で spring-boot-starter-velocity を調べた時のように spring-boot-starter-freemarker の AutoConfiguration の動作を確認します。
org.springframework.boot.autoconfigure.freemarker の FreeMarkerAutoConfiguration クラスが FreeMarker の AutoConfiguration クラスで、ソースを見て分かることは、
- spring.freemarker.enabled = false を設定すれば、HTML のテンプレートファイル用の設定は反映されません ( freeMarkerViewResolver Bean が生成されません )。
- VelocityEngine に該当するのは freemarker.template.Configuration を返す freeMarkerConfiguration Bean のようです。FreeMarker の Manual の Create a configuration instance と Get the template を見た感じでは freemarker.template.Configuration から freemarker.template.Template を生成すればメールのテンプレートとして利用できそうです。
- テンプレートファイルの拡張子は
.ftlです ( これは org.springframework.boot.autoconfigure.freemarker の下の FreeMarkerProperties クラスに記述があります )。
また application.properties に設定する項目を Spring Boot Reference Guide の Appendix A. Common application properties で確認すると、
- FreeMarker の設定は spring.freemarker.~ で設定します。
キャッシュの設定がデフォルトでは
spring.freemarker.cache=falseと書かれています。デフォルトは有効で DevTools を入れると無効になる、という訳ではないようです。IntelliJ IDEA の補完ではデフォルト値は表示されないのですが、どちらが正しいのかは build まで通った後に忘れていなければ検証したいと思います。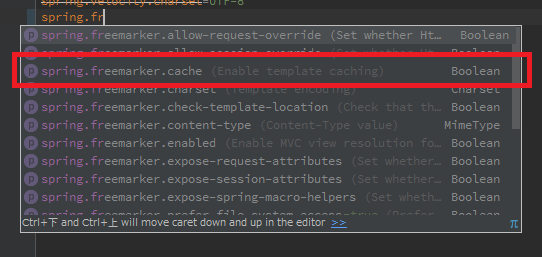
ちなみに DevTools を入れると FreeMarker のキャッシュが無効になることは org.springframework.boot.devtools.env の下の DevToolsPropertyDefaultsPostProcessor クラスに
properties.put("spring.freemarker.cache", "false");と記述されていることで確認しています。
application.properties を変更する
- src/main/resources の下の application.properties を リンク先の内容 に変更します。
VelocityUtils → FreeMarkerUtils へ変更する
Project Tool Window で ksbysample.webapp.lending.util.velocity を選択し、Shift+F6 を押して「Rename」ダイアログを表示した後、"velocity" → “freemarker” へ変更して「OK」ボタンをクリックします。
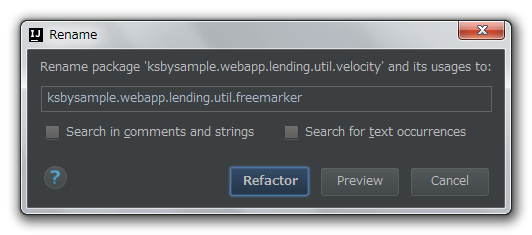
Project Tool Window で ksbysample.webapp.lending.util.freemarker の下の VelocityUtils.java を選択し、Shift+F6 を押して「Rename」ダイアログを表示した後、"VelocityUtils" → “FreeMarkerUtils” へ変更して「OK」ボタンをクリックします。
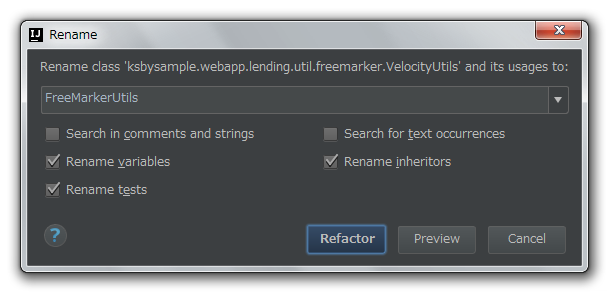
今回は使用先のフィールドの変数名も変更するかを確認する「Rename Variables」ダイアログが表示されますので「Select all」ボタンを押して選択した後「OK」ボタンをクリックします。
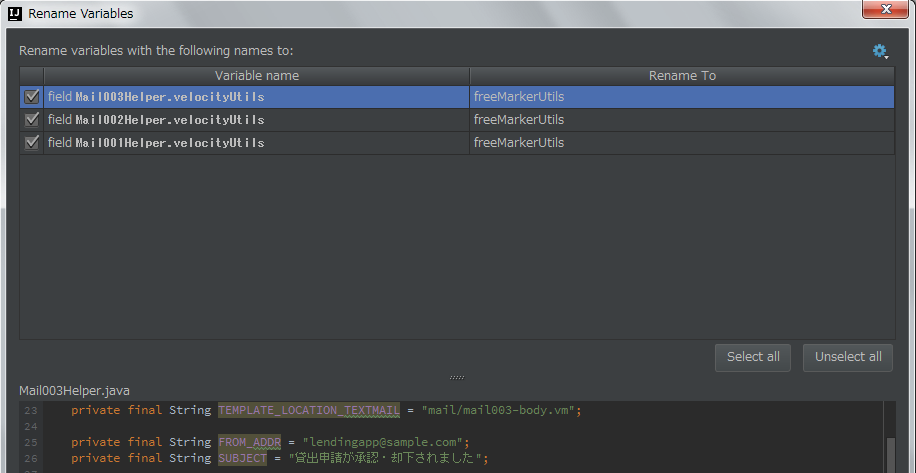
src/main/java/ksbysample/webapp/lending/util/freemarker の下の FreeMarkerUtils.java を リンク先の内容 に変更します。
FreeMarkerUtilsTest クラスを作成して動作確認する
テストは Spock で作ります。Spring IO Platform で指定される Spock のバージョン番号は 1.0-groovy-2.4 なのですが、このバージョンではまだ Spring Boot の 1.4 から導入されたテスト用の新アノテーションに対応していないとのことなので、対応されている 1.1 をバージョン番号を指定して導入します。
build.gradle を リンク先のその2の内容 に変更します。
Gradle Tool Window の左上にある「Refresh all Gradle projects」ボタンをクリックして更新します。
次にテストクラスを作ります。
FreeMarkerUtils.java のソース上で Ctrl+Shift+T を押してコンテキストメニューを表示した後「Create New Test…」を選択します。「Create Test」ダイアログが表示されたら以下の画像の状態にした後、「OK」ボタンをクリックします。
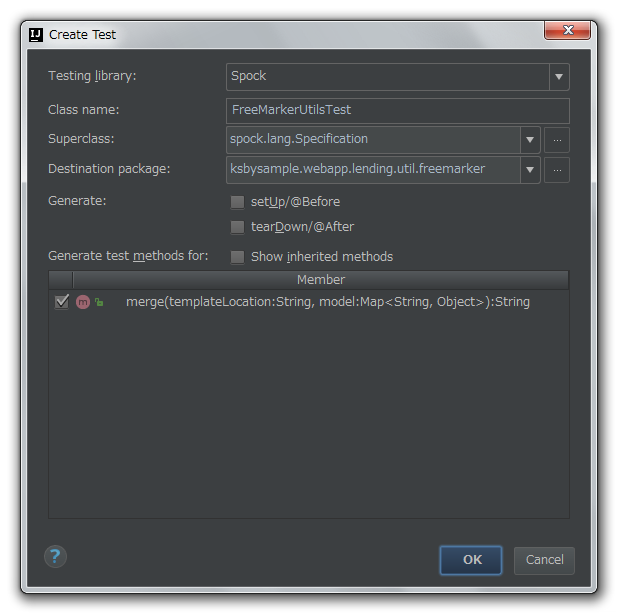
「Choose Destination Directory」ダイアログが表示されたら「…\src\test\groovy...」の方を選択して「OK」ボタンをクリックします。
src/test/groovy/ksbysample/webapp/lending/util/freemarker の下に FreeMarkerUtilsTest.groovy が作成されますので、リンク先のその1の内容 に変更します。
src/test/resources の下に templates/mail ディレクトリを作成します。
src/test/resources/templates/mail の下に FreeMarkerUtilsTest-001.ftl を作成し、リンク先の内容 を記述します。
テストを実行してみます。が、以下のソースで
java: パッケージorg.apache.commons.langは存在しませんというエラーメッセージが表示されました。- src/main/java/ksbysample/webapp/lending/web/lendingapp/LendingappController.java
- src/main/java/ksbysample/webapp/lending/web/ExceptionHandlerAdvice.java
どうも 1.0 の spock の依存関係に org.apache.commons.lang.StringUtils が入っていて、意識せずにそちらを使用していたようです。
import org.apache.commons.lang.StringUtils;→import org.apache.commons.lang3.StringUtils;へ変更します。再度テストを実行してみます。が、今度は “java.lang.NoClassDefFoundError: org/thymeleaf/dialect/IExpressionObjectDialect” のエラーが出ました。このエラーを解消しないとテストが通らないようです。原因を調べます。

Web で検索したところ、stackoverflow で Spring Boot Security + Thymeleaf : IProcessorDialect class missing という QA を見つけました。
build.gradle を見ると thymeleaf-extras-springsecurity4 は Spring IO Platform によりバージョン番号が自動で設定されるようにしていましたが、
compile("org.thymeleaf.extras:thymeleaf-extras-java8time:3.0.0.RELEASE")という指定を別にしていました。これが原因ですね。Spring IO Platform の Appendix A. Dependency versions を見ると
org.thymeleaf.extras:thymeleaf-extras-java8timeが記述されていて Spring IO Platform の対象にできることが判明したので、バージョン番号を build.gradle で指定しないようにします。build.gradle を リンク先のその3の内容 に変更します。
Gradle Tool Window の左上にある「Refresh all Gradle projects」ボタンをクリックして更新します。
再度テストを実行すると今度は成功しました。

でもなんかテストに時間がかかるような。。。 最初、このテストに Web 環境は不要なので
@SpringBootTest(webEnvironment = MOCK)ではなく@SpringBootTest(webEnvironment = NONE)を指定したのですが、この記述だと ksbysample.common.test.rule.mockmvc の SecurityMockMvcResource クラスで@Autowired private WebApplicationContext context;に DI が出来なくてエラーになったので、MOCK に変更しました。SecurityMockMvcResource クラスの Bean 生成を Web 環境の時だけに出来ないかな?と思って @Conditional 系アノテーションを調べたところ
@ConditionalOnWebApplicationというのがあったので、SecurityMockMvcResource クラスに付加したいと思います。src/test/java/ksbysample/common/test/rule/mockmvc の下の SecurityMockMvcResource.java を リンク先の内容 に変更します。
テストを実行すると成功し、実行時間も4~5秒程度速くなりました。実施したことの割に速くなり過ぎでは?とも思いましたが、今は気にしないことにします。

もう少しテストを追加します。src/test/groovy/ksbysample/webapp/lending/util/freemarker の下の FreeMarkerUtilsTest.groovy を リンク先のその3の内容 に変更します。
src/test/resources/templates/mail の下に以下のファイルを作成し、リンク先の内容 を記述します。
テストを実行して全て成功することを確認します。

メールのテンプレートファイルを変更する
src/main/resources/templates/mail の下のファイルの拡張子を全て
.vm→.ftlに変更します。src/main/resources/templates/mail の下の mail003-body.ftl を リンク先の内容 に変更します。
ksbysample.webapp.lending.helper.mail パッケージの下の MailxxxHelper クラスを変更する
必要があるかなと思っていたのですが、IntelliJ IDEA のリファクタリングの機能でいろいろ変更をした時に MailxxxHelper クラスにも必要な変更が反映されていて、この時点では何もすることがありませんでした。
以下のソースに自動で変更が反映されています。
- src/main/java/ksbysample/webapp/lending/helper/mail/Mail001Helper.java
- src/main/java/ksbysample/webapp/lending/helper/mail/Mail002Helper.java
- src/main/java/ksbysample/webapp/lending/helper/mail/Mail003Helper.java
変更内容は以下の点です。
private VelocityUtils velocityUtils;→private FreeMarkerUtils freeMarkerUtils;へ変更します。- TEMPLATE_LOCATION_TEXTMAIL 定数で指定しているテンプレートファイルの拡張子を
.vm→.ftlへ変更します。
動作確認はまだできないので Rebuild Project の確認だけ行う
動作確認は build でエラーが出なくなってから行いますので、この時点では clean タスク実行 → Rebuild Project を実行して Warning が1つも出ないことだけ確認します。
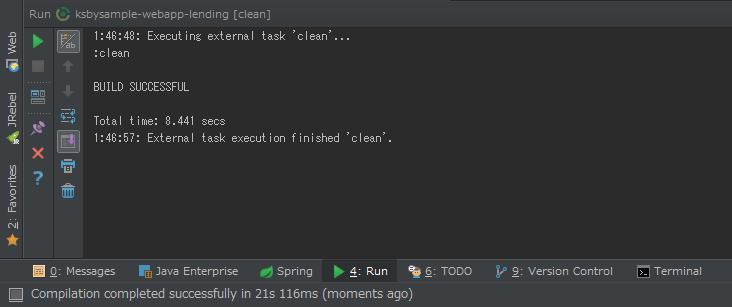
次回は。。。
「Run ‘All Tests’ with Coverage」と build タスクを実行してみましたが、まだエラーが出ていますので次回は「Run ‘All Tests’ with Coverage」実行時のエラーを解消します。

また今回 Velocity → FreeMarker へ切り替えてみて、以下の感想でした。
- 使い勝手はほとんど変わらず、むしろ FreeMarker の方が高機能です。
- FreeMarker は Web 上のマニュアルも綺麗でまとまっていて分かりやすい!
2010 年で開発が止まっている Velocity に対して Spring Boot がサポートを終了するのも仕方がないかな、と思いました。
と、ここまで書いてから The Move from Velocity to FreeMarker with Spring Boot の記事を見つけました。org.springframework.ui.freemarker の下に FreeMarkerTemplateUtils クラスなんてあるんですね。。。
ソースコード
build.gradle
■その1
dependencies {
    def jdbcDriver = "org.postgresql:postgresql:9.4.1212"

    // dependency-management-plugin によりバージョン番号が自動で設定されるもの
    // Appendix A. Dependency versions ( http://docs.spring.io/platform/docs/current/reference/htmlsingle/#appendix-dependency-versions ) 参照
    compile("org.springframework.boot:spring-boot-starter-web")
    compile("org.springframework.boot:spring-boot-starter-thymeleaf")
    compile("org.thymeleaf.extras:thymeleaf-extras-springsecurity4")
    compile("org.springframework.boot:spring-boot-starter-data-jpa")
    compile("org.springframework.boot:spring-boot-starter-freemarker")
    compile("org.springframework.boot:spring-boot-starter-mail")
    compile("org.springframework.boot:spring-boot-starter-security")
    ..........
compile("org.springframework.boot:spring-boot-starter-velocity")→compile("org.springframework.boot:spring-boot-starter-freemarker")へ変更します。
■その2
dependencies {
    def jdbcDriver = "org.postgresql:postgresql:9.4.1212"
    def spockVersion = "1.1-groovy-2.4-rc-3"

    // dependency-management-plugin によりバージョン番号が自動で設定されるもの
    // Appendix A. Dependency versions ( http://docs.spring.io/platform/docs/current/reference/htmlsingle/#appendix-dependency-versions ) 参照
    ..........

    // dependency-management-plugin によりバージョン番号が自動で設定されないもの、あるいは最新バージョンを指定したいもの
    ..........
    testCompile("org.jmockit:jmockit:1.30")
    testCompile("org.spockframework:spock-core:${spockVersion}") {
        exclude module: "groovy-all"
    }
    testCompile("org.spockframework:spock-spring:${spockVersion}") {
        exclude module: "groovy-all"
    }
def spockVersion = "1.1-groovy-2.4-rc-3"を追加します。org.spockframework:spock-core、org.spockframework:spock-springをバージョン番号を指定するので記述位置を下へ変更します。testCompile("org.spockframework:spock-core")→testCompile("org.spockframework:spock-core:${spockVersion}")へ変更します。testCompile("org.spockframework:spock-spring")→testCompile("org.spockframework:spock-spring:${spockVersion}")へ変更します。
■その3
dependencies {
    def jdbcDriver = "org.postgresql:postgresql:9.4.1212"
    def spockVersion = "1.1-groovy-2.4-rc-3"

    // dependency-management-plugin によりバージョン番号が自動で設定されるもの
    // Appendix A. Dependency versions ( http://docs.spring.io/platform/docs/current/reference/htmlsingle/#appendix-dependency-versions ) 参照
    compile("org.springframework.boot:spring-boot-starter-web")
    compile("org.springframework.boot:spring-boot-starter-thymeleaf")
    compile("org.thymeleaf.extras:thymeleaf-extras-springsecurity4")
    compile("org.thymeleaf.extras:thymeleaf-extras-java8time")
    compile("org.springframework.boot:spring-boot-starter-data-jpa")
    ..........
compile("org.thymeleaf.extras:thymeleaf-extras-java8time:3.0.0.RELEASE")→compile("org.thymeleaf.extras:thymeleaf-extras-java8time")へ変更し、記述位置を上へ変更します。
application.properties
hibernate.dialect=org.hibernate.dialect.PostgreSQL9Dialect
doma.dialect=org.seasar.doma.jdbc.dialect.PostgresDialect

spring.jpa.hibernate.ddl-auto=none
spring.jpa.hibernate.naming_strategy=org.hibernate.cfg.ImprovedNamingStrategy

spring.freemarker.cache=true
spring.freemarker.charset=UTF-8
spring.freemarker.enabled=false
spring.freemarker.prefer-file-system-access=false
- 以下の設定を削除します。
spring.velocity.enabled=falsespring.velocity.charset=UTF-8
- 以下の設定を追加します。
spring.freemarker.cache=truespring.freemarker.charset=UTF-8spring.freemarker.enabled=falsespring.freemarker.prefer-file-system-access=false- デフォルトは true ですが、この設定を入れないとテストクラスからテストを実行した時に src/main/resources の下のテンプレートファイルを見に行ってくれませんでした。なぜデフォルト値が true なのか疑問です。。。
spring.jpa.hibernate.naming_strategyの設定は非推奨か無くなっているようなので ( IntelliJ IDEA のエディタ上で取消線が表示されます )、次回以降に見直します。
FreeMarkerUtils.java
package ksbysample.webapp.lending.util.freemarker;

import freemarker.template.Configuration;
import freemarker.template.Template;
import freemarker.template.TemplateException;
import org.springframework.stereotype.Component;

import java.io.IOException;
import java.io.StringWriter;
import java.util.Map;

@Component
public class FreeMarkerUtils {

    private final Configuration freeMarkerConfiguration;

    public FreeMarkerUtils(Configuration freeMarkerConfiguration) {
        this.freeMarkerConfiguration = freeMarkerConfiguration;
    }

    public String merge(String templateLocation, Map<String, Object> model) {
        Template template = getTemplate(templateLocation);
        return process(template, model);
    }

    private Template getTemplate(String templateLocation) {
        try {
            return this.freeMarkerConfiguration.getTemplate(templateLocation);
        } catch (IOException e) {
            throw new RuntimeException(e);
        }
    }

    private String process(Template template, Map<String, Object> model) {
        try {
            StringWriter sw = new StringWriter();
            template.process(model, sw);
            return sw.toString();
        } catch (TemplateException | IOException e) {
            throw new RuntimeException(e);
        }
    }

}
FreeMarkerUtilsTest.groovy
■その1
package ksbysample.webapp.lending.util.freemarker

import org.springframework.beans.factory.annotation.Autowired
import org.springframework.boot.test.context.SpringBootTest
import spock.lang.Specification

import static org.springframework.boot.test.context.SpringBootTest.WebEnvironment.MOCK

@SpringBootTest(webEnvironment = MOCK)
class FreeMarkerUtilsTest extends Specification {

    @Autowired
    FreeMarkerUtils freeMarkerUtils

    def "テンプレートファイルから文字列を生成する_変数のみの場合"() {
        setup:
        def model = [username: "田中 太郎"]

        expect:
        freeMarkerUtils.merge("mail/FreeMarkerUtilsTest-001.ftl", model) == "田中 太郎"
    }

}
■その2
import static org.springframework.boot.test.context.SpringBootTest.WebEnvironment.NONE

@SpringBootTest(webEnvironment = NONE)
class FreeMarkerUtilsTest extends Specification {
@SpringBootTest(webEnvironment = MOCK)→@SpringBootTest(webEnvironment = NONE)に変更します。
■その3
package ksbysample.webapp.lending.util.freemarker

import org.springframework.beans.factory.annotation.Autowired
import org.springframework.boot.test.context.SpringBootTest
import spock.lang.Specification

import static org.springframework.boot.test.context.SpringBootTest.WebEnvironment.NONE

@SpringBootTest(webEnvironment = NONE)
class FreeMarkerUtilsTest extends Specification {

    @Autowired
    FreeMarkerUtils freeMarkerUtils

    class TestUser {
        String name
        Integer age
        String address
    }

    def "テンプレートファイルから文字列を生成する_変数のみの場合"() {
        setup:
        def model = [username: "田中 太郎"]

        expect:
        freeMarkerUtils.merge("mail/FreeMarkerUtilsTest-001.ftl", model) == "田中 太郎"
    }

    /**
     * 変数が null の場合にエラーにならないようにするには、テンプレートファイルの変数の最後に ! を付けること。
     * ${xxx} ではなく ${xxx!} のように書く。
     * null の時にはスペースで埋めたい時には ${xxx!?left_pad(3)} のように書ける
     *
     * ただし、この記述にすると model に必要なデータがない時に例外が throw されないので注意すること
     */
    def "テンプレートファイルから文字列を生成する_変数がnullの場合"() {
        setup:
        def model = [username: null]

        expect:
        freeMarkerUtils.merge("mail/FreeMarkerUtilsTest-001.ftl", model) == ""
    }

    def "テンプレートファイルから文字列を生成する_変数+クラスの場合"() {
        setup:
        def model = [
                username: "田中 太郎"
                , user  : new TestUser(age: 25, address: "東京都千代田区")
        ]
        def result = new File("src/test/resources/templates/mail/FreeMarkerUtilsTest-002-result.txt").text

        expect:
        freeMarkerUtils.merge("mail/FreeMarkerUtilsTest-002.ftl", model) == result
    }

    def "テンプレートファイルから文字列を生成する_リストの場合"() {
        setup:
        def userList = [
                new TestUser(name: "田中 太郎", age: 25, address: "東京都千代田区")
                , new TestUser(name: "鈴木 花子", age: 8, address: "神奈川県横浜市")
                , new TestUser(name: "高橋 孝", age: 100, address: "埼玉県大宮市")
        ]
        def model = [userList: userList]
        def result = new File("src/test/resources/templates/mail/FreeMarkerUtilsTest-003-result.txt").text

        expect:
        freeMarkerUtils.merge("mail/FreeMarkerUtilsTest-003.ftl", model) == result
    }

    def "テンプレートファイルから文字列を生成する_リストでnameの一部がnullの場合"() {
        setup:
        def userList = [
                new TestUser(name: "田中 太郎", age: 25, address: "東京都千代田区")
                , new TestUser(name: null, age: 8, address: "神奈川県横浜市")
                , new TestUser(name: "高橋 孝", age: 100, address: "埼玉県大宮市")
        ]
        def model = [userList: userList]
        def result = new File("src/test/resources/templates/mail/FreeMarkerUtilsTest-003-result2.txt").text

        expect:
        freeMarkerUtils.merge("mail/FreeMarkerUtilsTest-003.ftl", model) == result
    }

    def "テンプレートファイルが存在しない場合はエラーになる"() {
        given:
        def model = [username: "田中 太郎"]

        when:
        freeMarkerUtils.merge("mail/FreeMarkerUtilsTest-notFound.ftl", model)

        then:
        RuntimeException e = thrown()
        e.getMessage() contains "Template not found"
    }

}
FreeMarkerUtilsTest-001.ftl
${username!}
- 変数名の最後に ! を付けておくと、値が null の時にエラーになりません。
SecurityMockMvcResource.java
@Component
@ConditionalOnWebApplication
public class SecurityMockMvcResource extends ExternalResource {
@ConditionalOnWebApplicationを追加します。
FreeMarkerUtilsTest-002.ftl, FreeMarkerUtilsTest-002-result.txt, FreeMarkerUtilsTest-003.ftl, FreeMarkerUtilsTest-003-result.txt, FreeMarkerUtilsTest-003-result2.txt
■FreeMarkerUtilsTest-002.ftl
氏名: ${username!}
年齢: ${user.age!}
住所: ${user.address!}
■FreeMarkerUtilsTest-002-result.txt
氏名: 田中 太郎
年齢: 25
住所: 東京都千代田区
■FreeMarkerUtilsTest-003.ftl
氏名             年齢  住所
----------------------------------------------------------
<#list userList as user>
${user.name!?right_pad(8, " ")}  ${user.age!?left_pad(3)}  ${user.address!}
</#list>
■FreeMarkerUtilsTest-003-result.txt
氏名             年齢  住所
----------------------------------------------------------
田中 太郎      25  東京都千代田区
鈴木 花子       8  神奈川県横浜市
高橋 孝      100  埼玉県大宮市
■FreeMarkerUtilsTest-003-result2.txt
氏名             年齢  住所
----------------------------------------------------------
田中 太郎      25  東京都千代田区
            8  神奈川県横浜市
高橋 孝      100  埼玉県大宮市
mail003-body.ftl
貸出申請が承認・却下されました。
========================================================================
承認/却下 書籍
------------------------------------------------------------------------
<#list mail003BookDataList as bookData>
 ${bookData.approvalResultStr}   ${bookData.bookName}
</#list>
========================================================================

詳細は以下のURLから確認してください。

http://localhost:8080/confirmresult?lendingAppId=${lendingAppId}
履歴
2017/02/12
初版発行。