Spring Boot + Spring Integration でいろいろ試してみる ( その1 )( SFTP でファイルアップロードするバッチを作成する )
概要
記事一覧はこちらです。
- Spring Boot を利用して SFTP クライアントを作るとしたらどうすればよいのだろう?と思って調べていたところ、Spring Integration に SFTP Adapters ( http://docs.spring.io/spring-integration/reference/html/sftp.html ) というクラスが用意されていることが分かりました。
- Spring Integration として使うなら本当は Channel や Endpoint を作成するべきですが、SFTP のクラスだけ利用して SFTP クライアントが作れないか興味が出たので試してみます。
- 今回は Web アプリケーションではなく、Spring Boot の ApplicationRunner インターフェースを利用したバッチとして作成します。
参照したサイト・書籍
Spring Integration Reference Manual - Part V. Integration Endpoints - 27. SFTP Adapters
http://docs.spring.io/spring-integration/reference/html/sftp.htmlfreeSSHd and freeFTPd
http://www.freesshd.com/これからの「Java I/O」の話をしようwww (10) : Files クラスのメソッド 〜ディレクトリの階層を Stream で走査〜
http://waman.hatenablog.com/entry/2015/10/11/002340- Files クラスの walk メソッドの使い方を参考にしました。
Spring徹底入門

Spring徹底入門 Spring FrameworkによるJavaアプリケーション開発
- 作者: 株式会社NTTデータ
- 出版社/メーカー: 翔泳社
- 発売日: 2016/07/21
- メディア: 大型本
- この商品を含むブログ (1件) を見る
- 待望の Spring Framework の日本語の解説本です。
- 今回はテストクラスでプロパティを設定する方法を参考にしました。
Runtime exception thrown by GatewayProxyFactoryBean
http://stackoverflow.com/questions/26142547/runtime-exception-thrown-by-gatewayproxyfactorybeanjava.lang.RuntimeException: No beanFactoryの WARN ログの対応方法を調査した時に参考にしました。
Spring Boot と Spring Integration を使用したクローラ
http://qiita.com/sunny4381/items/94d3ddec57ec88cd7af3- Spring Integration を利用したバッチを処理終了後に終了させる方法を参考にしました。
Programmable exit codes for Spring command line applications
http://sdqali.in/blog/2016/04/17/programmable-exit-codes-for-spring-command-line-applications/- 今回の記事とは関係ありませんが、例外を throw した時に独自の exit code を返したい場合の方法が書いてあったので、メモしておきます。
SpringOne 2GX 2014 参加報告 & Spring 4.1について
http://www.slideshare.net/makingx/springone-2gx-2014-spring-41-jsug- Message インターフェースは Spring Integration で提供されているものと勘違いしていましたが、この資料の P.51 を見て Spring Framework で提供されていることに気づきました。
目次
- 作成するバッチの仕様
- freeFTPd、WinSCP のインストール
- GitHub に ksbysample-boot-integration レポジトリを作成して git clone する
- ksbysample-batch-integration プロジェクトを作成する
- SftpUploadBatchRunner クラスを作成する
- テストクラスを作成して動作確認する
- 実行可能 jar ファイルを作成して動作確認する
- メモ書き
手順
作成するバッチの仕様
以下の仕様のバッチを作成します。
- Spring Boot の ApplicationRunner インターフェースを利用したバッチとして実装します。
- SFTP の処理は Spring Integration の SFTP Adapters を利用します。内部的には JSch ( http://www.jcraft.com/jsch/ ) が使われているようです。
- 以下の処理で実装します。
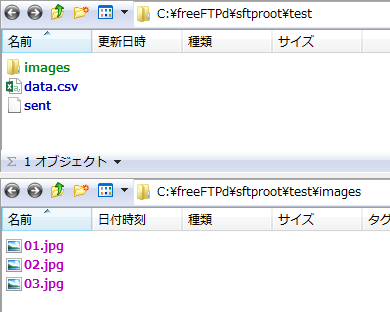
- ローカルのディレクトリ構成は以下のようにします。ファイルは今回のバッチで作成するのではなくあらかじめ作成しておきます。
C:\Batch
├ data
│ ├ data.csv
│ ├ sent
│ └ images
│    └ .....(ここに画像ファイルを数ファイル置きます).....
└ lib
  └ ksbysample-batch-integration-1.0.0-RELEASE.jar
/
└ images
- バッチの起動は以下のコマンドで実行します。
> cd /d C:\Batch
> java -Dbatch.execute=SftpUploadBatch -jar .\lib\ksbysample-batch-integration-1.0.0-RELEASE.jar
freeFTPd、WinSCP のインストール
SFTP サーバが必要なので freeFTPd ( http://www.freesshd.com/ ) を、SFTP で接続できるか確認するために WinSCP をインストールします。
freeFTPd のインストール
Downloads ページ ( http://www.freesshd.com/?ctt=download ) から freeFTPd.exe の 1.0.13 をダウンロードします。
freeFTPd.exe を実行します。
「Setup - freeFTPd FTP+SSL/SFTP Server」ダイアログが表示されます。「Next」ボタンをクリックします。
「Select Destination Location」画面が表示されます。インストール先を “C:\freeFTPd” に変更した後、「Next」ボタンをクリックします。
「Select Components」画面が表示されます。何も変更せずに「Next」ボタンをクリックします。
「Select Start Menu Folder」画面が表示されます。「Don’t create a Start Menu folder」チェックボックスをチェックした後、「Next」ボタンをクリックします。
「Select Additional Tasks」画面が表示されます。何も変更せずに「Next」ボタンをクリックします。
「Ready to Install」画面が表示されます。「Install」ボタンをクリックします。
「Installing」画面が表示されインストールが実行されます。
インストール完了後に “Private keys should be created. Should I do now?” というメッセージが表示された「Setup」ダイアログが表示されますので「OK」ボタンをクリックします。
“Do you want to run freeFTPd as a system service” という「Setup」ダイアログが表示されます。Service としては起動しないので「いいえ」ボタンをクリックします。
「Completing the freeFTPd FTP+SSL/SFTP Server Setup Wizard」画面が表示されます。「Finish」ボタンをクリックします。
WinSCP のインストール
WinSCP Downloads ( https://winscp.net/eng/download.php ) の「Installation package」リンクをクリックして WinSCP-5.9-Setup.exe をダウンロードします。
WinSCP-5.9-Setup.exe を実行します。
「WinSCP セットアップ」ダイアログが表示されます。「許諾」ボタンをクリックします。
「セットアップ形式」画面が表示されます。インストール先を変更したいので「カスタム インストール」を選択した後、「次へ」ボタンをクリックします。
「インストール先の指定」画面が表示されます。インストール先を “C:\WinSCP” へ変更した後、「次へ」ボタンをクリックします。
「コンポーネントの選択」画面が表示されます。何も変更せずに「次へ」ボタンをクリックします。
「追加タスクの選択」画面が表示されます。画面上の全てのチェックボックスのチェックを外した後、「次へ」ボタンをクリックします。
「ユーザの初期設定」画面が表示されます。何も変更せずに「次へ」ボタンをクリックします。
インストールが完了すると「WinSCP セットアップウィザードの完了」画面が表示されます。画面上のチェックを全て外した後、「完了」ボタンをクリックします。
freeFTPd の設定・起動と WinSCP での動作確認
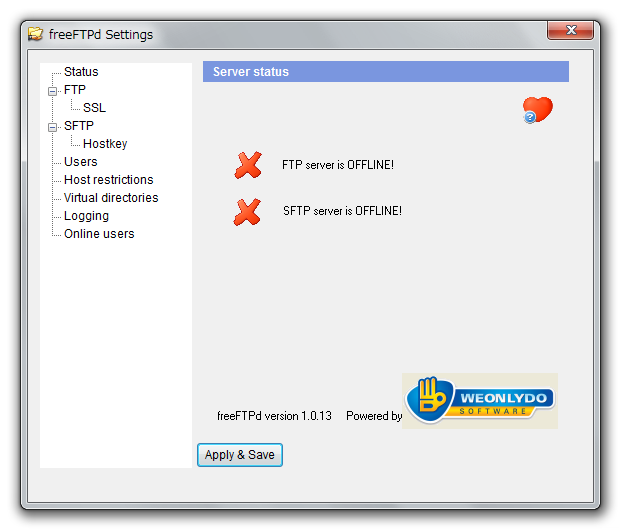
デスクトップにある「freeFTPd」アイコンをダブルクリックして freeFTPd の画面を表示します。まだ SFTP サーバは起動していません。
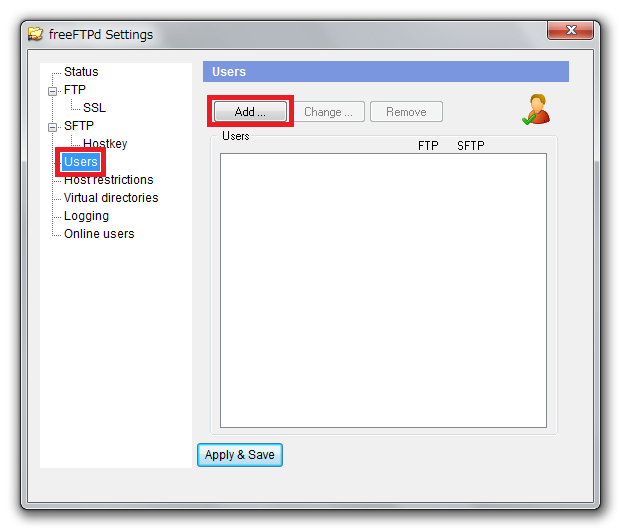
ユーザを追加します。画面左のツリーから「Users」を選択した後、画面右側の「Add」ボタンをクリックします。
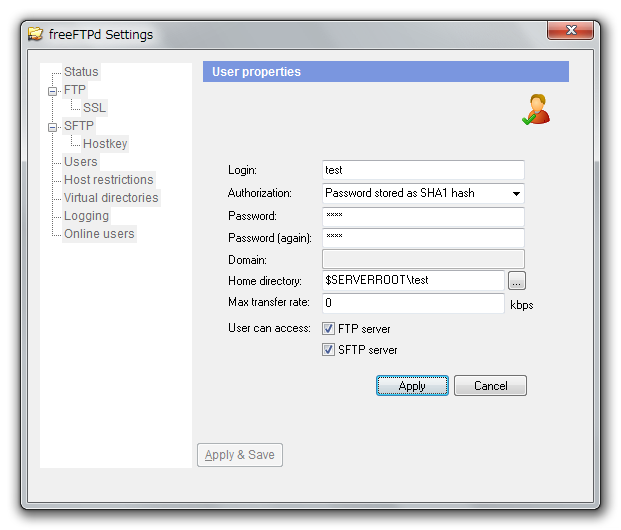
以下の画像のデータを入力した後、「Apply」ボタンをクリックします。Password には Login と同じ “test” を入力しています。
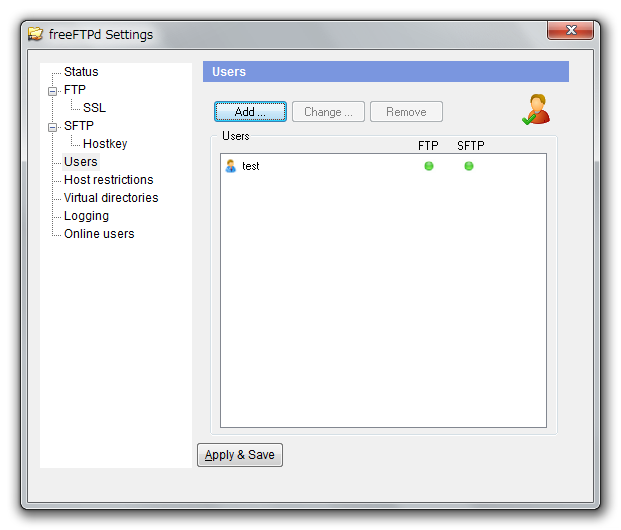
ユーザが追加された後に「Apply & Save」ボタンをクリックして保存します ( このボタンをクリックしておかないと freeFTPd を終了したらユーザが消えます )。
画面左のツリーから「SFTP」を選択した後、画面右側の「Start」ボタンをクリックして SFTP サーバを起動します。
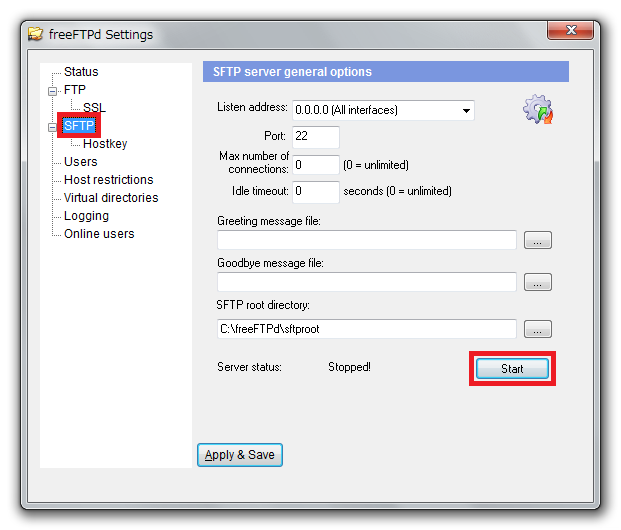
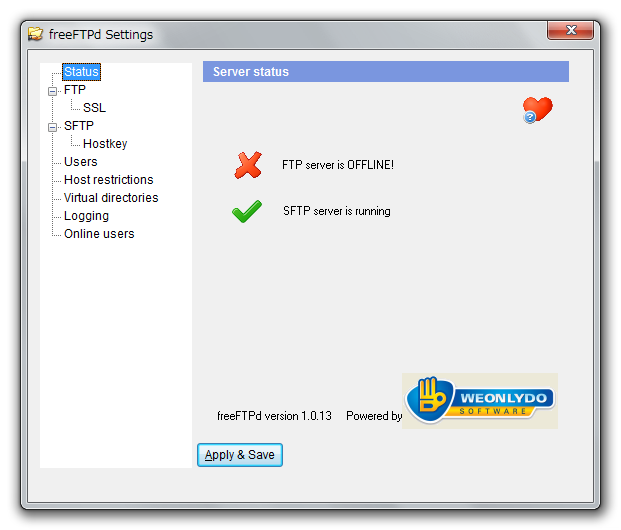
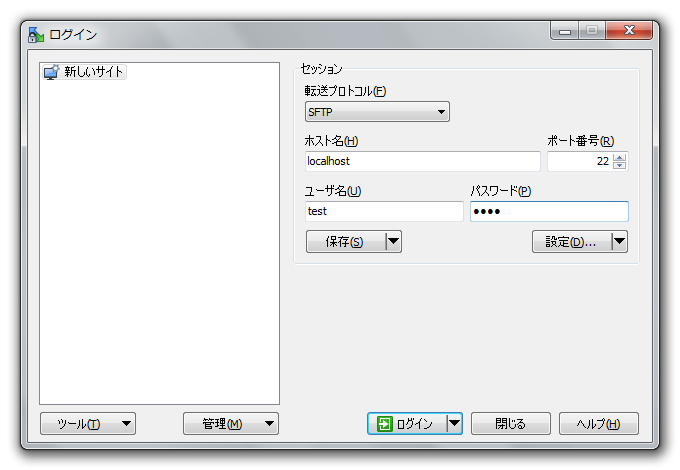
「ログイン」ダイアログが表示されます。以下の画像のデータを入力後、「ログイン」ボタンをクリックします。「パスワード」には “test” と入力しています。
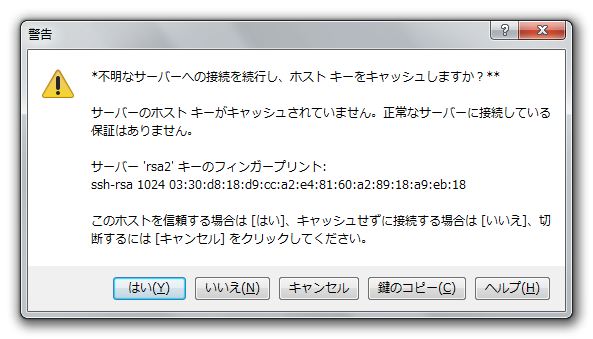
「警告」ダイアログが表示されますので「はい」ボタンをクリックします。
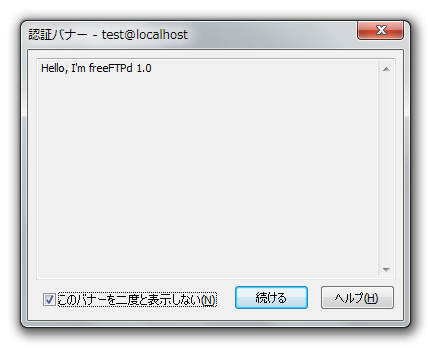
無事ログインが出来て「認証バナー - test@localhost」ダイアログが表示されます。「このバナーを二度と表示しない」チェックボックスをチェックした後、「続ける」ボタンをクリックします。
GitHub に ksbysample-boot-integration レポジトリを作成して git clone する
GitHub に ksbysample-nexus-repomng レポジトリを作成する を参考に、GitHub に ksbysample-boot-integration レポジトリを作成します。
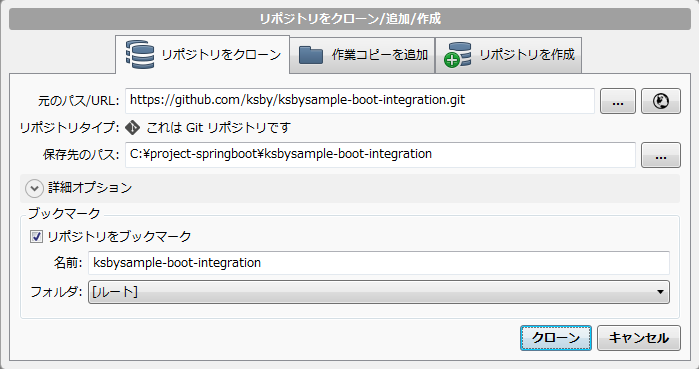
SourceTree で git clone します。
リンク先の内容 の .gitignore を追加し commit、push します。
master ブランチから develop ブランチを作成し、push します。
ksbysample-batch-integration プロジェクトを作成する
feature/1-issue ブランチを作成します。
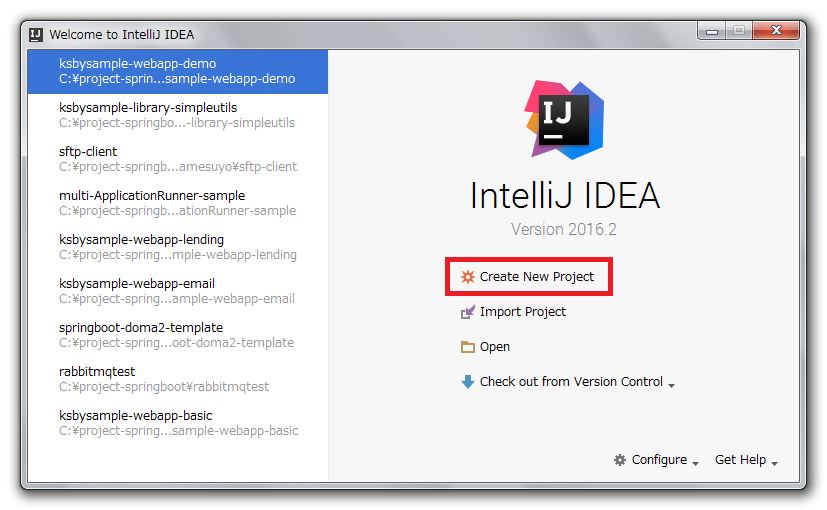
IntelliJ IDEA の「Welcome to IntelliJ IDEA」ダイアログを表示した後、「Create New Project」をクリックします。
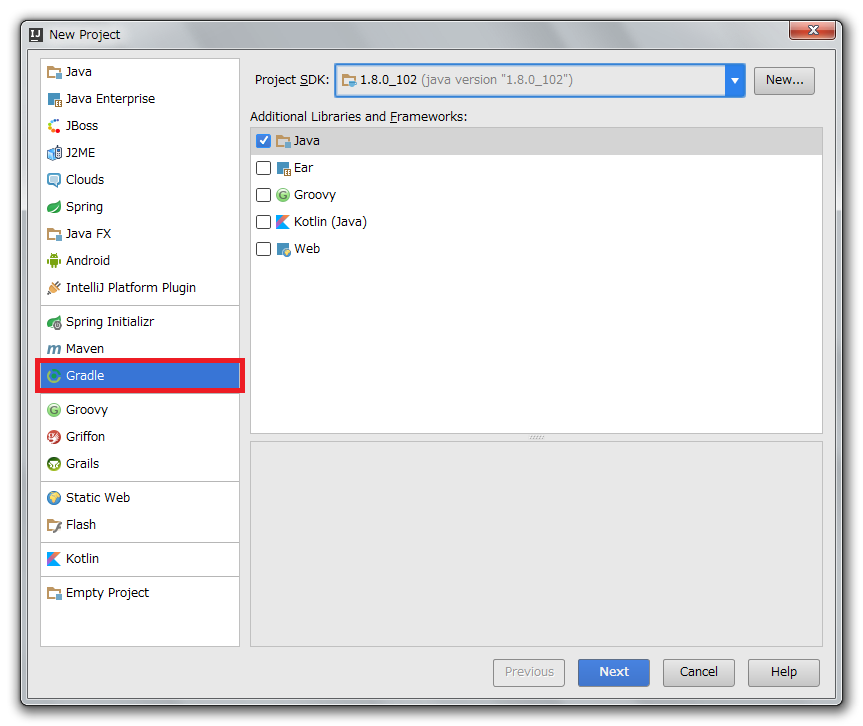
「New Project」ダイアログが表示されます。今回は Spring Initializr は使用せずに Gradle プロジェクトとして作成して、後から build.gradle を編集することにします。画面左側で「Gradle」を選択した後、画面右側は何も変更せずに「Next」ボタンをクリックします。
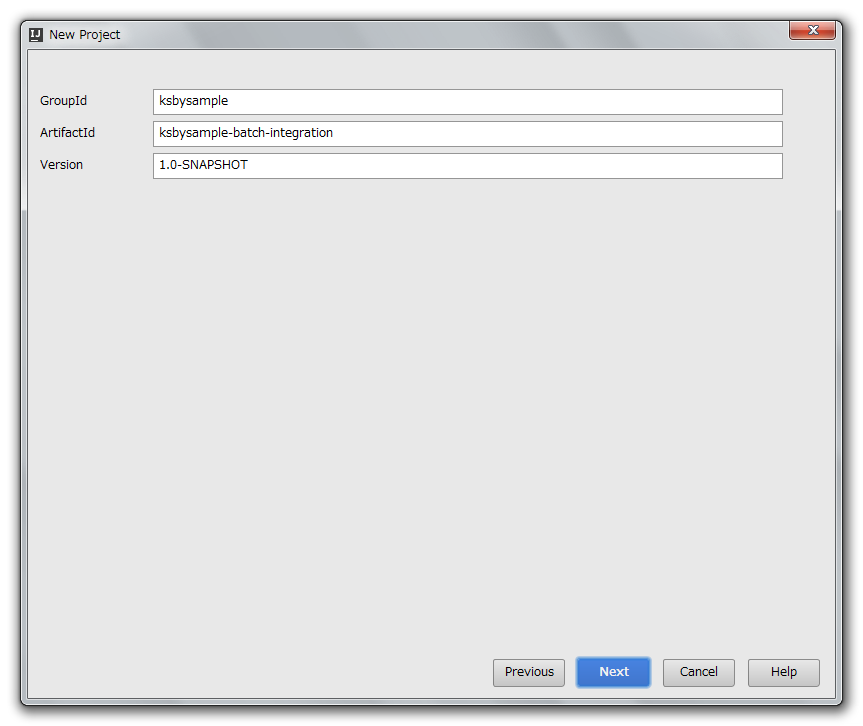
GroupId、ArtifactId を入力する画面が表示されます。以下の画像の文字列を入力した後、「Next」ボタンをクリックします。
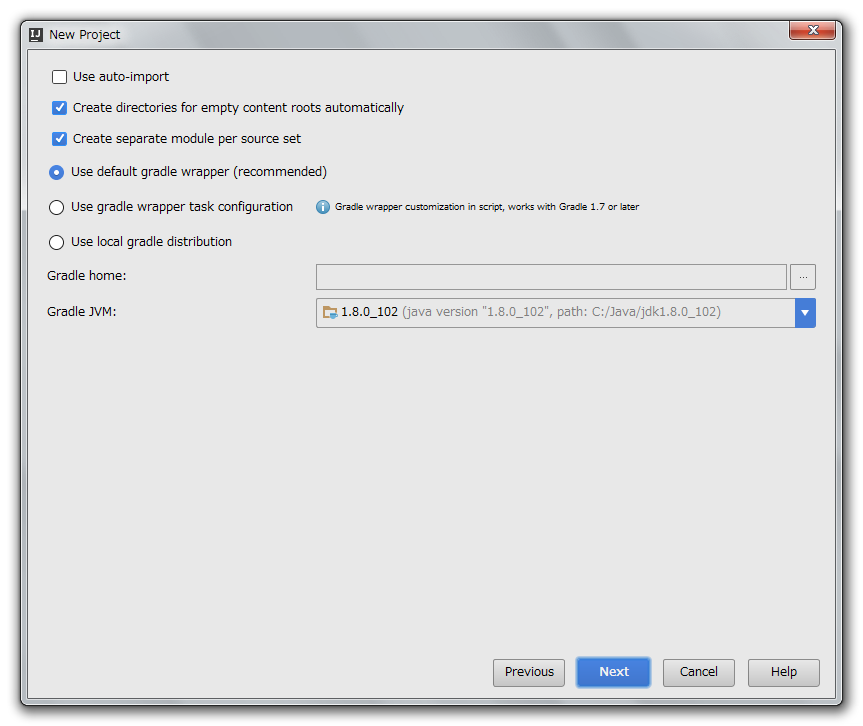
次の画面が表示されます。「Create directories for empty content roots automatically」をチェックした後、「Next」ボタンをクリックします。
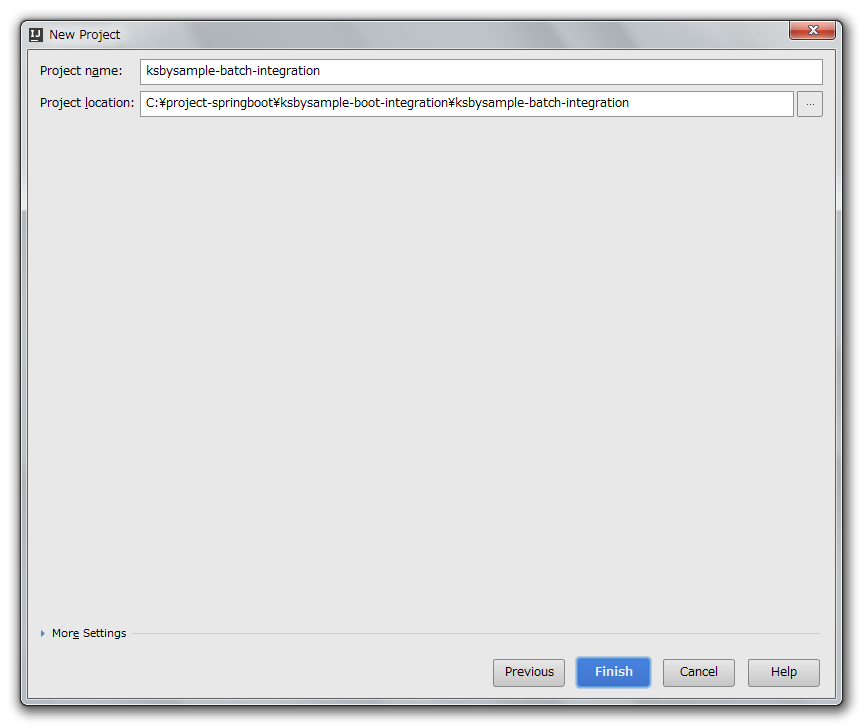
Project name、Project location を入力する画面が表示されます。以下の画像の文字列を入力した後、「Finish」ボタンをクリックします。
build.gradle を リンク先のその1の内容 に変更します。
Gradle projects View の左上にある「Refresh all Gradle projects」ボタンをクリックして build.gradle を反映します。
src/main/java の下に ksbysample.batch.integration パッケージを作成します。
src/main/java/ksbysample/batch/integration の下に Application.java を新規作成します。作成後、リンク先のその1の内容 に変更します。
以下のディレクトリの下に .gitkeep ファイルを作成します。
- src/main/groovy
- src/main/resources
- src/test/groovy
- src/test/java
- src/test/resources
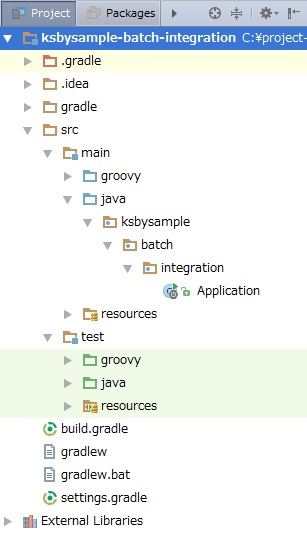
この時点で Project View は以下の状態になります。
commit&push します。
SftpUploadBatchRunner クラスを作成する
src/main/java/ksbysample/batch/integration の下に sftpuploadbatch パッケージを作成します。
org.apache.commons:commons-lang3 の StringUtils クラスが使いたいので、build.gradle を リンク先のその2の内容 に変更します。変更後、Gradle projects View の左上にある「Refresh all Gradle projects」ボタンをクリックして build.gradle を反映します。
src/main/java/ksbysample/batch/integration/sftpuploadbatch の下に SftpUploadBatchRunner.java を新規作成します。作成後、リンク先の内容 に変更します。
テストクラスを作成して動作確認する
まずローカル、リモートに 作成するバッチの仕様 に記載したディレクトリ、ファイルを作成しておきます。
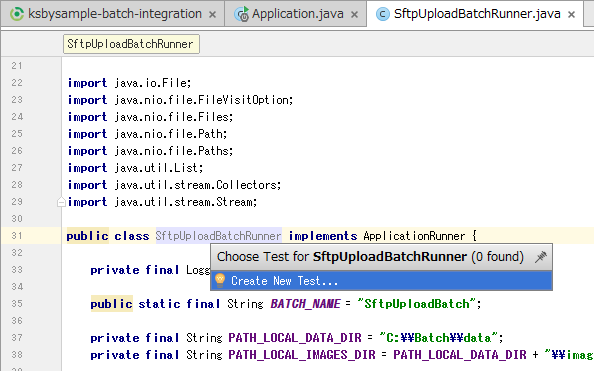
テストクラスを作成します。SftpUploadBatchRunner.java のソース上で Ctrl+Shift+T を押下してコンテキストメニューを表示した後、「Create New Test…」メニューをクリックします。
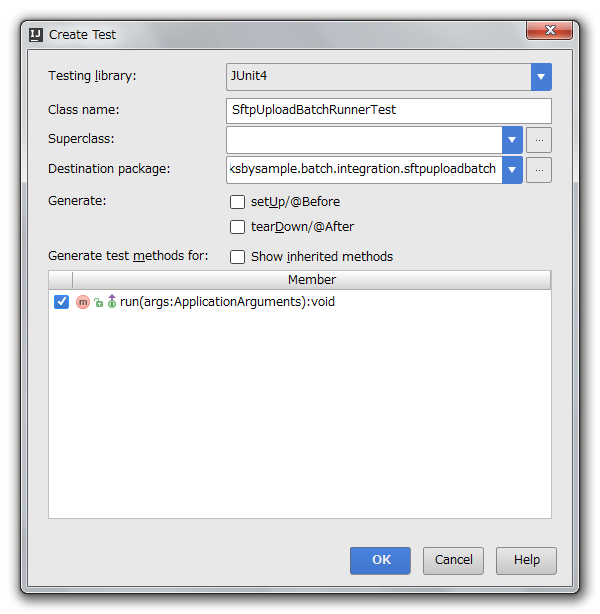
「Create Test」ダイアログが表示されます。画面下半分に表示されているメソッド一覧から run メソッドのチェックボックスをチェックした後、「OK」ボタンをクリックします。
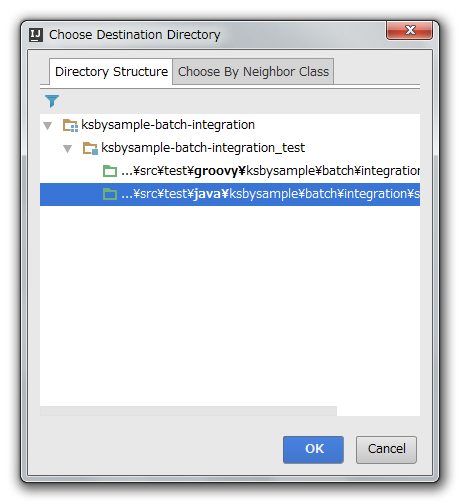
「Choose Destination Directory」ダイアログが表示されます。src\test\java のディレクトリを選択した後、「OK」ボタンをクリックします。
src/test/java/ksbysample/batch/integration/sftpuploadbatch の下に SftpUploadBatchRunnerTest.java が作成されますので、リンク先の内容 に変更します。
テストを実行します。run メソッドの左側に表示されているアイコンをクリックしてメニューを表示した後、「Run ‘run()'」メニューをクリックします。
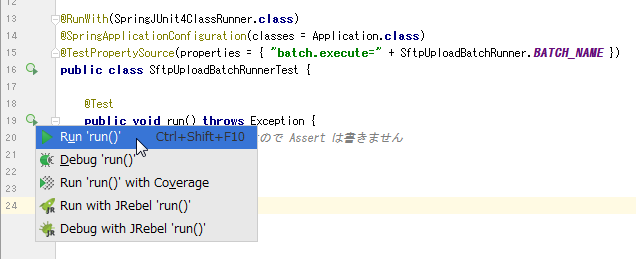
テストは正常に終了し、ファイルも全てアップロードされていました。

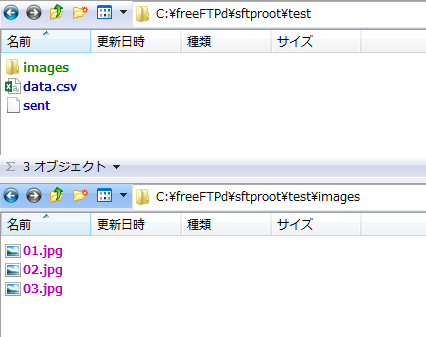
ただしコンソールに何回か
java.lang.RuntimeException: No beanFactoryという WARN ログが出力されています。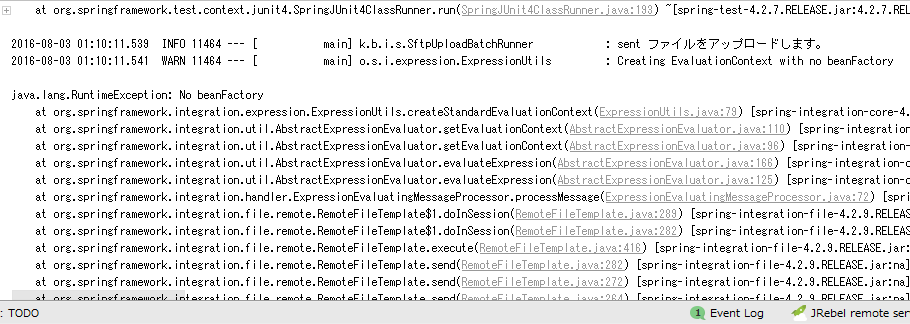
対応方法を調査したところ、stackoverflow の Runtime exception thrown by GatewayProxyFactoryBean という QA で WARN なのでログのレベルを ERROR にすればよいという回答を見かけました。今回は同じように対応することにします。
src/main/java/resources の下に logback-spring.xml を作成します。作成後、リンク先の内容 に変更します。
再度テストを実行すると、今度は
java.lang.RuntimeException: No beanFactoryの WARN ログは出力されなくなりました。SftpUploadBatchRunnerTest クラスに
@Ignore("バッチの動作確認用のテストクラスなので、通常は @Ignore アノテーションを付加して実行されないようにします")を付加して、通常はテストが実行されないようにします。
実行可能 jar ファイルを作成して動作確認する
Gradle projects View で build タスクを実行します。"BUILD SUCCESSFUL" が出力されることが確認できます。
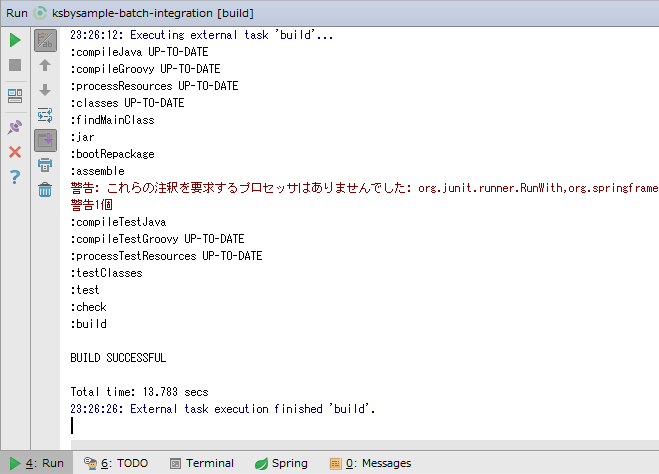
C:\project-springboot\ksbysample-boot-integration\ksbysample-batch-integration\build\libs の下に ksbysample-batch-integration-1.0.0-RELEASE.jar が出力されていますので、C:\Batch\lib の下にコピーします。
SFTP サーバにアップロード済の data.csv, sent ファイル、及び images ディレクトリの下の画像ファイルを削除します。
コマンドプロンプトから以下のコマンドを実行します。
> cd /d C:\Batch
> java -Dbatch.execute=SftpUploadBatch -jar .\lib\ksbysample-batch-integration-1.0.0-RELEASE.jarエラーにはならなかったようですが、なぜかバッチが終了しません ( 起動したままでコマンドプロンプトが表示されません )。
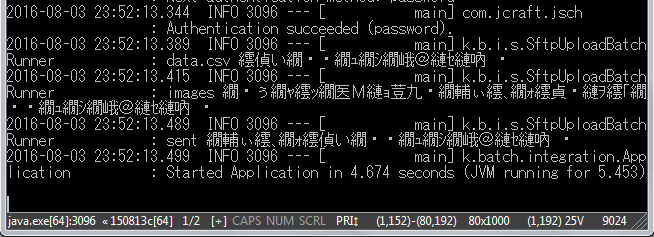
ファイルはアップロードされていました。
Ctrl+C を押してバッチを強制終了させてから、終了しない原因を調査します。
Google で検索して調べて見たところ、Spring Boot と Spring Integration を使用したクローラ の記事で Spring Integration を利用したバッチが記載されており、
SpringApplication.run(...)を呼び出した後にRuntime.getRuntime().exit(SpringApplication.exit(...));を呼び出して終了させているようでしたので、同じようにしてみます。src/main/java/ksbysample/batch/integration の下の Application.java を リンク先のその2の内容 に変更します。
再度 Gradle projects View で build タスクを実行して ksbysample-batch-integration-1.0.0-RELEASE.jar を作成し直した後、C:\Batch\lib の下にコピーします。
SFTP サーバにアップロード済の data.csv, sent ファイル、及び images ディレクトリの下の画像ファイルを削除します。
コマンドプロンプトから以下のコマンドを実行します。
> java -Dbatch.execute=SftpUploadBatch -jar .\lib\ksbysample-batch-integration-1.0.0-RELEASE.jar
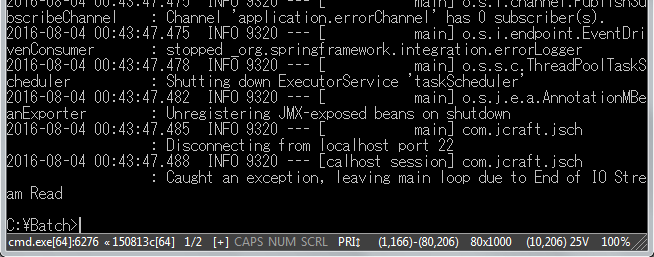
今度はバッチが終了してコマンドプロンプトが表示されました。ファイルもアップロードされていました。
メモ書き
Spring Integration の良い本がないか探してみて、最近以下の本を購入してみました。

Pivotal Certified Spring Enterprise Integration Specialist Exam: A Study Guide
- 作者: Lubos Krnac
- 出版社/メーカー: Apress
- 発売日: 2015/10/13
- メディア: ペーパーバック
- この商品を含むブログを見る
ぱっと見た感想ですが、
- Spring Integration の XML で定義する方法と Java Config で定義する方法が両方書いてあります。Web では XML で定義する記事が多いので、この点は結構ありがたいです。
- Spring Batch についても書いてあります。こちらも興味はあるのと、サンプルもそんなに難しいものではなさそうなので、目を通して見たいと思います。
ソースコード
.gitignore
# built application files
*.apk
*.ap_

# files for the dex VM
*.dex

# Java class files
*.class

# generated files
**/bin/
**/gen/

# Local configuration file (sdk path, etc)
local.properties

# Eclipse project files
.classpath
.project

# Proguard folder generated by Eclipse
**/proguard/

# Intellij project files
*.iml
*.ipr
*.iws
**/.idea/
**/out/

#Gradle
.gradletasknamecache
**/.gradle/
**/build/
**/bin/
build.gradle
■その1
group 'ksbysample'
version '1.0.0-RELEASE'

buildscript {
    ext {
        springBootVersion = '1.3.7.RELEASE'
    }
    repositories {
        jcenter()
        maven { url "http://repo.spring.io/repo/" }
    }
    dependencies {
        classpath("org.springframework.boot:spring-boot-gradle-plugin:${springBootVersion}")
        classpath("io.spring.gradle:dependency-management-plugin:0.6.0.RELEASE")
    }
}

apply plugin: 'java'
apply plugin: 'eclipse'
apply plugin: 'idea'
apply plugin: 'spring-boot'
apply plugin: 'io.spring.dependency-management'
apply plugin: 'groovy'

sourceCompatibility = 1.8
targetCompatibility = 1.8

compileJava.options.compilerArgs = ['-Xlint:all']
compileTestGroovy.options.compilerArgs = ['-Xlint:all']
compileTestJava.options.compilerArgs = ['-Xlint:all']

eclipse {
    classpath {
        containers.remove('org.eclipse.jdt.launching.JRE_CONTAINER')
        containers 'org.eclipse.jdt.launching.JRE_CONTAINER/org.eclipse.jdt.internal.debug.ui.launcher.StandardVMType/JavaSE-1.8'
    }
}

idea {
    module {
        inheritOutputDirs = false
        outputDir = file("$buildDir/classes/main/")
    }
}

repositories {
    jcenter()
}

dependencyManagement {
    imports {
        mavenBom 'io.spring.platform:platform-bom:2.0.7.RELEASE'
    }
}

dependencies {
    // dependency-management-plugin によりバージョン番号が自動で設定されるもの
    // Appendix A. Dependency versions ( http://docs.spring.io/platform/docs/current/reference/htmlsingle/#appendix-dependency-versions ) 参照
    compile('org.springframework.boot:spring-boot-starter-integration')
    compile('org.springframework.integration:spring-integration-sftp')
    testCompile("org.springframework.boot:spring-boot-starter-test")
    testCompile("org.spockframework:spock-core") { exclude module: "groovy-all" }
    testCompile("org.spockframework:spock-spring") { exclude module: "groovy-all" }

    // dependency-management-plugin によりバージョン番号が自動で設定されないもの、あるいは最新バージョンを指定したいもの
    compile("org.projectlombok:lombok:1.16.10")
}
■その2
dependencies {
    // dependency-management-plugin によりバージョン番号が自動で設定されるもの
    // Appendix A. Dependency versions ( http://docs.spring.io/platform/docs/current/reference/htmlsingle/#appendix-dependency-versions ) 参照
    compile('org.springframework.boot:spring-boot-starter-integration')
    compile('org.springframework.integration:spring-integration-sftp')
    testCompile("org.springframework.boot:spring-boot-starter-test")
    testCompile("org.spockframework:spock-core") { exclude module: "groovy-all" }
    testCompile("org.spockframework:spock-spring") { exclude module: "groovy-all" }

    // dependency-management-plugin によりバージョン番号が自動で設定されないもの、あるいは最新バージョンを指定したいもの
    compile("org.projectlombok:lombok:1.16.10")
    compile("org.apache.commons:commons-lang3:3.4")
}
compile("org.apache.commons:commons-lang3:3.4")を追加します。
Application.java
■その1
package ksbysample.batch.integration;

import org.springframework.boot.SpringApplication;
import org.springframework.boot.autoconfigure.SpringBootApplication;

@SpringBootApplication
public class Application {

    public static void main(String[] args) {
        SpringApplication.run(Application.class, args);
    }

}
■その2
package ksbysample.batch.integration;

import org.springframework.boot.SpringApplication;
import org.springframework.boot.autoconfigure.SpringBootApplication;
import org.springframework.context.ApplicationContext;

@SpringBootApplication
public class Application {

    public static void main(String[] args) {
        ApplicationContext context = SpringApplication.run(Application.class, args);
        Runtime.getRuntime().exit(SpringApplication.exit(context));
    }

}
SpringApplication.run(...)→ApplicationContext context = SpringApplication.run(...)へ変更します。Runtime.getRuntime().exit(SpringApplication.exit(context));を追加します。
SftpUploadBatchRunner.java
package ksbysample.batch.integration.sftpuploadbatch;

import com.jcraft.jsch.ChannelSftp;
import org.apache.commons.lang3.StringUtils;
import org.slf4j.Logger;
import org.slf4j.LoggerFactory;
import org.springframework.beans.factory.annotation.Autowired;
import org.springframework.boot.ApplicationArguments;
import org.springframework.boot.ApplicationRunner;
import org.springframework.boot.autoconfigure.condition.ConditionalOnProperty;
import org.springframework.context.annotation.Bean;
import org.springframework.context.annotation.Configuration;
import org.springframework.expression.Expression;
import org.springframework.expression.common.LiteralExpression;
import org.springframework.integration.file.remote.session.CachingSessionFactory;
import org.springframework.integration.file.remote.session.SessionFactory;
import org.springframework.integration.file.support.FileExistsMode;
import org.springframework.integration.sftp.session.DefaultSftpSessionFactory;
import org.springframework.integration.sftp.session.SftpRemoteFileTemplate;
import org.springframework.integration.support.MessageBuilder;
import org.springframework.messaging.Message;

import java.io.File;
import java.nio.file.FileVisitOption;
import java.nio.file.Files;
import java.nio.file.Path;
import java.nio.file.Paths;
import java.util.List;
import java.util.stream.Collectors;
import java.util.stream.Stream;

public class SftpUploadBatchRunner implements ApplicationRunner {

    private final Logger logger = LoggerFactory.getLogger(this.getClass());

    public static final String BATCH_NAME = "SftpUploadBatch";

    private final String PATH_LOCAL_DATA_DIR = "C:\\Batch\\data";
    private final String PATH_LOCAL_IMAGES_DIR = PATH_LOCAL_DATA_DIR + "\\images";

    private final String PATH_REMOTE_ROOT_DIR = "/";
    private final String PATH_REMOTE_IMAGES_DIR = "/images";
    private final Expression REMOTE_ROOT_DIR = new LiteralExpression(PATH_REMOTE_ROOT_DIR);
    private final Expression REMOTE_IMAGES_DIR = new LiteralExpression(PATH_REMOTE_IMAGES_DIR);

    @Autowired
    private SessionFactory<ChannelSftp.LsEntry> sessionFactory;

    @Override
    public void run(ApplicationArguments args) throws Exception {
        SftpRemoteFileTemplate sftpClient = new SftpRemoteFileTemplate(sessionFactory);

        // sent ファイルがあるかチェックし、ある場合には処理を終了する
        logger.info("sent ファイルがあるかチェックします。");
        sftpClient.setRemoteDirectoryExpression(REMOTE_ROOT_DIR);
        if (sftpClient.exists("sent")) {
            logger.info("sent ファイルがあるため、ファイルアップロード処理を中断します。");
            return;
        }

        // ローカルの data.csv をリモートの / の下へアップロードする
        logger.info("data.csv をアップロードします。");
        sftpClient.send(fileMessage(PATH_LOCAL_DATA_DIR + "\\data.csv"), FileExistsMode.REPLACE);

        // ローカルの images ディレクトリの下にあるファイルを全て
        // リモートの /images の下へアップロードする
        logger.info("images ディレクトリの下のファイルを全てアップロードします。");
        List<Path> imagesPathList;
        try (Stream<Path> imagesPathStream
                     = Files.walk(Paths.get(PATH_LOCAL_IMAGES_DIR), FileVisitOption.FOLLOW_LINKS)) {
            imagesPathList = imagesPathStream
                    .map(Path::toAbsolutePath)
                    .filter(p -> !StringUtils.equals(p.toString(), PATH_LOCAL_IMAGES_DIR))
                    .collect(Collectors.toList());
        }
        sftpClient.setRemoteDirectoryExpression(REMOTE_IMAGES_DIR);
        imagesPathList.forEach(p -> sftpClient.send(fileMessage(p.toString()), FileExistsMode.REPLACE));

        // sent ファイルをアップロードする
        logger.info("sent ファイルをアップロードします。");
        sftpClient.setRemoteDirectoryExpression(REMOTE_ROOT_DIR);
        sftpClient.send(fileMessage(PATH_LOCAL_DATA_DIR + "\\sent"), FileExistsMode.REPLACE);
    }

    private Message<File> fileMessage(String path) {
        File file = Paths.get(path).toFile();
        return MessageBuilder.withPayload(file).build();
    }

    @Configuration
    public static class SftpUploadBatchConfig {

        @Bean
        @ConditionalOnProperty(value = { "batch.execute" }, havingValue = SftpUploadBatchRunner.BATCH_NAME)
        public SessionFactory<ChannelSftp.LsEntry> sftpSessionFactory() {
            DefaultSftpSessionFactory factory = new DefaultSftpSessionFactory(true);
            factory.setHost("localhost");
            factory.setPort(22);
            factory.setUser("test");
            factory.setPassword("test");
            factory.setAllowUnknownKeys(true);
            return new CachingSessionFactory<>(factory);
        }

        @Bean
        @ConditionalOnProperty(value = { "batch.execute" }, havingValue = SftpUploadBatchRunner.BATCH_NAME)
        public ApplicationRunner applicationRunner() {
            return new SftpUploadBatchRunner();
        }

    }

}
- バッチの処理は ApplicationRunner インターフェースを実装した SftpUploadBatchRunner クラスの run メソッドに実装します。
- SFPT サーバへの接続に関する設定は SftpUploadBatchConfig クラス内に記述した sftpSessionFactory メソッドで行います。
- DefaultSftpSessionFactory クラスのインスタンスを生成して、SFTP サーバのホスト名/IPアドレス、ポート番号、ユーザ名、パスワード等を設定します。
- DefaultSftpSessionFactory クラスのインスタンスを渡して CachingSessionFactory クラスのインスタンスを生成します。DefaultSftpSessionFactory クラスのままだと1ファイルアップロード毎に接続・切断が発生しますので、必ず CachingSessionFactory クラスを利用するようにします。接続・切断の状況は jsch の INFO ログで分かります。
- 実際に SFTP サーバに接続するのは一番最初の処理が行われる時です。SftpUploadBatchRunner.java では
sftpClient.exists("sent")の処理のタイミングで SFTP サーバに接続します。
- run メソッドの直後に SftpRemoteFileTemplate クラスのインスタンスを生成します。SFTP サーバに対する処理を行うメソッドは SftpRemoteFileTemplate の親クラスである RemoteFileTemplate クラスにいろいろ用意されています。
- 個人的に注意点と思ったのは、
SftpUploadBatchRunnerTest.java
package ksbysample.batch.integration.sftpuploadbatch;

import ksbysample.batch.integration.Application;
import org.junit.Test;
import org.junit.runner.RunWith;
import org.springframework.boot.test.SpringApplicationConfiguration;
import org.springframework.test.context.TestPropertySource;
import org.springframework.test.context.junit4.SpringJUnit4ClassRunner;
import org.springframework.test.context.web.WebAppConfiguration;

import static org.junit.Assert.*;

@RunWith(SpringJUnit4ClassRunner.class)
@SpringApplicationConfiguration(classes = Application.class)
@TestPropertySource(properties = { "batch.execute=" + SftpUploadBatchRunner.BATCH_NAME })
public class SftpUploadBatchRunnerTest {

    @Test
    public void run() throws Exception {
        // 今は動作させたいだけなので Assert は書きません
    }

}
- @TestPropertySource アノテーションで batch.execute プロパティを設定して、SftpUploadBatchRunner::run メソッドが実行されるようにします。今回はそれをやる方法をメモって置きたかっただけです。
- SFTP サーバを立ててユニットテストする方法は今回は調べません。
logback-spring.xml
<?xml version="1.0" encoding="UTF-8"?>
<configuration>
    <include resource="org/springframework/boot/logging/logback/defaults.xml"/>

    <appender name="CONSOLE" class="ch.qos.logback.core.ConsoleAppender">
        <encoder>
            <pattern>${CONSOLE_LOG_PATTERN}</pattern>
            <charset>UTF-8</charset>
        </encoder>
    </appender>

    <root level="INFO">
        <appender-ref ref="CONSOLE"/>
    </root>

    <logger name="org.springframework.integration.expression.ExpressionUtils" level="ERROR"/>
</configuration>
org.springframework.integration.expression.ExpressionUtilsの level を ERROR に設定します。
履歴
2016/08/04
初版発行。
2016/08/13
* Message インターフェースが Spring Integration ではなく Spring Framework が提供していることに気付いたので、該当箇所を修正した。