Spring Boot + Spring Integration でいろいろ試してみる ( その25 )( Docker Compose でサーバを構築する、SMTP+POP3サーバ編 )
概要
記事一覧はこちらです。
Spring Integration のアプリケーションで使用するサーバを Docker Compose で構築します。
- SMTPサーバ+POP3サーバを構築します。
- Dockerイメージは tvial/docker-mailserver を使用します。選定理由は以下の通りです。
- SMTPサーバは認証なし、SSLなし、ポート番号は25番を使用。
- POP3サーバは認証あり、SSLなし、ポート番号は110番を使用。
- 認証に使用するパスワードは、サーバ側で PLAIN TEXT で保存します。
参照したサイト・書籍
Spring Integration Reference Manual - 22. Mail Support
https://docs.spring.io/spring-integration/docs/5.0.7.RELEASE/reference/html/mail.htmltvial/docker-mailserver(Docker Hub のページ)
https://hub.docker.com/r/tvial/docker-mailserver/tomav/docker-mailserver(GitHub のページ)
https://github.com/tomav/docker-mailservertomav/docker-mailserver - Wiki
https://github.com/tomav/docker-mailserver/wiki- docker-mailserver の設定方法は Wiki に記載されています。
Docker for Windows で postgres コンテナの Volume マウントを安全にする
https://qiita.com/megmogmog1965/items/e7cd4500006c3b6b1894
目次
- ksbysample-eipapp-dockerserver プロジェクトを作成する
- SMTP+POP3 サーバを構築する
- SMTP でメールを送信するサンプルを作成する
- POP3 でメールを受信するサンプルを作成する
手順
ksbysample-eipapp-dockerserver プロジェクトを作成する
Spring Initializr で作成します。


生成された build.gradle は以下のものですが、
buildscript {
    ext {
        springBootVersion = '2.0.4.RELEASE'
    }
    repositories {
        mavenCentral()
    }
    dependencies {
        classpath("org.springframework.boot:spring-boot-gradle-plugin:${springBootVersion}")
    }
}

apply plugin: 'java'
apply plugin: 'eclipse'
apply plugin: 'org.springframework.boot'
apply plugin: 'io.spring.dependency-management'

group = 'ksbysample'
version = '0.0.1-SNAPSHOT'
sourceCompatibility = 1.8

repositories {
    mavenCentral()
}


dependencies {
    compile('org.springframework.boot:spring-boot-starter-integration')
    testCompile('org.springframework.boot:spring-boot-starter-test')
}
dependencies block を以下のように変更します。
dependencies {
    implementation('org.springframework.boot:spring-boot-starter-integration')
    implementation("org.springframework.boot:spring-boot-starter-mail")
    implementation('org.springframework.integration:spring-integration-mail')
    implementation("org.apache.commons:commons-lang3")
    testImplementation('org.springframework.boot:spring-boot-starter-test')
}
compile→implementation、testCompile→testImplementationに変更します。- Spring Integration の Mail Support の機能を使用するので、以下の行を追加します。
implementation('org.springframework.integration:spring-integration-mail')
- メールを送信するのに JavaMailSender Bean を使用したいので、以下の行を追加します。
implementation("org.springframework.boot:spring-boot-starter-mail")
- StringUtils を使用したいので、以下の行を追加します。
implementation("org.apache.commons:commons-lang3")
build.gradle を変更後、Gradle Tool Window の左上にある「Refresh all Gradle projects」ボタンをクリックして更新します。
また @SpringBootApplication アノテーションが記述されているファイル名が長いので、KsbysampleEipappDockerserverApplication.java → Application.java に変更します。
SMTP+POP3 サーバを構築する
docker-mailserver をカスタマイズする設定ファイルを配置するディレクトリを作成する
プロジェクトの直下に docker/mail-server/config ディレクトリを作成します。

docker-compose.yml を作成する
プロジェクトのルートディレクトリ直下に docker-compose.yml を新規作成し、以下の内容を記述します。
version: '3'

services:
  # docker-mailserver
  # https://hub.docker.com/r/tvial/docker-mailserver/
  # https://github.com/tomav/docker-mailserver
  #
  # 起動した docker-mailserver のコンテナ(mail-server) にアクセスする場合には以下のコマンドを実行する
  # docker exec -it mail-server /bin/sh
  #
  # アカウントのパスワードを SHA512 で作成する場合には、コンテナにアクセスして以下のようにコマンドを実行して生成する
  # doveadm pw -s SHA512-CRYPT -u [メールアドレス(例:tanaka@mail.example.com)] -p [パスワード]
  #
  mail-server:
    image: tvial/docker-mailserver:latest
    container_name: mail-server
    hostname: mail
    domainname: example.com
    ports:
      - "25:25"
      - "110:110"
    volumes:
      - ./docker/mail-server/config/:/tmp/docker-mailserver/
    environment:
      # debug したい場合には以下の行のコメントアウトを解除する
      # - DMS_DEBUG=1
      - ENABLE_SPAMASSASSIN=0
      - ENABLE_CLAMAV=0
      - ENABLE_FETCHMAIL=0
      - ENABLE_FAIL2BAN=0
      - ENABLE_POSTGREY=0
      - ENABLE_POP3=1
    cap_add:
      - NET_ADMIN
      - SYS_PTRACE
    restart: always
- コンテナ名は
mail-server。 - メールのドメイン名は
mail.example.com。 - https://github.com/tomav/docker-mailserver の docker-compose.yml のサンプルから主に以下の点を変更しています。
- PORT は 25番(SMTP)、110番(POP3)のみ記述しています。
Note: Port 25 is only for receiving email from other mailservers and not for submitting email. You need to use port 465 or 587 for this.と記述されていますが、465番、587番は SSL, TLS 用のポートなので、今回は SSL なしのサンプルのため 25番を使用します。 - サンプルでは volumes に
maildata:/var/mail,mailstate:/var/mail-stateが記載されていますが、Windows PC 上のディレクトリにマウントしないことにしたので記述していません。マウントする場合にはdocker volume createコマンドで maildata, mailstate という名前のボリュームを作成して、サンプルのように記述すればよいはず。 - 開発環境用としてシンプルに SMTP, POP3 を使用したいだけなので、spamassasin, clamav, fetchmail, fail2ban, postgrey は OFF にします。
- POP3 を使用するので
ENABLE_POP3=1を追加します。
- PORT は 25番(SMTP)、110番(POP3)のみ記述しています。
Postfix をカスタマイズするための postfix-main.cf を作成する
docker/mail-server/config の下に postfix-main.cf を新規作成し、以下の内容を記述します。
mydestination =
smtpd_recipient_restrictions =
- mydestination と virtual_mailbox_domains に同じドメインが設定されていると
warning: do not list domain mail.example.com in BOTH mydestination and virtual_mailbox_domainsというログが出るので、mydestination を空にします。 - 既存の smtpd_recipient_restrictions の設定のままではメール送信時に
Helo command rejected: need fully-qualified hostnameというエラーが出るため、空にします。
Dovecot をカスタマイズするための dovecot.cf を作成する
docker/mail-server/config の下に dovecot.cf を新規作成し、以下の内容を記述します。
disable_plaintext_auth = no
ssl = no
# debug したい場合には以下の行のコメントアウトを解除する
# auth_verbose = yes
# auth_debug = yes
- SSL をオフにして、かつ PLAIN TEXT のパスワード送信を受け付けるようにするために
disable_plaintext_auth = no、ssl = noの設定を入れます。この2つの設定がないと POP3 の認証時にPlaintext authentication disallowed on non-secure (SSL/TLS) connections.というエラーが発生します。
ユーザを登録するための postfix-accounts.cf を作成する
tanaka@mail.example.com、suzuki@mail.example.com の2ユーザを作成します。docker/mail-server/config の下に postfix-accounts.cf を新規作成し、以下の内容を記述します。
tanaka@mail.example.com|{PLAIN}xxxxxxxx
suzuki@mail.example.com|{PLAIN}yyyyyyyy
ここまでの作業で docker ディレクトリは以下の構成になります。

サーバを起動する
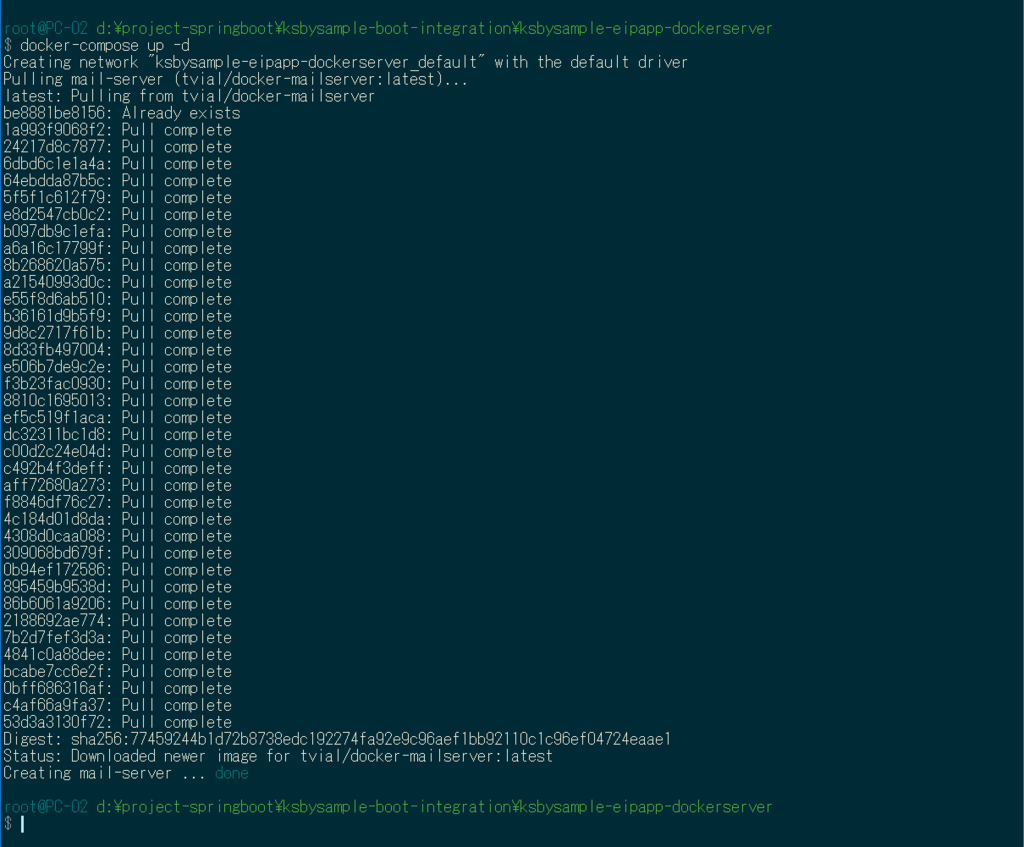
コマンドプロンプトを起動し docker-compose.yml のあるディレクトリへ移動して docker-compose up -d コマンドを実行して起動します。

IntelliJ IDEA の docker plugin を見ると mail-server コンテナが起動していることが確認できます。

動作確認
telnet で接続して SMTP, POP3 コマンドを実行すれば動作確認できるのですが、Windows には標準では telnet コマンドがありません。「Windows の機能の有効化または無効化」で「Telnet クライアント」がインストール可能ですが、インストールしてもなぜかうまく接続できませんでした。Git for Windows の中を見ても telnet コマンドはありませんでした。
Windows 10 では WSL(Windows Subsystem for Linux)という機能で Ubuntu 18.04 がインストールできますので、Ubuntu から telnet で接続して動作確認します(おそらく Windows で telnet を使うのはこれが一番使いやすいです)。WSL や Ubuntu 18.04 のインストール方法はここでは書きません。
まずは telnet localhost 25 で接続してメールを送信します。

コマンドプロンプトで docker exec -it mail-server /bin/sh コマンドを実行して mail-server コンテナに接続し、/var/mail の下の tanaka@mail.example.com にメールが届いていることを確認します。

最後に telnet localhost 110 で接続して POP3 でメールを受信できることを確認します。

SMTP でメールを送信するサンプルを作成する
Spring Framework のスケジューリング機能を利用して一定時間毎にメールを送信したいので、src/main/java/ksbysample/eipapp/dockerserver/Application.java に @EnableScheduling アノテーションを付与します。
package ksbysample.eipapp.dockerserver;

import org.springframework.boot.SpringApplication;
import org.springframework.boot.autoconfigure.SpringBootApplication;
import org.springframework.scheduling.annotation.EnableScheduling;

@SpringBootApplication
@EnableScheduling
public class Application {

    public static void main(String[] args) {
        SpringApplication.run(Application.class, args);
    }
}
src/main/resources/application.properties に以下の内容を記述します。
spring.mail.host=localhost
spring.mail.port=25
# メール送信処理を debug したい場合には以下の行のコメントアウトを解除する
# spring.mail.properties.mail.debug=true
src/main/java/ksbysample/eipapp/dockerserver の下に flow パッケージを新規作成し、その下に MailFlowConfig.java を新規作成して、以下の内容を記述します。
package ksbysample.eipapp.dockerserver.flow;

import org.springframework.beans.factory.annotation.Autowired;
import org.springframework.context.annotation.Bean;
import org.springframework.context.annotation.Configuration;
import org.springframework.integration.dsl.IntegrationFlow;
import org.springframework.integration.handler.LoggingHandler;
import org.springframework.integration.mail.MailHeaders;
import org.springframework.integration.mail.MailSendingMessageHandler;
import org.springframework.integration.support.StringObjectMapBuilder;
import org.springframework.mail.javamail.JavaMailSender;
import org.springframework.messaging.Message;
import org.springframework.messaging.MessageHeaders;
import org.springframework.messaging.support.MessageBuilder;
import org.springframework.scheduling.annotation.Scheduled;

import java.util.Map;
import java.util.concurrent.Executors;
import java.util.concurrent.atomic.AtomicInteger;

@Configuration
public class MailFlowConfig {

    /****************************************
     * メール送信処理のサンプル                 *
     ****************************************/

    private final JavaMailSender mailSender;

    private final AtomicInteger count;

    public MailFlowConfig(JavaMailSender mailSender) {
        this.mailSender = mailSender;
        this.count = new AtomicInteger(0);
    }

    @Bean
    public MailSendingMessageHandler mailSendingMessageHandler() {
        return new MailSendingMessageHandler(this.mailSender);
    }

    @Autowired
    private MailSendingMessageHandler mailSendingMessageHandler;

    /**
     * 受信したメッセージを元にメールを送信する
     *
     * @return {@IntegrationFlow} オブジェクト
     */
    @Bean
    public IntegrationFlow sendMailFlow() {
        return f -> f
                // メッセージ送信に時間がかかるので(1件あたり約10秒)、スレッドを生成してメール送信は別スレッドに処理させる
                .channel(c -> c.executor(Executors.newCachedThreadPool()))
                .filter(Message.class, m ->
                        m.getHeaders().containsKey(MailHeaders.FROM)
                                && m.getHeaders().containsKey(MailHeaders.TO)
                                && m.getHeaders().containsKey(MailHeaders.SUBJECT))
                .log(LoggingHandler.Level.WARN, m -> String.format("★★★ メール送信: %s", m.getPayload()))
                .wireTap(sf -> sf.handle(mailSendingMessageHandler))
                .log(LoggingHandler.Level.WARN, m -> String.format("◇◇◇ メール送信: %s", m.getPayload()));
    }

    /**
     * sendMailFlow へ5秒おきに MailHeaders.* のヘッダーをセットした Message を送信する
     */
    @Scheduled(initialDelay = 5000, fixedDelay = 5000)
    public void sendMessageTask() {
        Map<String, Object> headers = new StringObjectMapBuilder()
                .put(MailHeaders.FROM, "sample@test.co.jp")
                .put(MailHeaders.TO, "tanaka@mail.example.com,suzuki@mail.example.com")
                .put(MailHeaders.SUBJECT, "これはテストです")
                .get();
        MessageHeaders messageHeaders = new MessageHeaders(headers);
        Message<String> message
                = MessageBuilder.createMessage(String.format("count = %d", this.count.incrementAndGet())
                , messageHeaders);
        sendMailFlow().getInputChannel().send(message);
    }

}
動作確認してみます。最初に docker-compose up -d でメールサーバを起動し、メールが何も届いていないことを確認します。

次に作成したアプリケーションを実行してメールを送信します。

メールサーバを見るとメールが届いていることが確認できます。

POP3 でメールを受信するサンプルを作成する
src/main/java/ksbysample/eipapp/dockerserver/flow/MailFlowConfig.java に POP3 のメール受信の処理を追加します。
    /****************************************
     * メール受信処理のサンプル                 *
     ****************************************/

    /**
     * Pop3MailReceiver {@link MailFlowConfig#pop3MessageSource()} に記述せず Bean で定義する必要がある
     * Bean にしないと受信したメッセージをサーバから削除してくれない
     *
     * @return {@Pop3MailReceiver} オブジェクト
     */
    @Bean
    public Pop3MailReceiver pop3MailReceiver() {
        Pop3MailReceiver pop3MailReceiver
                = new Pop3MailReceiver("localhost", "tanaka@mail.example.com", "xxxxxxxx");
        pop3MailReceiver.setShouldDeleteMessages(true);
        Properties javaMailProperties = new Properties();
        // debug したい場合には以下のコメントアウトを解除する
        // javaMailProperties.put("mail.debug", "true");
        pop3MailReceiver.setJavaMailProperties(javaMailProperties);
        return pop3MailReceiver;
    }

    @Bean
    public MailReceivingMessageSource pop3MessageSource() {
        return new MailReceivingMessageSource(pop3MailReceiver());
    }

    /**
     * 5秒おきにメールを受信してみる
     *
     * @return
     */
    @Bean
    public IntegrationFlow mailRecvByPop3Flow() {
        return IntegrationFlows.from(pop3MessageSource()
                // 5秒おきに最大100件受信する
                , c -> c.poller(Pollers.fixedDelay(5000).maxMessagesPerPoll(100)))
                .<MimeMessage>log(LoggingHandler.Level.ERROR, m -> {
                    try {
                        return String.format("◎◎◎ メール受信: %s"
                                , StringUtils.chomp((String) m.getPayload().getContent()));
                    } catch (IOException | MessagingException e) {
                        throw new RuntimeException(e);
                    }
                })
                .get();
    }
メールサーバを再起動してから(送信されたメールがクリアされます)、アプリケーションを実行するとメールの送信と受信が行われます。

履歴
2018/08/28
初版発行。