Spring Boot 1.5.x の Web アプリを 2.0.x へバージョンアップする ( その8 )( 一旦動作確認し、動作しない点があれば修正する )
概要
記事一覧はこちらです。
- 今回の手順で確認できるのは以下の内容です。
- ここまでいろいろ変更したので Tomcat を起動して画面から正常に動作するか確認し、動作しない点があれば修正します。
参照したサイト・書籍
correlation id missing when trying to communicate between different rabbitmq rpc library
https://github.com/spring-projects/spring-amqp/issues/657Spring AMQP - 3.3.3 Stock Trading
https://docs.spring.io/spring-amqp/docs/current/reference/html/reference.html#stock_trading
目次
手順
動作確認1
動作確認前に DB のデータを以下の状態にします。
- user_info, user_role テーブルのデータは開発時のままにします。
- lending_app, lending_book, library_forsearch テーブルのデータはクリアします。
メールを受信するので smtp4dev を起動します。

Tomcat を起動後、以下の手順で動作確認します。
ブラウザを起動して http://localhost:8080/ にアクセスしてログイン画面を表示します。tanaka.taro@sample.com / taro でログインします。

検索対象図書館登録画面が表示されます。"東京都" で検索した後、一覧表示されている図書館から「国立国会図書館東京本館」を選択します。

ログアウトします。
- ログイン画面に戻るので suzuki.hanako@test.co.jp / hanako でログインします。
- 貸出希望書籍 CSV ファイルアップロード画面が表示されます。以下の内容が記述された CSV ファイルをアップロードします。
"ISBN","書名"
"978-4-7741-6366-6","GitHub実践入門"
"978-4-7741-5377-3","JUnit実践入門"
"978-4-7973-8014-9","Java最強リファレンス"
"978-4-7973-4778-4","アジャイルソフトウェア開発の奥義"
"978-4-87311-704-1","Javaによる関数型プログラミング"

この後メールが送信されてくるはずですが、メールは送信されず NullPointerException が延々と発生していました。

RabbitMQ へのメッセージ送信時に correlationId を付けるよう修正する
NullPointerException が発生している org.springframework.amqp.core.MessageProperties.hashCode(MessageProperties.java:528) をクリックしてみると result = prime * result + this.correlationId.hashCode(); のところでした。Spring Boot 1.5.x の Web アプリを 2.0.x へバージョンアップする ( その4 )( AbstractJsonpResponseBodyAdvice を削除し、失敗しているテストを成功させる ) に書きましたが、2.0 にバージョンアップするとメッセージ送信時に correlationId を必ずセットしないといけなくなっているのですが、セットしていないのが原因のようです。

correlationId は自動で一意の値を割り当ててもらえれば良さそうに思えたので何か方法がないか調べたところ、Spring AMQP - 3.3.3 Stock Trading のページに UUID.randomUUID().toString() を使う方法が記載されていました。今回はこの方法を使うことにします。
メッセージを送信している src/main/java/ksbysamplevwebapp/lending/service/queue/InquiringStatusOfBookQueueService.java の sendMessage メソッドを以下のように変更します。
    public void sendMessage(Long lendingAppId) {
        InquiringStatusOfBookQueueMessage body = new InquiringStatusOfBookQueueMessage();
        body.setLendingAppId(lendingAppId);
        Message message = converter.toMessage(body
                , MessagePropertiesBuilder.newInstance().setCorrelationId(UUID.randomUUID().toString()).build());
        rabbitTemplate.send(Constant.QUEUE_NAME_INQUIRING_STATUSOFBOOK, message);
    }
Message message = converter.toMessage(body, MessagePropertiesBuilder.newInstance().setCorrelationId(UUID.randomUUID().toString()).build());を追加します。- メッセージ送信時に呼び出すメソッドを
rabbitTemplate.convertAndSend→rabbitTemplate.sendに変更します。
動作確認2
RabbitMQ、Tomcat を再起動して最初からやり直します。

- 「貸出状況を確認しました」のメールが送信されるので、メールに記述されている URL にアクセスします。


- 貸出申請画面が表示されます。3冊程「申請する」を選択して申請します。


- ログアウトします。
- 「貸出申請がありました」のメールが送信されるので、メールに記述されている URL にアクセスします。ログイン画面が表示されるので、tanaka.taro@sample.com / taro でログインします。


- 貸出承認画面が表示されます。「承認」あるいは「却下」を選択して確定させます。


- ログアウトします。
- 「貸出申請が承認・却下されました」のメールが送信されるので、メールに記述されている URL にアクセスします。ログイン画面が表示されるので、suzuki.hanako@test.co.jp / hanako でログインします。


- 貸出申請結果確認画面が表示されるので内容を確認します。

動作しなかったのは RabbitMQ へのメッセージ送受信のところだけでした。
次回は。。。
以下の順に進める予定です。
- gradle-errorprone-plugin を 0.0.16 → 0.6 へバージョンアップします。知らないうちに plugin の方が大きく変更されていました。
- Tomcat connection Pool → HikariCP に変更します。
履歴
2018/10/03
初版発行。
Spring Boot 1.5.x の Web アプリを 2.0.x へバージョンアップする ( その7 )( src/main/resources/static の下の css や js ファイルにアクセスできない原因とは? )
概要
記事一覧はこちらです。
Spring Boot 1.5.x の Web アプリを 2.0.x へバージョンアップする ( その6 )( FindBugs 3.0.1 → SpotBugs 3.1.7 に切り替える ) の続きです。
- 今回の手順で確認できるのは以下の内容です。
参照したサイト・書籍
Serving static web resources in Spring Boot & Spring Security application
https://stackoverflow.com/questions/24916894/serving-static-web-resources-in-spring-boot-spring-security-application/24920752Security changes in Spring Boot 2.0 M4
https://spring.io/blog/2017/09/15/security-changes-in-spring-boot-2-0-m4Spring MVC 5 - Static resources handling example
https://www.boraji.com/spring-mvc-5-static-resources-handling-example
目次
- Spring Boot 1.5 の時と 2.0 の時の CSS のリクエスト・レスポンスを比較してみる
- src/main/resources/static の下のファイルにアクセスできない原因を調査・解消する
- src/main/resources/static の下のファイルにキャッシュ期間を設定する
手順
Spring Boot 1.5 の時と 2.0 の時の CSS のリクエスト・レスポンスを比較してみる
1.5 の時はログイン画面は正常に表示されていたので、1.5 の時と 2.0 の時の CSS のリクエスト・レスポンスを比較してみます。まずは 2.0 から。
Tomcat を起動して DevTools を起動した Chrome で http://localhost:8080/ にアクセスすると、コンソールに MIME が text/html になっているというエラーメッセージが表示されています。

Refused to apply style from '<URL>' because its MIME type ('text/html') is not a supported stylesheet MIME type, and strict MIME checking is enabled.Refused to execute script from 'http://localhost:8080/' because its MIME type ('text/html') is not executable, and strict MIME type checking is enabled.
Fiddler でログイン画面表示時のキャプチャを取得し、/css/bootstrap.min.css のリクエスト・レスポンスを見てみると、以下のようになっていました。

HTTP/1.1 302
X-Content-Type-Options: nosniff
X-XSS-Protection: 1; mode=block
Cache-Control: no-cache, no-store, max-age=0, must-revalidate
Pragma: no-cache
Expires: 0
X-Frame-Options: DENY
Location: http://localhost:8080/
Content-Length: 0
Date: Sat, 29 Sep 2018 00:18:08 GMT
HTTPステータスコードが 302 で Location: http://localhost:8080/ ヘッダが返ってきていました。なぜかリダイレクトされています。。。
次に 1.5 の時を見てみます。master ブランチへ切り替えてから build し直して Tomcat を起動し、ブラウザでアクセスします。画面も正常に表示され、コンソールには何も表示されていません。

Fiddler で /css/bootstrap.min.css のリクエスト・レスポンスを見てみると、以下のようになっていました。

HTTP/1.1 200
Last-Modified: Sat, 29 Sep 2018 10:35:37 GMT
Cache-Control: no-store
Accept-Ranges: bytes
Content-Type: text/css
Content-Length: 117309
Date: Sat, 29 Sep 2018 10:44:10 GMT
HTTPステータスコードは 200 が返ってきます。
状況は分かったので 2.0 の作業用ブランチに戻します。Spring Boot 1.5+Spring Security の構成の時には src/main/resources/static の下のファイルにアクセスできた(200 が返ってきていた)のですが、Spring Boot 2.0+Spring Security の構成だとアクセスできなくなっているようです。
src/main/resources/static の下のファイルにアクセスできない原因を調査・解消する
stackoverflow で Serving static web resources in Spring Boot & Spring Security application という QA を見つけました。
この中の回答によると、1.5 以下では public/** or static/** がデフォルトで許可されていましたが、2.0 ではデフォルトで全て許可されなくなったそうです。
src/main/java/ksbysample/webapp/lending/config/WebSecurityConfig.java の以下の点を変更します。
    @Override
    protected void configure(HttpSecurity http) throws Exception {
        http.authorizeRequests()
                // 認証の対象外にしたいURLがある場合には、以下のような記述を追加します
                // 複数URLがある場合はantMatchersメソッドにカンマ区切りで対象URLを複数列挙します
                // .antMatchers("/country/**").permitAll()
                .requestMatchers(PathRequest.toStaticResources().atCommonLocations()).permitAll()
                .antMatchers("/fonts/**").permitAll()
                ..........
.requestMatchers(PathRequest.toStaticResources().atCommonLocations()).permitAll()を追加します。
Tomcat を起動してブラウザでアクセスすると、今度は画面が正常に表示されました。

Fiddler で見ると HTTPステータスコードの 200 が返ってきています。

HTTP/1.1 200
Last-Modified: Sat, 29 Sep 2018 23:28:18 GMT
Accept-Ranges: bytes
X-Content-Type-Options: nosniff
X-XSS-Protection: 1; mode=block
Cache-Control: no-cache, no-store, max-age=0, must-revalidate
Pragma: no-cache
Expires: 0
X-Frame-Options: DENY
Content-Type: text/css
Content-Length: 117309
Date: Sat, 29 Sep 2018 23:34:21 GMT
src/main/resources/static の下のファイルにキャッシュ期間を設定する
※以降の変更はコミットはしません。
src/main/resources/static の下のファイルにアクセスできるようになりましたが、Cache-Control: no-cache, no-store, max-age=0, must-revalidate 等の HTTP ヘッダが付いていてキャッシュが無効になっています。css や js はキャッシュを設定したいことがあるので、設定してみます。
src/main/java/ksbysample/webapp/lending/config/WebMvcConfig.java に addResourceHandlers メソッドを override して設定します。
package ksbysample.webapp.lending.config;

import org.springframework.beans.factory.annotation.Autowired;
import org.springframework.context.annotation.Configuration;
import org.springframework.http.CacheControl;
import org.springframework.web.servlet.config.annotation.ResourceHandlerRegistry;
import org.springframework.web.servlet.config.annotation.WebMvcConfigurer;
import org.thymeleaf.spring5.SpringTemplateEngine;

import java.util.concurrent.TimeUnit;

/**
 * ???
 */
@Configuration
public class WebMvcConfig implements WebMvcConfigurer {

    /**
     * Thymeleaf 3 のパフォーマンスを向上させるために SpEL コンパイラを有効にする
     *
     * @param templateEngine {@link SpringTemplateEngine} オブジェクト
     */
    @Autowired
    public void configureThymeleafSpringTemplateEngine(SpringTemplateEngine templateEngine) {
        templateEngine.setEnableSpringELCompiler(true);
    }

    /**
     * css, js のキャッシュ期間を設定する(css は 1時間、js は 15分)
     *
     * @param registry {@link ResourceHandlerRegistry} オブジェクト
     */
    @Override
    public void addResourceHandlers(ResourceHandlerRegistry registry) {
        registry.addResourceHandler("/css/**")
                .addResourceLocations("classpath:/static/css/")
                .setCacheControl(CacheControl.maxAge(1, TimeUnit.HOURS).cachePublic());

        registry.addResourceHandler("/js/**")
                .addResourceLocations("classpath:/static/js/")
                .setCacheControl(CacheControl.maxAge(15, TimeUnit.MINUTES).cachePublic());
    }

}
Tomcat を起動して css, js のレスポンスを見るとキャッシュ期間が設定されていることが確認できます。
/css は Cache-Control: max-age=3600, public とキャッシュ期間が1時間で設定されています。

HTTP/1.1 200
Last-Modified: Sat, 29 Sep 2018 23:28:18 GMT
Cache-Control: max-age=3600, public
Accept-Ranges: bytes
X-Content-Type-Options: nosniff
X-XSS-Protection: 1; mode=block
X-Frame-Options: DENY
Content-Type: text/css
Content-Length: 117309
Date: Sun, 30 Sep 2018 00:20:13 GMT
/js は Cache-Control: max-age=900, public とキャッシュ期間が15分で設定されています。

HTTP/1.1 200
Last-Modified: Sat, 29 Sep 2018 23:28:18 GMT
Cache-Control: max-age=900, public
Accept-Ranges: bytes
X-Content-Type-Options: nosniff
X-XSS-Protection: 1; mode=block
X-Frame-Options: DENY
Content-Type: application/javascript
Content-Length: 84349
Date: Sun, 30 Sep 2018 00:20:13 GMT
履歴
2018/09/30
初版発行。
Spring Boot 1.5.x の Web アプリを 2.0.x へバージョンアップする ( その6 )( FindBugs 3.0.1 → SpotBugs 3.1.7 に切り替える )
概要
記事一覧はこちらです。
- 今回の手順で確認できるのは以下の内容です。
- FindBugs 3.0.1 → SpotBugs 3.1.7 に切り替えます。
- Spring Boot + npm + Geb で入力フォームを作ってテストする ( その74 )( FindBugs 3.0.1 → SpotBugs 3.1.3 に切り替える ) を参考に進めます。
参照したサイト・書籍
How do I configure Jackson Serialization on LocalDateTime and LocalDate for Java?
https://stackoverflow.com/questions/51527794/how-do-i-configure-jackson-serialization-on-localdatetime-and-localdate-for-java- 今回の記事とは関係ありません。作業中に見つけたのでメモとして残しています。
目次
- build.gradle を変更する
- config/findbugs/findbugs-exclude.xml を削除する
- clean タスク → Rebuild Project → build タスクを実行する
- 出力された警告を解消する
- org.springframework.validation.Errors.rejectValue(String, String) の 非 null パラメータに null を渡しています。(Bug type NP_NONNULL_PARAM_VIOLATION)
- null になっている可能性があるメソッドの戻り値を利用しています。(Bug type NP_NULL_ON_SOME_PATH_FROM_RETURN_VALUE)
- target は,非 null でなければならないが null 可能としてマークされています。(Bug type NP_PARAMETER_MUST_BE_NONNULL_BUT_MARKED_AS_NULLABLE)
- 再度 clean タスク → Rebuild Project → build タスクを実行する
- 次回は。。。
手順
build.gradle を変更する
build.gradle の以下の点を変更します。
plugins {
    id "java"
    id "eclipse"
    id "idea"
    id "org.springframework.boot" version "2.0.4.RELEASE"
    id "io.spring.dependency-management" version "1.0.6.RELEASE"
    id "groovy"
    id "checkstyle"
    id "com.github.spotbugs" version "1.6.4"
    id "pmd"
    id "net.ltgt.errorprone" version "0.0.16"
    id "de.undercouch.download" version "3.4.3"
}

..........

spotbugs {
    toolVersion = "3.1.7"
    ignoreFailures = true
    effort = "max"
    spotbugsTest.enabled = false
}
tasks.withType(com.github.spotbugs.SpotBugsTask) {
    reports {
        xml.enabled = false
        html.enabled = true
    }
}

..........

dependencies {
    def jdbcDriver = "org.postgresql:postgresql:42.2.4"
    def spockVersion = "1.1-groovy-2.4"
    def domaVersion = "2.19.3"
    def lombokVersion = "1.18.2"
    def errorproneVersion = "2.3.1"
    def powermockVersion = "2.0.0-beta.5"
    def spotbugsVersion = "3.1.7"

    ..........

    // for SpotBugs
    compileOnly("com.github.spotbugs:spotbugs:${spotbugsVersion}")
    compileOnly("net.jcip:jcip-annotations:1.0")
    compileOnly("com.github.spotbugs:spotbugs-annotations:${spotbugsVersion}")
    testImplementation("com.google.code.findbugs:jsr305:3.0.2")
}
- plugins block の以下の点を変更します。
id "findbugs"→id "com.github.spotbugs" version "1.6.4"に変更します。
- タスク名を
findbugs→spotbugsに変更し、タスク内の以下の点を変更します。toolVersion = "3.0.1"→toolVersion = "3.1.7"に変更します。sourceSets = [project.sourceSets.main]を削除します。- 警告を無視したい場合には
@SuppressFBWarningsを付ければ回避できるので、excludeFilter = file("${rootProject.projectDir}/config/spotbugs/spotbugs-exclude.xml")を削除します。 spotbugsTest.enabled = falseを追加します。tasks.withType(FindBugs)→tasks.withType(com.github.spotbugs.SpotBugsTask)に変更します。
- dependencies block の以下の点を変更します。
- 以下の4行を追加します。
def spotbugsVersion = "3.1.7"compileOnly("com.github.spotbugs:spotbugs:${spotbugsVersion}")compileOnly("net.jcip:jcip-annotations:1.0")compileOnly("com.github.spotbugs:spotbugs-annotations:${spotbugsVersion}")
testImplementation("com.google.code.findbugs:jsr305:3.0.2")をcompileOnly("com.github.spotbugs:spotbugs-annotations:${spotbugsVersion}")の下に移動します。
- 以下の4行を追加します。
変更後、Gradle Tool Window の左上にある「Refresh all Gradle projects」ボタンをクリックして更新します。
config/findbugs/findbugs-exclude.xml を削除する
使用しなくなったので、config/findbugs/findbugs-exclude.xml を削除します。
clean タスク → Rebuild Project → build タスクを実行する
clean タスク → Rebuild Project → build タスクを実行してみると spotbugsMain タスクで SpotBugs rule violations were found. のメッセージが出力されました。

build/reports/spotbugs/main.html を Firefox で開くと、High Priority Warnings が 4件、Medium Priority Warnings が 12件の合計 16件の警告が出ています。

出力された警告を解消する
org.springframework.validation.Errors.rejectValue(String, String) の 非 null パラメータに null を渡しています。(Bug type NP_NONNULL_PARAM_VIOLATION)
警告が出ている原因の箇所は src/main/java/ksbysample/webapp/lending/web/lendingapp/LendingappFormValidator.java の以下の画像の赤線で囲んだところと、

src/main/java/ksbysample/webapp/lending/web/lendingapproval/LendingapprovalFormValidator.java の以下の画像の赤線で囲んだところでした。

src/main/java/ksbysample/webapp/lending/web/lendingapp/LendingappFormValidator.java は以下のように対応します。
errors.rejectValueの第2引数 errcode に null を渡していましたが、非 null パラメータに null を渡しているので警告が出ていました。その後に呼び出しているerrors.rejectの第1引数にしている errcode を渡すようにします(同じエラーのため)。errors.rejectの第2引数 defaultMessage に null を渡していましたが、非 null パラメータに null を渡しているので警告が出ていました。errors.rejectは第1引数のみのものも定義されているので、第2引数の null を削除します。

src/main/java/ksbysample/webapp/lending/web/lendingapproval/LendingapprovalFormValidator.java は src/main/resources/messages_ja_JP.properties にメッセージを定義して errors.rejectValue で呼び出すように修正します。
LendingapprovalParamForm.lendingAppId.emptyerr=貸出申請IDが指定されていません。
LendingapprovalForm.lendingApp.nodataerr=指定された貸出申請IDでは貸出申請されておりません。
LendingapprovalForm.applyingBookFormList.approvalResult.notAllCheckedErr=全ての書籍で承認か却下を選択してください。
LendingapprovalForm.applyingBookFormList.approvalReason.empty=却下理由が入力されていません。
LendingapprovalForm.applyingBookFormList.approvalReason.empty=却下理由が入力されていません。を追加します。

null になっている可能性があるメソッドの戻り値を利用しています。(Bug type NP_NULL_ON_SOME_PATH_FROM_RETURN_VALUE)
3つのソースで警告が出ており、1つ目は src/main/java/ksbysample/webapp/lending/aspect/logging/RequestAndResponseLogger.java の以下の画像の赤線で囲んだところでした。

ここは Optional を使って以下のように変更します。

2つ目は src/main/java/ksbysample/webapp/lending/service/calilapi/CalilApiService.java の以下の画像の赤線で囲んだところでした。

org.springframework.http.HttpEntity@Nullable アノテーションが付いていて、null の場合がありうるため警告が出ていました。

response.getBody() を変数に取得して null チェックをするように修正します。

src/main/resources/messages_ja_JP.properties に CalilApiService.checkapi.response.emptybody=蔵書検索APIのレスポンスボディが空です。 のメッセージを追加しています。
3つ目は src/main/java/ksbysample/webapp/lending/service/openweathermapapi/OpenWeatherMapApiService.java の以下の画像の赤線で囲んだところでした。

OpenWeatherMapApi 関連は JSONP のサンプルとして実装しましたが、AbstractJsonpResponseBodyAdvice も非推奨になったので全て削除します。以下のパッケージを削除します。
ksbysample.webapp.lending.service.openweathermapapiksbysample.webapp.lending.webapi.weatherksbysample.webapp.lending.service.openweathermapapi
target は,非 null でなければならないが null 可能としてマークされています。(Bug type NP_PARAMETER_MUST_BE_NONNULL_BUT_MARKED_AS_NULLABLE)
警告が出ているのは以下の3つのソースで、
- src/main/java/ksbysample/webapp/lending/web/booklist/UploadBooklistFormValidator.java
- src/main/java/ksbysample/webapp/lending/web/lendingapp/LendingappFormValidator.java
- src/main/java/ksbysample/webapp/lending/web/lendingapproval/LendingapprovalFormValidator.java
以下の画像の赤線で囲んだところでした。

override 元の org.springframework.validation.Validator#validate では引数 target に @Nullable アノテーションが付いていますが、override した後では NonNull の想定で実装していて矛盾があるという警告でした。

Assert.notNull(target, "target must not be null"); を追加して null の場合には例外が throw されるようにします。

再度 clean タスク → Rebuild Project → build タスクを実行する
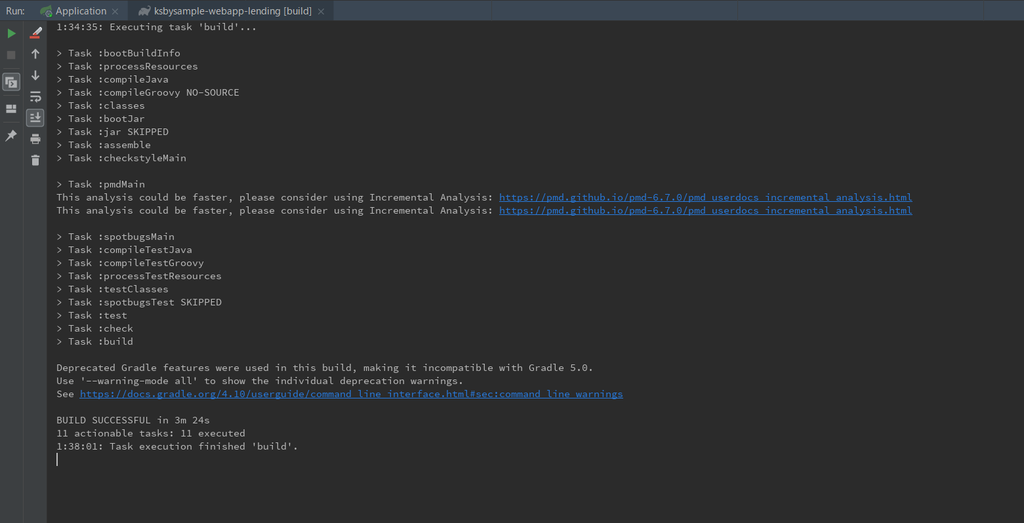
再度 clean タスク → Rebuild Project → build タスクを実行してみると spotbugsMain タスクで何も出力されなくなりました。
次回は。。。
いろいろ対応したので一旦 Tomcat を起動して画面が表示できるか確認してみたのですが、画面が正常に表示されませんでした。CSS が適用されていないようです。原因を調査することにします。

履歴
2018/09/29
初版発行。
Spring Boot + Spring Integration でいろいろ試してみる ( その29 )( Docker Compose でサーバを構築する、FTP+SFTPサーバ編 )
概要
記事一覧はこちらです。
Spring Integration のアプリケーションで使用するサーバを Docker Compose で構築します。
- FTPサーバ+SFTPサーバを構築します。
- FTPサーバの Dockerイメージは stilliard/pure-ftpd を使用します。
- SFTPサーバの Dockerイメージは atmoz/sftp を使用します。
- プロジェクトは Spring Boot + Spring Integration でいろいろ試してみる ( その25 )( Docker Compose でサーバを構築する、SMTP+POP3サーバ編 ) で作成した ksbysample-eipapp-dockerserver を使います。
- 今回はファイルのアップロード・ダウンロードを行うので、アプリケーションを実行するディレクトリ構成を以下のようにします。ftp ディレクトリが FTPサーバとの、sftp ディレクトリが SFTP サーバとのアップロード・ダウンロードを行うためのディレクトリです。
D:\eipapp\ksbysample-eipapp-dockerserver
├ ftp
│ ├ download
│ ├ upload
│ └ uploading
└ sftp
   ├ download
   ├ upload
   └ uploading
参照したサイト・書籍
stilliard/pure-ftpd(Docker Hub のページ)
https://hub.docker.com/r/stilliard/pure-ftpd/stilliard/docker-pure-ftpd(GitHub のページ)
https://github.com/stilliard/docker-pure-ftpdatmoz/sftp(Docker Hub のページ)
https://hub.docker.com/r/atmoz/sftp/atmoz/sftp(GitHub のページ)
https://github.com/atmoz/sftp
目次
- FTP サーバを構築する
- SFTP サーバを構築する
- FTP でアップロードするサンプルを作成する
- FTP でダウンロードするサンプルを作成する
- SFTP でアップロード・ダウンロードするサンプルを作成する
手順
FTP サーバを構築する
docker-compose.yml を変更する
docker-compose.yml の以下の点を変更します。
version: '3'

services:
  ..........

  # stilliard/pure-ftpd
  # https://hub.docker.com/r/stilliard/pure-ftpd/
  #
  # 起動した pure-ftpd のコンテナ(ftp-server) にアクセスする場合には以下のコマンドを実行する
  # docker exec -it ftp-server /bin/bash
  #
  ftp-server:
    image: stilliard/pure-ftpd:latest
    container_name: ftp-server
    ports:
      - "21:21"
      - "30000-30009:30000-30009"
    environment:
      - PUBLICHOST=localhost
      - FTP_USER_NAME=test
      - FTP_USER_PASS=12345678
      - FTP_USER_HOME=/home/ftpusers/test
    restart: always
servicesにftp-serverを追加します。- FTPユーザは環境変数 FTP_USER_NAME, FTP_USER_PASS, FTP_USER_HOME で設定します。
- この方法だと1ユーザしか設定できません。複数ユーザを作成したい場合には https://download.pureftpd.org/pure-ftpd/doc/README.Virtual-Users を参考に作成します。
- image は
stilliard/pure-ftpd:hardenedではなくstilliard/pure-ftpd:latestを指定します。stilliard/pure-ftpd:hardenedだと Spring Integration でファイルをアップロードできません(Spring Integration はファイルアップロード時にファイル名の最後に .writing という文字列を付けてアップロードし、完了後にリネームで取り除くのですが、stilliard/pure-ftpd:hardenedだとリネームができませんでした)。
サーバを起動する
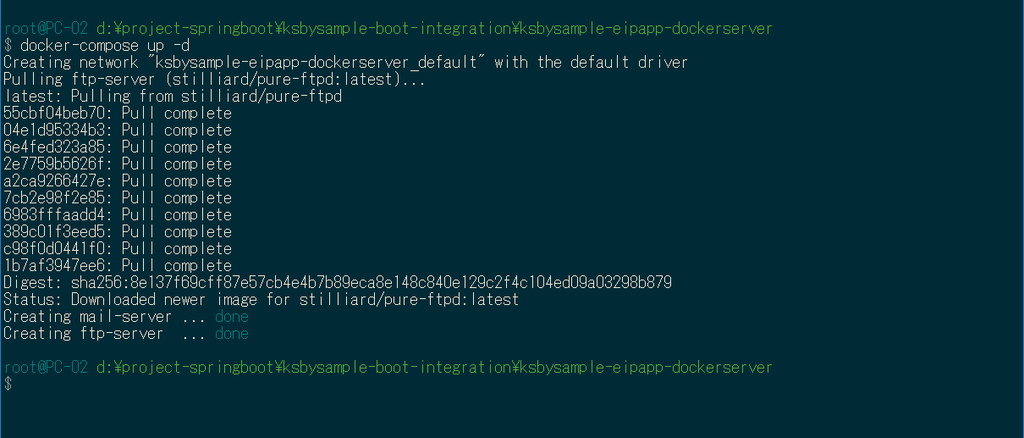
コマンドプロンプトを起動し docker-compose.yml のあるディレクトリへ移動して docker-compose up -d コマンドを実行して起動します。
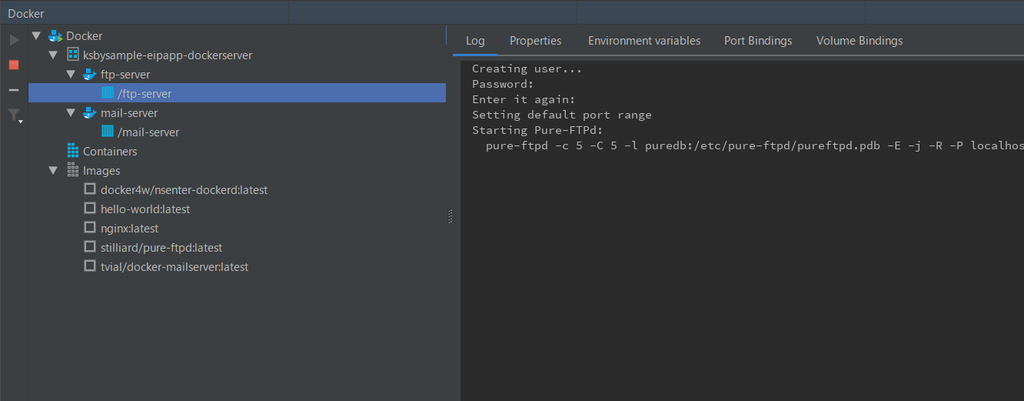
IntelliJ IDEA の docker plugin を見ると ftp-server コンテナが起動していることが確認できます。
動作確認
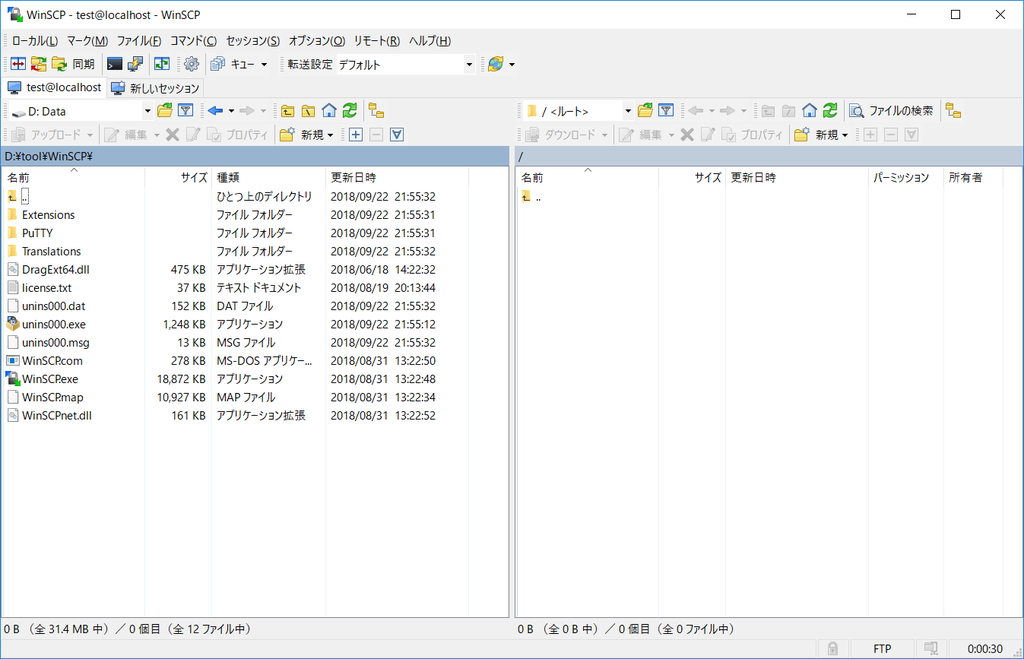
WinSCP で接続してみます。「ログイン」ダイアログでホスト名、ユーザ名、パスワードを入力して「ログイン」ボタンをクリックします。
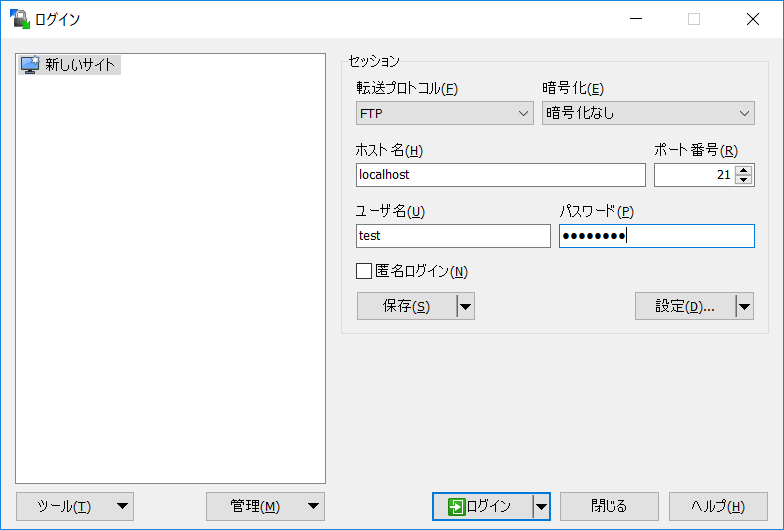
無事ログインできました。ファイルのアップロード、ダウンロードも問題なく出来ました。
一旦 docker-compose down コマンドを実行してコンテナを停止・削除します。
SFTP サーバを構築する
users.conf を作成する
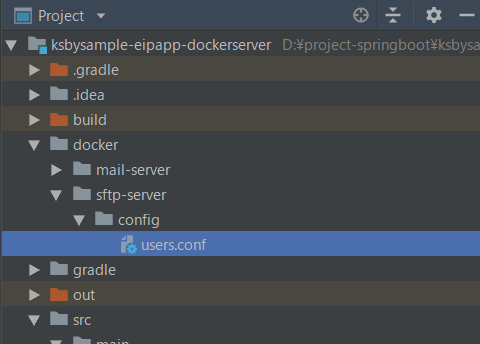
プロジェクトの直下に docker/sftp-server/config ディレクトリを作成します。
docker/sftp-server/config の下に users.conf を新規作成し、以下の内容を記述します。
user01:pass01:::upload,download
user02:pass02:::upload,download
user03:pass03:::upload,download
- 改行コードは LF にします(CRLF だとログインできません)。
- ログインした直後のルートディレクトリにはファイルをアップロードできません(Permission denied が表示されます、ただしダウンロードは可能)。アップロードしたい場合には、アップロード先のディレクトリ名を users.conf の一番右の場所に記述します(複数ディレクトリを作成したい場合にはカンマで区切ります)。
以下のディレクトリ構成になります。
docker-compose.yml を変更する
docker-compose.yml の以下の点を変更します。
version: '3'

services:
  ..........

  # atmoz/sftp
  # https://hub.docker.com/r/atmoz/sftp/
  #
  # 起動した sftp のコンテナ(sftp-server) にアクセスする場合には以下のコマンドを実行する
  # docker exec -it sftp-server /bin/bash
  #
  sftp-server:
    image: atmoz/sftp
    container_name: sftp-server
    ports:
      - "22:22"
    volumes:
      - ./docker/sftp-server/config/users.conf:/etc/sftp/users.conf:ro
サーバを起動する
docker-compose up -d コマンドを実行して起動します。

IntelliJ IDEA の docker plugin を見ると sftp-server コンテナが起動していることが確認できます。

動作確認
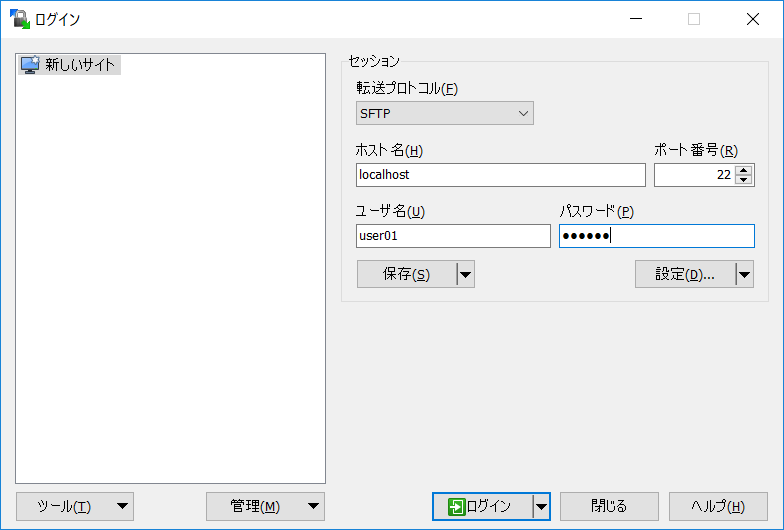
WinSCP で接続してみます。「ログイン」ダイアログでホスト名、ユーザ名、パスワードを入力して「ログイン」ボタンをクリックします。
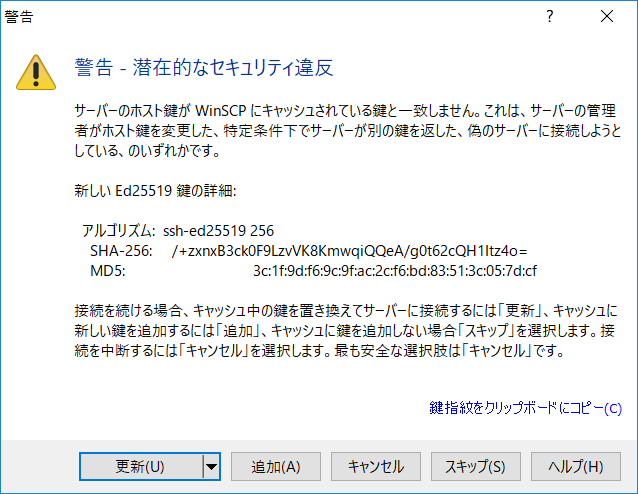
「警告」ダイアログが表示されますので、「更新」ボタンをクリックします。
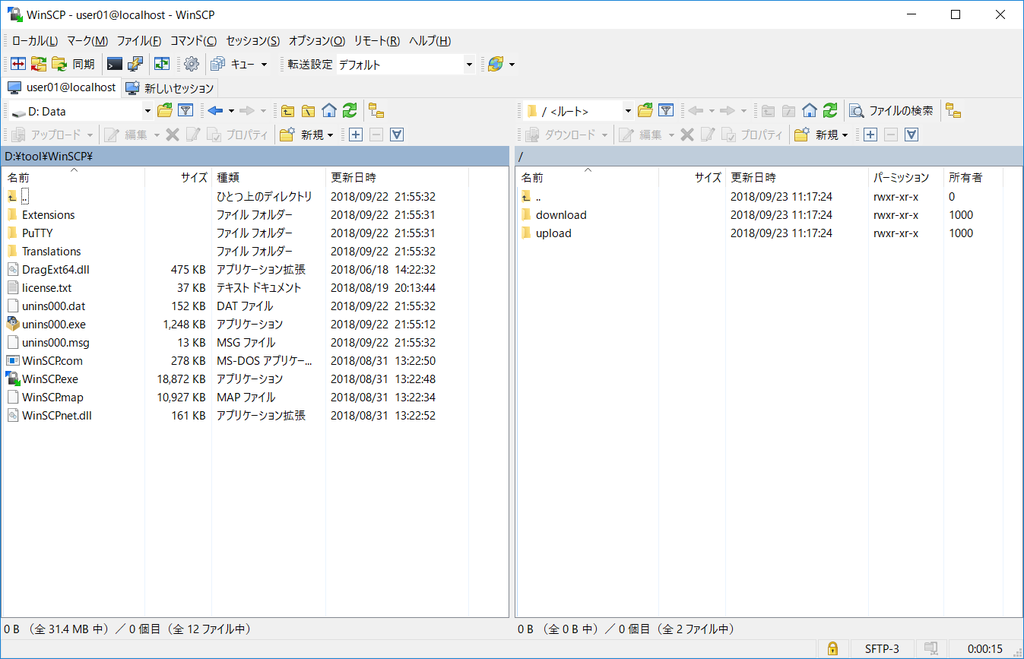
無事ログインできました。download, upload ディレクトリへファイルのアップロード、ダウンロードも問題なく出来ました。
FTP でアップロードするサンプルを作成する
最初にアプリケーションを起動した時にメールのサンプルが実行されないよう src/main/java/ksbysample/eipapp/dockerserver/flow/MailFlowConfig.java の @Configuration アノテーションをコメントアウトします。
// このサンプルを実行したい場合には、@Configuration のコメントアウトを外すこと
//@Configuration
public class MailFlowConfig {
build.gradle の以下の点を変更します。
dependencies {
    implementation('org.springframework.boot:spring-boot-starter-integration')
    implementation("org.springframework.boot:spring-boot-starter-mail")
    implementation('org.springframework.integration:spring-integration-mail')
    implementation('org.springframework.integration:spring-integration-file')
    implementation('org.springframework.integration:spring-integration-ftp')
    implementation("org.apache.commons:commons-lang3")
    testImplementation('org.springframework.boot:spring-boot-starter-test')
}
- 以下の行を追加します。
implementation('org.springframework.integration:spring-integration-file')implementation('org.springframework.integration:spring-integration-ftp')
build.gradle を変更後、Gradle Tool Window の左上にある「Refresh all Gradle projects」ボタンをクリックして更新します。
src/main/java/ksbysample/eipapp/dockerserver/flow の下に FtpFlowConfig.java を新規作成し、以下の内容を記述します。
package ksbysample.eipapp.dockerserver.flow;

import org.apache.commons.net.ftp.FTPClient;
import org.apache.commons.net.ftp.FTPFile;
import org.springframework.context.annotation.Bean;
import org.springframework.context.annotation.Configuration;
import org.springframework.expression.common.LiteralExpression;
import org.springframework.integration.dsl.IntegrationFlow;
import org.springframework.integration.dsl.IntegrationFlows;
import org.springframework.integration.dsl.Pollers;
import org.springframework.integration.file.FileReadingMessageSource;
import org.springframework.integration.file.filters.AcceptAllFileListFilter;
import org.springframework.integration.file.remote.handler.FileTransferringMessageHandler;
import org.springframework.integration.file.remote.session.CachingSessionFactory;
import org.springframework.integration.file.remote.session.SessionFactory;
import org.springframework.integration.ftp.session.DefaultFtpSessionFactory;
import org.springframework.integration.handler.LoggingHandler;
import org.springframework.messaging.support.GenericMessage;

import java.io.File;
import java.io.IOException;
import java.nio.file.Files;
import java.nio.file.Path;
import java.nio.file.Paths;
import java.nio.file.StandardCopyOption;

@Configuration
public class FtpFlowConfig {

    private static final String FTP_SERVER = "localhost";
    private static final int FTP_PORT = 21;
    private static final String FTP_USER = "test";
    private static final String FTP_PASSWORD = "12345678";

    private static final String FTP_REMOTE_DIR = "/";
    private static final String FTP_LOCAL_ROOT_DIR = "D:/eipapp/ksbysample-eipapp-dockerserver/ftp";
    private static final String FTP_LOCAL_UPLOAD_DIR = FTP_LOCAL_ROOT_DIR + "/upload";
    private static final String FTP_LOCAL_UPLOADING_DIR = FTP_LOCAL_ROOT_DIR + "/uploading";

    @Bean
    public SessionFactory<FTPFile> ftpSessionFactory() {
        DefaultFtpSessionFactory factory = new DefaultFtpSessionFactory();
        factory.setHost(FTP_SERVER);
        factory.setPort(FTP_PORT);
        factory.setUsername(FTP_USER);
        factory.setPassword(FTP_PASSWORD);
        factory.setClientMode(FTPClient.PASSIVE_LOCAL_DATA_CONNECTION_MODE);
        return new CachingSessionFactory<>(factory);
    }

    /****************************************
     * FTPアップロード処理のサンプル             *
     ****************************************/

    @Bean
    public FileReadingMessageSource ftpUploadFileMessageSource() {
        FileReadingMessageSource source = new FileReadingMessageSource();
        source.setDirectory(new File(FTP_LOCAL_UPLOAD_DIR));
        source.setFilter(new AcceptAllFileListFilter<>());
        return source;
    }

    @Bean
    public FileTransferringMessageHandler<FTPFile> ftpFileTransferringMessageHandler() {
        FileTransferringMessageHandler<FTPFile> handler
                = new FileTransferringMessageHandler<>(ftpSessionFactory());
        handler.setRemoteDirectoryExpression(new LiteralExpression(FTP_REMOTE_DIR));
        return handler;
    }

    @Bean
    public IntegrationFlow ftpUploadFlow() {
        return IntegrationFlows.from(
                // 200ミリ秒毎に ftp ディレクトリを監視し、ファイルがあれば処理を進める
                ftpUploadFileMessageSource(), c -> c.poller(Pollers.fixedDelay(200)))
                // ファイルを uploading ディレクトリへ移動する
                .<File>handle((p, h) -> {
                    try {
                        Path movedFilePath = Files.move(p.toPath(), Paths.get(FTP_LOCAL_UPLOADING_DIR, p.getName())
                                , StandardCopyOption.REPLACE_EXISTING);
                        return new GenericMessage<>(movedFilePath.toFile(), h);
                    } catch (IOException e) {
                        throw new RuntimeException(e);
                    }
                })
                // FTPサーバにファイルをアップロードする
                .wireTap(f -> f.handle(ftpFileTransferringMessageHandler()))
                .log(LoggingHandler.Level.WARN)
                // アップロードしたファイルを削除する
                .<File>handle((p, h) -> {
                    p.delete();
                    return null;
                })
                .get();
    }

}
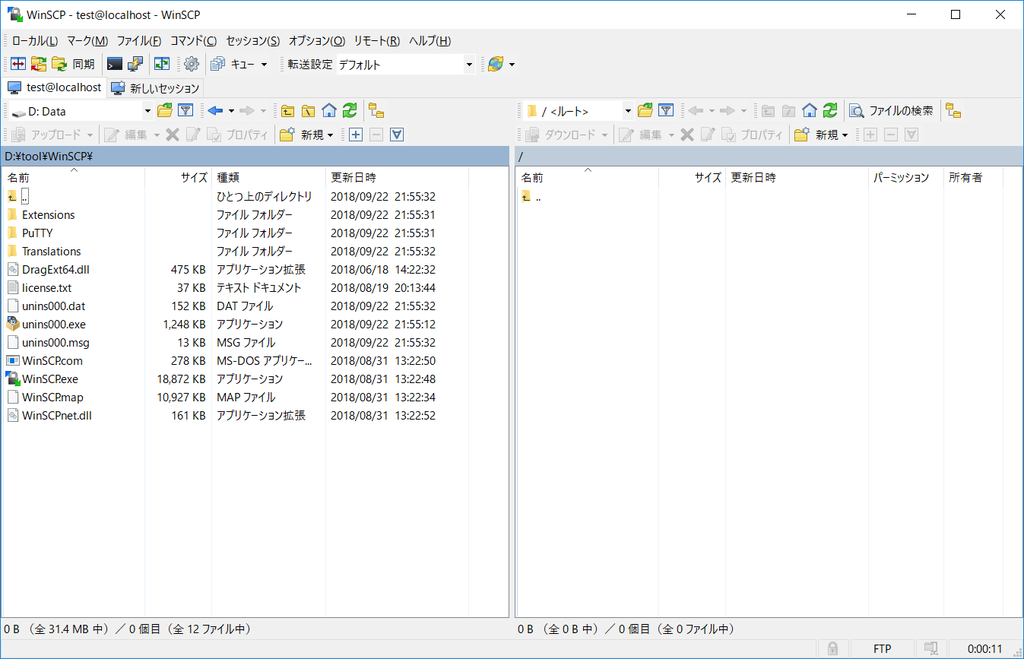
動作確認してみます。最初に docker-compose up -d で FTP サーバを起動し、WinSCP で何もアップロードされていないことを確認します。
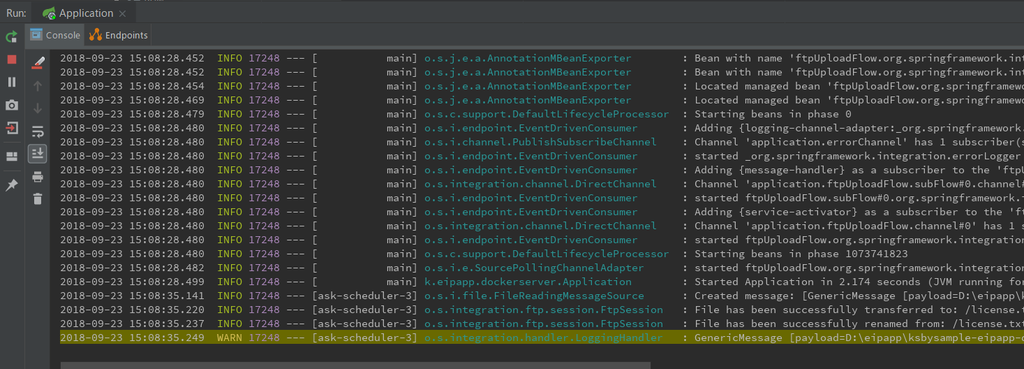
アプリケーションを起動後、D:\eipapp\ksbysample-eipapp-dockerserver\ftp\upload の下にファイルを1つ配置します。ファイルをアップロードしたことを示すログが出力されることが確認できます。
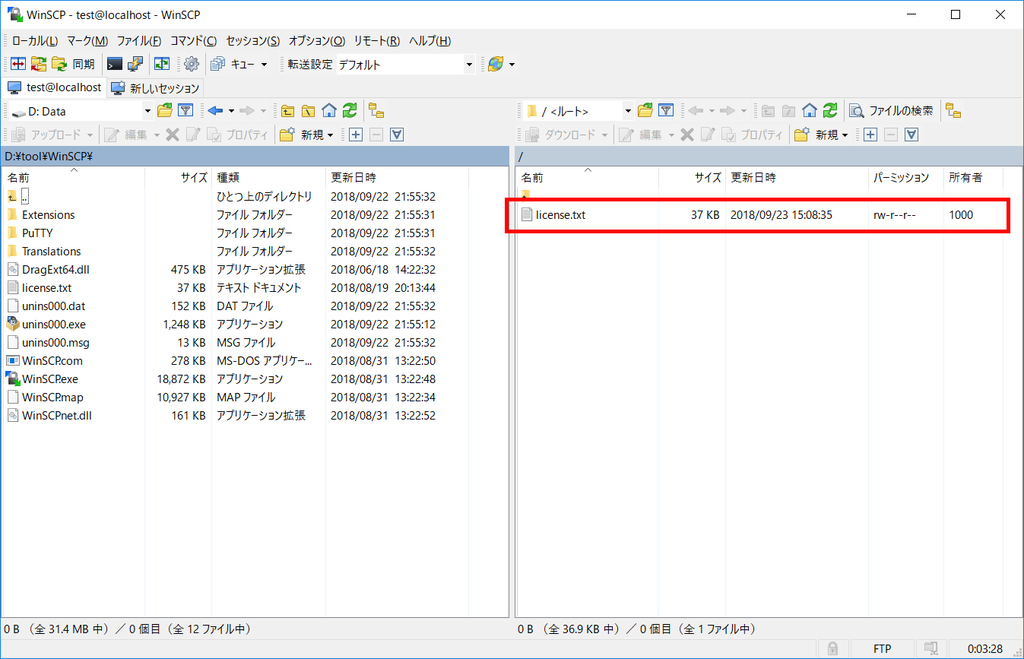
WinSCP で見ると配置したファイルがアップロードされていることが確認できます。
アップロードされたファイルを削除し、アプリケーションを停止します。
FTP でダウンロードするサンプルを作成する
src/main/java/ksbysample/eipapp/dockerserver/flow/FtpFlowConfig.java に FTP ダウンロード処理を追加します。
@Configuration
public class FtpFlowConfig {

    ..........
    private static final String FTP_LOCAL_DOWNLOAD_DIR = FTP_LOCAL_ROOT_DIR + "/download";

    ..........

    /****************************************
     * FTPダウンロード処理のサンプル             *
     ****************************************/

    @Bean
    public FtpInboundFileSynchronizer ftpInboundFileSynchronizer() {
        FtpInboundFileSynchronizer synchronizer = new FtpInboundFileSynchronizer(ftpSessionFactory());
        synchronizer.setRemoteDirectory(FTP_REMOTE_DIR);
        synchronizer.setFilter(new AcceptAllFileListFilter<>());
        synchronizer.setPreserveTimestamp(true);
        synchronizer.setDeleteRemoteFiles(true);
        return synchronizer;
    }

    @Bean
    public FtpInboundFileSynchronizingMessageSource ftpDownloadFileMessageSource() {
        FtpInboundFileSynchronizingMessageSource messageSource
                = new FtpInboundFileSynchronizingMessageSource(ftpInboundFileSynchronizer());
        messageSource.setLocalDirectory(new File(FTP_LOCAL_DOWNLOAD_DIR));
        messageSource.setLocalFilter(new AcceptAllFileListFilter<>());
        messageSource.setMaxFetchSize(1);
        return messageSource;
    }

    @Bean
    public IntegrationFlow ftpDownloadFlow() {
        return IntegrationFlows.from(
                // 1秒毎に FTPサーバを監視し、ファイルがあれば download ディレクトリにダウンロードする
                ftpDownloadFileMessageSource(), c -> c.poller(Pollers.fixedDelay(1000)))
                .log(LoggingHandler.Level.ERROR)
                // ファイルを upload ディレクトリへ移動する
                .<File>handle((p, h) -> {
                    try {
                        Files.move(p.toPath(), Paths.get(FTP_LOCAL_UPLOAD_DIR, p.getName())
                                , StandardCopyOption.REPLACE_EXISTING);
                        return null;
                    } catch (IOException e) {
                        throw new RuntimeException(e);
                    }
                })
                .get();
    }

}
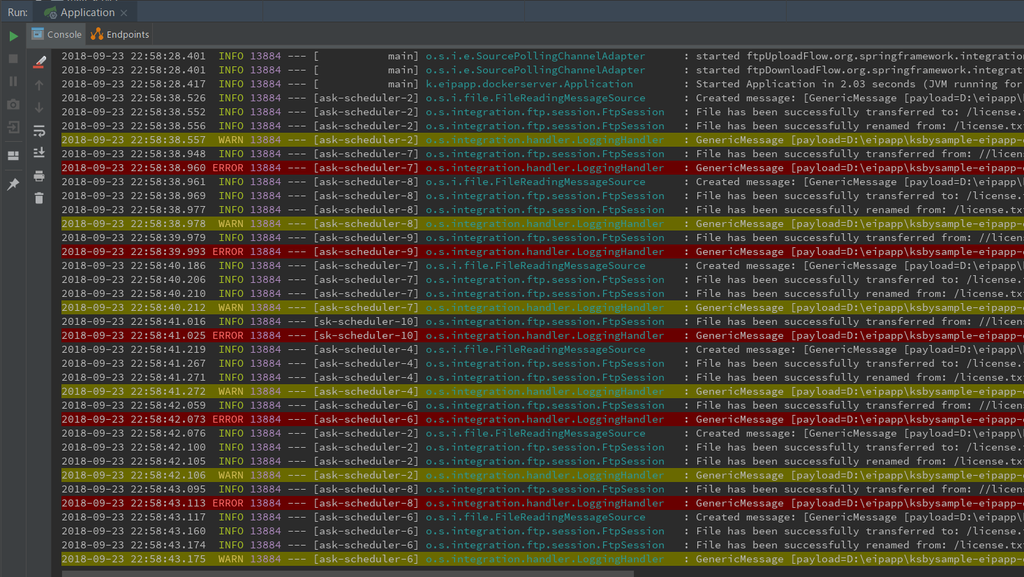
動作確認します。アプリケーションを起動後、D:\eipapp\ksbysample-eipapp-dockerserver\ftp\upload の下にファイルを1つ配置します。ファイルのアップロード・ダウンロードが繰り返されていることを示すログが出力されます。
アプリケーションを停止し、docker-compose down で FTP サーバも停止します。
アプリケーションを起動した時に FTP のサンプルが実行されないよう src/main/java/ksbysample/eipapp/dockerserver/flow/FtpFlowConfig.java の @Configuration アノテーションをコメントアウトします。
// このサンプルを実行したい場合には、@Configuration のコメントアウトを外すこと
//@Configuration
public class FtpFlowConfig {
SFTP でアップロード・ダウンロードするサンプルを作成する
SFTP のサンプルは FTP とほぼ同じ書き方になるので、アップロード・ダウンロードのサンプルを一気に作成します。
build.gradle の以下の点を変更します。
dependencies {
    implementation('org.springframework.boot:spring-boot-starter-integration')
    implementation("org.springframework.boot:spring-boot-starter-mail")
    implementation('org.springframework.integration:spring-integration-mail')
    implementation('org.springframework.integration:spring-integration-file')
    implementation('org.springframework.integration:spring-integration-ftp')
    implementation('org.springframework.integration:spring-integration-sftp')
    implementation("org.apache.commons:commons-lang3")
    testImplementation('org.springframework.boot:spring-boot-starter-test')
}
implementation('org.springframework.integration:spring-integration-sftp')を追加します。
build.gradle を変更後、Gradle Tool Window の左上にある「Refresh all Gradle projects」ボタンをクリックして更新します。
src/main/java/ksbysample/eipapp/dockerserver/flow の下に SftpFlowConfig.java を新規作成し、以下の内容を記述します。
package ksbysample.eipapp.dockerserver.flow;

import com.jcraft.jsch.ChannelSftp;
import org.springframework.context.annotation.Bean;
import org.springframework.context.annotation.Configuration;
import org.springframework.expression.common.LiteralExpression;
import org.springframework.integration.dsl.IntegrationFlow;
import org.springframework.integration.dsl.IntegrationFlows;
import org.springframework.integration.dsl.Pollers;
import org.springframework.integration.file.FileReadingMessageSource;
import org.springframework.integration.file.filters.AcceptAllFileListFilter;
import org.springframework.integration.file.remote.handler.FileTransferringMessageHandler;
import org.springframework.integration.file.remote.session.CachingSessionFactory;
import org.springframework.integration.file.remote.session.SessionFactory;
import org.springframework.integration.handler.LoggingHandler;
import org.springframework.integration.sftp.inbound.SftpInboundFileSynchronizer;
import org.springframework.integration.sftp.inbound.SftpInboundFileSynchronizingMessageSource;
import org.springframework.integration.sftp.session.DefaultSftpSessionFactory;
import org.springframework.messaging.support.GenericMessage;

import java.io.File;
import java.io.IOException;
import java.nio.file.Files;
import java.nio.file.Path;
import java.nio.file.Paths;
import java.nio.file.StandardCopyOption;

@Configuration
public class SftpFlowConfig {

    private static final String SFTP_SERVER = "localhost";
    private static final int SFTP_PORT = 22;
    private static final String SFTP_USER = "user01";
    private static final String SFTP_PASSWORD = "pass01";

    private static final String SFTP_REMOTE_DIR = "/upload";
    private static final String SFTP_LOCAL_ROOT_DIR = "D:/eipapp/ksbysample-eipapp-dockerserver/sftp";
    private static final String SFTP_LOCAL_UPLOAD_DIR = SFTP_LOCAL_ROOT_DIR + "/upload";
    private static final String SFTP_LOCAL_UPLOADING_DIR = SFTP_LOCAL_ROOT_DIR + "/uploading";
    private static final String SFTP_LOCAL_DOWNLOAD_DIR = SFTP_LOCAL_ROOT_DIR + "/download";

    @Bean
    public SessionFactory<ChannelSftp.LsEntry> sftpSessionFactory() {
        DefaultSftpSessionFactory factory = new DefaultSftpSessionFactory();
        factory.setHost(SFTP_SERVER);
        factory.setPort(SFTP_PORT);
        factory.setUser(SFTP_USER);
        factory.setPassword(SFTP_PASSWORD);
        factory.setAllowUnknownKeys(true);
        return new CachingSessionFactory<>(factory);
    }

    /****************************************
     * SFTPアップロード処理のサンプル            *
     ****************************************/

    @Bean
    public FileReadingMessageSource sftpUploadFileMessageSource() {
        FileReadingMessageSource source = new FileReadingMessageSource();
        source.setDirectory(new File(SFTP_LOCAL_UPLOAD_DIR));
        source.setFilter(new AcceptAllFileListFilter<>());
        return source;
    }

    @Bean
    public FileTransferringMessageHandler<ChannelSftp.LsEntry> sftpFileTransferringMessageHandler() {
        FileTransferringMessageHandler<ChannelSftp.LsEntry> handler
                = new FileTransferringMessageHandler<>(sftpSessionFactory());
        handler.setRemoteDirectoryExpression(new LiteralExpression(SFTP_REMOTE_DIR));
        return handler;
    }

    @Bean
    public IntegrationFlow sftpUploadFlow() {
        return IntegrationFlows.from(
                // 200ミリ秒毎に upload ディレクトリを監視し、ファイルがあれば処理を進める
                sftpUploadFileMessageSource(), c -> c.poller(Pollers.fixedDelay(200)))
                // ファイルを uploading ディレクトリへ移動する
                .<File>handle((p, h) -> {
                    try {
                        Path movedFilePath = Files.move(p.toPath(), Paths.get(SFTP_LOCAL_UPLOADING_DIR, p.getName())
                                , StandardCopyOption.REPLACE_EXISTING);
                        return new GenericMessage<>(movedFilePath.toFile(), h);
                    } catch (IOException e) {
                        throw new RuntimeException(e);
                    }
                })
                // SFTPサーバにファイルをアップロードする
                .wireTap(f -> f.handle(sftpFileTransferringMessageHandler()))
                .log(LoggingHandler.Level.WARN)
                // アップロードしたファイルを削除する
                .<File>handle((p, h) -> {
                    p.delete();
                    return null;
                })
                .get();
    }

    /****************************************
     * SFTPダウンロード処理のサンプル            *
     ****************************************/

    @Bean
    public SftpInboundFileSynchronizer sftpInboundFileSynchronizer() {
        SftpInboundFileSynchronizer synchronizer = new SftpInboundFileSynchronizer(sftpSessionFactory());
        synchronizer.setRemoteDirectory(SFTP_REMOTE_DIR);
        synchronizer.setFilter(new AcceptAllFileListFilter<>());
        synchronizer.setPreserveTimestamp(true);
        synchronizer.setDeleteRemoteFiles(true);
        return synchronizer;
    }

    @Bean
    public SftpInboundFileSynchronizingMessageSource sftpDownloadFileMessageSource() {
        SftpInboundFileSynchronizingMessageSource messageSource
                = new SftpInboundFileSynchronizingMessageSource(sftpInboundFileSynchronizer());
        messageSource.setLocalDirectory(new File(SFTP_LOCAL_DOWNLOAD_DIR));
        messageSource.setLocalFilter(new AcceptAllFileListFilter<>());
        messageSource.setMaxFetchSize(1);
        return messageSource;
    }

    @Bean
    public IntegrationFlow sftpDownloadFlow() {
        return IntegrationFlows.from(
                // 1秒毎に SFTPサーバを監視し、ファイルがあれば download ディレクトリにダウンロードする
                sftpDownloadFileMessageSource(), c -> c.poller(Pollers.fixedDelay(1000)))
                .log(LoggingHandler.Level.ERROR)
                // ファイルを upload ディレクトリへ移動する
                .<File>handle((p, h) -> {
                    try {
                        Files.move(p.toPath(), Paths.get(SFTP_LOCAL_UPLOAD_DIR, p.getName())
                                , StandardCopyOption.REPLACE_EXISTING);
                        return null;
                    } catch (IOException e) {
                        throw new RuntimeException(e);
                    }
                })
                .get();
    }

}
動作確認します。最初に docker-compose up -d で SFTP サーバを起動します。
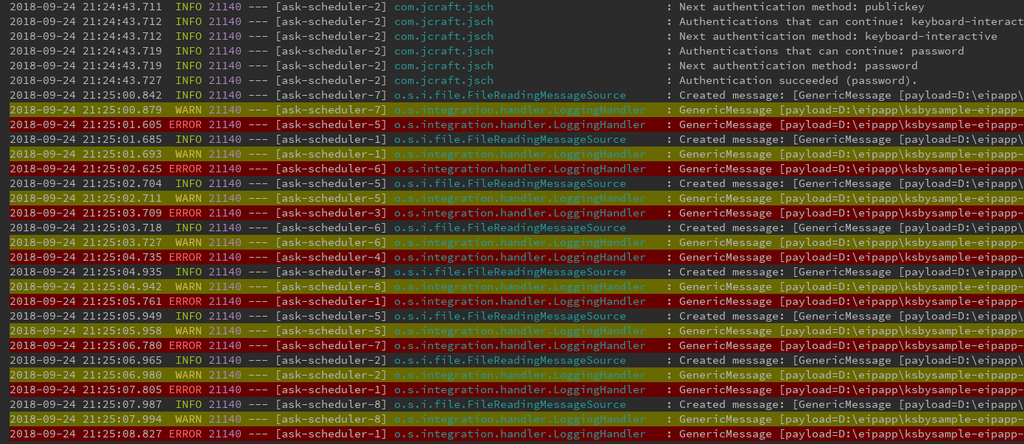
アプリケーションを起動後、D:\eipapp\ksbysample-eipapp-dockerserver\sftp\upload の下にファイルを1つ配置します。ファイルのアップロード・ダウンロードが繰り返されていることを示すログが出力されることが確認できます。

アプリケーションを停止し、docker-compose down で SFTP サーバも停止します。
アプリケーションを起動した時に FTP のサンプルが実行されないよう src/main/java/ksbysample/eipapp/dockerserver/flow/SftpFlowConfig.java の @Configuration アノテーションをコメントアウトします。
// このサンプルを実行したい場合には、@Configuration のコメントアウトを外すこと
//@Configuration
public class SftpFlowConfig {
履歴
2018/09/24
初版発行。
IntelliJ IDEA を 2018.2.3 → 2018.2.4 へバージョンアップ
IntelliJ IDEA を 2018.2.3 → 2018.2.4 へバージョンアップする
IntelliJ IDEA の 2018.2.4 がリリースされているのでバージョンアップします。
- IntelliJ IDEA 2018.2.4 Update is Out!
https://blog.jetbrains.com/idea/2018/09/intellij-idea-2018-2-4-update-is-out/
※ksbysample-webapp-lending プロジェクトを開いた状態でバージョンアップしています。
IntelliJ IDEA のメインメニューから「Help」-「Check for Updates...」を選択します。
「IDE and Plugin Updates」ダイアログが表示されます。左下に「Update and Restart」ボタンが表示されていますので、「Update and Restart」ボタンをクリックします。

Plugin の update も表示されました。このまま「Update and Restart」ボタンをクリックします。
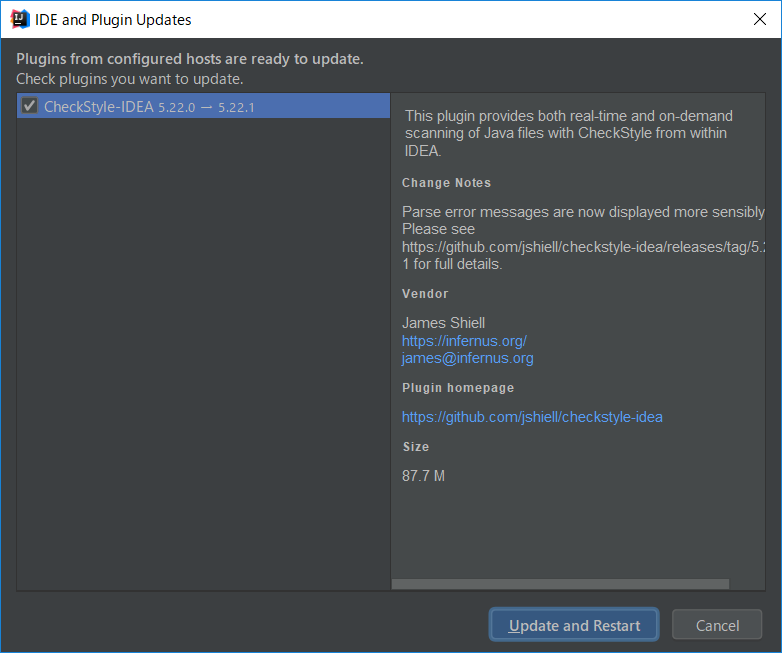
Patch がダウンロードされて IntelliJ IDEA が再起動します。
IntelliJ IDEA が起動すると画面下部に「Indexing…」のメッセージが表示されますので、終了するまで待機します。

IntelliJ IDEA のメインメニューから「Help」-「About」を選択し、2018.2.4 へバージョンアップされていることを確認します。
Gradle Tool Window のツリーを見ると「Tasks」の下に「other」しかない状態になっているので、左上にある「Refresh all Gradle projects」ボタンをクリックして更新します。

clean タスク実行 → Rebuild Project 実行 → build タスクを実行して、"BUILD SUCCESSFUL" のメッセージが出力されることを確認します。

Project Tool Window で src/test を選択した後、コンテキストメニューを表示して「Run with Coverage」-「All Tests」を選択し、テストが全て成功することを確認します。

Spring Boot 1.5.x の Web アプリを 2.0.x へバージョンアップする ( その5 )( checkstyle を 7.8.1 → 8.12 に、PMD を 5.8.1 → 6.7.0 にバージョンアップする )
概要
記事一覧はこちらです。
- 今回の手順で確認できるのは以下の内容です。
- checkstyle を 7.8.1 → 8.12 にバージョンアップします。
- PMD を 5.8.1 → 6.7.0 にバージョンアップします。
参照したサイト・書籍
目次
- checkstyle を 7.8.1 → 8.12 にバージョンアップする
- PMD を 5.8.1 → 6.7.0 にバージョンアップする
- build.gradle を変更して build してみる
The constant name 'springProfiles' doesn't match '[A-Z][A-Z_0-9]*'Do not use hard coded encryption keysComment is too large: Too many linesAvoid throwing raw exception types.The constant name 'logger' doesn't match '[A-Z][A-Z_0-9]*'StringBuffer (or StringBuilder).append is called consecutively without reusing the target variable.This class has too many methods, consider refactoring it.Avoid unnecessary constructors - the compiler will generate these for youIt is a good practice to call super() in a constructorA method/constructor should not explicitly throw java.lang.ExceptionThe constant name 'serialVersionUID' doesn't match '[A-Z][A-Z_0-9]*'Useless parentheses.Document empty constructorThere is log block not surrounded by ifAvoid short class names like ...Avoid using Literals in Conditional StatementsAvoid instantiating new objects inside loopsPrefer StringBuilder (non-synchronized) or StringBuffer (synchronized) over += for concatenating stringsAssigning an Object to null is a code smell. Consider refactoring.Avoid using redundant field initializer for 'errcode'Avoid catching generic exceptions such as NullPointerException, RuntimeException, Exception in try-catch block- 最後に
手順
checkstyle を 7.8.1 → 8.12 にバージョンアップする
build.gradle の以下の点を変更します。
checkstyle {
    configFile = file("${rootProject.projectDir}/config/checkstyle/google_checks.xml")
    toolVersion = "8.12"
    sourceSets = [project.sourceSets.main]
}
- checkstyle タスクで
toolVersion = "7.8.1"→toolVersion = "8.12"に変更します。
変更後、Gradle Tool Window の左上にある「Refresh all Gradle projects」ボタンをクリックして更新します。
clean タスク実行 → Rebuild Project 実行 → build タスクを実行すると、checkstyleMain タスクで失敗しました。

コマンドラインから gradlew --stacktrace --debug build > gradle-debug.log 2>&1 コマンドを実行してログをファイルに出力した後、gradle-debug.log を IntelliJ IDEA のメインメニューの「Tools」-「Tail File in Console...」で開きます。

Property 'maxLineLength' in module LeftCurly does not exist, please check the documentation というエラーが出ていました。Spring Boot + npm + Geb で入力フォームを作ってテストする ( その28 )( Spring Boot を 1.5.4 → 1.5.7 へ、error-prone を 2.0.15 → 2.1.1 へバージョンアップする ) で書きましたが、LeftCurly module から maxLineLength プロパティがなくなったので削除します。
config/checkstyle/google_checks.xml を以下のように変更します。
        <module name="NeedBraces"/>
        <module name="LeftCurly"/>
        <module name="RightCurly">
            <property name="id" value="RightCurlySame"/>
            <property name="tokens" value="LITERAL_TRY, LITERAL_CATCH, LITERAL_FINALLY, LITERAL_IF, LITERAL_ELSE, LITERAL_DO"/>
        </module>
- LeftCurly module に記述していた
<property name="maxLineLength" value="100"/>を削除して、<module name="LeftCurly">...</module>→<module name="LeftCurly"/>に変更します。
再度 clean タスク実行 → Rebuild Project 実行 → build タスクを実行すると、今度は BUILD SUCCESSFUL が表示されました。

Checkstyle plugin の設定も 8.12 に変更しておきます。

PMD を 5.8.1 → 6.7.0 にバージョンアップする
以下の記事をベースに進めます。
- Spring Boot + npm + Geb で入力フォームを作ってテストする ( その55 )( PMD を 5.8.1 → 6.4.0 へバージョンアップする )
- Spring Boot + npm + Geb で入力フォームを作ってテストする ( その56 )( PMD を 5.8.1 → 6.4.0 へバージョンアップする2 )
設定ファイルも以下のファイルをコピーします。
build.gradle を変更して build してみる
まずは build.gradle の以下の点を変更します。
pmd {
    toolVersion = "5.8.1"
    sourceSets = [project.sourceSets.main]
    ignoreFailures = true
    consoleOutput = true
    ruleSetFiles = rootProject.files("/config/pmd/pmd-project-rulesets.xml")
    ruleSets = []
}
toolVersion = "5.8.1"→toolVersion = "6.7.0"に変更します。
変更後、Gradle Tool Window の左上にある「Refresh all Gradle projects」ボタンをクリックして更新します。
pmd-project-rulesets.xml をダウンロードして、config/pmd/pmd-project-rulesets.xml にコピーします。
clean タスク実行 → Rebuild Project 実行 → build タスクを実行しますが、警告が大量に出力されました。1つずつ解消していきます。
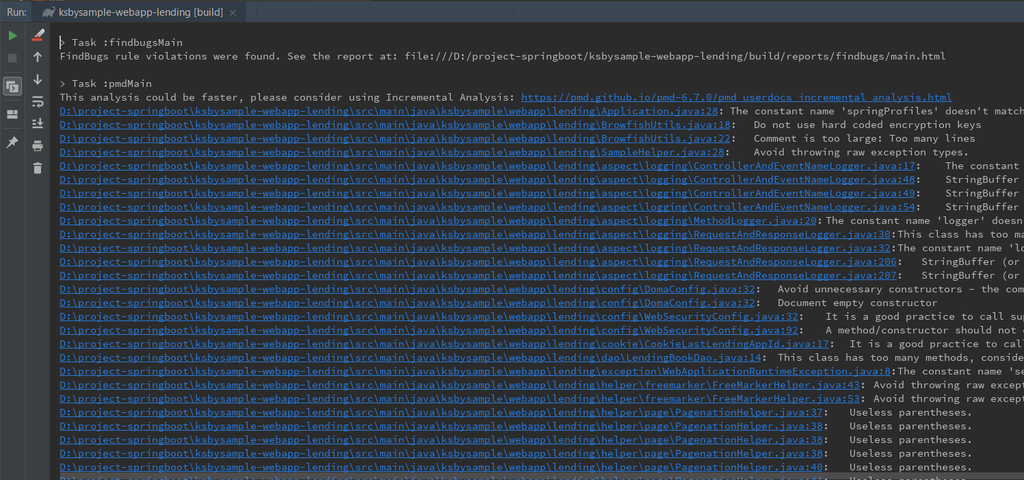
The constant name 'springProfiles' doesn't match '[A-Z][A-Z_0-9]*'
定数名を 英大文字+スネークケースにしていなかったので、警告が出ていました。警告に従って springProfiles → SPRING_PROFILES に変更します。
Do not use hard coded encryption keys
SecretKeySpec クラスのコンストラクタの第1引数に渡すキー文字列をクラス内に定数として定義していたので、外部に定義するよう警告が出ていました。このサンプルではこのままにしますので、クラスに @SuppressWarnings({"PMD.HardCodedCryptoKey"}) を付けて警告が出ないようにします。
Comment is too large: Too many lines
コメントの行数が多いという警告なのですが、警告が出たところを見ると以下の内容でした。

この警告は不要なので削除します。config/pmd/pmd-project-rulesets.xml では一旦 exclude した後、<rule ref="category/java/documentation.xml/CommentSize">...</rule> で定義し直していたのですが、<rule ref="category/java/documentation.xml/CommentSize">...</rule> を削除して exclude するだけにします。
Avoid throwing raw exception types.
適切な Exception クラスを定義せずに throw new RuntimeException(e); と RuntimeException を throw していたので警告が出ていました。このサンプルでは config/pmd/pmd-project-rulesets.xml を以下のように変更して、警告が出ないようにします。
    <rule ref="category/java/design.xml">
        <exclude name="AvoidThrowingRawExceptionTypes"/>
        <exclude name="CyclomaticComplexity"/>
        <exclude name="DataClass"/>
        <exclude name="LawOfDemeter"/>
        <exclude name="LoosePackageCoupling"/>
        <exclude name="NcssCount"/>
        <exclude name="UseObjectForClearerAPI"/>
        <exclude name="UseUtilityClass"/>
    </rule>
<exclude name="AvoidThrowingRawExceptionTypes"/>を追加します。
The constant name 'logger' doesn't match '[A-Z][A-Z_0-9]*'
logger を private static final Logger logger = LoggerFactory.getLogger(ControllerAndEventNameLogger.class); と定義していたので、定数なのに英大文字+スネークケースでないと警告が出ていました。でも、変数は logger のままにしたいので static を削除すると、今度は The Logger variable declaration does not contain the static and final modifiers という警告が出ます。
今回は static を削除して private static final Logger logger = ... → private final Logger logger = ... に変更し、config/pmd/pmd-project-rulesets.xml を以下のように変更します。
    <rule ref="category/java/errorprone.xml">
        <exclude name="BeanMembersShouldSerialize"/>
        <exclude name="DataflowAnomalyAnalysis"/>
        <exclude name="LoggerIsNotStaticFinal"/>
        <exclude name="MissingStaticMethodInNonInstantiatableClass"/>
    </rule>
<exclude name="LoggerIsNotStaticFinal"/>を追加します。
StringBuffer (or StringBuilder).append is called consecutively without reusing the target variable.
1行ずつ .append(...) を呼び出していたので警告が出ていました。

.append(...) を連続で呼び出すようにします。
This class has too many methods, consider refactoring it.
メソッド数が多いので警告が出ていました。この警告は不要なので、config/pmd/pmd-project-rulesets.xml を以下のように変更します。
    <rule ref="category/java/design.xml">
        <exclude name="AvoidThrowingRawExceptionTypes"/>
        <exclude name="CyclomaticComplexity"/>
        <exclude name="DataClass"/>
        <exclude name="LawOfDemeter"/>
        <exclude name="LoosePackageCoupling"/>
        <exclude name="NcssCount"/>
        <exclude name="TooManyMethods"/>
        <exclude name="UseObjectForClearerAPI"/>
        <exclude name="UseUtilityClass"/>
    </rule>
<exclude name="TooManyMethods"/>を追加します。
Avoid unnecessary constructors - the compiler will generate these for you
以下のように空の public コンストラクタを定義していたら不要との警告でした。コンストラクタの定義を削除します。

It is a good practice to call super() in a constructor
継承クラスのコンストラクタで super(); を呼び出していないという警告でした。super(); の呼び出しを追加します。
A method/constructor should not explicitly throw java.lang.Exception
メソッドに throws Exception を付けているとこの警告が出ていました。メソッドに付けている throws Exception を削除し、もしメソッド内から呼び出しているメソッドに throws Exception が付いていて削除できない場合には、メソッドに @SuppressWarnings("PMD.SignatureDeclareThrowsException") を付けて警告が出ないようにします。
The constant name 'serialVersionUID' doesn't match '[A-Z][A-Z_0-9]*'
private static final long serialVersionUID = ... と static final が付いているので定数と判断されたが、英大文字/数字+スネークケースでないので警告が出ていました。serialVersionUID はこういう宣言だと思うので警告出さなくてもいいと思うのですが。。。 @SuppressWarnings("PMD.FieldNamingConventions") を付けて警告が出ないようにします。
Useless parentheses.
不要なカッコが書かれているという警告でした。この警告は不要なので、config/pmd/pmd-project-rulesets.xml を以下のように変更します。
    <rule ref="category/java/codestyle.xml">
        <exclude name="AtLeastOneConstructor"/>
        <exclude name="ClassNamingConventions"/>
        <exclude name="CommentDefaultAccessModifier"/>
        <exclude name="DefaultPackage"/>
        <exclude name="LongVariable"/>
        <exclude name="LocalVariableCouldBeFinal"/>
        <exclude name="MethodArgumentCouldBeFinal"/>
        <exclude name="OnlyOneReturn"/>
        <exclude name="ShortVariable"/>
        <exclude name="UnnecessaryAnnotationValueElement"/>
        <exclude name="UselessParentheses"/>
        <exclude name="VariableNamingConventions"/>
    </rule>
<exclude name="UselessParentheses"/>を追加します。
Document empty constructor
コンストラクタをオーバーロードしている時に、中身が空でコメントも書かれていないものがあると出る警告でした。// This constructor is intentionally empty. Nothing special is needed here. というコメントを記述して警告が出ないようにします。
There is log block not surrounded by if
logger.info("★★★ リトライ回数 = " + context.getRetryCount()); のようにlogger で変数を出力する時に {} を使わずに + で結合しているために警告が出ていました。logger.info("★★★ リトライ回数 = {}", context.getRetryCount()); という書き方に変更します。
Avoid short class names like ...
クラス名が短い(デフォルトでは5文字以内)と出る警告でした。この警告は不要なので、config/pmd/pmd-project-rulesets.xml を以下のように変更します。
    <rule ref="category/java/codestyle.xml">
        <exclude name="AtLeastOneConstructor"/>
        <exclude name="ClassNamingConventions"/>
        <exclude name="CommentDefaultAccessModifier"/>
        <exclude name="DefaultPackage"/>
        <exclude name="LongVariable"/>
        <exclude name="LocalVariableCouldBeFinal"/>
        <exclude name="MethodArgumentCouldBeFinal"/>
        <exclude name="OnlyOneReturn"/>
        <exclude name="ShortClassName"/>
        <exclude name="ShortVariable"/>
        <exclude name="UnnecessaryAnnotationValueElement"/>
        <exclude name="UselessParentheses"/>
        <exclude name="VariableNamingConventions"/>
    </rule>
<exclude name="ShortClassName"/>を追加します。
Avoid using Literals in Conditional Statements
メソッドの処理内に数値リテラルを直接記述していたので警告が出ていました。定数を定義して、数値リテラルと置き換えます。
Avoid instantiating new objects inside loops
ループ処理内で new でオブジェクトを生成していたので警告が出ていました。@SuppressWarnings("PMD.AvoidInstantiatingObjectsInLoops") を付けるか、ループの外で生成したオブジェクトをループ内で使い回すように変更します。
Prefer StringBuilder (non-synchronized) or StringBuffer (synchronized) over += for concatenating strings
+= を使用しているところを StringBuilder か StringBuffer に置き換えるように出た警告でした。StringBuilder を使用するよう変更します。
Assigning an Object to null is a code smell. Consider refactoring.
変数宣言時以外の場所で変数に null をセットしていると出る警告でした。直接 null をセットしないよう実装を変えるようにします。
Avoid using redundant field initializer for 'errcode'
int の変数を宣言した時に 0 をセットしていたのですが、default の初期値なので警告が出ていました。セットしないようにします。
Avoid catching generic exceptions such as NullPointerException, RuntimeException, Exception in try-catch block
catch (Exception e) { ... } を記述していると出る警告でした。使用している外部ライブラリが Exception を throw するため変更も削除もできないので、`` を付けて警告が出ないようにします。
最後に
これで全ての警告に対応しました。clean タスク実行 → Rebuild Project 実行 → build タスクを実行すると BUILD SUCCESSFUL の文字が出力されます。

config/pmd/pmd-project-rulesets.xml は以下のようになりました。
<?xml version="1.0" encoding="UTF-8"?>
<ruleset name="mybraces"
         xmlns="http://pmd.sourceforge.net/ruleset/2.0.0"
         xmlns:xsi="http://www.w3.org/2001/XMLSchema-instance"
         xsi:schemaLocation="http://pmd.sourceforge.net/ruleset/2.0.0 http://pmd.sourceforge.net/ruleset_2_0_0.xsd">
    <description>project rulesets</description>

    <!--
        rulesets の種類・説明は 以下の URL 参照
        https://github.com/pmd/pmd/tree/master/pmd-java/src/main/resources/category/java
        https://github.com/pmd/pmd/tree/master/pmd-java/src/main/resources/rulesets/java
        https://pmd.github.io/pmd-6.7.0/pmd_rules_java.html
        ※"pmd-6.7.0" の部分は適用しているバージョンに変更すること。
    -->
    <rule ref="category/java/bestpractices.xml"/>
    <rule ref="category/java/codestyle.xml">
        <exclude name="AtLeastOneConstructor"/>
        <exclude name="ClassNamingConventions"/>
        <exclude name="CommentDefaultAccessModifier"/>
        <exclude name="DefaultPackage"/>
        <exclude name="LocalVariableCouldBeFinal"/>
        <exclude name="LongVariable"/>
        <exclude name="MethodArgumentCouldBeFinal"/>
        <exclude name="OnlyOneReturn"/>
        <exclude name="ShortClassName"/>
        <exclude name="ShortVariable"/>
        <exclude name="UnnecessaryAnnotationValueElement"/>
        <exclude name="UselessParentheses"/>
        <exclude name="VariableNamingConventions"/>
    </rule>
    <rule ref="category/java/design.xml">
        <exclude name="AvoidThrowingRawExceptionTypes"/>
        <exclude name="CyclomaticComplexity"/>
        <exclude name="DataClass"/>
        <exclude name="LawOfDemeter"/>
        <exclude name="LoosePackageCoupling"/>
        <exclude name="NcssCount"/>
        <exclude name="TooManyMethods"/>
        <exclude name="UseObjectForClearerAPI"/>
        <exclude name="UseUtilityClass"/>
    </rule>
    <rule ref="category/java/documentation.xml">
        <!-- CommentRequired はここでは exclude し、下で別途定義する -->
        <exclude name="CommentRequired"/>
        <exclude name="CommentSize"/>
        <exclude name="UncommentedEmptyMethodBody"/>
    </rule>
    <rule ref="category/java/documentation.xml/CommentRequired">
        <properties>
            <property name="fieldCommentRequirement" value="Ignored"/>
            <property name="enumCommentRequirement" value="Ignored"/>
        </properties>
    </rule>
    <rule ref="category/java/errorprone.xml">
        <exclude name="BeanMembersShouldSerialize"/>
        <exclude name="DataflowAnomalyAnalysis"/>
        <exclude name="LoggerIsNotStaticFinal"/>
        <exclude name="MissingStaticMethodInNonInstantiatableClass"/>
    </rule>
    <rule ref="category/java/multithreading.xml">
        <exclude name="UseConcurrentHashMap"/>
    </rule>
    <rule ref="category/java/performance.xml"/>
    <rule ref="category/java/security.xml"/>
</ruleset>
履歴
2018/09/21
初版発行。
Spring Boot + Spring Integration でいろいろ試してみる ( その28 )( Spring Cloud for AWS で S3 へファイルをアップロード・ダウンロードする )
概要
記事一覧 はこちらです。
今回作成したソースの GitHub レポジトリ はこちらです。
今回は Spring Cloud for Amazon Web Services のサンプルを作成します。仕様や、S3 Bucket とアップロード・ダウンロード用の IAM ユーザは前回と同じにして、実装だけ変えます。
参照したサイト・書籍
Spring Cloud for Amazon Web Services
https://cloud.spring.io/spring-cloud-aws/AWS SDK for Java - Amazon S3 バケットの作成、一覧表示、削除
https://docs.aws.amazon.com/ja_jp/sdk-for-java/v1/developer-guide/examples-s3-buckets.htmlAWS SDK for Java - AWS SDK for Java を使用したオブジェクトの削除
https://docs.aws.amazon.com/ja_jp/AmazonS3/latest/dev/DeletingOneObjectUsingJava.html
目次
- ksbysample-eipapp-cloudaws プロジェクトを作成する
- upload ディレクトリ → S3 へアップロードする処理を実装する
- S3 → download ディレクトリへダウンロード → upload ディレクトリへ移動する処理を実装する
- 動作確認
- S3 Bucket とアップロード・ダウンロード用の IAM ユーザを削除する
- Spring Integration Extension for AWS と Spring Cloud for AWS を使用してみた感想
手順
ksbysample-eipapp-cloudaws プロジェクトを作成する
Spring Initializr でプロジェクトの雛形を作成します。


作成後、build.gradle を以下のように変更します。
buildscript {
    ext {
        springBootVersion = '2.0.4.RELEASE'
    }
    repositories {
        mavenCentral()
    }
    dependencies {
        classpath("org.springframework.boot:spring-boot-gradle-plugin:${springBootVersion}")
    }
}

apply plugin: 'java'
apply plugin: 'eclipse'
apply plugin: 'org.springframework.boot'
apply plugin: 'io.spring.dependency-management'

group = 'ksbysample'
version = '0.0.1-SNAPSHOT'
sourceCompatibility = 1.8

repositories {
    mavenCentral()
}

dependencyManagement {
    imports {
        mavenBom org.springframework.boot.gradle.plugin.SpringBootPlugin.BOM_COORDINATES
        mavenBom 'org.springframework.cloud:spring-cloud-aws:2.0.0.RELEASE'
    }
}

dependencies {
    def lombokVersion = "1.18.2"

    implementation('org.springframework.boot:spring-boot-starter-integration')
    implementation('org.springframework.cloud:spring-cloud-aws-context')
    implementation('org.springframework.integration:spring-integration-file')
    testImplementation('org.springframework.boot:spring-boot-starter-test')

    // for lombok
    annotationProcessor("org.projectlombok:lombok:${lombokVersion}")
    compileOnly("org.projectlombok:lombok:${lombokVersion}")
}
- dependencyManagement block を追加します。
- dependencies block に以下の2行を追加します。
implementation('org.springframework.cloud:spring-cloud-aws-context')implementation('org.springframework.integration:spring-integration-file')
- lombok の
@Slf4jアノテーションを使いたいので、dependencies block に以下の3行を追加します。def lombokVersion = "1.18.2"annotationProcessor("org.projectlombok:lombok:${lombokVersion}")compileOnly("org.projectlombok:lombok:${lombokVersion}")
メインクラス名を KsbysampleEipappCloudawsApplication → Application に変更した後、clean タスク実行 → Rebuild Project 実行 → build タスクを実行して "BUILD SUCCESSFUL" のメッセージが出力されることを確認します。
※最初 build.gradle の dependencies block には Spring Cloud for Amazon Web Services に記載されている implementation('org.springframework.cloud:spring-cloud-starter-aws') を記載したのですが、テストを実行した時に java.lang.IllegalStateException: There is no EC2 meta data available, because the application is not running in the EC2 environment. Region detection is only possible if the application is running on a EC2 instance というエラーが出たので implementation('org.springframework.cloud:spring-cloud-aws-context') に変更しました。
upload ディレクトリ → S3 へアップロードする処理を実装する
src/main/java/ksbysample/eipapp/cloudaws の下に flow パッケージを作成した後、その下に FlowConfig.java を新規作成して、以下の内容を記述します。
@Slf4j
@Configuration
public class FlowConfig {

    private static final String EIPAPP_ROOT_DIR_PATH = "D:/eipapp/ksbysample-eipapp-cloudaws";
    private static final String UPLOAD_DIR_PATH = EIPAPP_ROOT_DIR_PATH + "/upload";
    private static final String UPLOADING_DIR_PATH = EIPAPP_ROOT_DIR_PATH + "/uploading";
    private static final String S3_BUCKET = "s3bucket-integration-test-ksby";

    // リージョンは環境変数 AWS_REGION に(東京リージョンなら ap-northeast-1)、
    // AccessKeyId, SecretAccessKey はそれぞれ環境変数 AWS_ACCESS_KEY_ID, AWS_SECRET_ACCESS_KEY にセットする
    @Bean
    public TransferManager transferManager() {
        return TransferManagerBuilder.standard().build();
    }

    /********************************************************
     * upload ディレクトリ --> S3 ファイルアップロード処理        *
     ********************************************************/

    @Bean
    public FileReadingMessageSource uploadFileMessageSource() {
        FileReadingMessageSource source = new FileReadingMessageSource();
        source.setDirectory(new File(UPLOAD_DIR_PATH));
        source.setFilter(new AcceptAllFileListFilter<>());
        return source;
    }

    @Bean
    public IntegrationFlow uploadToS3Flow() {
        return IntegrationFlows.from(
                // 200ミリ秒毎に upload ディレクトリを監視し、ファイルがあれば処理を進める
                uploadFileMessageSource(), c -> c.poller(Pollers.fixedDelay(200)))
                // ファイルを uploading ディレクトリへ移動する
                .<File>handle((p, h) -> {
                    try {
                        Path movedFilePath = Files.move(p.toPath(), Paths.get(UPLOADING_DIR_PATH, p.getName())
                                , StandardCopyOption.REPLACE_EXISTING);
                        return new GenericMessage<>(movedFilePath.toFile(), h);
                    } catch (IOException e) {
                        throw new RuntimeException(e);
                    }
                })
                // ここから下はマルチスレッドで並列処理する
                .channel(c -> c.executor(Executors.newFixedThreadPool(2)))
                // 処理開始のログを出力し、S3 へアップロードする
                .<File>handle((p, h) -> {
                    log.warn(String.format("☆☆☆ %s を S3 にアップロードします", p.getName()));
                    try {
                        // .waitForUploadResult() も呼び出してアップロード完了を待たないとファイルはアップロードされない
                        transferManager()
                                .upload(S3_BUCKET, p.getName(), p)
                                .waitForUploadResult();
                    } catch (InterruptedException e) {
                        throw new RuntimeException(e);
                    }
                    return new GenericMessage<>(p, h);
                })
                // アップロードしたファイルを削除し、処理終了のログを出力する
                .<File>handle((p, h) -> {
                    p.delete();
                    log.warn(String.format("★★★ %s を S3 にアップロードしました", p.getName()));
                    return null;
                })
                .get();
    }

}
upload ディレクトリに5ファイルだけ配置して動作確認してみます。最初に IntelliJ IDEA のメインメニューから「Run」-「Edit Configurations...」を選択して「Run/Debug Configurations」ダイアログを表示後、AWS_REGION、AWS_ACCESS_KEY_ID、AWS_SECRET_ACCESS_KEY を設定します。

s3bucket-integration-test-ksby バケットが空の状態であることを確認します。

アプリケーションを起動し upload ディレクトリに5ファイル配置すると、ファイルがアップロードされます。

再び s3bucket-integration-test-ksby バケットを見ると5ファイルアップロードされていました。ダウンロードして元の画像と比較すると同じファイルで問題ありませんでした。
S3 → download ディレクトリへダウンロード → upload ディレクトリへ移動する処理を実装する
src/main/java/ksbysample/eipapp/cloudaws/flow/FlowConfig.java に以下の処理を追加します。
@Slf4j
@Configuration
public class FlowConfig {

    ..........
    private static final String DOWNLOAD_DIR_PATH = EIPAPP_ROOT_DIR_PATH + "/download";
    ..........

    /********************************************************
     * S3 --> download ディレクトリ ファイルダウンロード処理      *
     ********************************************************/

    @Bean
    public MessageSource<File> downloadFileFromS3MessageSource() {
        return () -> {
            try {
                File downloadFile = null;
                String key = null;
                ObjectListing objectListing = amazonS3().listObjects(S3_BUCKET);
                if (objectListing.getObjectSummaries().size() > 0) {
                    S3ObjectSummary summary = objectListing.getObjectSummaries().iterator().next();
                    key = summary.getKey();
                    downloadFile = Paths.get(DOWNLOAD_DIR_PATH, key).toFile();
                    transferManager().download(S3_BUCKET, key, downloadFile)
                            .waitForCompletion();
                }
                return downloadFile != null
                        ? MessageBuilder.withPayload(downloadFile).setHeader("s3Path", key).build()
                        : null;
            } catch (InterruptedException e) {
                throw new RuntimeException(e);
            }
        };
    }

    @Bean
    public IntegrationFlow downloadFromS3Flow() {
        return IntegrationFlows.from(
                // 200ミリ秒毎に S3 Bucket を監視し、ファイルがあれば処理を進める
                downloadFileFromS3MessageSource(), c -> c.poller(Pollers
                        .fixedDelay(200)))
                // download ディレクトリに保存されたファイルを upload ディレクトリに移動する
                // ちなみに download ディレクトリからファイルを移動か削除しないと s3InboundFileSynchronizingMessageSource()
                // から Message が延々と送信され続けるので、必ず移動か削除する必要がある
                .<File>handle((p, h) -> {
                    try {
                        Files.move(p.toPath(), Paths.get(UPLOAD_DIR_PATH, p.getName())
                                , StandardCopyOption.REPLACE_EXISTING);
                        log.error(String.format("◎◎◎ %s をダウンロードしました", p.getName()));
                        return new GenericMessage<>(p, h);
                    } catch (IOException e) {
                        throw new RuntimeException(e);
                    }
                })
                .<File>handle((p, h) -> {
                    amazonS3().deleteObject(S3_BUCKET, (String) h.get("s3Path"));
                    return null;
                })
                .get();
    }

}
アップロードの処理をコメントアウトして、アップロードしたファイルをダウンロードしてみます。
アプリケーションを起動すると S3 Bucket にあるファイルが download ディレクトリにダウンロード → upload ディレクトリへ移動されて、

S3 Bucket の中は空になっていました。

ダウンロードされたファイルは元々アップロードしたファイルと全く同じで問題ありませんでした。
動作確認
アプリケーションを起動後、最初は upload ディレクトリにファイルを1つだけ配置してみます。

ファイルのアップロードとダウンロードを繰り返し、エラーも発生しませんでした。
今度は 30ファイル配置してみます。


ダウンロード・アップロードが実行されました。全然制御していないので、同じファイルばかりダウンロードされていますが。。。
S3 Bucket とアップロード・ダウンロード用の IAM ユーザを削除する
以下のコマンドを実行して、作成した S3 Bucket とアップロード・ダウンロード用の IAM ユーザを削除します。

Spring Integration Extension for AWS と Spring Cloud for AWS を使用してみた感想
- Spring Integration Extension for AWS を使用すると Spring Integration らしく実装できて、かつ便利になったという感じがします。
- Spring Cloud for AWS は AWS SDK for Java の知識がないとやりたいことが実装できなくて、S3 を使うだけの場合、あまりメリットを感じられませんでした。build.gradle に
implementation('org.springframework.cloud:spring-cloud-aws-context')を記述すれば依存性解決をしてくれることくらいのような気がします。 implementation('org.springframework.cloud:spring-cloud-starter-aws')を記述すると、裏で何かいろいろ設定されるのか、PC 上で起動できなくなる(起動するためにいろいろ調べないといけない)ので、やり過ぎの感じがします。EC2 インスタンス上で起動すれば便利に感じるのかもしれませんが、今回は PC 上で実行していたので分かりません。implementation('org.springframework.integration:spring-integration-aws:2.0.0.RELEASE')はそんなことはなかったので、Spring Integration Extension for AWS の方で不要な自動設定を無効にしてくれているのでしょうか。。。- Spring Cloud for AWS のダウンロード処理を実装しようとしていて思ったのが、Spring Integration の MessageSource の作成方法の理解が全然足りないということでした。Spring Integration Extension for AWS だと Spring Integration に既にある AbstractInboundFileSynchronizer や AbstractInboundFileSynchronizingMessageSource を利用して実装されているのですが、それらのクラスは今回初めて知りました。Spring Integration、まだまだ奥が深いです。
履歴
2018/09/16
初版発行。