Gradle で Multi-project を作成する ( その12 )( doma2lib+cmdapp+webapp編、sample-webapp プロジェクトを作成する )
概要
記事一覧はこちらです。
- 今回の手順で確認できるのは以下の内容です。
参照したサイト・書籍
目次
- Spring Initializr で sample-webapp プロジェクトを作成する
- sample-webapp の build.gradle を変更する
- gradle-multiprj-doma2lib-cmdwebapp の settings.gradle に include 'sample-webapp' を追加する
- gradle-multiprj-doma2lib-cmdwebapp の build.gradle の configure の適用対象に sample-webapp を追加する
- DB のテーブルのデータを読み込んで画面に表示する機能を実装する
- テストを作成する
- 動作確認
- 次回は。。。
手順
Spring Initializr で sample-webapp プロジェクトを作成する
IntelliJ IDEA から Spring Initializr を利用して sample-webapp プロジェクトを作成します。


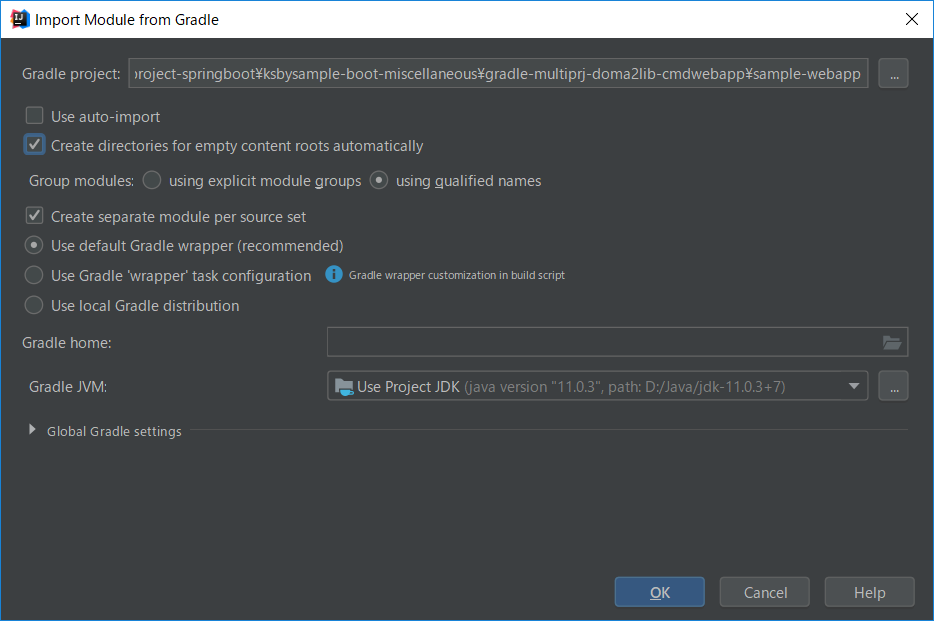
作成後 IntelliJ IDEA のウィンドウが開きますが、何もせずに閉じます。
src ディレクトリと build.gradle だけ残して、それ以外のディレクトリファイルは全て削除します。
また sample-webapp/src/test/java/ksbysample/app/samplewebapp/SampleWebappApplicationTests.java も削除し、sample-cmdapp/src/test/java/ の下はクリアします。
sample-webapp の build.gradle を変更する
sample-webapp の build.gradle を以下のように変更します。
dependencies {
    implementation("org.springframework.boot:spring-boot-starter-web")
    runtimeOnly("org.springframework.boot:spring-boot-devtools")

    implementation project(":doma2-lib")
}
- doma2-lib プロジェクトへの依存関係を追加します。
gradle-multiprj-doma2lib-cmdwebapp の settings.gradle に include 'sample-webapp' を追加する
settings.gradle に include 'sample-webapp' を追加します。
rootProject.name = 'gradle-multiprj-doma2lib-cmdwebapp'
include 'doma2-lib'
include 'sample-cmdapp'
include 'sample-webapp'
gradle-multiprj-doma2lib-cmdwebapp の build.gradle の configure の適用対象に sample-webapp を追加する
gradle-multiprj-doma2lib-cmdwebapp の build.gradle の configure の適用対象に sample-webapp を追加します。
..........

configure(subprojects.findAll { it.name ==~ /^(doma2-lib|sample-cmdapp|sample-webapp)$/ }) {
    apply plugin: "org.springframework.boot"

    dependencyManagement {
        imports {
            mavenBom(org.springframework.boot.gradle.plugin.SpringBootPlugin.BOM_COORDINATES)
        }
    }

    ext {
        jdbcDriver = "mysql:mysql-connector-java:8.0.15"
        domaVersion = "2.24.0"
    }

    dependencies {
        def lombokVersion = "1.18.6"

        testImplementation("org.springframework.boot:spring-boot-starter-test")

        runtimeOnly(jdbcDriver)
        implementation("org.seasar.doma.boot:doma-spring-boot-starter:1.1.1")
        implementation("org.seasar.doma:doma:${domaVersion}")
        implementation("org.flywaydb:flyway-core:5.2.4")
        implementation("com.integralblue:log4jdbc-spring-boot-starter:1.0.2")

        // for lombok
        // testAnnotationProcessor、testCompileOnly を併記しなくてよいよう configurations で設定している
        annotationProcessor("org.projectlombok:lombok:${lombokVersion}")
        compileOnly("org.projectlombok:lombok:${lombokVersion}")
    }

}
/^(doma2-lib|sample-cmdapp)$/→/^(doma2-lib|sample-cmdapp|sample-webapp)$/に変更します。
変更後、Gradle Tool Window の左上にある「Refresh all Gradle projects」ボタンをクリックして更新します。Gradle Tool Window に sample-webapp が表示されます。
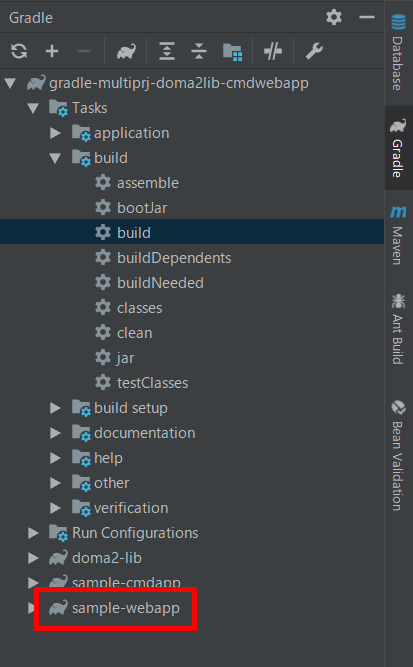
Run Dashboard Tool Window にも SampleWebappApplication が追加されています。

clean タスク実行 → Rebuild Project 実行 → build タスク実行を行い、警告・エラーが出ずに BUILD SUCCESSFUL が出力されることを確認します。
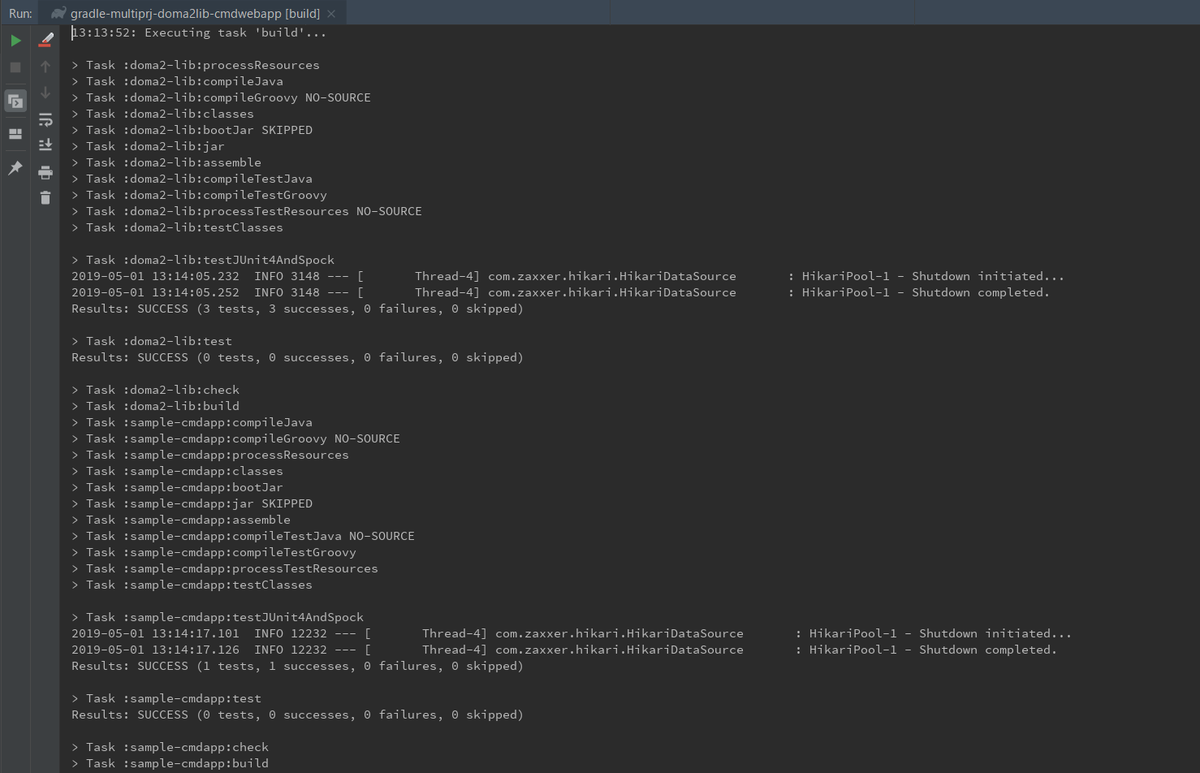

DB のテーブルのデータを読み込んで画面に表示する機能を実装する
以下の仕様で実装します。
- employee テーブルからデータを読み込んで name, age, sex のデータを画面上に表示します。
- URL は
http://localhost:8080/sampleにします。 - Thymeleaf は使用しません。@ResponseBody アノテーションを付与してテキストデータを返します。
sample-webapp/src/main/java/ksbysample/app/samplewebapp/SampleWebappApplication.java に @ComponentScan アノテーションを追加し、ksbysample.lib、ksbysample.app の2つの package を指定します
package ksbysample.app.samplewebapp;

import org.springframework.boot.SpringApplication;
import org.springframework.boot.autoconfigure.AutoConfigurationExcludeFilter;
import org.springframework.boot.autoconfigure.SpringBootApplication;
import org.springframework.boot.context.TypeExcludeFilter;
import org.springframework.context.annotation.ComponentScan;
import org.springframework.context.annotation.FilterType;

@SpringBootApplication
@ComponentScan(
        basePackages = {"ksbysample.lib", "ksbysample.app"},
        excludeFilters = {
                @ComponentScan.Filter(type = FilterType.CUSTOM, classes = TypeExcludeFilter.class),
                @ComponentScan.Filter(type = FilterType.CUSTOM,
                        classes = AutoConfigurationExcludeFilter.class)})
public class SampleWebappApplication {

    public static void main(String[] args) {
        SpringApplication.run(SampleWebappApplication.class, args);
    }

}
employee テーブルからデータ一覧を取得するメソッドがないので、doma2-lib/src/main/java/ksbysample/lib/doma2lib/dao/EmployeeDao.java に selectAll メソッドを追加します。
■doma2-lib/src/main/java/ksbysample/lib/doma2lib/dao/EmployeeDao.java
package ksbysample.lib.doma2lib.dao;

import ksbysample.lib.doma2lib.entity.Employee;
import org.seasar.doma.boot.ConfigAutowireable;
import org.seasar.doma.Dao;
import org.seasar.doma.Delete;
import org.seasar.doma.Insert;
import org.seasar.doma.Select;
import org.seasar.doma.Update;

import java.util.List;

/**
 */
@Dao
@ConfigAutowireable
public interface EmployeeDao {

    /**
     * @param id
     * @return the Employee entity
     */
    @Select
    Employee selectById(Integer id);

    @Select
    List<Employee> selectAll();

    /**
     * @param entity
     * @return affected rows
     */
    @Insert(excludeNull = true)
    int insert(Employee entity);

    /**
     * @param entity
     * @return affected rows
     */
    @Update
    int update(Employee entity);

    /**
     * @param entity
     * @return affected rows
     */
    @Delete
    int delete(Employee entity);
}
■doma2-lib/src/main/resources/META-INF/ksbysample/lib/doma2lib/dao/EmployeeDao/selectAll.sql
select
  /*%expand*/*
from
  employee
order by id
DB のテーブルのデータを読み込んで画面に表示するクラスを実装します。sample-webapp/src/main/java/ksbysample/app/samplewebapp/SampleController.java を新規作成し、以下の内容を記述します。
package ksbysample.app.samplewebapp;

import ksbysample.lib.doma2lib.dao.EmployeeDao;
import ksbysample.lib.doma2lib.entity.Employee;
import org.springframework.http.MediaType;
import org.springframework.stereotype.Controller;
import org.springframework.web.bind.annotation.RequestMapping;
import org.springframework.web.bind.annotation.ResponseBody;

import java.util.List;
import java.util.stream.Collectors;

@Controller
@RequestMapping("/sample")
public class SampleController {

    private final EmployeeDao employeeDao;

    public SampleController(EmployeeDao employeeDao) {
        this.employeeDao = employeeDao;
    }

    @RequestMapping(produces = MediaType.TEXT_PLAIN_VALUE)
    @ResponseBody
    public String index() {
        List<Employee> employeeList = employeeDao.selectAll();
        return employeeList.stream()
                .map(employee ->
                        String.format("name = %s, age = %d, sex = %s"
                                , employee.getName()
                                , employee.getAge()
                                , employee.getSex()))
                .collect(Collectors.joining("\n"));
    }

}
clean タスク実行 → Rebuild Project 実行 → build タスク実行を行い、警告・エラーが出ずに BUILD SUCCESSFUL が出力されることを確認します(画面キャプチャは省略します)。
テストを作成する
sample-webapp/src/main/java/ksbysample/app/samplewebapp/SampleController.java のテストを作成します。


sample-webapp/src/test/groovy/ksbysample/app/samplewebapp/SampleControllerTest.groovy が新規作成されますので、以下の内容を記述します。
package ksbysample.app.samplewebapp

import groovy.sql.Sql
import ksbysample.lib.doma2lib.entity.Employee
import org.springframework.beans.factory.annotation.Autowired
import org.springframework.boot.test.autoconfigure.web.servlet.AutoConfigureMockMvc
import org.springframework.boot.test.context.SpringBootTest
import org.springframework.test.web.servlet.MockMvc
import spock.lang.Specification

import javax.sql.DataSource

import static org.springframework.test.web.servlet.request.MockMvcRequestBuilders.get
import static org.springframework.test.web.servlet.result.MockMvcResultMatchers.content
import static org.springframework.test.web.servlet.result.MockMvcResultMatchers.status

// 通常は spring.profiles.active は IntelliJ IDEA の JUnit の Run/Debug Configuration と build.gradle に定義するが、
// 今回はテストが1つしかないので @SpringBootTest の properties 属性で指定する
@SpringBootTest(properties = ["spring.profiles.active=develop"])
@AutoConfigureMockMvc
class SampleControllerTest extends Specification {

    static final def TESTDATA = [
            [id: 1, name: "鈴木 太郎", age: 42, sex: "男", update_time: "2019/05/01 00:00:00"],
            [id: 2, name: "渡辺 香", age: 36, sex: "女", update_time: "2019/04/30 16:51:47"],
            [id: 3, name: "木村 結衣", age: 23, sex: "女", update_time: "2019/04/01 09:15:02"]
    ]

    @Autowired
    private MockMvc mvc

    @Autowired
    private DataSource dataSource

    def sql
    List<Employee> backupData

    void setup() {
        sql = new Sql(dataSource)

        // employee テーブルのバックアップを取得後クリアする
        backupData = sql.rows("select * from employee")
        sql.execute("truncate table employee")
    }

    void cleanup() {
        // バックアップからemployee テーブルのデータをリカバリする
        sql.execute("truncate table employee")
        backupData.each {
            sql.execute("insert into employee values (:id, :name, :age, :sex, :update_time)", it)
        }

        sql.close()
    }

    def "employeeテーブルにデータがない場合にはcontentも空になる"() {
        expect:
        mvc.perform(get("/sample"))
                .andExpect(status().isOk())
                .andExpect(content().string(""))
    }

    def "employeeテーブルにデータがある場合には全てのデータが出力される"() {
        setup:
        TESTDATA.each {
            sql.execute("insert into employee values (:id, :name, :age, :sex, :update_time)", it)
        }
        def expectedContent =
                TESTDATA.collect { String.format("name = ${it.name}, age = ${it.age}, sex = ${it.sex}") }
                        .join("\n")

        expect:
        mvc.perform(get("/sample"))
                .andExpect(status().isOk())
                .andExpect(content().string(expectedContent))
    }

}
テストを実行して成功することを確認します。

今回 employee テーブルをバックアップ・リカバリする仕組みを考えたので、doma2-lib/src/test/groovy/ksbysample/lib/doma2lib/dao/EmployeeDaoTest にも反映します。以下のように変更します。
package ksbysample.lib.doma2lib.dao

import groovy.sql.Sql
import ksbysample.lib.doma2lib.entity.Employee
import org.springframework.beans.factory.annotation.Autowired
import org.springframework.boot.test.context.SpringBootTest
import spock.lang.Specification
import spock.lang.Unroll

import javax.sql.DataSource

// 通常は spring.profiles.active は IntelliJ IDEA の JUnit の Run/Debug Configuration と build.gradle に定義するが、
// 今回はテストが1つしかないので @SpringBootTest の properties 属性で指定する
@SpringBootTest(properties = ["spring.profiles.active=develop"])
class EmployeeDaoTest extends Specification {

    static final def TESTDATA = [
            [id: 1, name: "鈴木 太郎", age: 42, sex: "男", update_time: "2019/05/01 00:00:00"],
            [id: 2, name: "渡辺 香", age: 36, sex: "女", update_time: "2019/04/30 16:51:47"],
            [id: 3, name: "木村 結衣", age: 23, sex: "女", update_time: "2019/04/01 09:15:02"]
    ]

    static final def TESTDATA2 =
            new Employee(id: null, name: "木村 太郎", age: 35, sex: "男", updateTime: null)

    @Autowired
    EmployeeDao employeeDao

    @Autowired
    private DataSource dataSource

    def sql

    List<Employee> backupData

    void setup() {
        sql = new Sql(dataSource)

        // employee テーブルのバックアップを取得後クリアする
        backupData = sql.rows("select * from employee")
        sql.execute("truncate table employee")
    }

    void cleanup() {
        // バックアップからemployee テーブルのデータをリカバリする
        sql.execute("truncate table employee")
        backupData.each {
            sql.execute("insert into employee values (:id, :name, :age, :sex, :update_time)", it)
        }

        sql.close()
    }

    @Unroll
    def "selectById メソッドのテスト(#id --> #name, #age, #sex)"() {
        setup:
        TESTDATA.each {
            sql.execute("insert into employee values (:id, :name, :age, :sex, :update_time)", it)
        }
        def row = employeeDao.selectById(id)

        expect:
        row.name == name
        row.age == age
        row.sex == sex

        where:
        id || name    | age | sex
        1  || "鈴木 太郎" | 42  | "男"
        2  || "渡辺 香"  | 36  | "女"
    }

    def "insert メソッドのテスト"() {
        setup:
        employeeDao.insert(TESTDATA2)

        expect:
        def row = sql.firstRow("select * from employee where name = ${TESTDATA2.name}")
        row.name == TESTDATA2.name
        row.age == TESTDATA2.age
        row.sex == TESTDATA2.sex
    }

}
テストを実行して成功することを確認します。

動作確認
clean タスク実行 → Rebuild Project 実行 → build タスク実行を行い、警告・エラーが出ずに BUILD SUCCESSFUL が出力されることを確認します。

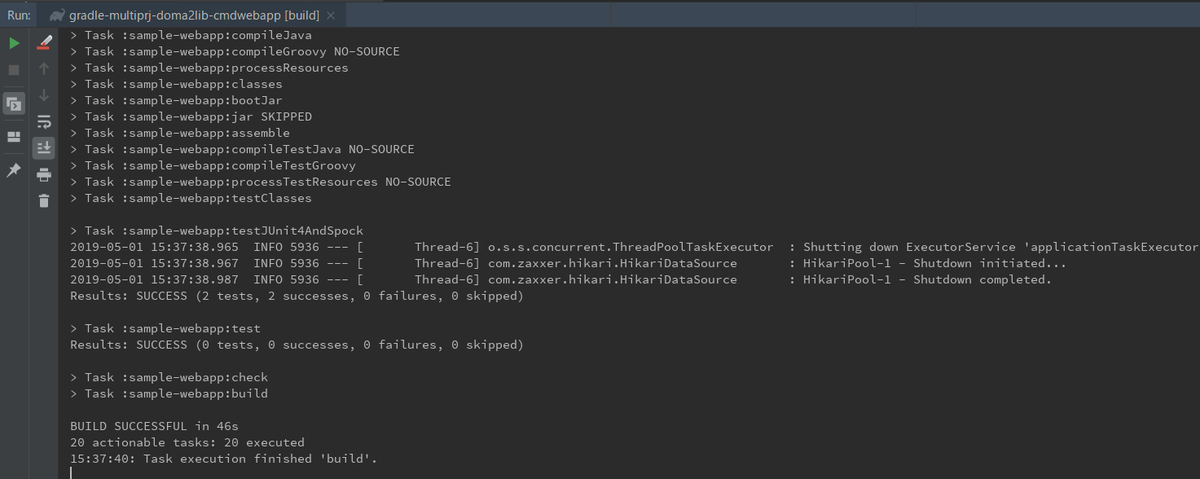
Run Dashboard から sample-webapp を起動して動作確認します。

employee テーブルに以下のデータが登録されている場合、
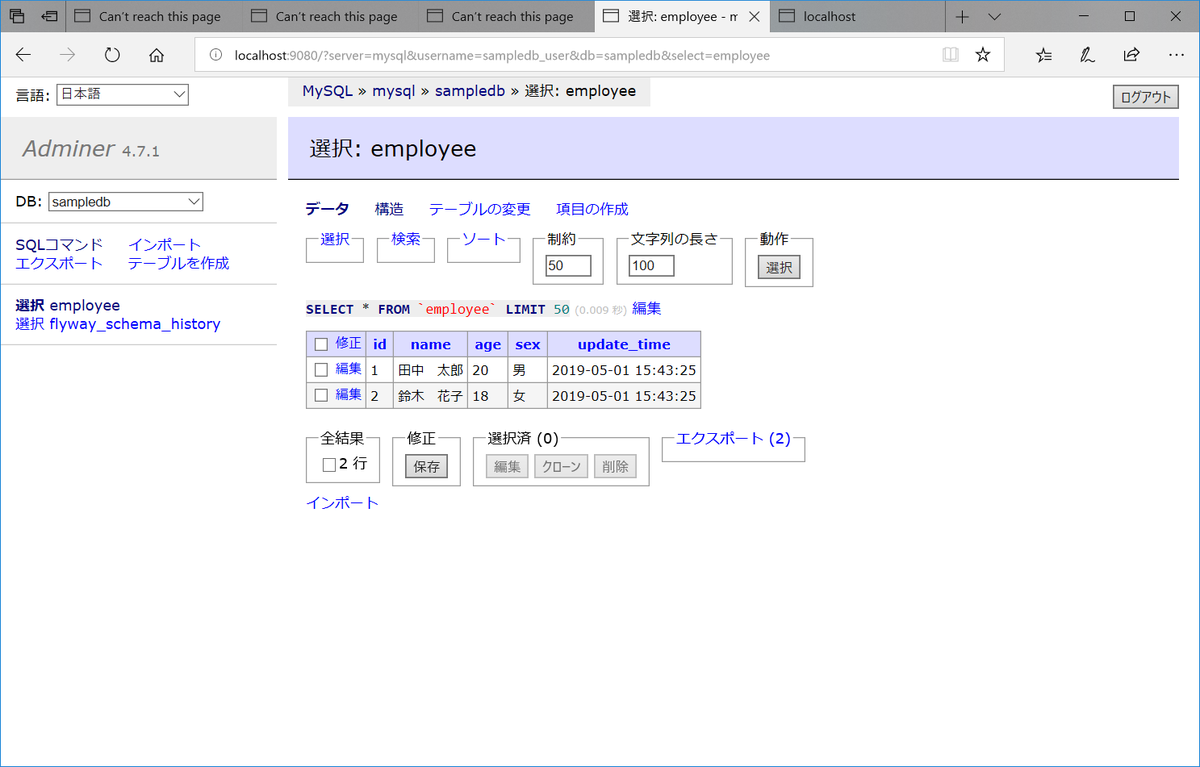
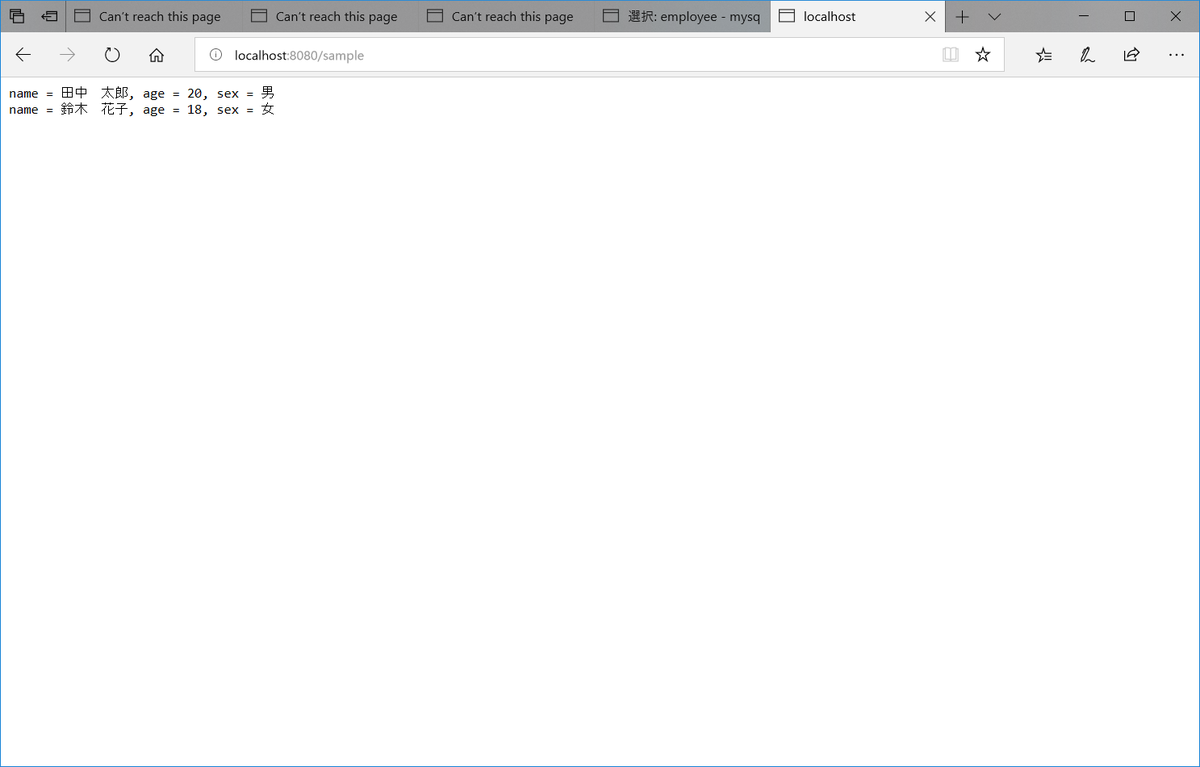
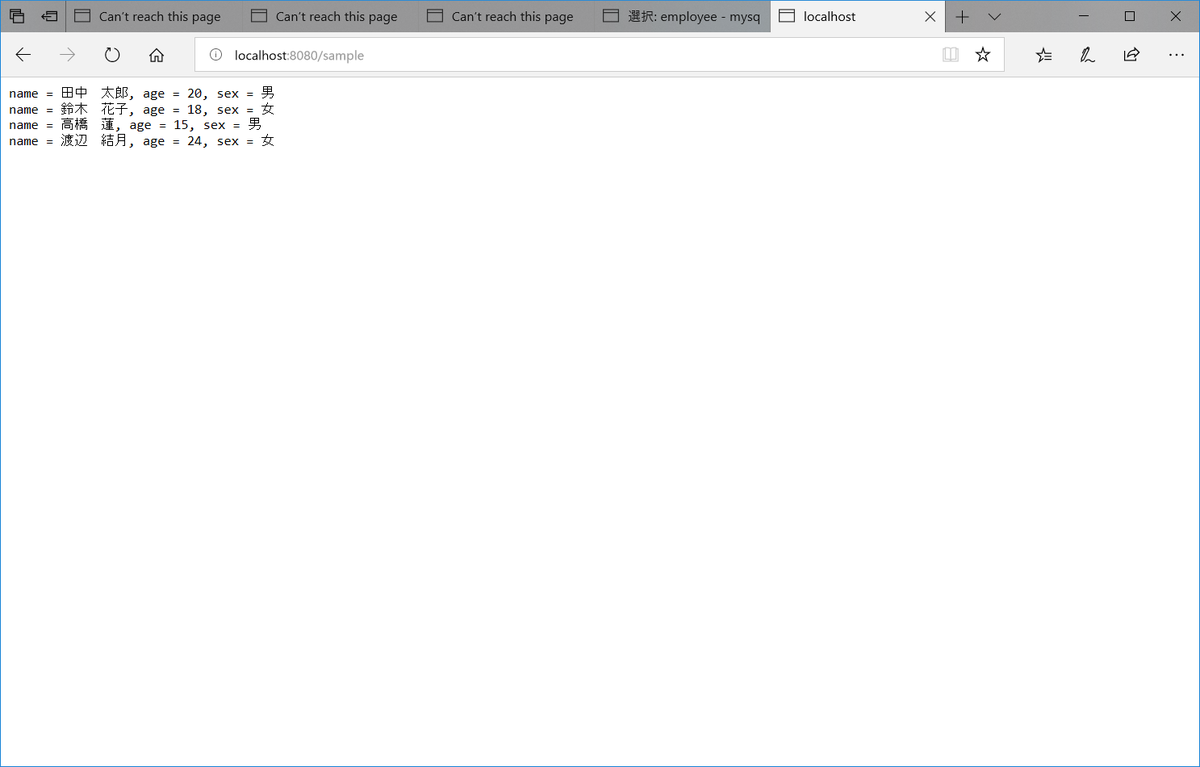
http://localhost:8080/sample にアクセスすると employee テーブルのデータが出力されていることが確認できます。
コマンドラインから java -Dspring.profiles.active=develop -Dbatch.execute=EmployeeDataCsvToDbLoader -jar sample-cmdapp-1.0.0-RELEASE.jar -csvfile=D:\project-springboot\ksbysample-boot-miscellaneous\gradle-multiprj-doma2lib-cmdwebapp\sample-cmdapp\src\test\resources\employee.csv を実行してデータを追加すると、
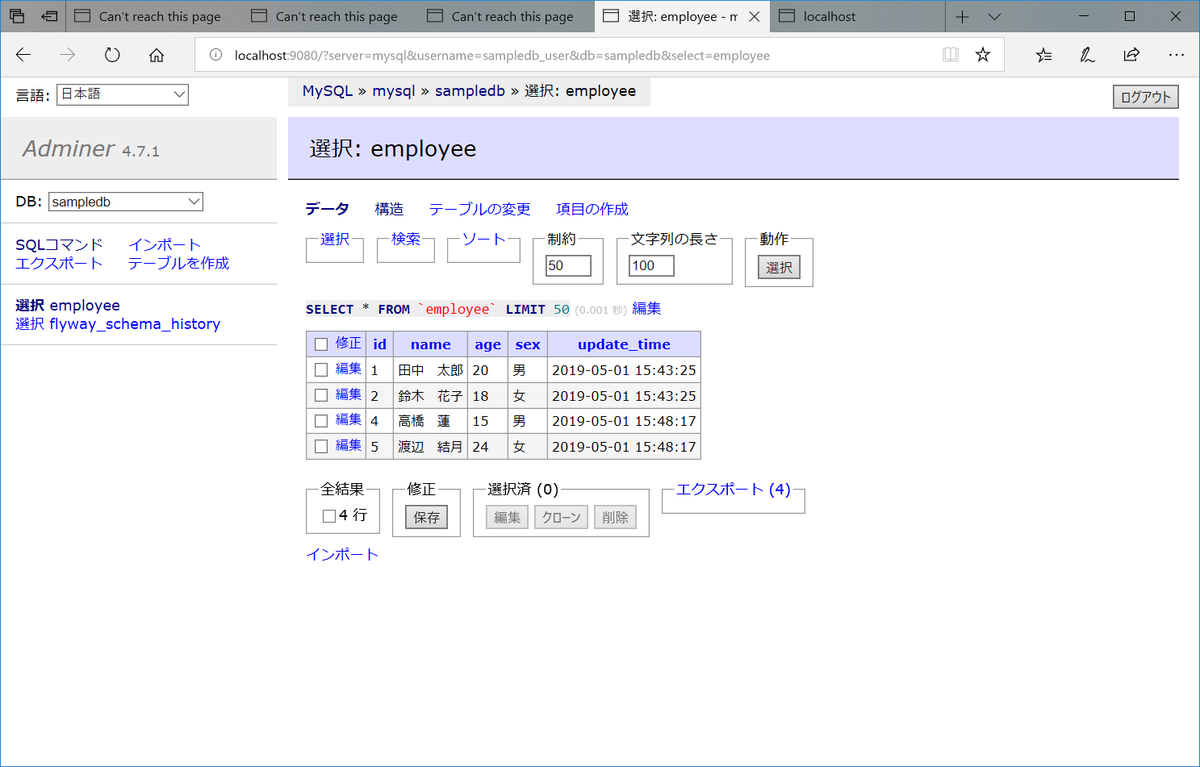
http://localhost:8080/sample の画面を更新すると追加されたデータが反映されました。
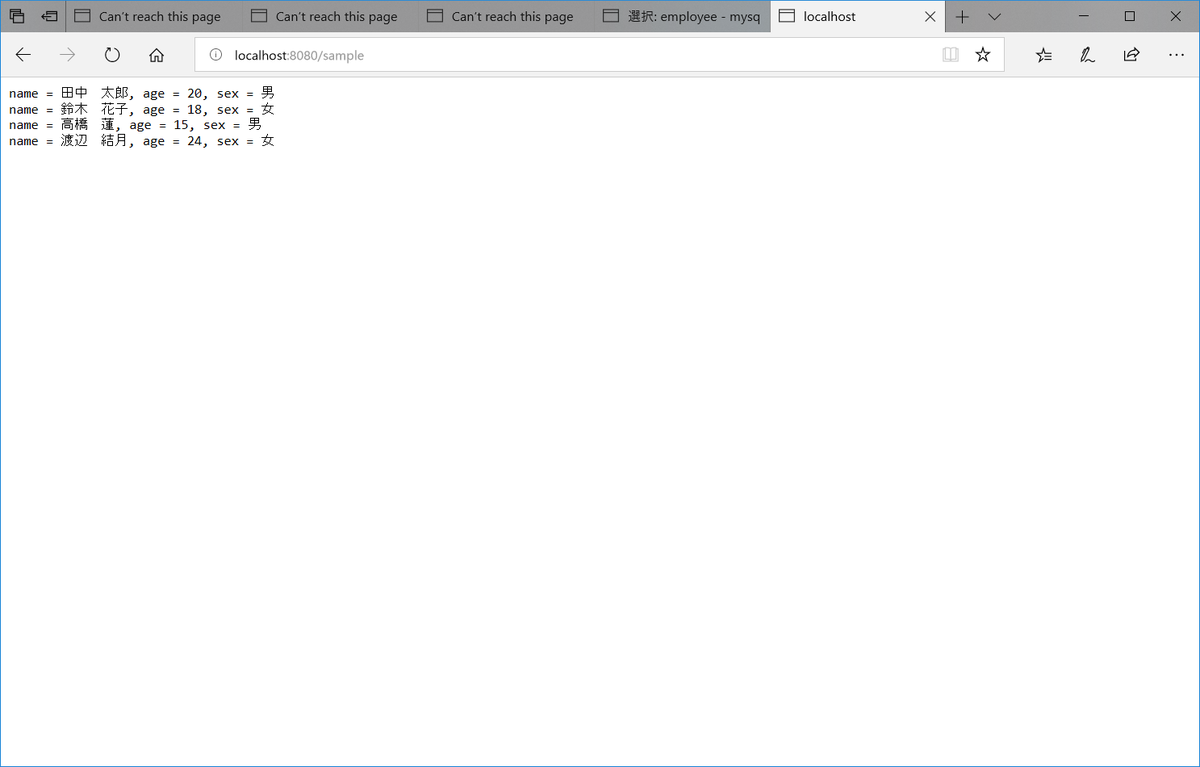
コマンドラインから sample-webapp を起動して動作確認します。java -Dspring.profiles.active=develop -jar sample-webapp-1.0.0-RELEASE.jar コマンドを実行して起動します。
 (.....途中省略.....)

http://localhost:8080/sample にアクセスすると先程と同じデータが表示されました。
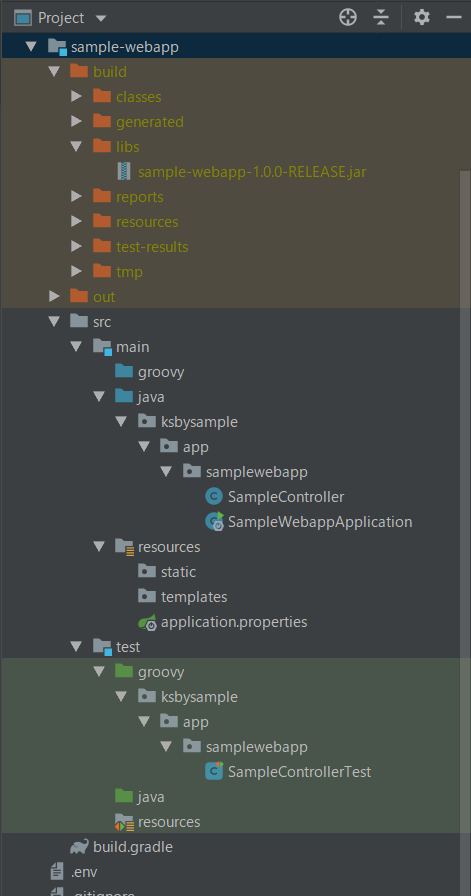
最後に sample-webapp プロジェクトのディレクトリ構成を記載します。
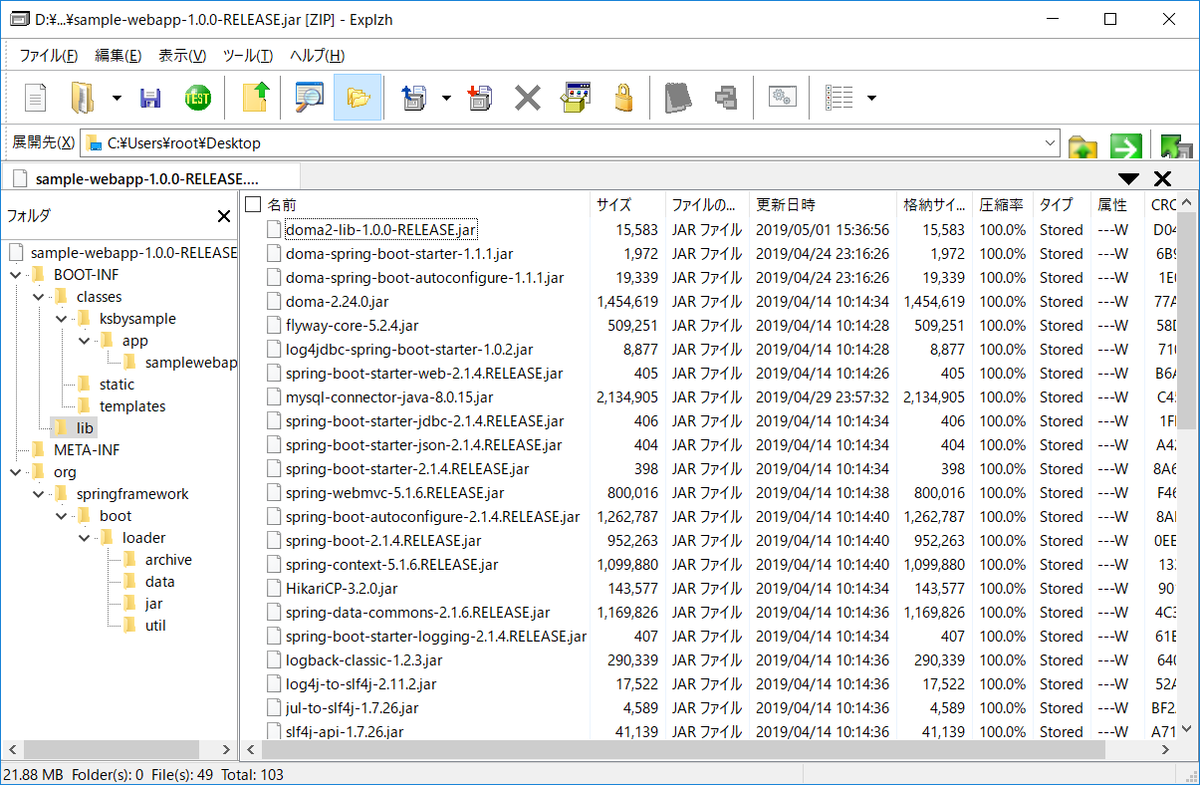
sample-webapp-1.0.0-RELEASE.jar の中身を見てみると以下のようになっており doma2-lib-1.0.0-RELEASE.jar が lib ディレクトリの下に入っています。
次回は。。。
ここまで doma2-lib-1.0.0-RELEASE.jar を各サブプロジェクトの jar の中に入れる方式(JarLauncher による起動)で書きましたので、次は doma2-lib-1.0.0-RELEASE.jar を外に出す方式(PropertiesLauncher による起動)を書く予定です。
履歴
2019/05/01
初版発行。