Spring Boot 1.5.x の Web アプリを 2.0.x へバージョンアップする ( その14 )( Docker で Prometheus+Grafana の環境を構築して Spring Actuator で収集したメトリックスを表示する )
概要
記事一覧はこちらです。
Spring Boot 1.5.x の Web アプリを 2.0.x へバージョンアップする ( その13 )( Remember Me 認証が使えなくなっていたので調査・修正する ) の続きです。
- 今回の手順で確認できるのは以下の内容です。
- Docker で Prometheus+Grafana の環境を構築して Spring Actuator で収集したメトリックスを表示させてみます。
参照したサイト・書籍
Prometheus
https://prometheus.io/prometheus/prometheus
https://github.com/prometheus/prometheusprom/prometheus
https://hub.docker.com/r/prom/prometheus/Spring Boot Actuator metrics monitoring with Prometheus and Grafana
https://www.callicoder.com/spring-boot-actuator-metrics-monitoring-dashboard-prometheus-grafana/prometheus/config/testdata/conf.good.yml
https://github.com/prometheus/prometheus/blob/master/config/testdata/conf.good.ymlGrafana
https://grafana.com/grafana/grafana(GitHub)
https://github.com/grafana/grafanagrafana/grafana(docker hub)
https://hub.docker.com/r/grafana/grafana/
目次
手順
Prometheus の環境を構築する
prometheus.yml を作成する
プロジェクトのルートディレクトリの下に docker/prometheus のディレクトリを作成し、その下に prometheus.yml というファイルを新規作成して以下の内容を記述します。
global:
  scrape_interval: 15s # By default, scrape targets every 15 seconds.
  evaluation_interval: 15s # Evaluate rules every 15 seconds.

# A scrape configuration containing exactly one endpoint to scrape:
# Here it's Prometheus itself.
scrape_configs:
# The job name is added as a label `job=<job_name>` to any timeseries scraped from this config.
- job_name: 'prometheus'
  scrape_interval: 15s
  static_configs:
  - targets: ['localhost:9090']

- job_name: 'spring-actuator'
  metrics_path: '/actuator/prometheus'
  scrape_interval: 15s
  basic_auth:
    username: actuator
    password: xxxxxxxx
  static_configs:
  # Docker で起動した Prometheus からローカルPCで起動している Spring Boot のアプリケーション
  # にアクセスするので、localhost ではなくローカルPCに割り当てられているIPアドレスを設定する
  - targets: ['172.23.136.33:8080']
docker-compose.yml を作成する
プロジェクトのルートディレクトリの下に docker-compose.yml を新規作成して以下の内容を記述します。
version: '3'

services:
  prometheus:
    image: prom/prometheus:latest
    container_name: prometheus
    ports:
    - "9090:9090"
    volumes:
    - ./docker/prometheus/prometheus.yml:/etc/prometheus/prometheus.yml
prometheus を起動する
docker-compose up -d コマンドを実行します。

動作確認
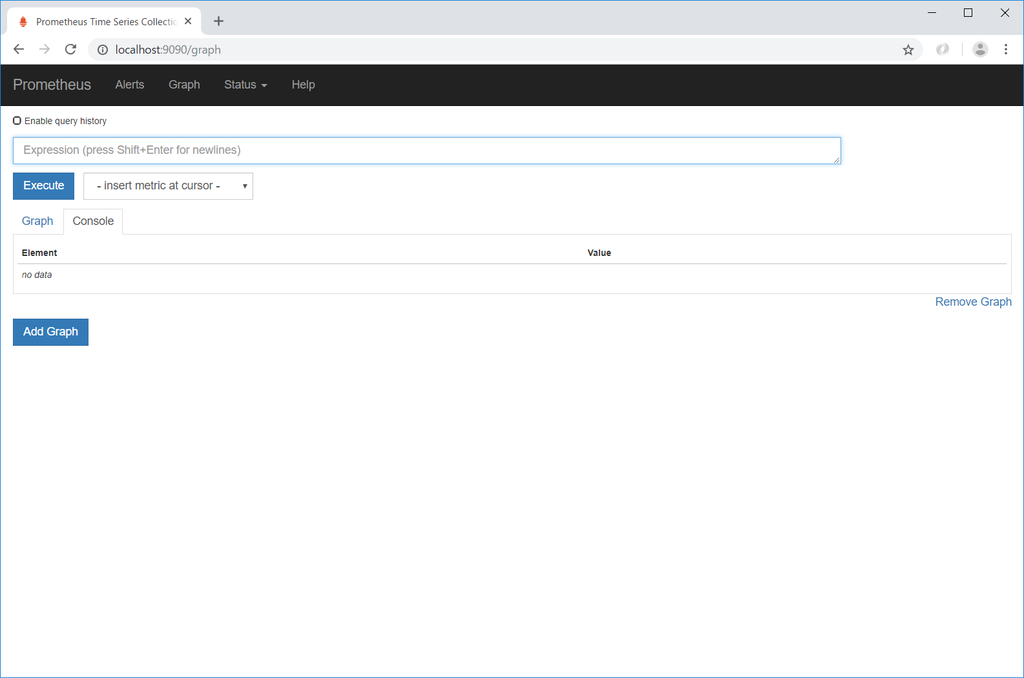
http://localhost:9090/ にアクセスすると http://localhost:9090/graph にリダイレクトされて以下の画面が表示されます。
jvm と入力すると Spring Actuator から収集した jvm が含まれるメトリックスが表示されて、

jvm_memory_used_bytes を選択して「Execute」ボタンをクリックすると以下のように表示されます。
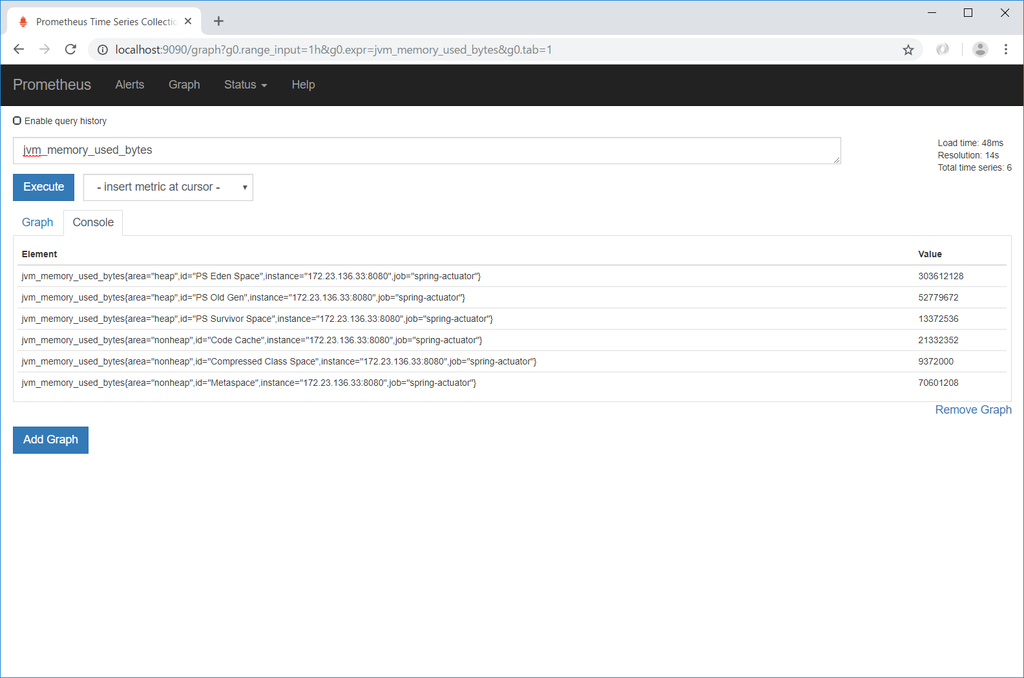
「Graph」タブをクリックするとグラフが表示されます(表示間隔をデフォルトの 1h から 15m に変更しています)。

Grafana の環境を構築する
docker-compose.yml に Grafana の設定を追加する
docker-compose.yml に Grafana の設定を追加します。
version: '3'

services:
  ..........

  grafana:
    image: grafana/grafana:latest
    container_name: grafana
    ports:
    - "3000:3000"
Grafana を起動する
docker-compose down コマンドを実行した後、docker-compose up -d コマンドを実行します。

設定&動作確認
http://localhost:3000/ にアクセスすると http://localhost:3000/login にリダイレクトされてログイン画面が表示されます。
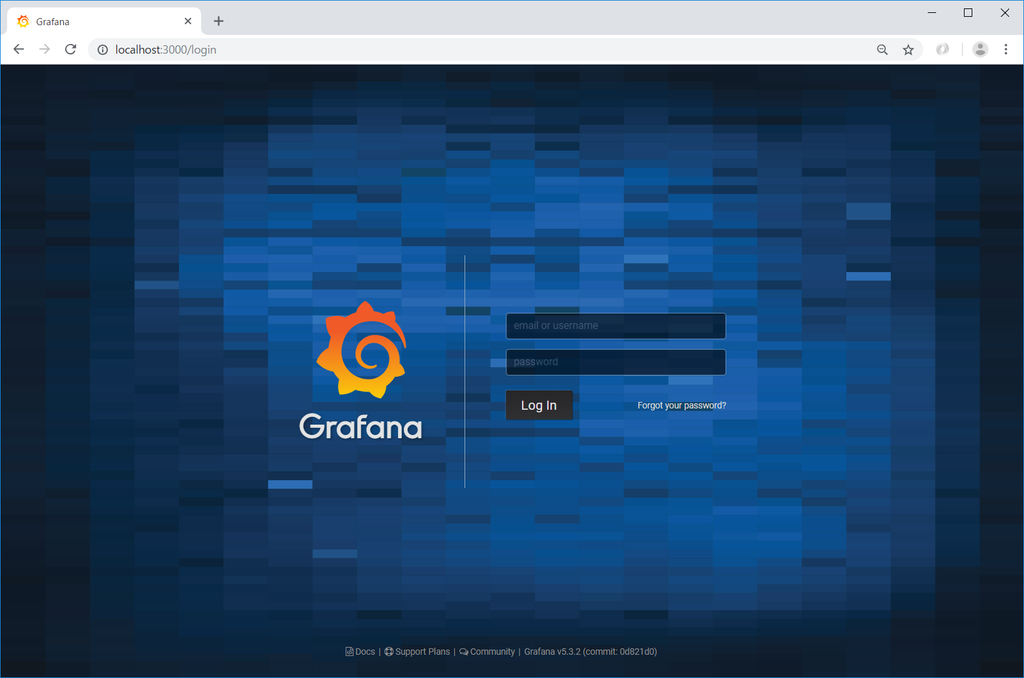
admin / admin を入力した後「Log In」ボタンをクリックすると、今度はパスワードの変更を求められるのでパスワードを入力して「Save」ボタンをクリックします。
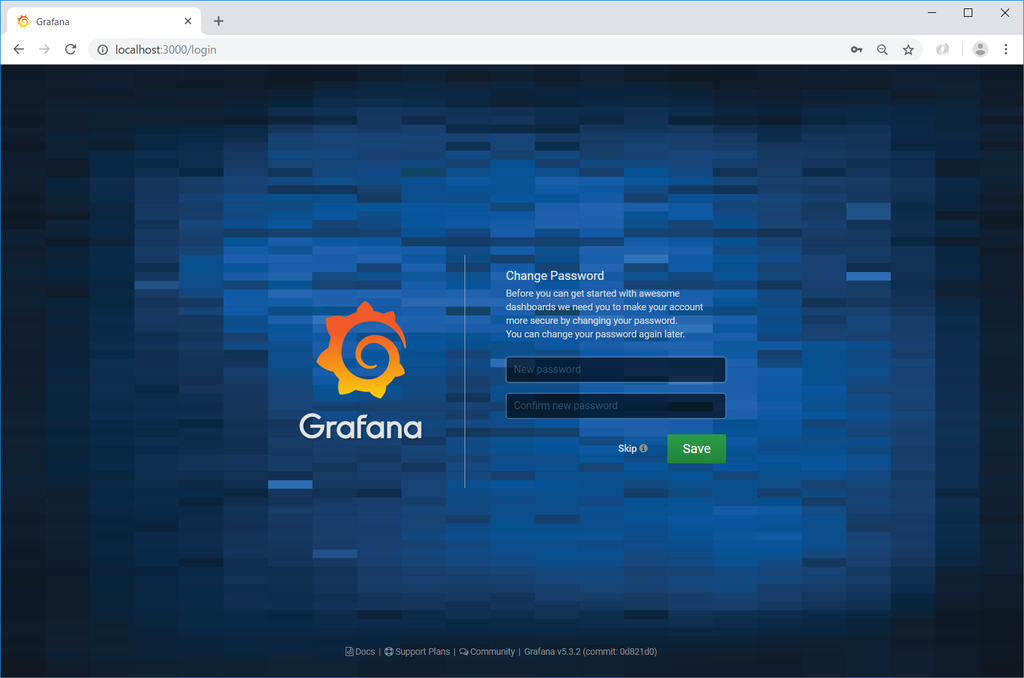
「Home Dashboard」画面が表示されるので「Add data source」をクリックします。

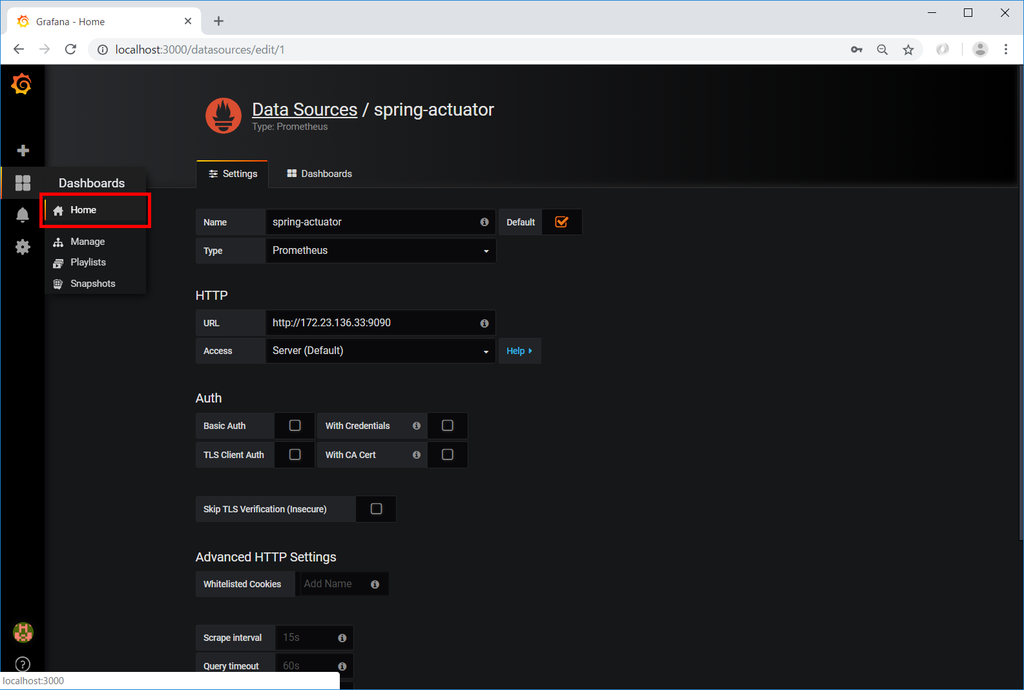
以下の画面の値を入力して「Save & Test」ボタンをクリックします。Prometheus は Docker の別コンテナで起動しているので、「HTTP」-「URL」には localhost 以外の IP アドレスを記述します。

画面左側から「Dashboards」-「Home」を選択します。
「New dashboard」をクリックします。

Panel を追加します。「Graph」をクリックします。

「Panel Title」-「Edit」を選択します。

jvm_memory_used_bytes を入力した後、画面右上の「Back to dashboard」ボタンをクリックします。
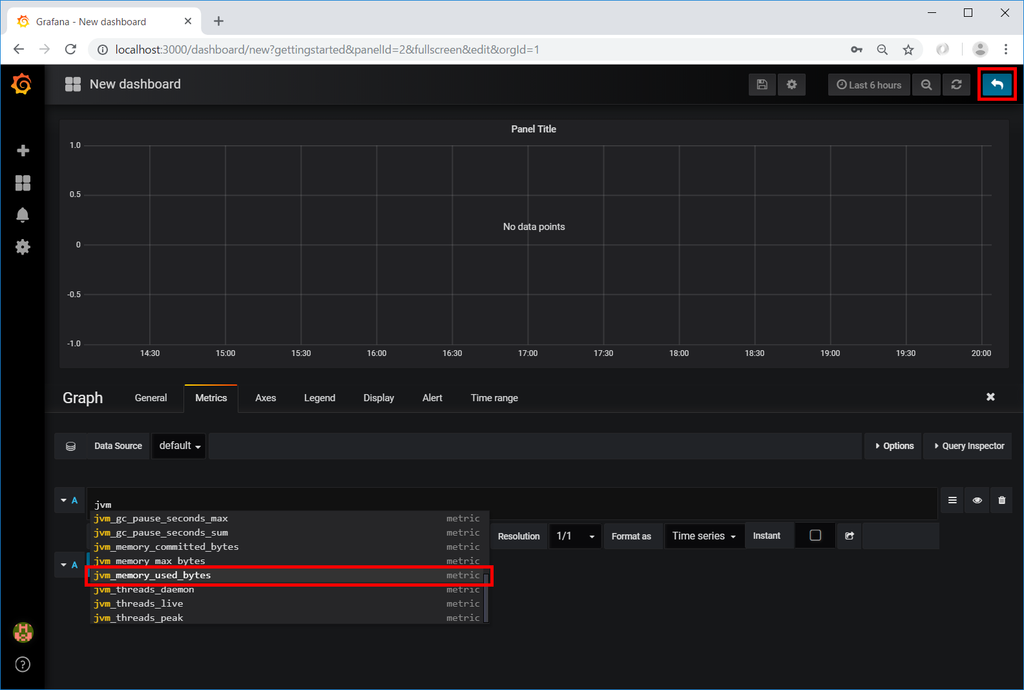
Panel 上に jvm_memory_used_bytes のメトリックスのグラフが表示されます。

グラフの表示期間がデフォルトでは Last 6 hours になっているので Last 1 hour に変更し、かつ自動リフレッシュされるようにします。画面右上の「Last 6 hours」と表示されているところをクリックした後、「Custom range」-「Refreshing every」で「5s」を選択して「Apply」ボタンをクリックし、「Quick ranges」で「Last 1 hour」をクリックします。


次回は。。。
Prometheus+Grafana が面白い!! もう少しいろいろ試してみたいので、Prometheus+Grafana で jvm 以外のデータを表示させてみます。
履歴
2018/11/04
初版発行。
Spring Boot 1.5.x の Web アプリを 2.0.x へバージョンアップする ( その13 )( Remember Me 認証が使えなくなっていたので調査・修正する )
概要
記事一覧はこちらです。
Spring Boot 1.5.x の Web アプリを 2.0.x へバージョンアップする ( その12 )( Spring Boot Actuator を導入する ) の続きです。
- 今回の手順で確認できるのは以下の内容です。
- 前回の記事の後に build するのを忘れていたので build したところ、Remember Me 認証が使えなくなっていることに気づきました。
- Docker で Prometheus+Grafana の環境を構築する予定でしたが、先にこの件を調査・修正します。
参照したサイト・書籍
目次
手順
build してみる
clean タスク実行 → Rebuild Project 実行 → build タスクを実行すると、テストが1件失敗して BUILD FAILED のメッセージが出力されます。

失敗したテストで何が起きているのか確認するために、Project Tool Window で src/test を選択した後、コンテキストメニューを表示して「Run with Coverage」-「All Tests」を選択してテストを実行してみると、失敗したテストとエラーメッセージが以下のように出力されて、
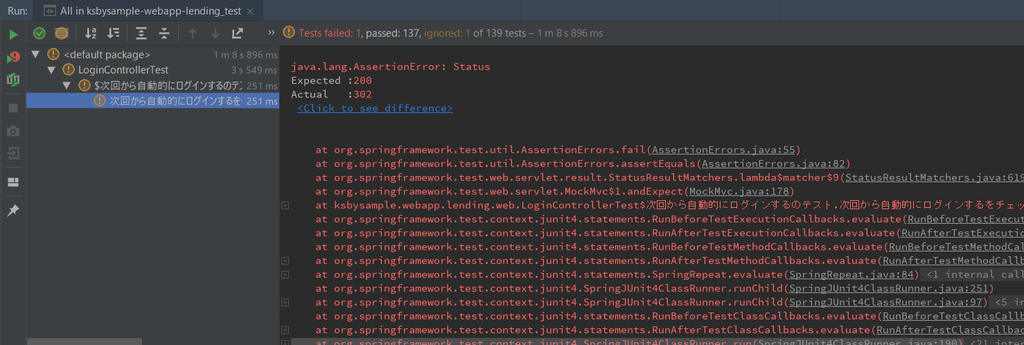
エラーが出力された箇所は以下のテストの赤線の部分でした。

どうも Remember Me 認証が動かなくなっているようです。
Tomcat を起動して動作を確認してみます。Tomcat 起動後、http://localhost:8080/ にアクセスして tanaka.taro@sample.com / taro を入力 →「次回から自動的にログインする 」をチェックしてから「ログイン」ボタンをクリックします。

http://localhost:8080/admin/library の URL の画面が表示されるので、ブラウザを一旦終了させます。
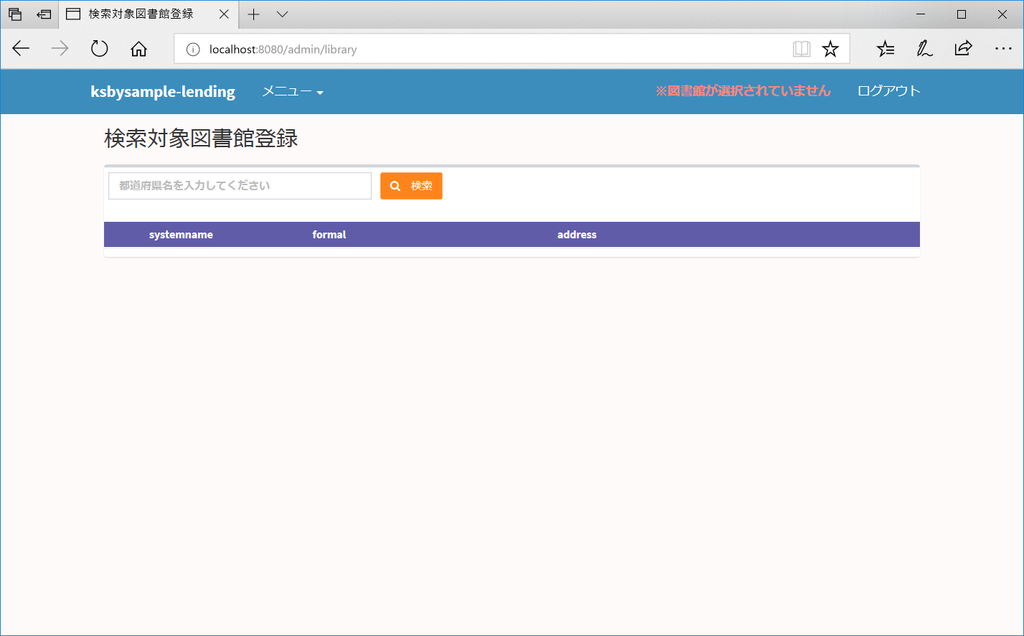
ブラウザを起動してアドレスバーに http://localhost:8080/admin/library を入力すると Remember Me 認証が行われて、ログイン不要で画面が表示されるはず。。。なのですがログイン画面が表示されました。やはり Remember Me 認証が使えなくなっています。

Remember Me 認証が使えなくなった原因を調査・修正する
DEBUG ログが出力されるように設定を変更して、テストが失敗した時に何が起きているか見てみると、org.springframework.security.provisioning.InMemoryUserDetailsManager.loadUserByUsername で UsernameNotFoundException が発生していました。
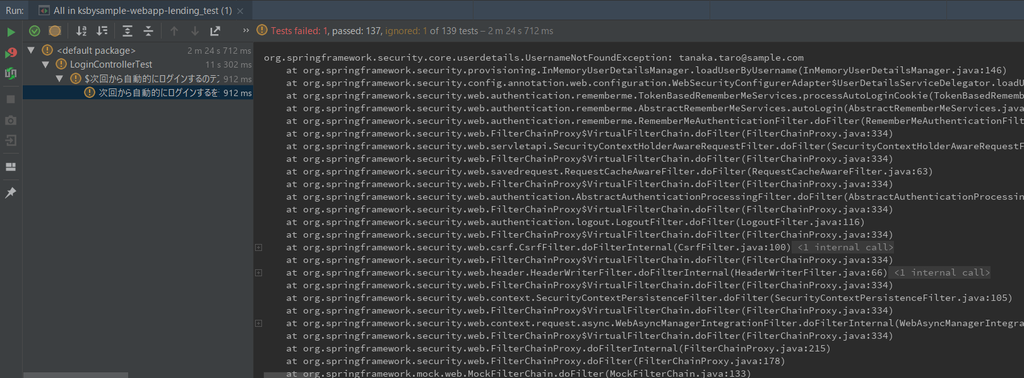
InMemory のユーザだけチェックして、ユーザがいなかった場合に DB のユーザをチェックしていないようです。
stacktrace に出力されているソースの場所を追ってみると、org.springframework.security.web.authentication.rememberme.TokenBasedRememberMeServices#processAutoLoginCookie で getUserDetailsService().loadUserByUsername(...) を呼び出しており、

getUserDetailsService().loadUserByUsername(...) は実際には org.springframework.security.config.annotation.web.configuration.WebSecurityConfigurerAdapter$UserDetailsServiceDelegator#loadUserByUsername を呼び出していて、
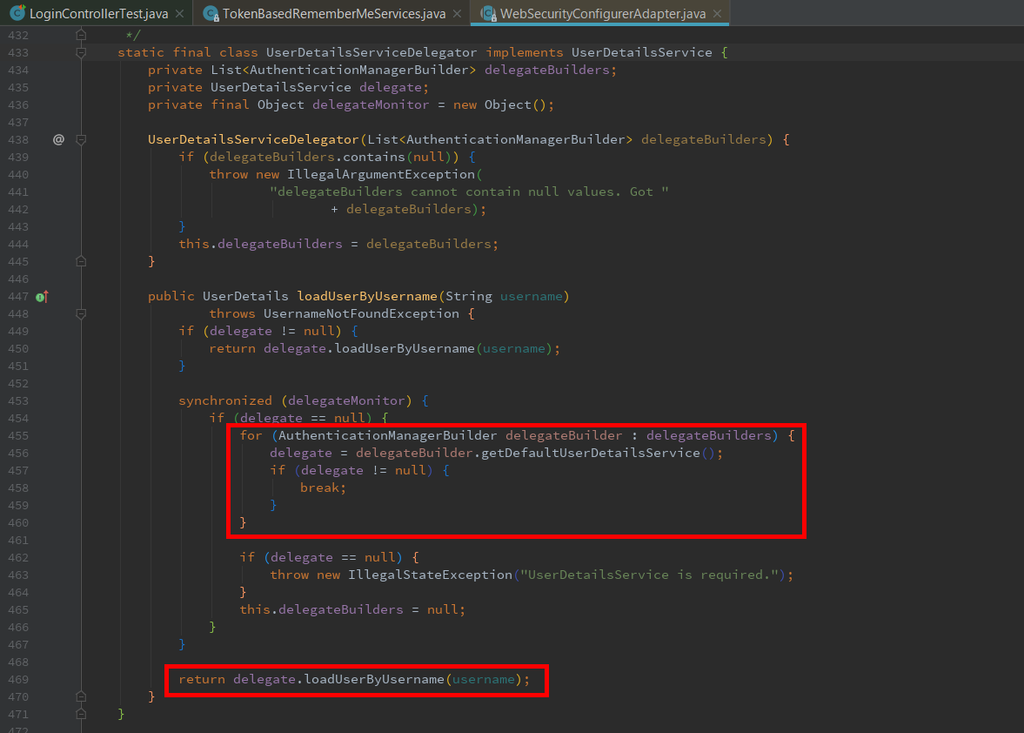
このメソッドでは AuthenticationManagerBuilder のリストから最初に AuthenticationManagerBuilder#getDefaultUserDetailsService で取得できた UserDetailsService の loadUserByUsername を呼び出しています。
AuthenticationManagerBuilder の設定は ksbysample.webapp.lending.config.WebSecurityConfig の中で以下のように行っていますが、

org.springframework.security.config.annotation.authentication.builders.AuthenticationManagerBuilder#inMemoryAuthentication を見ると apply メソッドを呼び出していて、

apply メソッドは以下のようになっています。DEBUG モードで確認すると inMemoryAuthentication メソッドが呼び出された時には defaultUserDetailsService には org.springframework.security.provisioning.InMemoryUserDetailsManager がセットされていました。

まとめてみると以下の状況でした。
- ksbysample.webapp.lending.config.WebSecurityConfig#configAuthentication で以下の順に呼び出しており、
auth.authenticationProvider(daoAuhthenticationProvider()).userDetailsService(userDetailsService);auth.inMemoryAuthentication()...
- 最初の
auth.authenticationProvider(daoAuhthenticationProvider()).userDetailsService(userDetailsService);で AuthenticationManagerBuilder の defaultUserDetailsService に userDetailsService がセットされるが、 - 次の
auth.inMemoryAuthentication()...で defaultUserDetailsService に org.springframework.security.provisioning.InMemoryUserDetailsManager がセットされる。 - Remember Me 認証では defaultUserDetailsService にセットされている UserDetailsService しか使用されない。
- よって InMemory にセットされたユーザしか使用されず、DB に保存されたユーザが使用されないため、Remember-me cookie が存在しても UsernameNotFoundException が発生する。
AuthenticationManagerBuilder#userDetailsService で userDetailsService をセットした後に auth.inMemoryAuthentication() を呼び出したため、InMemory の UserDetailsServce(InMemoryUserDetailsManager)が Remember Me 認証で使用される UserDetailsService になっていたのが原因でした。 AuthenticationManagerBuilder#userDetailsService を呼び出す前に auth.inMemoryAuthentication() を呼び出すように修正します。
src/main/java/ksbysample/webapp/lending/config/WebSecurityConfig.java を以下のように変更します。
    @Autowired
    public void configAuthentication(AuthenticationManagerBuilder auth) throws Exception {
       // AuthenticationManagerBuilder#userDetailsService の後に auth.inMemoryAuthentication() を呼び出すと
        // AuthenticationManagerBuilder の defaultUserDetailsService に
        // org.springframework.security.provisioning.InMemoryUserDetailsManager がセットされて
        // Remember Me 認証で InMemoryUserDetailsManager が使用されて DB のユーザが参照されなくなるので、
        // Remember Me 認証で使用する UserDetailsService を一番最後に呼び出す
        // ※今回の場合には auth.userDetailsService(userDetailsService) が一番最後に呼び出されるようにする
         auth.inMemoryAuthentication()
                .withUser("actuator")
                .password("{noop}xxxxxxxx")
                .roles("ENDPOINT_ADMIN");
        auth.authenticationProvider(daoAuhthenticationProvider())
                .userDetailsService(userDetailsService);
    }
auth.inMemoryAuthentication().~をauth.authenticationProvider(daoAuhthenticationProvider()).userDetailsService(userDetailsService);の前に移動します。
再度 build してみる
再度 clean タスク実行 → Rebuild Project 実行 → build タスクを実行すると、今度は BUILD SUCCESSFUL が出力されました。

履歴
2018/11/03
初版発行。
Spring Boot 1.5.x の Web アプリを 2.0.x へバージョンアップする ( その12 )( Spring Boot Actuator を導入する )
概要
記事一覧はこちらです。
Spring Boot 1.5.x の Web アプリを 2.0.x へバージョンアップする ( その11 )( HikariCP のコネクションプーリングの情報を JMX で取得できるようにする ) の続きです。
- 今回の手順で確認できるのは以下の内容です。
- Spring Boot Actuator を導入します。
- Spring Boot + npm + Geb で入力フォームを作ってテストする ( その76 )( Spring Boot Actuator を導入する ) を参考に進めます。
- ksbysample-webapp-lending では Spring Security で form login を設定していますが、Spring Actuator の Endpoint には Basic 認証を設定します。
- 今回は prometheus の endpoint も設定して、次回以降に Docker で Prometheus+Grafana の環境を構築して表示させてみる予定です。
参照したサイト・書籍
Spring Boot Reference Guide - 51.3 Securing HTTP Endpoints
https://docs.spring.io/spring-boot/docs/current/reference/html/production-ready-endpoints.html#production-ready-endpoints-securitySpring Security Reference - 6.10 Multiple HttpSecurity
https://docs.spring.io/spring-security/site/docs/current/reference/htmlsingle/#multiple-httpsecurityMultiple Authentication Providers in Spring Security
https://www.baeldung.com/spring-security-multiple-auth-providers
目次
- build.gradle を変更する
- WebSecurityConfig.java を変更して
/actuator/**にのみ Basic 認証を設定する - application.properties を変更する
- 動作確認
- 次回は。。。
手順
build.gradle を変更する
build.gradle の以下の点を変更します。
plugins {
    ..........
    id "de.undercouch.download" version "3.4.3"
    id "com.gorylenko.gradle-git-properties" version "1.5.2"
}

..........

dependencies {
    ..........
    implementation("org.springframework.boot:spring-boot-starter-amqp")
    implementation("org.springframework.boot:spring-boot-starter-actuator")
    runtimeOnly("org.springframework.boot:spring-boot-devtools")
    ..........
    implementation("org.codehaus.janino:janino")
    implementation("io.micrometer:micrometer-registry-prometheus")
    testImplementation("org.springframework.boot:spring-boot-starter-test")
    ..........
- plugins block の以下の点を変更します。
id "com.gorylenko.gradle-git-properties" version "1.5.2"を追加します。
- dependencies block の以下の点を変更します。
implementation("org.springframework.boot:spring-boot-starter-actuator")を追加します。- spring-boot-devtools は runtimeOnly で記述すべきなのに変更するのを忘れていることに気づきました。
implementation("org.springframework.boot:spring-boot-devtools")→runtimeOnly("org.springframework.boot:spring-boot-devtools")に変更します。 implementation("io.micrometer:micrometer-registry-prometheus")を追加します。
変更後、Gradle Tool Window の左上にある「Refresh all Gradle projects」ボタンをクリックして更新します。
WebSecurityConfig.java を変更して /actuator/** にのみ Basic 認証を設定する
src/main/java/ksbysample/webapp/lending/config/WebSecurityConfig.java の以下の点を変更します。
@Configuration
public class WebSecurityConfig {

    ..........

    @Configuration
    @Order(1)
    public static class ActuatorWebSecurityConfigurationAdapter extends WebSecurityConfigurerAdapter {

        @Override
        protected void configure(HttpSecurity http) throws Exception {
            http
                    // Spring Actuator の Endpoint のみ Basic認証を設定する
                    .requestMatcher(EndpointRequest.toAnyEndpoint())
                    .authorizeRequests()
                    .anyRequest().hasRole("ENDPOINT_ADMIN")
                    .and()
                    .httpBasic();
        }

    }

    @Configuration
    public static class FormLoginWebSecurityConfigurationAdapter extends WebSecurityConfigurerAdapter {

        @Override
        protected void configure(HttpSecurity http) throws Exception {
            http.authorizeRequests()
                    // 認証の対象外にしたいURLがある場合には、以下のような記述を追加します
                    // 複数URLがある場合はantMatchersメソッドにカンマ区切りで対象URLを複数列挙します
                    // .antMatchers("/country/**").permitAll()
                    .requestMatchers(PathRequest.toStaticResources().atCommonLocations()).permitAll()
                    .antMatchers("/fonts/**").permitAll()
                    .antMatchers("/html/**").permitAll()
                    .antMatchers("/encode").permitAll()
                    .antMatchers("/urllogin").permitAll()
                    .antMatchers("/webapi/**").permitAll()
                    .antMatchers("/springMvcMemo/**").permitAll()
                    .antMatchers("/sessionsample/**").permitAll()
                    .antMatchers("/textareamemo/**").permitAll()
                    .antMatchers("/sample/**").permitAll()
                    .anyRequest().hasAnyRole("USER", "ADMIN", "APPROVER");
            http.formLogin()
                    .loginPage("/")
                    .loginProcessingUrl("/login")
                    .defaultSuccessUrl(DEFAULT_SUCCESS_URL)
                    .usernameParameter("id")
                    .passwordParameter("password")
                    .successHandler(new RoleAwareAuthenticationSuccessHandler())
                    .failureHandler(new ForwardAuthenticationFailureHandler("/"))
                    .permitAll()
                    .and()
                    .logout()
                    .logoutRequestMatcher(new AntPathRequestMatcher("/logout"))
                    .logoutSuccessUrl("/")
                    .deleteCookies("SESSION")
                    .deleteCookies("remember-me")
                    .invalidateHttpSession(true)
                    .permitAll()
                    .and()
                    .rememberMe()
                    .key(REMEMBERME_KEY)
                    .tokenValiditySeconds(60 * 60 * 24 * 30);
        }

    }

    ..........

    /**
     * @param auth ???
     * @throws Exception
     */
    @SuppressWarnings("PMD.SignatureDeclareThrowsException")
    @Autowired
    public void configAuthentication(AuthenticationManagerBuilder auth) throws Exception {
        // 必ず auth.inMemoryAuthentication() を先に書くこと
        auth.inMemoryAuthentication()
                .withUser("actuator")
                .password("{noop}xxxxxxxx")
                .roles("ENDPOINT_ADMIN");
        auth.authenticationProvider(daoAuhthenticationProvider())
                .userDetailsService(userDetailsService);
    }

}
@Configuration public static class FormLoginWebSecurityConfigurationAdapter extends WebSecurityConfigurerAdapter { ... }を追加し、既存の configure メソッドをこの中へ移動します。また configure メソッド内の.authenticated()→.hasAnyRole("USER", "ADMIN", "APPROVER")に変更して actuator 用の Role として使用する ENDPOINT_ADMIN ではログインできないようにします。@Configuration @Order(1) public static class ActuatorWebSecurityConfigurationAdapter extends WebSecurityConfigurerAdapter { ... }を追加し、actuator の endpoint の Basic認証をこのクラスで設定します。- configAuthentication bean 内に
auth.inMemoryAuthentication().withUser("actuator").password("{noop}xxxxxxxx").roles("ENDPOINT_ADMIN");を追加します。
application.properties を変更する
src/main/resources/application.properties の以下の点を変更します。
doma.dialect=org.seasar.doma.jdbc.dialect.PostgresDialect

management.endpoints.web.exposure.include=health,info,loggers,prometheus

spring.autoconfigure.exclude=com.integralblue.log4jdbc.spring.Log4jdbcAutoConfiguration
spring.datasource.hikari.jdbc-url=jdbc:postgresql://localhost/ksbylending
..........
management.endpoints.web.exposure.include=health,info,loggers,prometheusを追加します。
動作確認
ここまでの設定で /actuator/** には Basic 認証が、それ以外のパスには Form 認証が行われるはずなので、確認してみます。
Tomcat を起動した後、http://localhost:8080/admin/library にアクセスするとログイン画面が表示されます。

tanaka.taro@sample.com / taro を入力して「ログイン」ボタンをクリックすると http://localhost:8080/admin/library が表示されます。

ログインしている状態から http://localhost:8080/actuator/prometheus にアクセスすると、現在ログインしている ID では ENDPOINT_ADMIN の ROLE を持っていないので 403 Forbidden が返ってきます。

画面右上の「ログアウト」リンクをクリックしてログアウトしてから再度 http://localhost:8080/actuator/prometheus にアクセスすると、Basic 認証のダイアログが表示されます。

actuator / xxxxxxxx を入力して「OK」ボタンをクリックすると /actuator/prometheus が出力する情報が表示されます。

次回は。。。
Docker で Prometheus+Grafana の環境を構築して Spring Actuator で収集したメトリックスを表示させてみます。
履歴
2018/10/29
初版発行。
2018/11/20
* Spring Boot 1.5.x の Web アプリを 2.0.x へバージョンアップする ( その13 )( Remember Me 認証が使えなくなっていたので調査・修正する ) の結果を反映して auth.inMemoryAuthentication() を書く位置を修正しました。
Java SE を 8u181 → 8u192 へ、IntelliJ IDEA を 2018.2.4 → 2018.2.5 へ、Git for Windows を 2.18.0 → 2.19.1 へバージョンアップ
Java SE を 8u181 → 8u192 へバージョンアップする
※ksbysample-webapp-lending プロジェクトを開いた状態でバージョンアップしています。
Oracle の Java SE Downloads を見ると 8u192 がダウンロードできるようになっていましたので、8u192 へバージョンアップします。
jdk-8u192-windows-x64.exe をダウンロードして D:\Java\jdk1.8.0_192 へインストールした後、環境変数 JAVA_HOME のパスを D:\Java\jdk1.8.0_192 へ変更します。
コマンドプロンプトから
java -versionを実行し、1.8.0_192に変更されていることを確認します。
開いているプロジェクトを閉じて「Welcome to IntelliJ IDEA」ダイアログを表示します。
ダイアログ下部の「Configure」-「Project Defaults」-「Project Structure」を選択します。

「Default Project Structure」ダイアログが表示されます。画面左側で「Project Settings」-「Project」を選択後、画面右側の「Project SDK」の「New...」ボタンをクリックし、表示されるメニューから「JDK」を選択します。

「Select Home Directory for JDK」ダイアログが表示されます。D:\Java\jdk1.8.0_192 を選択した後、「OK」ボタンをクリックします。
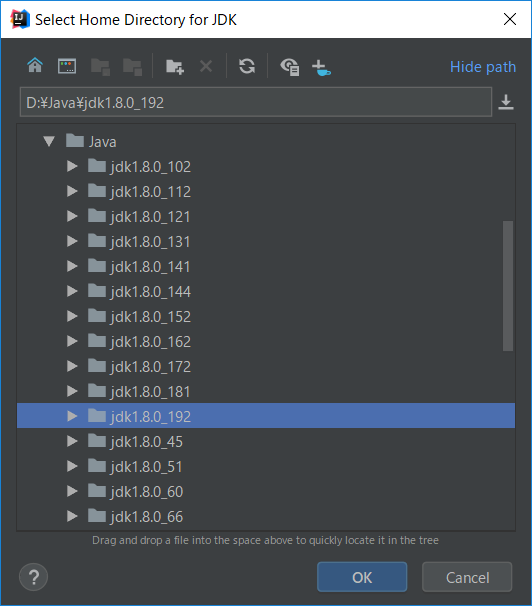
「Default Project Structure」ダイアログに戻るので、今度は「Project SDK」の「Edit」ボタンをクリックします。

画面左側で「Platform Settings」-「SDKs」が選択された状態になるので、画面右上の入力フィールドで "1.8" → "1.8.0_192" へ変更します。

次に中央のリストから「1.8.0_181」を選択した後、リストの上の「-」ボタンをクリックして削除します。

「OK」ボタンをクリックして「Default Project Structure」ダイアログを閉じます。
「Welcome to IntelliJ IDEA」ダイアログに戻ったら、ksbysample-webapp-lending プロジェクトを開きます。
IntelliJ IDEA のメイン画面が開いたら、メニューから「File」-「Project Structure...」を選択します。
「Project Structure」ダイアログが表示されます。以下の画像の状態になっているので、

「Project SDK」と「Project language level」を選択し直します。

「OK」ボタンをクリックして「Project Structure」ダイアログを閉じます。
メイン画面に戻ると画面右下に「Indexing...」の表示が出るので、終了するまで待ちます。

clean タスク実行 → Rebuild Project 実行 → build タスクを実行して、"BUILD SUCCESSFUL" のメッセージが出力されることを確認します。
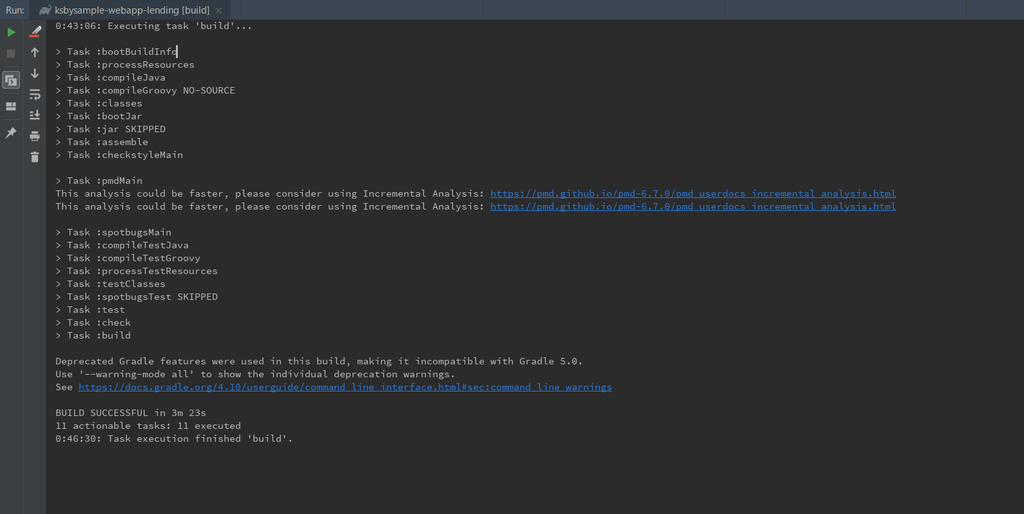
Project Tool Window で src/test を選択した後、コンテキストメニューを表示して「Run ‘All Tests’ with Coverage」を選択し、テストが全て成功することを確認します。

特に問題は発生しませんでした。8u192 で開発を進めます。
IntelliJ IDEA を 2018.2.4 → 2018.2.5 へバージョンアップする
IntelliJ IDEA の 2018.2.5 がリリースされているのでバージョンアップします。
- IntelliJ IDEA 2018.2.5 is released!
https://blog.jetbrains.com/idea/2018/10/intellij-idea-2018-2-5-is-released/
※ksbysample-webapp-lending プロジェクトを開いた状態でバージョンアップしています。
IntelliJ IDEA のメインメニューから「Help」-「Check for Updates...」を選択します。
「IDE and Plugin Updates」ダイアログが表示されます。左下に「Update and Restart」ボタンが表示されていますので、「Update and Restart」ボタンをクリックします。

Plugin の update も表示されました。このまま「Update and Restart」ボタンをクリックします。

Patch がダウンロードされて IntelliJ IDEA が再起動します。
IntelliJ IDEA が起動すると画面下部に「Indexing…」のメッセージが表示されますので、終了するまで待機します。

IntelliJ IDEA のメインメニューから「Help」-「About」を選択し、2018.2.5 へバージョンアップされていることを確認します。
Gradle Tool Window のツリーを見ると「Tasks」の下に「other」しかない状態になっているので、左上にある「Refresh all Gradle projects」ボタンをクリックして更新します。

clean タスク実行 → Rebuild Project 実行 → build タスクを実行して、"BUILD SUCCESSFUL" のメッセージが出力されることを確認します。

Project Tool Window で src/test を選択した後、コンテキストメニューを表示して「Run with Coverage」-「All Tests」を選択し、テストが全て成功することを確認します。

Git for Windows を 2.18.0 → 2.19.1 へバージョンアップする
Git for Windows の 2.19.1 がリリースされていたのでバージョンアップします。
https://git-for-windows.github.io/ の「Download」ボタンをクリックして Git-2.19.1-64-bit.exe をダウンロードします。
Git-2.19.1-64-bit.exe を実行します。
「Git 2.19.1 Setup」ダイアログが表示されます。[Next >]ボタンをクリックします。
「Select Components」画面が表示されます。「Git LFS(Large File Support)」だけチェックした状態で [Next >]ボタンをクリックします。
「Choosing the default editor used by Git」画面が表示されます。「Use Vim (the ubiquitous text editor) as Git's default editor」が選択された状態で [Next >]ボタンをクリックします。
「Adjusting your PATH environment」画面が表示されます。中央の「Use Git from the Windows Command Prompt」が選択されていることを確認後、[Next >]ボタンをクリックします。
「Choosing HTTPS transport backend」画面が表示されます。「Use the OpenSSL library」が選択されていることを確認後、[Next >]ボタンをクリックします。
「Configuring the line ending conversions」画面が表示されます。一番上の「Checkout Windows-style, commit Unix-style line endings」が選択されていることを確認した後、[Next >]ボタンをクリックします。
「Configuring the terminal emulator to use with Git Bash」画面が表示されます。「Use Windows'default console window」が選択されていることを確認した後、[Next >]ボタンをクリックします。
「Configuring extra options」画面が表示されます。「Enable file system caching」だけがチェックされていることを確認した後、[Next >]ボタンをクリックします。
「Configuring experimental options」画面が表示されます(初めて見る画面です)。"experimental" とのことなので、今回は何もチェックせずに [Install]ボタンをクリックします。
インストールが完了すると「Completing the Git Setup Wizard」のメッセージが表示された画面が表示されます。中央の「View Release Notes」のチェックを外した後、「Finish」ボタンをクリックしてインストーラーを終了します。
コマンドプロンプトを起動して
git --versionを実行し、git のバージョンがgit version 2.19.1.windows.1になっていることを確認します。
git-cmd.exe を起動して日本語の表示・入力が問題ないかを確認します。

特に問題はないようですので、2.19.1 で作業を進めたいと思います。
Spring Boot 1.5.x の Web アプリを 2.0.x へバージョンアップする ( その11 )( HikariCP のコネクションプーリングの情報を JMX で取得できるようにする )
概要
記事一覧はこちらです。
Spring Boot 1.5.x の Web アプリを 2.0.x へバージョンアップする ( その10 )( Tomcat connection Pool → HikariCP に変更する ) の続きです。
- 今回の手順で確認できるのは以下の内容です。
- Spring Boot 1.5.x の Web アプリを 2.0.x へバージョンアップする ( その10 )( Tomcat connection Pool → HikariCP に変更する ) で dataSource という名前で JMX MBean に登録されると書きましたが、それだとコネクションプーリングの中で現在使用中のコネクション数(Active Connections)等が見られずやっぱり何か変だなと思っていろいろ調べてみたら、Spring Boot + HikariCPでコネクションプールのMetricsを取得する という記事を見つけました。なるほど、Spring Boot が起動時に MBean を登録してしまうんですね。。。
- 実装を修正して HikariCP のコネクションプーリングの情報を JMX から取得できるようにします。
参照したサイト・書籍
Spring Boot + HikariCPでコネクションプールのMetricsを取得する
https://matsumana.info/blog/2016/02/06/spring-boot-hikaricp-metrics/How to set @Autowired constructor params as “required=false” individually
https://stackoverflow.com/questions/42135102/how-to-set-autowired-constructor-params-as-required-false-individually
目次
spring.datasource.hikari.register-mbeans=trueの設定がなくても HikariCP が MBean に登録されることを確認する- Pool(HikariPool-1)、PoolConfig(HikariPool-1)で MBean に登録されるようにする
- clean タスク実行 → Rebuild Project 実行 → build タスクを実行する
- ユニットテスト実行時には MBeanExporter の bean が生成されないのか?
- ApplicationConfig.java を変更してユニットテスト実行時には
mBeanExporter.addExcludedBean("dataSource");を呼び出さないようにする - 再度 clean タスク実行 → Rebuild Project 実行 → build タスクを実行する
手順
spring.datasource.hikari.register-mbeans=true の設定がなくても HikariCP が MBean に登録されることを確認する
Spring が起動時に MBean を登録するのであれば spring.datasource.hikari.register-mbeans=true の設定がなくても登録されてしまうのだろうか?と思ったので試してみます。
src/main/resources/application.properties で spring.datasource.hikari.register-mbeans=true をコメントアウトしてから、
spring.autoconfigure.exclude=com.integralblue.log4jdbc.spring.Log4jdbcAutoConfiguration
spring.datasource.hikari.jdbc-url=jdbc:postgresql://localhost/ksbylending
spring.datasource.hikari.username=ksbylending_user
spring.datasource.hikari.password=xxxxxxxx
spring.datasource.hikari.driver-class-name=org.postgresql.Driver
spring.datasource.hikari.leak-detection-threshold=5000
#spring.datasource.hikari.register-mbeans=true
- com.integralblue.log4jdbc.spring.Log4jdbcAutoConfiguration を無効にしないと dataSource ではなく Pool(HikariPool-1)という名前で MBean に登録されるので、
spring.autoconfigure.exclude=com.integralblue.log4jdbc.spring.Log4jdbcAutoConfigurationの設定を一時的に入れています。
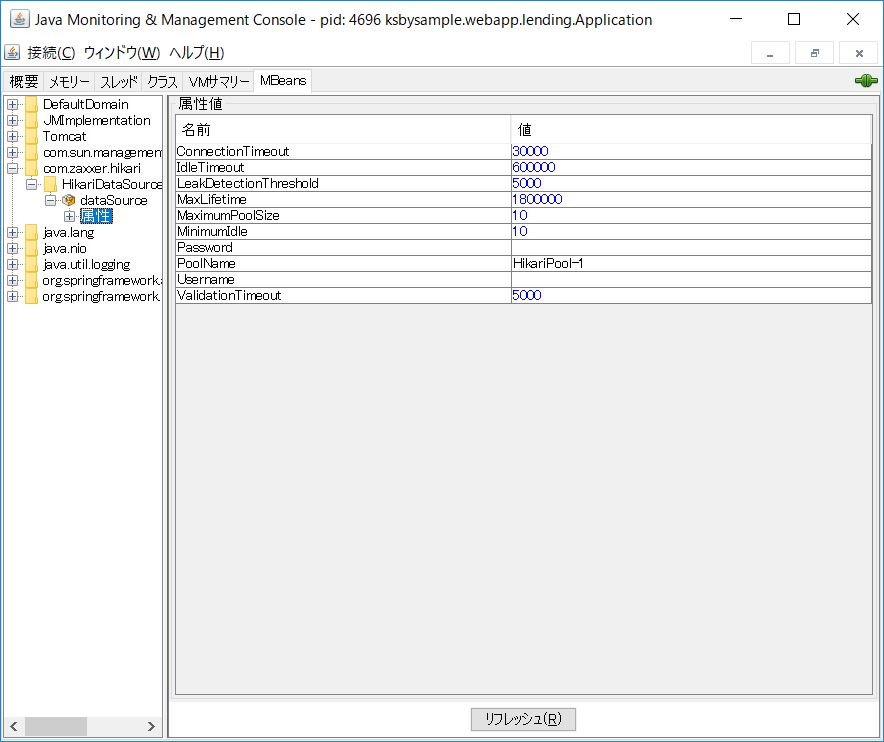
IntelliJ IDEA から Tomcat を起動 → ログイン画面(http://localhost:8080/)からログイン → jconsole で確認してみると、dataSource という名前の MBean が登録されていました。spring.datasource.hikari.register-mbeans=true を設定がなくても Spring Boot の AutoConfiguration によって登録されるようです。
spring.datasource.hikari.register-mbeans=true をコメントアウトしていたのは元に戻します。
Pool(HikariPool-1)、PoolConfig(HikariPool-1)で MBean に登録されるようにする
src/main/java/ksbysample/webapp/lending/config/ApplicationConfig.java を以下のように変更します。
@Configuration
public class ApplicationConfig {

    private final ConnectionFactory connectionFactory;

    private final MessageSource messageSource;

    private final MBeanExporter mBeanExporter;

    /**
     * @param connectionFactory {@link ConnectionFactory} bean
     * @param messageSource     {@link MessageSource} bean
     * @param mBeanExporter     {@link MBeanExporter} bean
     */
    public ApplicationConfig(ConnectionFactory connectionFactory
            , MessageSource messageSource
            , MBeanExporter mBeanExporter) {
        this.connectionFactory = connectionFactory;
        this.messageSource = messageSource;
        this.mBeanExporter = mBeanExporter;
    }

    ..........

    /**
     * @return HikariCP の DataSource オブジェクト
     */
    @Bean
    @ConfigurationProperties("spring.datasource.hikari")
    public DataSource dataSource() {
        mBeanExporter.addExcludedBean("dataSource");
        return DataSourceBuilder.create()
                .type(HikariDataSource.class)
                .build();
    }
private final MBeanExporter mBeanExporter;を追加し、コンストラクタインジェクションされるようコンストラクタに処理を追加します。- dataSource Bean 内に
mBeanExporter.addExcludedBean("dataSource");を追加し、Spring Boot により dataSource という名前で MBean に登録されないようにします。
動作確認してみます。src/main/resources/application.properties は以下の設定になっており、
spring.autoconfigure.exclude=com.integralblue.log4jdbc.spring.Log4jdbcAutoConfiguration
spring.datasource.hikari.jdbc-url=jdbc:postgresql://localhost/ksbylending
spring.datasource.hikari.username=ksbylending_user
spring.datasource.hikari.password=xxxxxxxx
spring.datasource.hikari.driver-class-name=org.postgresql.Driver
spring.datasource.hikari.leak-detection-threshold=5000
spring.datasource.hikari.register-mbeans=true
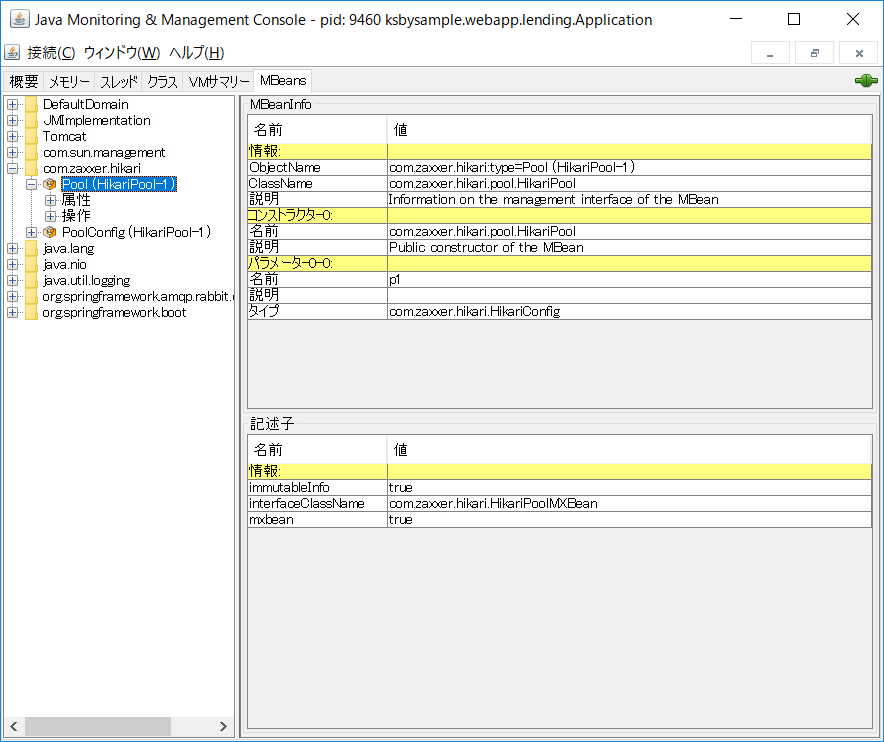
IntelliJ IDEA から Tomcat を起動 → ログイン画面(http://localhost:8080/)からログイン → jconsole で確認してみると、今度は Pool(HikariPool-1)、PoolConfig(HikariPool-1)で MBean に登録されています。

clean タスク実行 → Rebuild Project 実行 → build タスクを実行する
clean タスク → Rebuild Project → build タスクを実行してみます。
 ..........

checkstyle で2点警告が出たのと、
Member name 'mBeanExporter' must match pattern '^[a-z][a-z0-9][a-zA-Z0-9]*$'. [MemberName]Parameter name 'mBeanExporter' must match pattern '^[a-z]([a-z0-9][a-zA-Z0-9]*)?$'. [ParameterName]
テストも大量に失敗しました。。。 Project Tool Window で src/test を選択した後、コンテキストメニューを表示して「Run」-「All Tests」を選択して IntelliJ IDEA からテストを実行してみます。
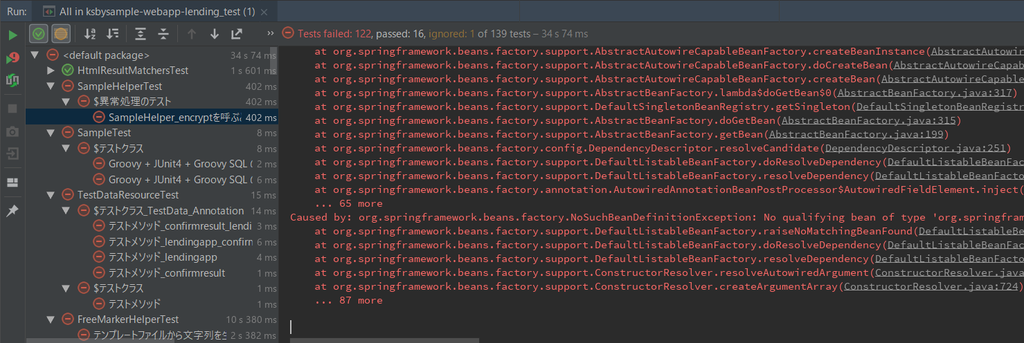
失敗しているテストを見ると Caused by: org.springframework.beans.factory.NoSuchBeanDefinitionException: No qualifying bean of type 'org.springframework.jmx.export.MBeanExporter' available: expected at least 1 bean which qualifies as autowire candidate. Dependency annotations: {} というエラーが発生していました。どうもテストだと MBeanExporter の bean が生成されていないようです。
ユニットテスト実行時には MBeanExporter の bean が生成されないのか?
ユニットテストではなく通常 Tomcat を起動する時に生成される MBeanExporter の bean は org.springframework.boot.autoconfigure.jmx.JmxAutoConfiguration の mbeanExporter メソッドで生成されますが(このメソッド内に breakpoint を設定して Tomcat を起動すると止まります)、
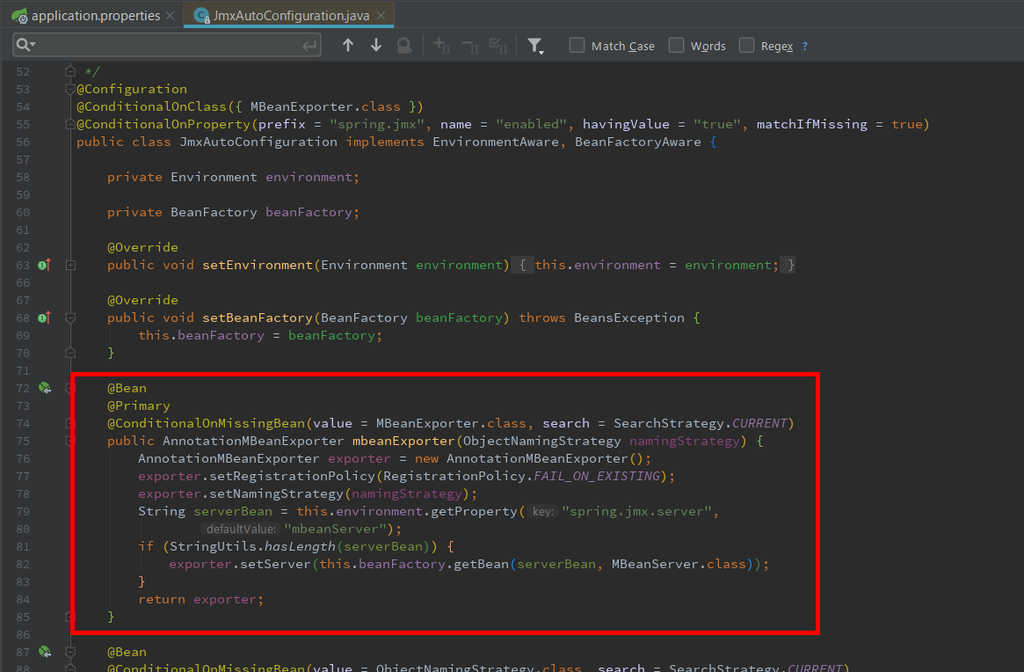
ただし、例えば src/test/groovy/ksbysample/webapp/lending/SampleHelperTest.groovy のテストを実行した時には、このメソッド内に設定した breakpoint には止まりませんでした。確かにユニットテストの時には MBeanExporter の bean は生成されていないようです。
IntelliJ IDEA の Find in Path ダイアログで spring.jmx.enabled で検索してみると org.springframework.boot.test.context.SpringBootContextLoader#disableJmx というメソッドが見つかりました。

また org.springframework.boot.test.context.SpringBootContextLoader のクラスコメントを見ると @see SpringBootTest という記述があります。
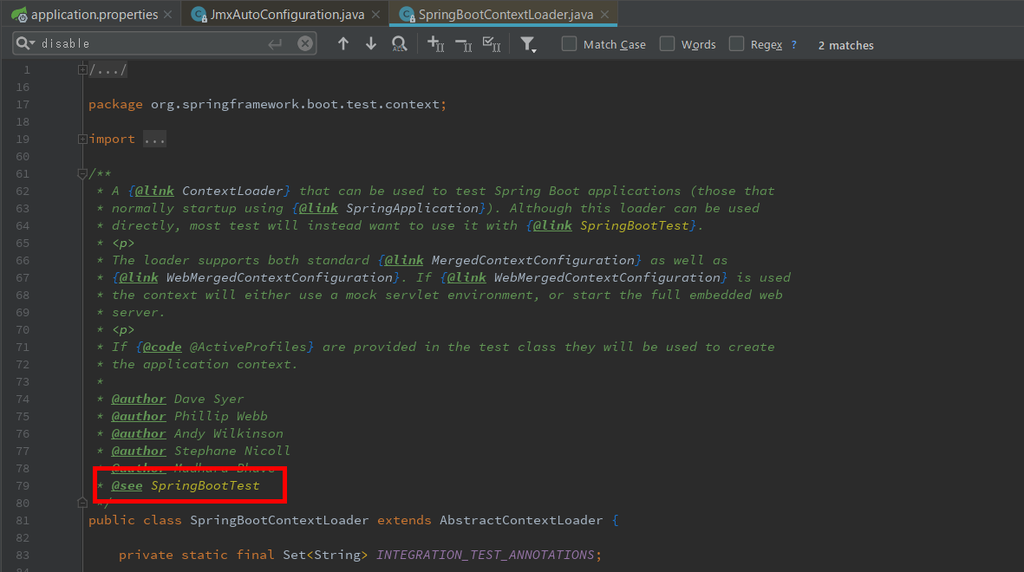
この2つから以下の仕組みになっているようです。
@SpringBootTestアノテーションが付加されたテストが実行されると org.springframework.boot.test.context.SpringBootContextLoader#disableJmx が呼び出される。spring.jmx.enabled=falseが設定されるので、JmxAutoConfiguration クラスに付加されている条件@ConditionalOnProperty(prefix = "spring.jmx", name = "enabled", havingValue = "true", matchIfMissing = true)と一致せず、mbeanExporter メソッドも実行されない(MBeanExporter の bean は生成されない)。
実際 org.springframework.boot.test.context.SpringBootContextLoader#disableJmx メソッド内に breakpoint を設定してから src/test/groovy/ksbysample/webapp/lending/SampleHelperTest.groovy のテストを実行すると設定した breakpoint で止まりました。
ApplicationConfig.java を変更してユニットテスト実行時には mBeanExporter.addExcludedBean("dataSource"); を呼び出さないようにする
src/main/java/ksbysample/webapp/lending/config/ApplicationConfig.java を以下のように変更します。
@Configuration
public class ApplicationConfig {

    private final ConnectionFactory connectionFactory;

    private final MessageSource messageSource;

    private final MBeanExporter mbeanExporter;

    /**
     * @param connectionFactory {@link ConnectionFactory} bean
     * @param messageSource     {@link MessageSource} bean
     * @param mbeanExporter     {@link MBeanExporter} bean
     */
    public ApplicationConfig(ConnectionFactory connectionFactory
            , MessageSource messageSource
            , @Autowired(required = false) MBeanExporter mbeanExporter) {
        this.connectionFactory = connectionFactory;
        this.messageSource = messageSource;
        this.mbeanExporter = mbeanExporter;
    }

    ..........

    /**
     * @return HikariCP の DataSource オブジェクト
     */
    @Bean
    @ConfigurationProperties("spring.datasource.hikari")
    public DataSource dataSource() {
        if (mbeanExporter != null) {
            mbeanExporter.addExcludedBean("dataSource");
        }
        return DataSourceBuilder.create()
                .type(HikariDataSource.class)
                .build();
    }
- checkstyle の警告が出ないようにするために
private final MBeanExporter mBeanExporter;→private final MBeanExporter mbeanExporter;に変更します。 - コンストラクタの引数を
MBeanExporter mbeanExporter→@Autowired(required = false) MBeanExporter mbeanExporterに変更します。 - dataSource メソッドで
mbeanExporter.addExcludedBean("dataSource");を呼び出している部分をif (mbeanExporter != null) { ... }で囲みます。
再度 clean タスク実行 → Rebuild Project 実行 → build タスクを実行する
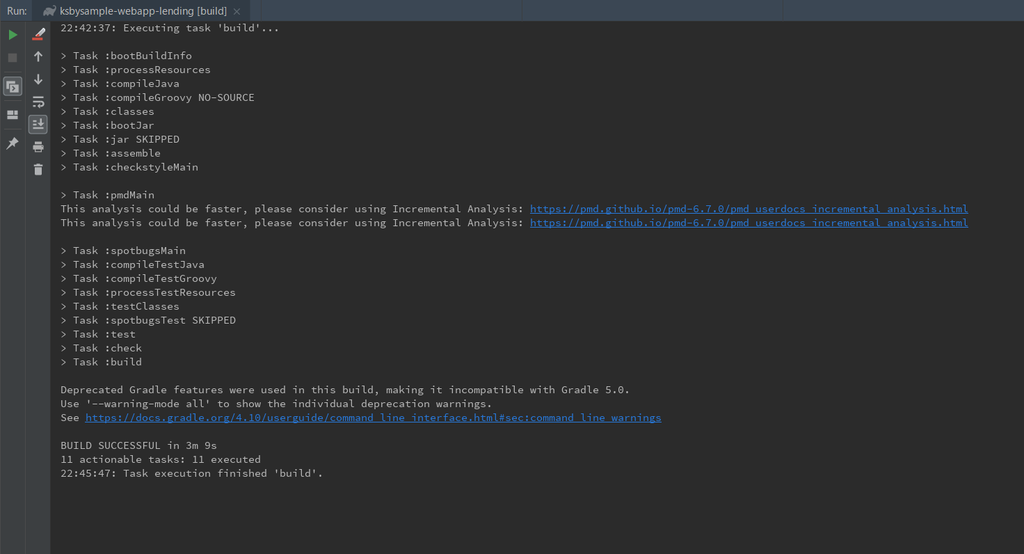
clean タスク → Rebuild Project → build タスクを実行してみると、今度は BUILD SUCCESSFUL が出力されました。
IntelliJ IDEA から Tomcat を起動 → ログイン画面(http://localhost:8080/)からログイン → jconsole で確認してみると、こちらも先程と同様に Pool(HikariPool-1)、PoolConfig(HikariPool-1)で MBean に登録されていました。

Spring Boot 2.0 から HikariCP がデフォルトになりましたが、MBean が絡むとなんか面倒です。。。
履歴
2018/10/19
初版発行。
2018/10/20
clean タスク実行 → Rebuild Project 実行 → build タスクを実行する 以降の記述を追加しました。
Spring Boot 1.5.x の Web アプリを 2.0.x へバージョンアップする ( その10 )( Tomcat connection Pool → HikariCP に変更する )
概要
記事一覧はこちらです。
- 今回の手順で確認できるのは以下の内容です。
- Spring Boot 2.0 からデフォルトのコネクションプーリング用ライブラリが Tomcat connection pool → HikariCP に変わりましたので、HikariCP に変更します。
- Spring Boot + npm + Geb で入力フォームを作ってテストする ( その75 )( コネクションプーリング用ライブラリを Tomcat connection pool → HikariCP に切り替える ) を参考に進めます。
参照したサイト・書籍
目次
- build.gradle を変更する
- application.properties を変更する
- logback-spring.xml を変更する
- dataSource Bean の実装を変更する
- clean タスク → Rebuild Project → build タスクを実行する
- JMX への登録状況を確認する
手順
build.gradle を変更する
dependencies block から implementation("org.apache.tomcat:tomcat-jdbc") を削除します。
変更後、Gradle Tool Window の左上にある「Refresh all Gradle projects」ボタンをクリックして更新します。
application.properties を変更する
src/main/resources/application.properties を以下のように変更します。
spring.datasource.hikari.jdbc-url=jdbc:postgresql://localhost/ksbylending
spring.datasource.hikari.username=ksbylending_user
spring.datasource.hikari.password=xxxxxxxx
spring.datasource.hikari.driver-class-name=org.postgresql.Driver
spring.datasource.hikari.leak-detection-threshold=5000
spring.datasource.hikari.register-mbeans=true
src/main/resources/application-product.properties から以下の4行を削除します。
spring.datasource.tomcat.initialSize=10spring.datasource.tomcat.maxActive=100spring.datasource.tomcat.maxIdle=100spring.datasource.tomcat.minIdle=10
logback-spring.xml を変更する
Tomcat connection pool の SlowQueryReport interceptor がなくなりましたので、<if condition='"${spring.profiles.active}" == "product" && "${slowquery.logging.file}" != ""'> ... </if> の設定を削除します。
dataSource Bean の実装を変更する
src/main/java/ksbysample/webapp/lending/config/ApplicationConfig.java の以下の点を変更します。
    @Bean
    @ConfigurationProperties("spring.datasource.hikari")
    public DataSource dataSource() {
        return DataSourceBuilder.create()
                .type(HikariDataSource.class)
                .build();
    }
@ConfigurationProperties("spring.datasource.tomcat")→@ConfigurationProperties("spring.datasource.hikari")に変更します。.type(org.apache.tomcat.jdbc.pool.DataSource.class)→.type(HikariDataSource.class)に変更します。
clean タスク → Rebuild Project → build タスクを実行する
clean タスク → Rebuild Project → build タスクを実行すると BUILD SUCCESSFUL が出力されました。

JMX への登録状況を確認する
まずは IntelliJ IDEA から spring.profiles.acive=develop で起動した後、jconsole を起動して確認します。


次に ksbysample-webapp-lending-2.0.4-RELEASE.jar を作成して、D:\webapps\ksbysample-webapp-lending\bat\webapp_startup.bat から spring.profiles.acive=product で起動した後、jconsole を起動して確認します。


表示が違いますが、spring.profiles.acive=develop の時は implementation("com.integralblue:log4jdbc-spring-boot-starter:1.0.2") が適用されているためと思われます。src/main/resources/application.properties に spring.autoconfigure.exclude=com.integralblue.log4jdbc.spring.Log4jdbcAutoConfiguration を追加してから jconsole で見てみます。

今度は spring.profiles.acive=product で起動した時と同じ表示になりました。
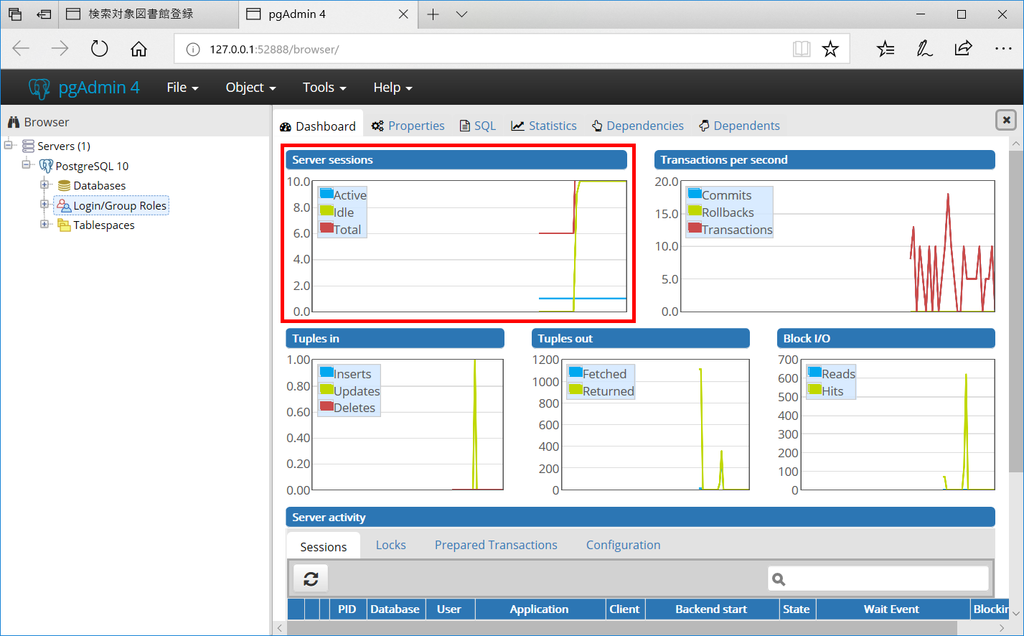
D:\webapps\ksbysample-webapp-lending\bat\webapp_startup.bat から spring.profiles.acive=product で起動した時に本当にコネクションプーリングをしているのかを PostgreSQL の管理ツール pgAdmin4 で見てみると、ログイン画面からログインした直後に 10 セッション接続していることが確認できました。
また、Spring Boot + npm + Geb で入力フォームを作ってテストする ( その75 )( コネクションプーリング用ライブラリを Tomcat connection pool → HikariCP に切り替える ) の時は @EnableMBeanExport(registration = RegistrationPolicy.IGNORE_EXISTING) を付けないと jar から起動した時に org.springframework.jmx.export.UnableToRegisterMBeanException: Unable to register MBean [HikariDataSource (HikariPool-1)] with key 'dataSource'; ... の例外が発生しましたが、今回は付けなくても例外は発生しませんでした。例外が発生する/しないの違いがよく分かりませんでした。。。
履歴
2018/10/11
初版発行。
Spring Boot 1.5.x の Web アプリを 2.0.x へバージョンアップする ( その9 )( gradle-errorprone-plugin を 0.0.16 → 0.6 にバージョンアップ。。。しようと思いましたが止めました )
概要
記事一覧はこちらです。
Spring Boot 1.5.x の Web アプリを 2.0.x へバージョンアップする ( その8 )( 一旦動作確認し、動作しない点があれば修正する ) の続きです。
- 今回の手順で確認できるのは以下の内容です。
- gradle-errorprone-plugin の 0.6 がリリースされていて、設定方法も大きく変わっていました。0.0.16 → 0.6 にバージョンアップしてみます。。。が、出来なかったという内容です。
参照したサイト・書籍
- tbroyer/gradle-errorprone-plugin
https://github.com/tbroyer/gradle-errorprone-plugin
目次
手順
build.gradle を変更する
build.gradle の以下の点を変更します。
plugins {
    id "java"
    id "eclipse"
    id "idea"
    id "org.springframework.boot" version "2.0.4.RELEASE"
    id "io.spring.dependency-management" version "1.0.6.RELEASE"
    id "groovy"
    id "checkstyle"
    id "com.github.spotbugs" version "1.6.4"
    id "pmd"
    id "net.ltgt.errorprone" version "0.6"
    id "de.undercouch.download" version "3.4.3"
}

..........

[compileJava, compileTestGroovy, compileTestJava]*.options*.encoding = "UTF-8"
[compileJava, compileTestGroovy, compileTestJava]*.options*.compilerArgs << "-Xlint:all,-options,-processing,-path"
tasks.withType(JavaCompile).configureEach {
    options.errorprone.errorproneArgs << "-Xep:RemoveUnusedImports:WARN"
    options.errorprone.errorproneArgs << "-Xep:InsecureCryptoUsage:OFF"
    options.errorprone.errorproneArgs << "-Xep:ParameterName:OFF"
}

..........

dependencies {
    ..........

    // for Error Prone ( http://errorprone.info/ )
    errorprone("com.google.errorprone:error_prone_core:${errorproneVersion}")
    compileOnly("com.google.errorprone:error_prone_annotations:${errorproneVersion}")
    // JDK 8 support
    errorproneJavac("com.google.errorprone:javac:9+181-r4173-1")

    ..........
}
id "net.ltgt.errorprone" version "0.0.16"→id "net.ltgt.errorprone" version "0.6"に変更します。[compileJava, compileTestGroovy, compileTestJava]*.options*.compilerArgs = [ ... ]で compile と error-prone のオプションを指定していたのを[compileJava, compileTestGroovy, compileTestJava]*.options*.compilerArgs << "-Xlint:all,-options,-processing,-path"とtasks.withType(JavaCompile).configureEach { ... }に分けます。- dependencies block の以下の点を変更します。
errorproneJavac("com.google.errorprone:javac:9+181-r4173-1")を追加します。
変更後、Gradle Tool Window の左上にある「Refresh all Gradle projects」ボタンをクリックして更新します。
build タスクを実行してみる
clean タスク実行 → Rebuild Project 実行 → build タスクを実行してみます。


compileTestJava タスクでエラーが 34個出て build は失敗しました。エラーの内容を見ると、テストコードで Lombok を使用して自動生成させている Getter/Setter を errorproneJavac が認識できていないようです。options.errorprone.disableWarningsInGeneratedCode = true とかを指定してもエラーはなくなりませんでした。テストコードで Lombok を使用しないように変更すればエラーはなくなるのですが、そうまでして 0.6 にバージョンアップするか迷います。。。
https://github.com/tbroyer/gradle-errorprone-plugin には Error Prone requires at least a JDK 9 compiler. という記述があり JDK 9 以上が本来想定されている環境のようですので、今回は gradle-errorprone-plugin のバージョンアップは止めることにします。JDK を 8 → 11 に変える時に再度試そうと思います。
履歴
2018/10/06
初版発行。